
AI MicroMind Docs
Drag & Drop UI to build your customized LLM flow
🙌 Contributing
We love contributions! Feel free to submit Pull Request and we will review. Reach out to us at Discord if you have any questions or issues.
📄 License
Source code in this repository is made available under the Apache License Version 2.0.
Get Started
Cloud
Self-hosting requires more technical skill to setup instance, backing up database and maintaning updates. If you aren't experienced at managing servers and just want to use the webapp, we recommend using aimicromindCloud.
Quick Start
{% hint style="info" %}
Pre-requisite: ensure NodeJS is installed on machine. Node v18.15.0 or v20 and above is supported.
{% endhint %}
Install aimicromind locally using NPM.
- Install AiMicromind:
npm install -g aimicromind
You can also install a specific version. Refer to available versions.
npm install -g aimicromind@x.x.x
- Start AiMicromind:
npx aimicromind start
- Open: http://localhost:3000
Docker
There are two ways to deploy aimicromind with Docker:
Docker Compose
- Go to
docker folderat the root of the project - Copy the
.env.examplefile and paste it as another file named.env - Run:
docker compose up -d
- Open: http://localhost:3000
- You can bring the containers down by running:
docker compose stop
Docker Image
- Build the image:
docker build --no-cache -t aimicromind.
- Run image:
docker run -d --name aimicromind-p 3000:3000 aimicromind
- Stop image:
docker stop aimicromind
For Developers
AiMicromind has 3 different modules in a single mono repository:
- Server: Node backend to serve API logics
- UI: React frontend
- Components: Integration components
Prerequisite
Install PNPM.
npm i -g pnpm
Setup 1
Simple setup using PNPM:
- Clone the repository
git clone https://github.com/operativestech/AiMicroMind_Platform_2025.git
- Go into repository folder
cd AiMicromind
- Install all dependencies of all modules:
pnpm install
- Build the code:
pnpm build
Start the app at http://localhost:3000
pnpm start
Setup 2
Step-by-step setup for project contributors:
- Fork the official AiMicromind Github Repository
- Clone your forked repository
- Create a new branch, see guide. Naming conventions:
- For feature branch:
feature/<Your New Feature> - For bug fix branch:
bugfix/<Your New Bugfix>.
- For feature branch:
- Switch to the branch you just created
- Go into repository folder:
cd AiMicromind
- Install all dependencies of all modules:
pnpm install
- Build the code:
pnpm build
- Start the app at http://localhost:3000
pnpm start
- For development build:
- Create
.envfile and specify thePORT(refer to.env.example) inpackages/ui - Create
.envfile and specify thePORT(refer to.env.example) inpackages/server
pnpm dev
-
Any changes made in
packages/uiorpackages/serverwill be reflected at http://localhost:8080 -
For changes made in
packages/components, you will need to build again to pickup the changes -
After making all the changes, run:
pnpm buildand
pnpm startto make sure everything works fine in production.
For Enterprise
Enterprise plans have separate repository and docker image.
Once granted access to both, the setup is the same as #setup-1. Before starting the app, enterprise users are required to fill in the values for Enterprise Parameters in the .env file. Refer to .env.example for the required changes.
Reach out to support@aimicromind.com for the value of following env variables:
LICENSE_URL
AIMICROMIND_EE_LICENSE_KEY
For Docker Installation:
cd docker
cd enterprise
docker compose up -d
Learn More
In this video tutorial (coming soon)
Community Guide
- Introduction to [Practical] Building LLM Applications with AiMicromind/ LangChain
- AiMicromind/ LangChainによるLLMアプリケーション構築[実践]入門
description: Learn how to contribute to this project
Contribution Guide
We appreciate all contributions! No matter your skill level or technical background, you can help this project grow. Here are a few ways to contribute:
⭐ Star
Star and share the Github Repo.
🙌 Share Chatflow
Yes! Sharing how you use aimicromind is a way of contribution. Export your chatflow as JSON, attach a screenshot and share it in Show and Tell section.
💡 Ideas
We welcome ideas for new features, apps integrations. Submit your suggestions to the Ideas section.
🙋 Q&A
Want to learn more? Search for answers to any questions in the Q&A section. If you can't find one, don't hesitate to create a new question. It might help others who have similar questions.
🐞 Report Bugs
Found an issue? Report it.
📖 Contribute to Docs
-
Fork the official AiMicromind Docs Repo
-
Clone your forked repository
-
Create a new branch
-
Switch to the branch you just created
-
Go into repository folder
cd AiMicromindDocs -
Make changes
-
Commit changes and submit Pull Request from forked branch pointing to AiMicromind Docs main
👨💻 Contribute to Code
To learn how to contribute code, go to the For Developers section and follow the instructions.
If you are contributing to a new node integration, read the Building Node guide.
🏷️ Pull Request process
A member of the AiMicromind team will automatically be notified/assigned when you open a pull request. You can also reach out to us on Discord.
📜 Code of Conduct
This project and everyone participating in it are governed by the Code of Conduct which can be found in the file. By participating, you are expected to uphold this code.
Please report unacceptable behavior to hello@aimicromind.com.
Building Node
Install Git
First, install Git and clone aimicromind repository. You can follow the steps from the Get Started guide.
Structure
AiMicromind separate every node integration under the folder packages/components/nodes. Let's try to create a simple Tool!
Create Calculator Tool
Create a new folder named Calculator under the packages/components/nodes/tools folder. Then create a new file named Calculator.ts. Inside the file, we will first write the base class.
import { INode } from '../../../src/Interface'
import { getBaseClasses } from '../../../src/utils'

class Calculator_Tools implements INode {
    label: string
    name: string
    version: number
    description: string
    type: string
    icon: string
    category: string
    author: string
    baseClasses: string[]

    constructor() {
        this.label = 'Calculator'
        this.name = 'calculator'
        this.version = 1.0
        this.type = 'Calculator'
        this.icon = 'calculator.svg'
        this.category = 'Tools'
        this.author = 'Your Name'
        this.description = 'Perform calculations on response'
        this.baseClasses = [this.type, ...getBaseClasses(Calculator)]
    }
}

module.exports = { nodeClass: Calculator_Tools }
Every node will implements the INode base class. Breakdown of what each property means:
| Property | Description |
|---|---|
| label | The name of the node that appears on the UI |
| name | The name that is used by code. Must be camelCase |
| version | Version of the node |
| type | Usually the same as label. To define which node can be connected to this specific type on UI |
| icon | Icon of the node |
| category | Category of the node |
| author | Creator of the node |
| description | Node description |
| baseClasses | The base classes from the node, since a node can extends from a base component. Used to define which node can be connected to this node on UI |
Define Class
Now the component class is partially finished, we can go ahead to define the actual Tool class, in this case - Calculator.
Create a new file under the same Calculator folder, and named as core.ts
import { Parser } from "expr-eval"
import { Tool } from "@langchain/core/tools"

export class Calculator extends Tool {
    name = "calculator"
    description = `Useful for getting the result of a math expression. The input to this tool should be a valid mathematical expression that could be executed by a simple calculator.`

    async _call(input: string) {
        try {
            return Parser.evaluate(input).toString()
        } catch (error) {
            return "I don't know how to do that."
        }
    }
}
Finishing
Head back to the Calculator.ts file, we can finish this up by having the async init function. In this function, we will initialize the Calculator class we created above. When the flow is being executed, the init function in each node will be called, and the _call function will be executed when LLM decides to call this tool.
import { INode } from '../../../src/Interface'
import { getBaseClasses } from '../../../src/utils'
import { Calculator } from './core'

class Calculator_Tools implements INode {
    label: string
    name: string
    version: number
    description: string
    type: string
    icon: string
    category: string
    author: string
    baseClasses: string[]

    constructor() {
        this.label = 'Calculator'
        this.name = 'calculator'
        this.version = 1.0
        this.type = 'Calculator'
        this.icon = 'calculator.svg'
        this.category = 'Tools'
        this.author = 'Your Name'
        this.description = 'Perform calculations on response'
        this.baseClasses = [this.type, ...getBaseClasses(Calculator)]
    }


    async init() {
        return new Calculator()
    }
}

module.exports = { nodeClass: Calculator_Tools }
Build and Run
In the .env file inside packages/server, create a new env variable:
SHOW_COMMUNITY_NODES=true
Now we can use pnpm build and pnpm start to bring the component alive!
 (1) (1) (2).png)
API Reference
Using aimicromind public API, you can programmatically execute many of the same tasks as you can in the GUI. This section introduces aimicromindREST API.
- Assistants
- Chat Message
- Chatflows
- Document Store
- Feedback
- Leads
- Ping
- Prediction
- Tools
- Upsert History
- Variables
Assistants
{% swagger src="../.gitbook/assets/swagger (1) (1) (1).yml" path="/assistants" method="post" %} swagger (1) (1) (1).yml {% endswagger %}
{% swagger src="../.gitbook/assets/swagger (1) (1).yml" path="/assistants" method="get" %} swagger (1) (1).yml {% endswagger %}
{% swagger src="../.gitbook/assets/swagger (1) (1).yml" path="/assistants/{id}" method="get" %} swagger (1) (1).yml {% endswagger %}
{% swagger src="../.gitbook/assets/swagger (1) (1).yml" path="/assistants/{id}" method="put" %} swagger (1) (1).yml {% endswagger %}
{% swagger src="../.gitbook/assets/swagger (1) (1).yml" path="/assistants/{id}" method="delete" %} swagger (1) (1).yml {% endswagger %}
Attachments
{% swagger src="../.gitbook/assets/swagger (1).yml" path="/attachments/{chatflowId}/{chatId}" method="post" %} swagger (1).yml {% endswagger %}
Chat Message
{% swagger src="../.gitbook/assets/swagger (3).yml" path="/chatmessage/{id}" method="get" %} swagger (3).yml {% endswagger %}
{% swagger src="../.gitbook/assets/swagger (4).yml" path="/chatmessage/{id}" method="delete" %} swagger (4).yml {% endswagger %}
Chatflows
{% swagger src="../.gitbook/assets/swagger (1) (1) (1).yml" path="/chatflows" method="get" %} swagger (1) (1) (1).yml {% endswagger %}
{% swagger src="../.gitbook/assets/swagger (1) (1) (1).yml" path="/chatflows" method="post" %} swagger (1) (1) (1).yml {% endswagger %}
{% swagger src="../.gitbook/assets/swagger (1) (1) (1).yml" path="/chatflows/{id}" method="get" %} swagger (1) (1) (1).yml {% endswagger %}
{% swagger src="../.gitbook/assets/swagger (1) (1) (1).yml" path="/chatflows/{id}" method="put" %} swagger (1) (1) (1).yml {% endswagger %}
{% swagger src="../.gitbook/assets/swagger (1) (1) (1).yml" path="/chatflows/{id}" method="delete" %} swagger (1) (1) (1).yml {% endswagger %}
{% swagger src="../.gitbook/assets/swagger (1) (1) (1).yml" path="/chatflows/apikey/{apikey}" method="get" %} swagger (1) (1) (1).yml {% endswagger %}
Document Store
{% swagger src="../.gitbook/assets/swagger (1) (1) (1).yml" path="/document-store/store" method="post" %} swagger (1) (1) (1).yml {% endswagger %}
{% swagger src="../.gitbook/assets/swagger (1) (1) (1).yml" path="/document-store/store" method="get" %} swagger (1) (1) (1).yml {% endswagger %}
{% swagger src="../.gitbook/assets/swagger (1) (1) (1).yml" path="/document-store/store/{id}" method="get" %} swagger (1) (1) (1).yml {% endswagger %}
{% swagger src="../.gitbook/assets/swagger (1) (1) (1).yml" path="/document-store/store/{id}" method="put" %} swagger (1) (1) (1).yml {% endswagger %}
{% swagger src="../.gitbook/assets/swagger (1) (1) (1).yml" path="/document-store/store/{id}" method="delete" %} swagger (1) (1) (1).yml {% endswagger %}
{% swagger src="../.gitbook/assets/swagger (5).yml" path="/document-store/upsert/{id}" method="post" %} swagger (5).yml {% endswagger %}
{% swagger src="../.gitbook/assets/swagger (3).yml" path="/document-store/refresh/{id}" method="post" %} swagger (3).yml {% endswagger %}
{% swagger src="../.gitbook/assets/swagger (1) (1) (1).yml" path="/document-store/vectorstore/query" method="post" %} swagger (1) (1) (1).yml {% endswagger %}
{% swagger src="../.gitbook/assets/swagger (2).yml" path="/document-store/loader/{storeId}/{loaderId}" method="delete" %} swagger (2).yml {% endswagger %}
{% swagger src="../.gitbook/assets/swagger (1) (1) (1).yml" path="/document-store/vectorstore/{id}" method="delete" %} swagger (1) (1) (1).yml {% endswagger %}
{% swagger src="../.gitbook/assets/swagger (2).yml" path="/document-store/chunks/{storeId}/{loaderId}/{pageNo}" method="get" %} swagger (2).yml {% endswagger %}
{% swagger src="../.gitbook/assets/swagger (2).yml" path="/document-store/chunks/{storeId}/{loaderId}/{chunkId}" method="put" %} swagger (2).yml {% endswagger %}
{% swagger src="../.gitbook/assets/swagger (2).yml" path="/document-store/chunks/{storeId}/{loaderId}/{chunkId}" method="delete" %} swagger (2).yml {% endswagger %}
Feedback
{% swagger src="../.gitbook/assets/swagger (1) (1) (1).yml" path="/feedback/{id}" method="get" %} swagger (1) (1) (1).yml {% endswagger %}
{% swagger src="../.gitbook/assets/swagger (1) (1) (1).yml" path="/feedback" method="post" %} swagger (1) (1) (1).yml {% endswagger %}
{% swagger src="../.gitbook/assets/swagger (1) (1) (1).yml" path="/feedback/{id}" method="put" %} swagger (1) (1) (1).yml {% endswagger %}
Leads
{% swagger src="../.gitbook/assets/swagger (1) (1) (1).yml" path="/leads/{id}" method="get" %} swagger (1) (1) (1).yml {% endswagger %}
{% swagger src="../.gitbook/assets/swagger (1) (1) (1).yml" path="/leads" method="post" %} swagger (1) (1) (1).yml {% endswagger %}
Ping
{% swagger src="../.gitbook/assets/swagger (1) (1) (1).yml" path="/ping" method="get" %} swagger (1) (1) (1).yml {% endswagger %}
Prediction
{% swagger src="../.gitbook/assets/swagger (1) (1) (1).yml" path="/prediction/{id}" method="post" %} swagger (1) (1) (1).yml {% endswagger %}
Tools
{% swagger src="../.gitbook/assets/swagger (1) (1) (1).yml" path="/tools" method="post" %} swagger (1) (1) (1).yml {% endswagger %}
{% swagger src="../.gitbook/assets/swagger (1) (1) (1).yml" path="/tools" method="get" %} swagger (1) (1) (1).yml {% endswagger %}
{% swagger src="../.gitbook/assets/swagger (1) (1) (1).yml" path="/tools/{id}" method="get" %} swagger (1) (1) (1).yml {% endswagger %}
{% swagger src="../.gitbook/assets/swagger (1) (1) (1).yml" path="/tools/{id}" method="put" %} swagger (1) (1) (1).yml {% endswagger %}
{% swagger src="../.gitbook/assets/swagger (1) (1) (1).yml" path="/tools/{id}" method="delete" %} swagger (1) (1) (1).yml {% endswagger %}
Upsert History
{% swagger src="../.gitbook/assets/swagger (1) (1) (1).yml" path="/upsert-history/{id}" method="get" %} swagger (1) (1) (1).yml {% endswagger %}
{% swagger src="../.gitbook/assets/swagger (1) (1) (1).yml" path="/upsert-history/{id}" method="patch" %} swagger (1) (1) (1).yml {% endswagger %}
Variables
{% swagger src="../.gitbook/assets/swagger (1) (1) (1).yml" path="/variables" method="post" %} swagger (1) (1) (1).yml {% endswagger %}
{% swagger src="../.gitbook/assets/swagger (1) (1) (1).yml" path="/variables" method="get" %} swagger (1) (1) (1).yml {% endswagger %}
{% swagger src="../.gitbook/assets/swagger (1) (1) (1).yml" path="/variables/{id}" method="put" %} swagger (1) (1) (1).yml {% endswagger %}
{% swagger src="../.gitbook/assets/swagger (1) (1) (1).yml" path="/variables/{id}" method="delete" %} swagger (1) (1) (1).yml {% endswagger %}
Vector Upsert
{% swagger src="../.gitbook/assets/swagger (1) (1) (1).yml" path="/vector/upsert/{id}" method="post" %} swagger (1) (1) (1).yml {% endswagger %}
description: Learn about some core functionalities built into AiMicromind
Using AiMicromind
This section provides in-depth guides on core aimicromind functionalities, including API usage, variables, and telemetry collection practices.
Guides
description: Learn about how to build agentic systems in Aimicromind
Agentflows
Introducing Agentic Systems in AiMicromind
AiMicromind's Agentflows section provides a platform for building agent-based systems that can interact with external tools and data sources.
Currently, AiMicromind offers two approaches for designing these systems: Multi-Agents1 and Sequential Agents2. These approaches provide different levels of control and complexity, allowing you to choose the best fit for your needs.

aimicromindAPP
{% hint style="success" %} This documentation will explore both the Sequential Agent and Multi-Agent approaches, explaining their features and how they can be used to build different types of conversational workflows. {% endhint %}
-
Multi-Agents, built on top of the Sequential Agent architecture, simplify the process of building and managing teams of agents by pre-configuring core elements and providing a higher-level abstraction. ↩
-
Sequential Agents provide developers with direct access to the underlying workflow structure, enabling granular control over every step of the conversation flow and offering maximum flexibility for building highly customized conversational applications. ↩
description: Learn how to use Multi-Agents in Aimicromind, written by @toi500
Multi-Agents
This guide intends to provide an introduction of the multi-agent AI system architecture within Aimicromind, detailing its components, operational constraints, and workflow.
Concept
Analogous to a team of domain experts collaborating on a complex project, a multi-agent system uses the principle of specialization within artificial intelligence.
This multi-agent system utilizes a hierarchical, sequential workflow, maximizing efficiency and specialization.
1. System Architecture
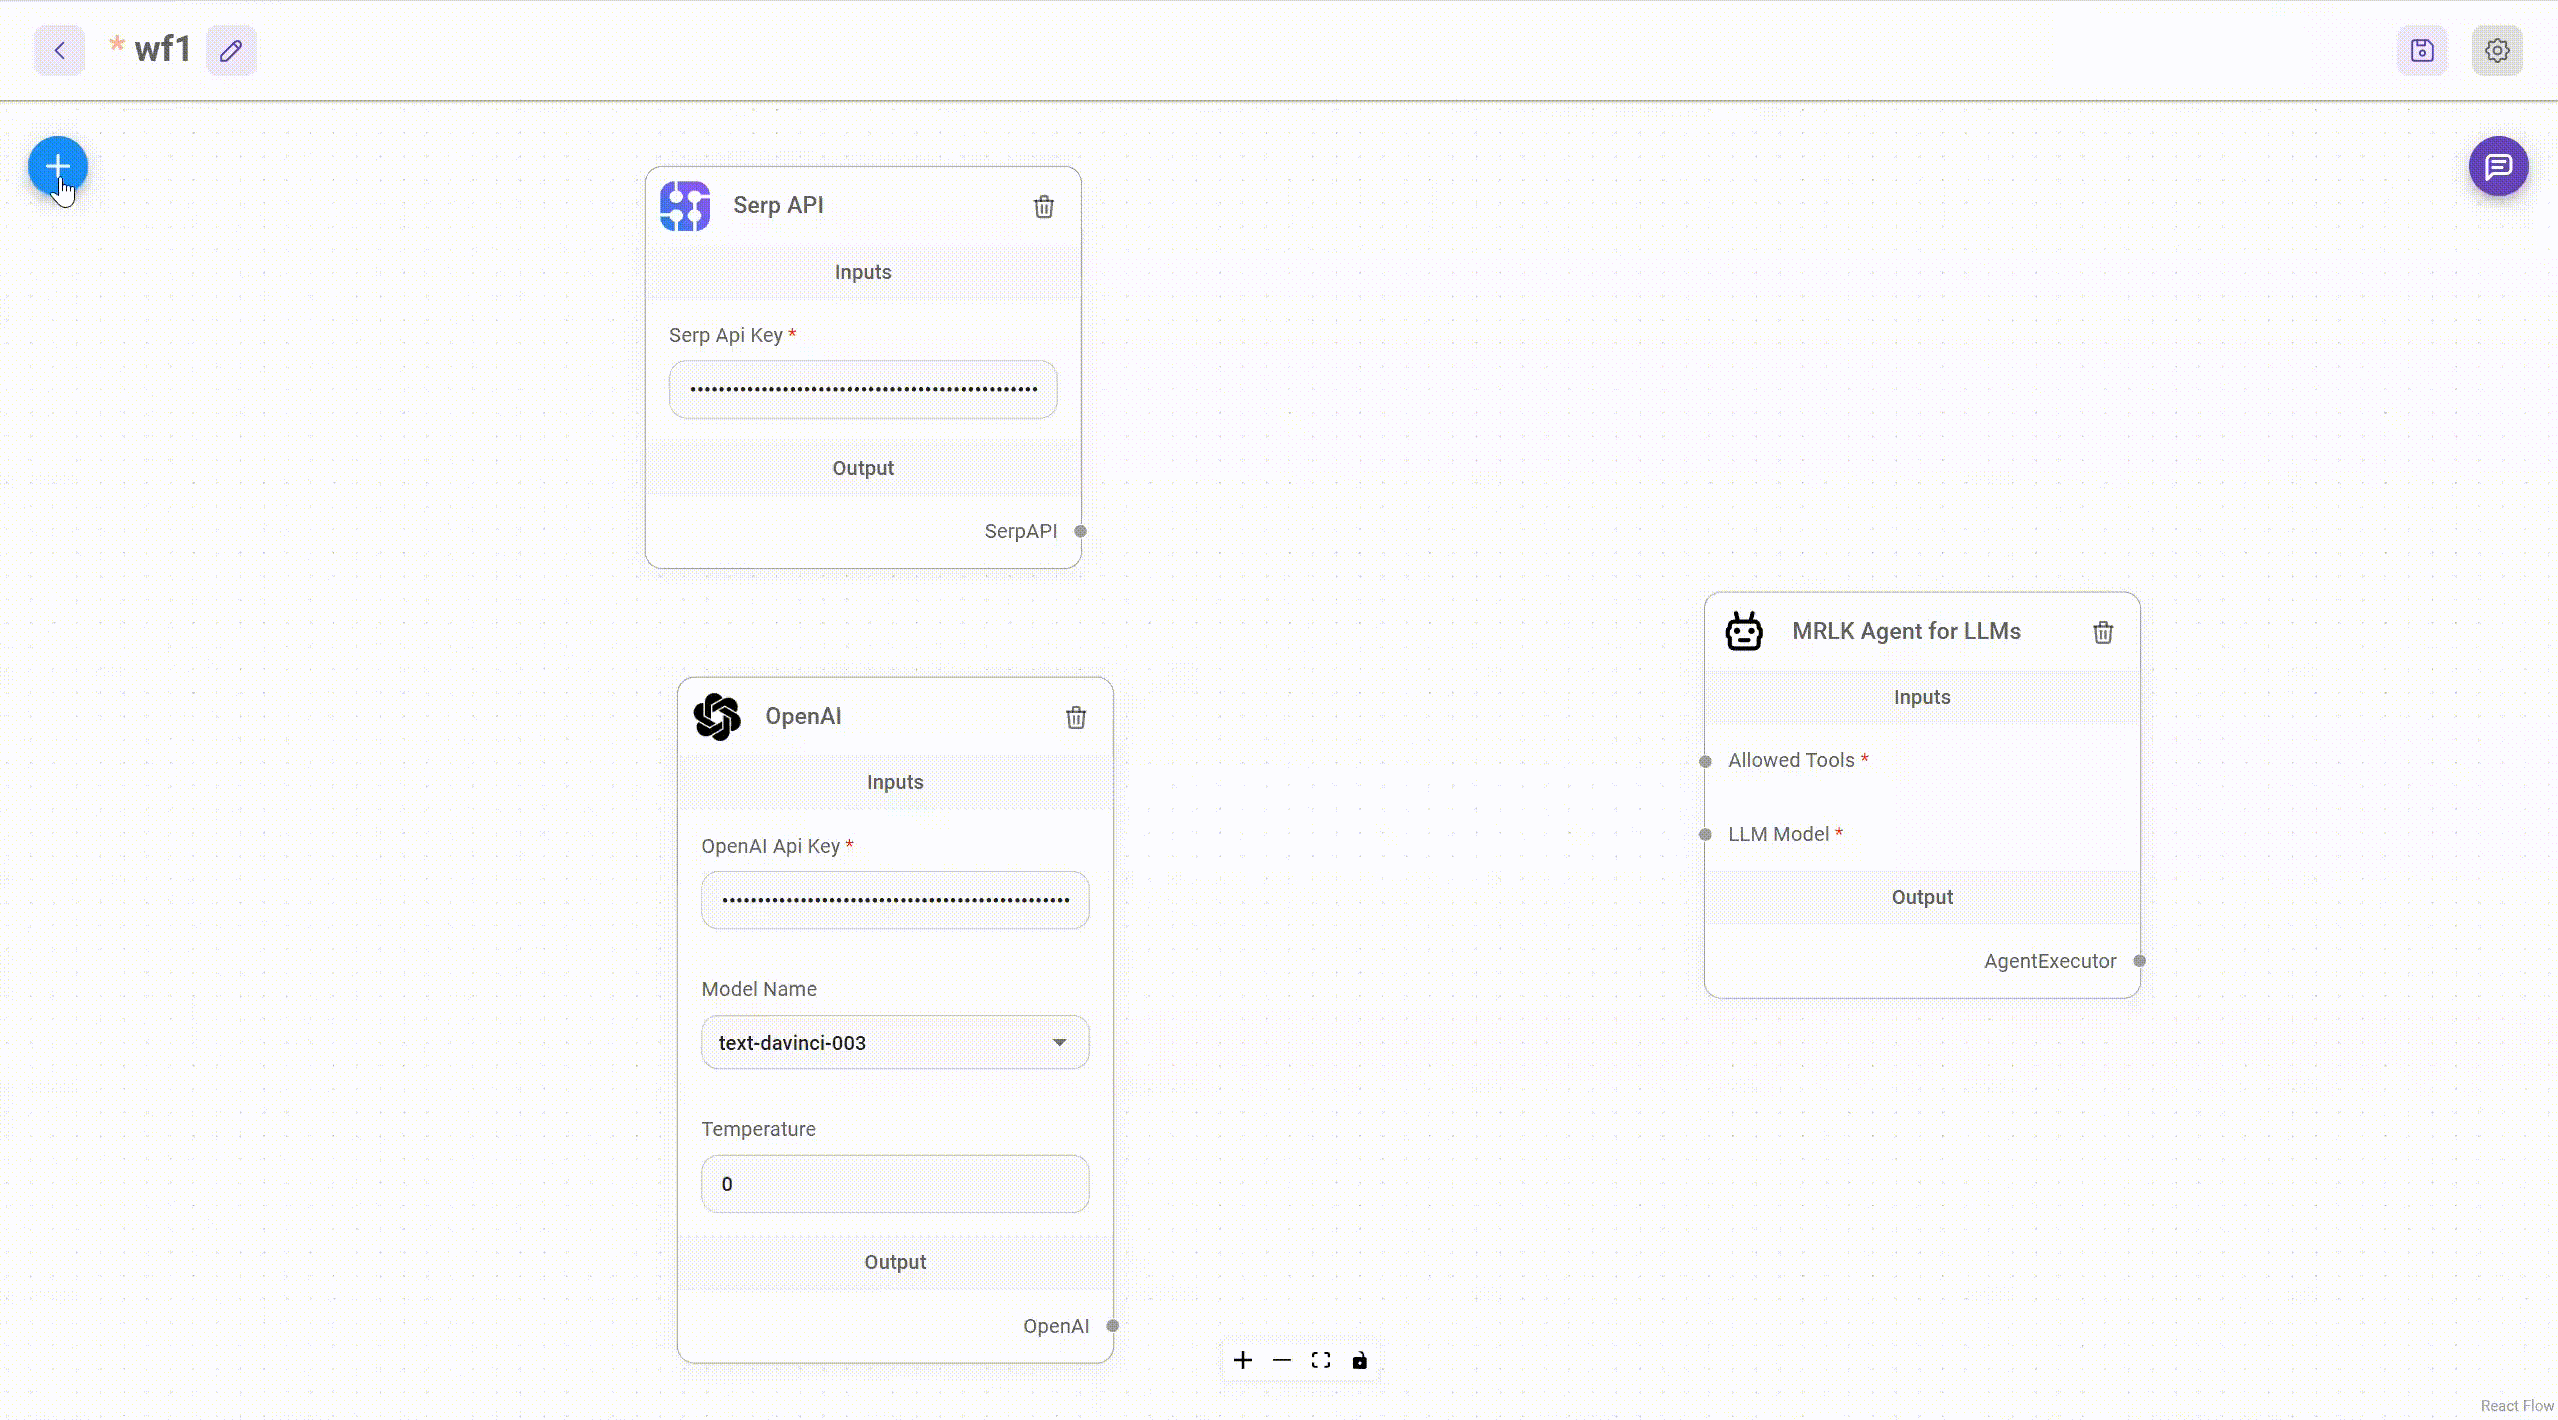
We can define the multi-agent AI architecture as a scalable AI system capable of handling complex projects by breaking them down into manageable sub-tasks.
In Aimicromind, a multi-agent system comprises two primary nodes or agent types and a user, interacting in a hierarchical graph to process requests and deliver a targeted outcome:
- User: The user acts as the system's starting point, providing the initial input or request. While a multi-agent system can be designed to handle a wide range of requests, it's important that these user requests align with the system's intended purpose. Any request falling outside this scope can lead to inaccurate results, unexpected loops, or even system errors. Therefore, user interactions, while flexible, should always align with the system's core functionalities for optimal performance.
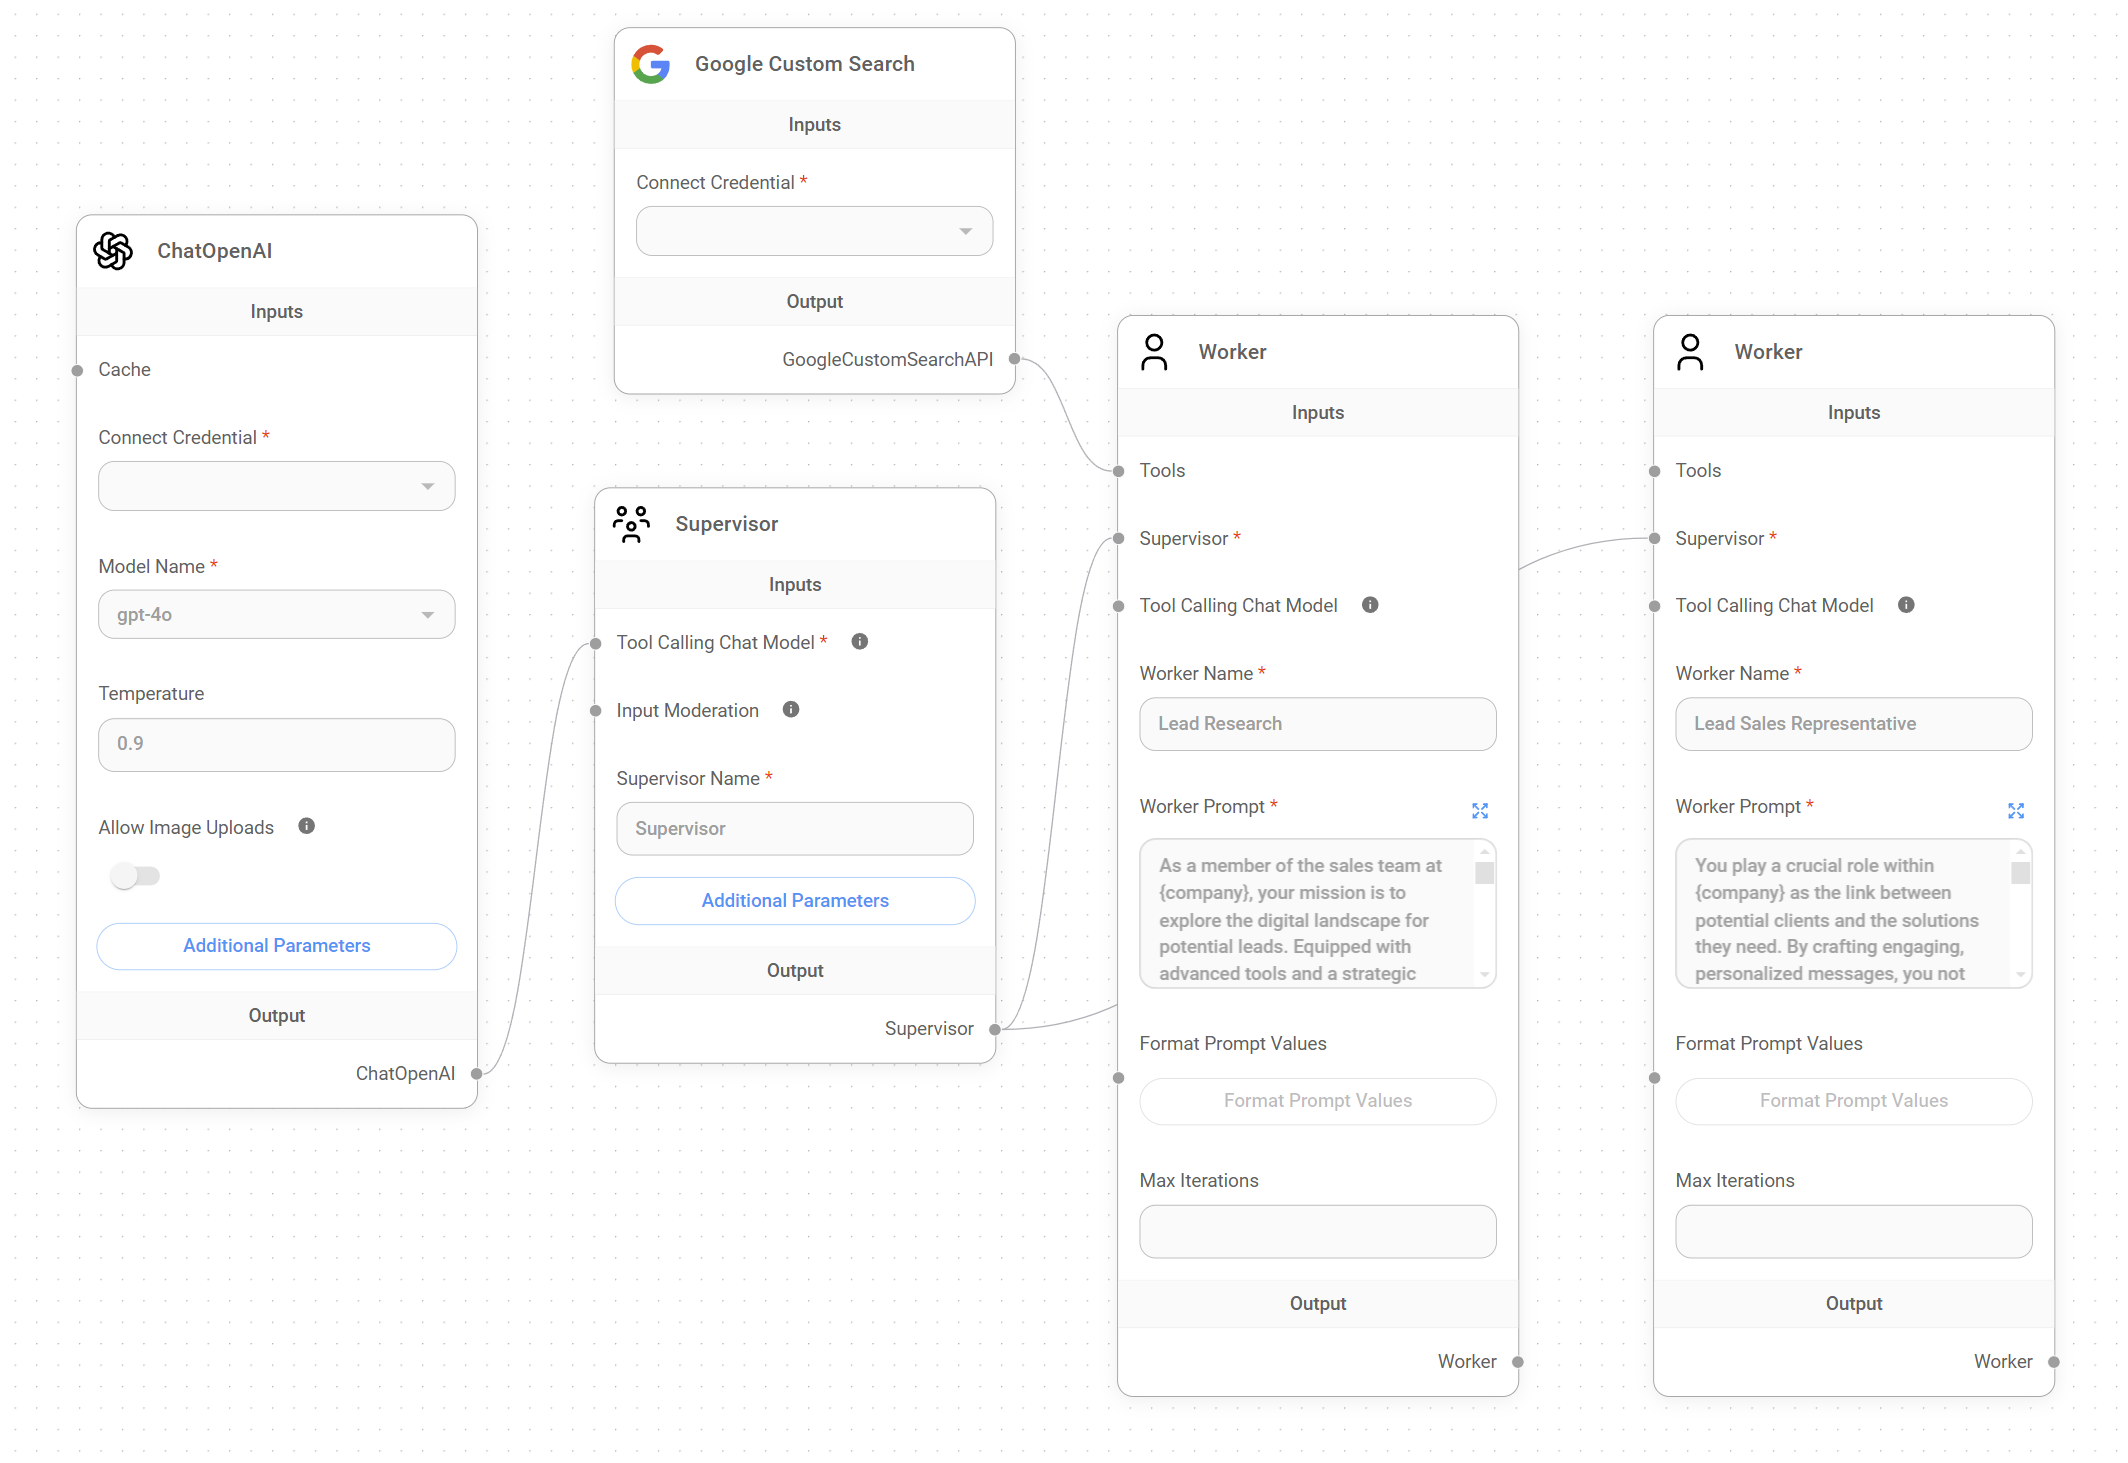
- Supervisor AI: The Supervisor acts as the system's orchestrator, overseeing the entire workflow. It analyzes user requests, decomposes them into a sequence of sub-tasks, assigns these sub-tasks to the specialized worker agents, aggregates the results, and ultimately presents the processed output back to the user.
- Worker AI Team: This team consists of specialized AI agents, or Workers, each instructed - via prompt messages - to handle a specific task within the workflow. These Workers operate independently, receiving instructions and data from the Supervisor, executing their specialized functions, using tools as needed, and returning the results to the Supervisor.

2. Operational Constraints
To maintain order and simplicity, this multi-agent system operates under two important constraints:
- One task at a time: The Supervisor is intentionally designed to focus on a single task at a time. It waits for the active Worker to complete its task and return the results before it analyzes the next step and delegates the subsequent task. This ensures each step is completed successfully before moving on, preventing overcomplexity.
- One Supervisor per flow: While it's theoretically possible to implement a set of nested multi-agent systems to form a more sophisticated hierarchical structure for highly complex workflows, what LangChain defines as "Hierarchical Agent Teams", with a top-level supervisor and mid-level supervisors managing teams of workers, Aimicromind's multi-agent systems currently operate with a single Supervisor.
{% hint style="info" %} These two constraints are important when planning your application's workflow. If you try to design a workflow where the Supervisor needs to delegate multiple tasks simultaneously, in parallel, the system won't be able to handle it and you'll encounter an error. {% endhint %}
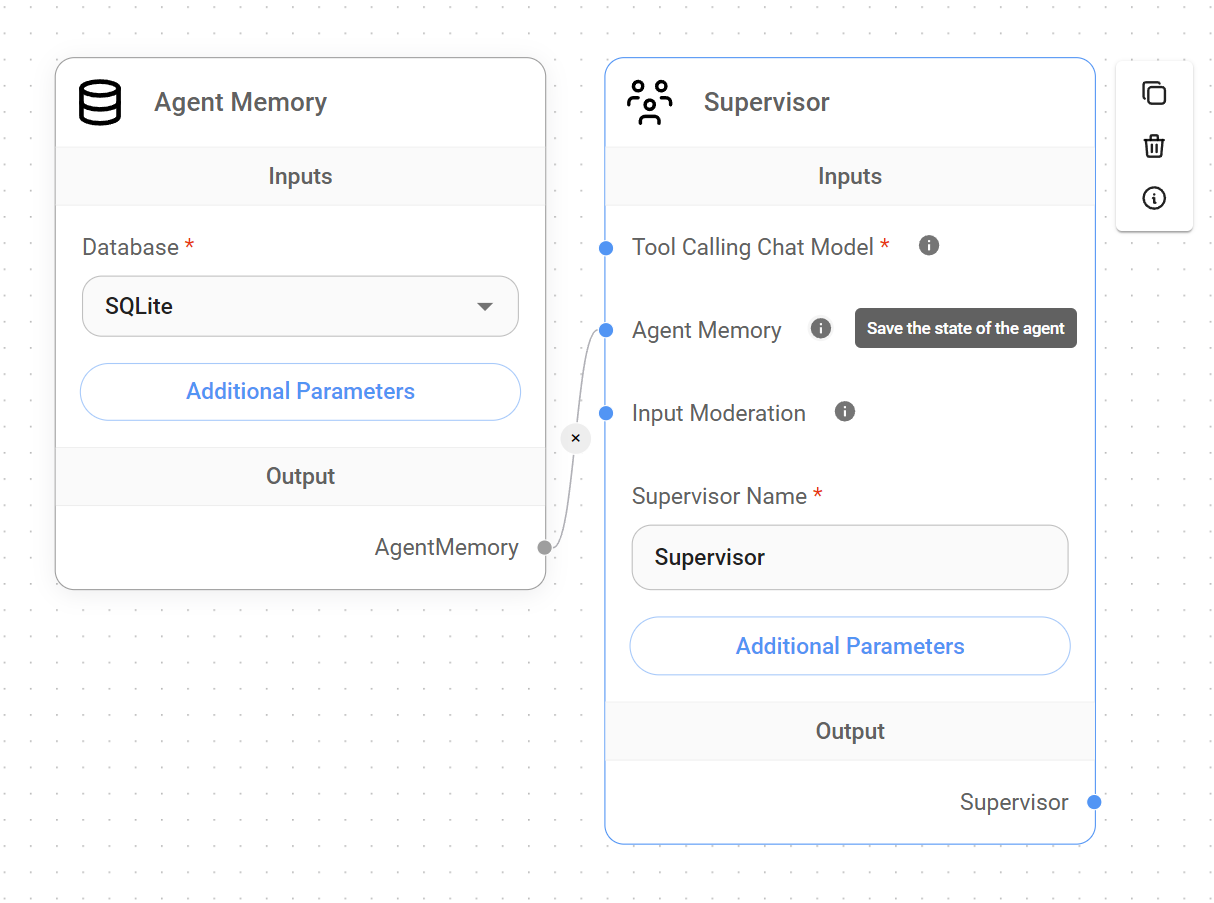
The Supervisor
The Supervisor, as the agent governing the overall workflow and responsible for delegating tasks to the appropriate Worker, requires a set of components to function correctly:
- Chat Model capable of function calling to manage the complexities of task decomposition, delegation, and result aggregation.
- Agent Memory (optional): While the Supervisor can function without Agent Memory, this node can significantly enhance workflows that require access to past Supervisor states. This state preservation could allow the Supervisor to resume the job from a specific point or leverage past data for improved decision-making.
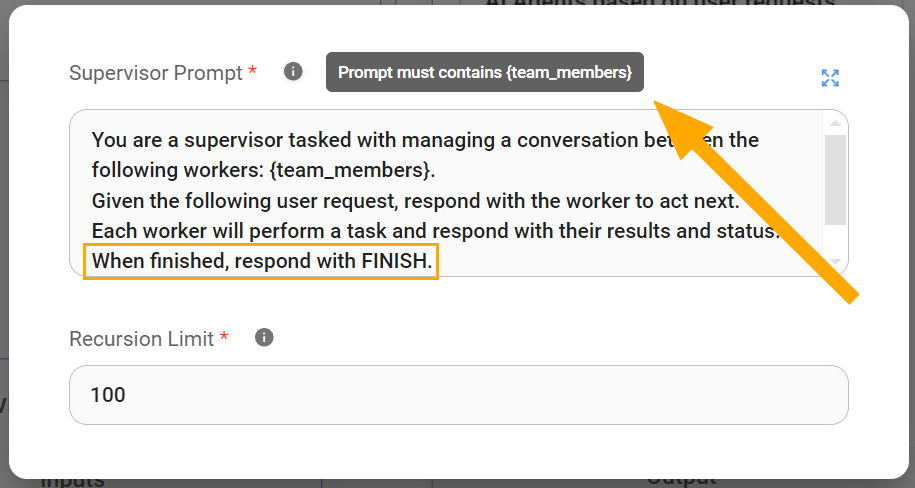
Supervisor Prompt
By default, the Supervisor Prompt is worded in a way that instructs the Supervisor to analyze user requests, decompose them into a sequence of sub-tasks, and assign these sub-tasks to the specialized worker agents.
While the Supervisor Prompt is customizable to fit specific application needs, it always requires the following two key elements:
- The {team_members} Variable: This variable is crucial for the Supervisor's understanding of the available workforce since it provides the Supervisor with list of Worker names. This allows the Supervisor to diligently delegate tasks to the most appropriate Worker based on their expertise.
- The "FINISH" Keyword: This keyword serves as a signal within the Supervisor Prompt. It indicates when the Supervisor should consider the task complete and present the final output to the user. Without a clear "FINISH" directive, the Supervisor might continue delegating tasks unnecessarily or fail to deliver a coherent and finalized result to the user. It signals that all necessary sub-tasks have been executed and the user's request has been fulfilled.
{% hint style="info" %} It's important to understand that the Supervisor plays a very distinct role from Workers. Unlike Workers, which can be tailored with highly specific instructions, the Supervisor operates most effectively with general directives, which allow it to plan and delegate tasks as it deems appropriate. If you're new to multi-agent systems, we recommend sticking with the default Supervisor prompt {% endhint %}
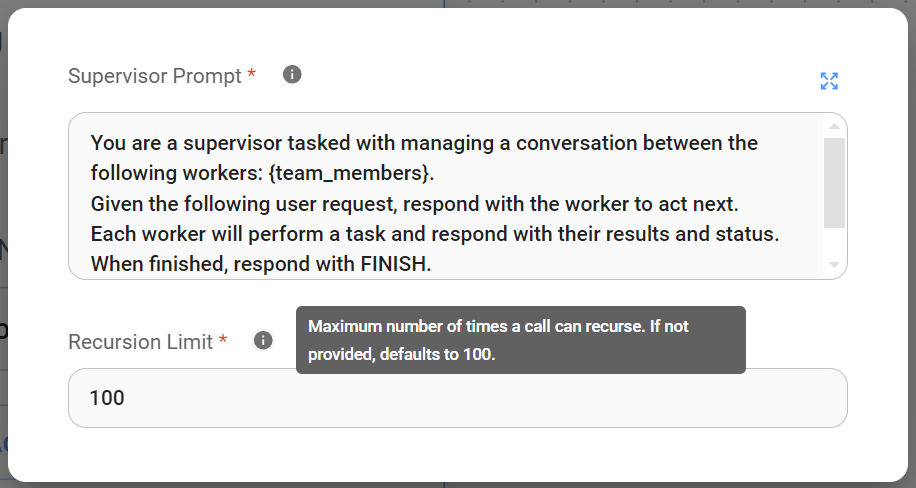
Understanding Recursion Limit in Supervisor node:
This parameter restricts the maximum depth of nested function calls within our application. In our current context, it limits how many times the Supervisor can trigger itself within a single workflow execution. This is important for preventing unbounded recursion and ensuring resources are used efficiently.
How the Supervisor works
Upon receiving a user query, the Supervisor initiates the workflow by analyzing the request and discerning the user's intended outcome.
Then, leveraging the {team_members} variable in the Supervisor Prompt, which only provides a list of available Worker AI names, the Supervisor infers each Worker's specialty and strategically selects the most suitable Worker for each task within the workflow.
{% hint style="info" %} Since the Supervisor only has the Workers' names to infer their functionality inside the workflow, it is very important that those names are set accordingly. Clear, concise, and descriptive names that accurately reflect the Worker's role or area of expertise are crucial for the Supervisor to make informed decisions when delegating tasks. This ensures that the right Worker is selected for the right job, maximizing the system's accuracy in fulfilling the user's request. {% endhint %}
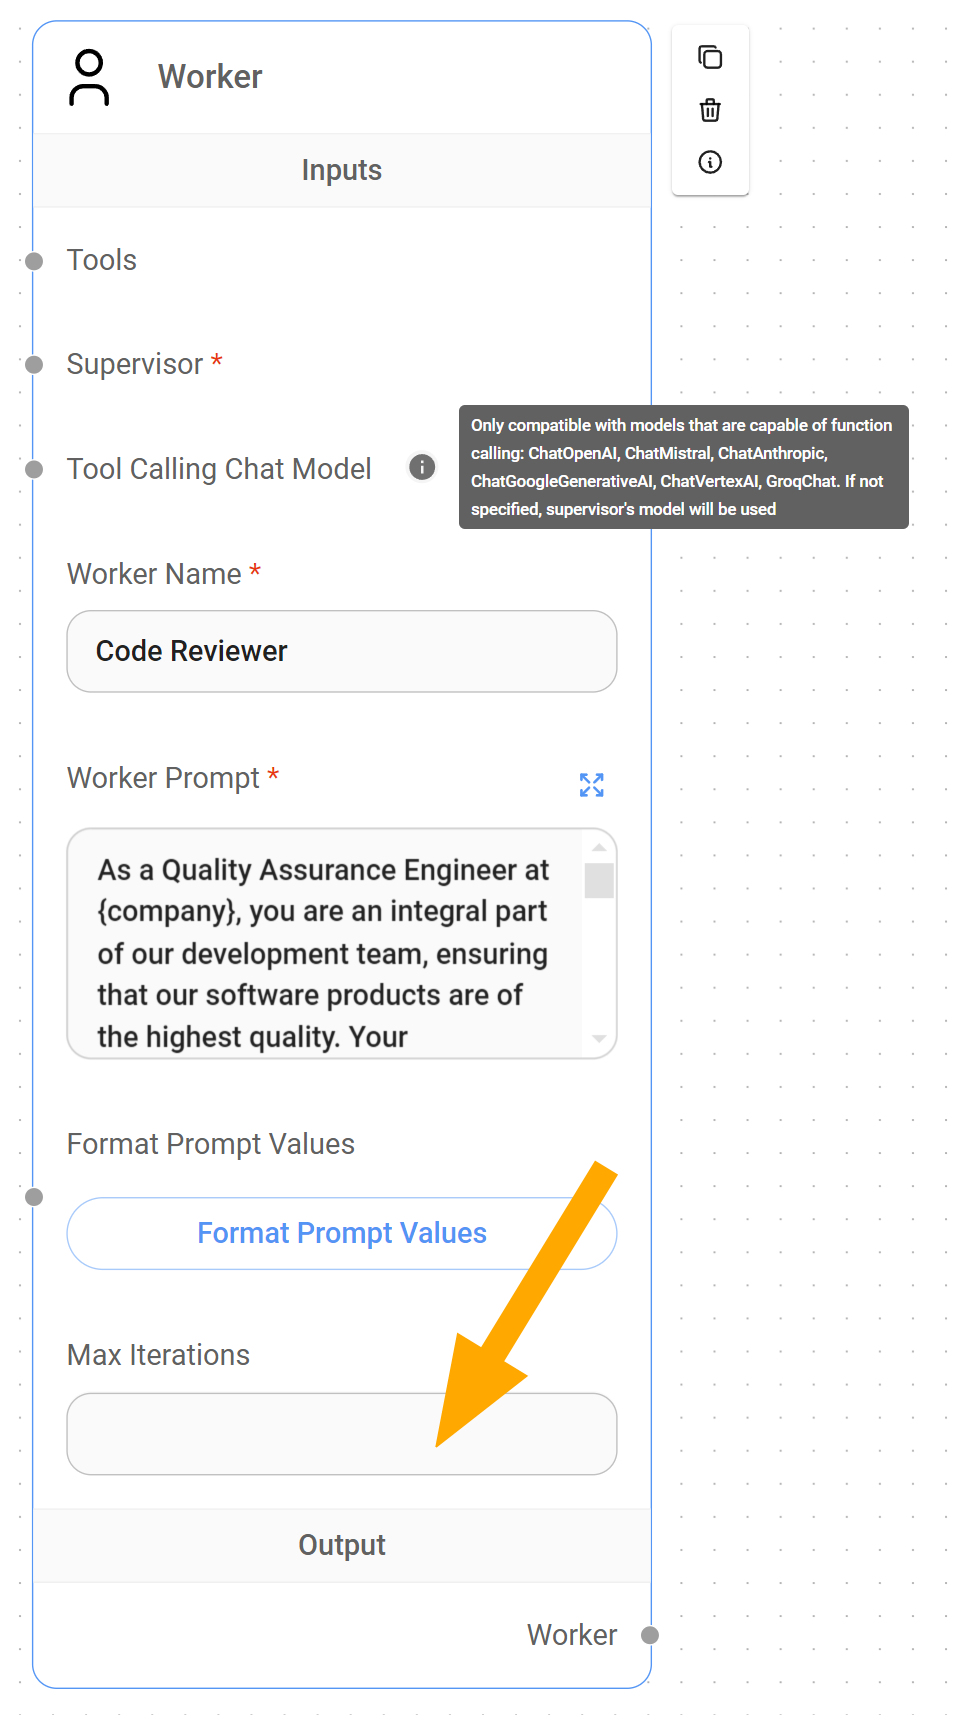
The Worker
The Worker, as a specialized agent instructed to handle a specific task within the system, requires two essential components to function correctly:
- A Supervisor: Each Worker must be connected to the Supervisor so it can be called upon when a task needs to be delegated. This connection establishes the essential hierarchical relationship within the multi-agent system, ensuring that the Supervisor can efficiently distribute work to the appropriate specialized Workers.
- A Chat Model node capable of function calling: By default, Workers inherit the Supervisor's Chat Model node unless assigned one directly. This function-calling capability enables the Worker to interact with tools designed for its specialized task.
{% hint style="info" %} The ability to assign different Chat Models to each Worker provides significant flexibility and optimization opportunities for our application. By selecting Chat Models tailored to specific tasks, we can leverage more cost-effective solutions for simpler tasks and reserve specialized, potentially more expensive, models when truly necessary. {% endhint %}
Understanding Max Iteration parameter in Workers
LangChain refers to Max Iterations Cap as a important control mechanism for preventing haywire within an agentic system. In our current this context, it serves us as a guardrail against excessive, potentially infinite, interactions between the Supervisor and Worker.
Unlike the Supervisor node's Recursion Limit, which restricts how many times the Supervisor can call itself, the Worker node's Max Iteration parameter limits how many times a Supervisor can iterated or query a specific Worker.
By capping or limiting the Max Iteration, we ensure that costs remain under control, even in cases of unexpected system behavior.
Example: A practical user case
Now that we've established a foundational understanding of how Multi-Agent systems work within Aimicromind, let's explore a practical application.
Imagine a Lead Outreach multi-agent system (available in the Marketplace) designed to automate the process of identifying, qualifying, and engaging with potential leads. This system would utilize a Supervisor to orchestrate the following two Workers:
- Lead Researcher: This Worker, using the Google Search Tool, will be responsible for gathering potential leads based on user-defined criteria.
- Lead Sales Generator: This Worker will utilize the information gathered by the Lead Researcher to create personalized email drafts for the sales team.
Background: A user working at Solterra Renewables wants to gather available information about Evergreen Energy Group, a reputable renewable energy company located in the UK, and target its CEO, Amelia Croft, as a potential lead.
User Request: The Solterra Renewables employee provides the following query to the multi-agent system: "I need information about Evergreen Energy Group and Amelia Croft as a potential new customer for our business."
- Supervisor:
- The Supervisor receives the user request and delegates the "Lead Research" task to the
Lead Researcher Worker.
- The Supervisor receives the user request and delegates the "Lead Research" task to the
- Lead Researcher Worker:
- The Lead Researcher Worker, using the Google Search Tool, gathers information about Evergreen Energy Group, focusing on:
- Company background, industry, size, and location.
- Recent news and developments.
- Key executives, including confirming Amelia Croft's role as CEO.
- The Lead Researcher sends the gathered information back to the
Supervisor.
- The Lead Researcher Worker, using the Google Search Tool, gathers information about Evergreen Energy Group, focusing on:
- Supervisor:
- The Supervisor receives the research data from the Lead Researcher Worker and confirms that Amelia Croft is a relevant lead.
- The Supervisor delegates the "Generate Sales Email" task to the
Lead Sales Generator Worker, providing:- The research information on Evergreen Energy Group.
- Amelia Croft's email.
- Context about Solterra Renewables.
- Lead Sales Generator Worker:
- The Lead Sales Generator Worker crafts a personalized email draft tailored to Amelia Croft, taking into account:
- Her role as CEO and the relevance of Solterra Renewables' services to her company.
- Information from the research about Evergreen Energy Group's current focus or projects.
- The Lead Sales Generator Worker sends the completed email draft back to the
Supervisor.
- The Lead Sales Generator Worker crafts a personalized email draft tailored to Amelia Croft, taking into account:
- Supervisor:
- The Supervisor receives the generated email draft and issues the "FINISH" directive.
- The Supervisor outputs the email draft back to the user, the
Solterra Renewables employee.
- User Receives Output: The Solterra Renewables employee receives a personalized email draft ready to be reviewed and sent to Amelia Croft.
Video Tutorials (Coming soon)
description: Learn the Fundamentals of Sequential Agents in Aimicromind, written by @toi500
Sequential Agents
This guide offers a complete overview of the Sequential Agent AI system architecture within Aimicromind, exploring its core components and workflow design principles.
{% hint style="warning" %} Disclaimer: This documentation is intended to help aimicromind users understand and build conversational workflows using the Sequential Agent system architecture. It is not intended to be a comprehensive technical reference for the LangGraph framework and should not be interpreted as defining industry standards or core LangGraph concepts. {% endhint %}
Concept
Built on top of LangGraph, Aimicromind's Sequential Agents architecture facilitates the development of conversational agentic systems by structuring the workflow as a directed cyclic graph (DCG), allowing controlled loops and iterative processes.
This graph, composed of interconnected nodes, defines the sequential flow of information and actions, enabling the agents to process inputs, execute tasks, and generate responses in a structured manner.

Understanding Sequential Agents' DCG Architecture
This architecture simplifies the management of complex conversational workflows by defining a clear and understandable sequence of operations through its DCG structure.
Let's explore some key elements of this approach:
{% tabs %} {% tab title="Core Principles" %}
- Node-based processing: Each node in the graph represents a discrete processing unit, encapsulating its own functionality like language processing, tool execution, or conditional logic.
- Data flow as connections: Edges in the graph represent the flow of data between nodes, where the output of one node becomes the input for the subsequent node, enabling a chain of processing steps.
- State management: State is managed as a shared object, persisting throughout the conversation. This allows nodes to access relevant information as the workflow progresses. {% endtab %}
{% tab title="Terminology" %}
- Flow: The movement or direction of data within the workflow. It describes how information passes between nodes during a conversation.
- Workflow: The overall design and structure of the system. It's the blueprint that defines the sequence of nodes, their connections, and the logic that orchestrates the conversation flow.
- State: A shared data structure that represents the current snapshot of the conversation. It includes the conversation history
state.messagesand any custom State variables defined by the user. - Custom State: User-defined key-value pairs added to the state object to store additional information relevant to the workflow.
- Tool: An external system, API, or service that can be accessed and executed by the workflow to perform specific tasks, such as retrieving information, processing data, or interacting with other applications.
- Human-in-the-Loop (HITL): A feature that allows human intervention in the workflow, primarily during tool execution. It enables a human reviewer to approve or reject a tool call before it's executed.
- Parallel node execution: It refers to the ability to execute multiple nodes concurrently within a workflow by using a branching mechanism. This means that different branches of the workflow can process information or interact with tools simultaneously, even though the overall flow of execution remains sequential. {% endtab %} {% endtabs %}
Sequential Agents vs Multi-Agents
While both Multi-Agent and Sequential Agent systems in aimicromind are built upon the LangGraph framework and share the same fundamental principles, the Sequential Agent architecture provides a lower level of abstraction1, offering more granular control over every step of the workflow.
Multi-Agent systems, which are characterized by a hierarchical structure with a central supervisor agent delegating tasks to specialized worker agents, excel at handling complex workflows by breaking them down into manageable sub-tasks. This decomposition into sub-tasks is made possible by pre-configuring core system elements under the hood, such as condition nodes, which would require manual setup in a Sequential Agent system. As a result, users can more easily build and manage teams of agents.
In contrast, Sequential Agent systems operate like a streamlined assembly line, where data flows sequentially through a chain of nodes, making them ideal for tasks demanding a precise order of operations and incremental data refinement. Compared to the Multi-Agent system, its lower-level access to the underlying workflow structure makes it fundamentally more flexible and customizable, offering parallel node execution and full control over the system logic, incorporating conditions, state, and loop nodes into the workflow, allowing for the creation of new dynamic branching capabilities.
Introducing State, Loop and Condition Nodes
Aimicromind's Sequential Agents offer new capabilities for creating conversational systems that can adapt to user input, make decisions based on context, and perform iterative tasks.
These capabilities are made possible by the introduction of four new core nodes; the State Node, the Loop Node, and two Condition Nodes.
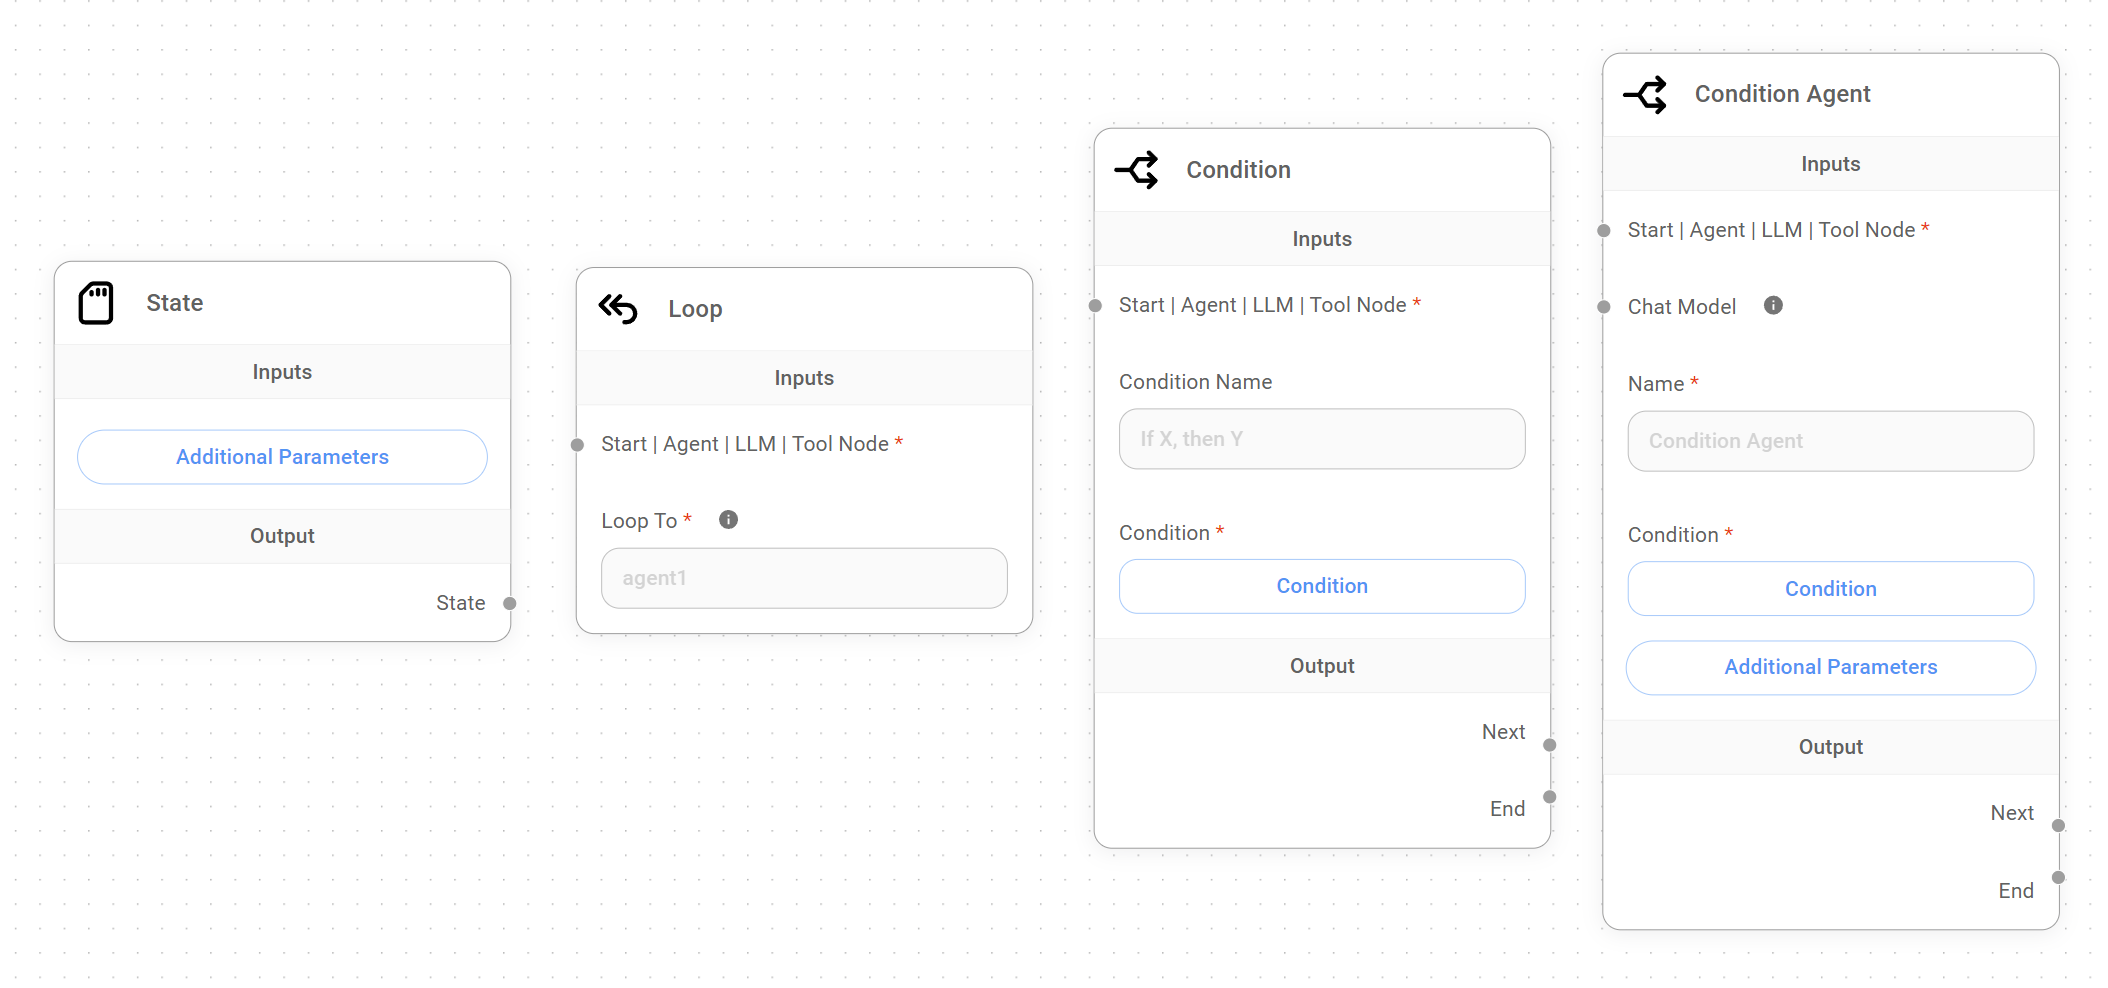
- State Node: We define State as a shared data structure that represents the current snapshot of our application or workflow. The State Node allows us to add a custom State to our workflow from the start of the conversation. This custom State is accessible and modifiable by other nodes in the workflow, enabling dynamic behavior and data sharing.
- Loop Node: This node introduces controlled cycles within the Sequential Agent workflow, enabling iterative processes where a sequence of nodes can be repeated based on specific conditions. This allows agents to refine outputs, gather additional information from the user, or perform tasks multiple times.
- Condition Nodes: The Condition and Condition Agent Node provide the necessary control to create complex conversational flows with branching paths. The Condition Node evaluates conditions directly, while the Condition Agent Node uses an agent's reasoning to determine the branching logic. This allows us to dynamically guide the flow's behavior based on user input, the custom State, or results of actions taken by other nodes.
Choosing the right system
Selecting the ideal system for your application depends on understanding your specific workflow needs. Factors like task complexity, the need for parallel processing, and your desired level of control over data flow are all key considerations.
- For simplicity: If your workflow is relatively straightforward, where tasks can be completed one after the other and therefore does not require parallel node execution or Human-in-the-Loop (HITL), the Multi-Agent approach offers ease of use and quick setup.
- For flexibility: If your workflow needs parallel execution, dynamic conversations, custom State management, and the ability to incorporate HITL, the Sequential Agent approach provides the necessary flexibility and control.
Here's a table comparing Multi-Agent and Sequential Agent implementations in Aimicromind, highlighting key differences and design considerations:
| Multi-Agent | Sequential Agent | |
|---|---|---|
| Structure | Hierarchical; Supervisor delegates to specialized Workers. | Linear, cyclic and/or branching; nodes connect in a sequence, with conditional logic for branching. |
| Workflow | Flexible; designed for breaking down a complex task into a sequence of sub-tasks, completed one after another. | Highly flexible; supports parallel node execution, complex dialogue flows, branching logic, and loops within a single conversation turn. |
| Parallel Node Execution | No; Supervisor handles one task at a time. | Yes; can trigger multiple actions in parallel within a single run. |
| State Management | Implicit; State is in place, but is not explicitly managed by the developer. | Explicit; State is in place, and developers can define and manage an initial or custom State using the State Node and the "Update State" field in various nodes. |
| Tool Usage | Workers can access and use tools as needed. | Tools are accessed and executed through Agent Nodes and Tool Nodes. |
| Human-in-the-Loop (HITL) | HITL is not supported. | Supported through the Agent Node and Tool Node's "Require Approval" feature, allowing human review and approval or rejection of tool execution. |
| Complexity | Higher level of abstraction; simplifies workflow design. | Lower level of abstraction; more complex workflow design, requiring careful planning of node interactions, custom State management, and conditional logic. |
| Ideal Use Cases |
|
|
{% hint style="info" %} Note: Even though Multi-Agent systems are technically a higher-level layer built upon the Sequential Agent architecture, they offer a distinct user experience and approach to workflow design. The comparison above treats them as separate systems to help you select the best option for your specific needs. {% endhint %}
Sequential Agents Nodes
Sequential Agents bring a whole new dimension to Aimicromind, introducing 10 specialized nodes, each serving a specific purpose, offering more control over how our conversational agents interact with users, process information, make decisions, and execute actions.
The following sections aim to provide a comprehensive understanding of each node's functionality, inputs, outputs, and best practices, ultimately enabling you to craft sophisticated conversational workflows for a variety of applications.
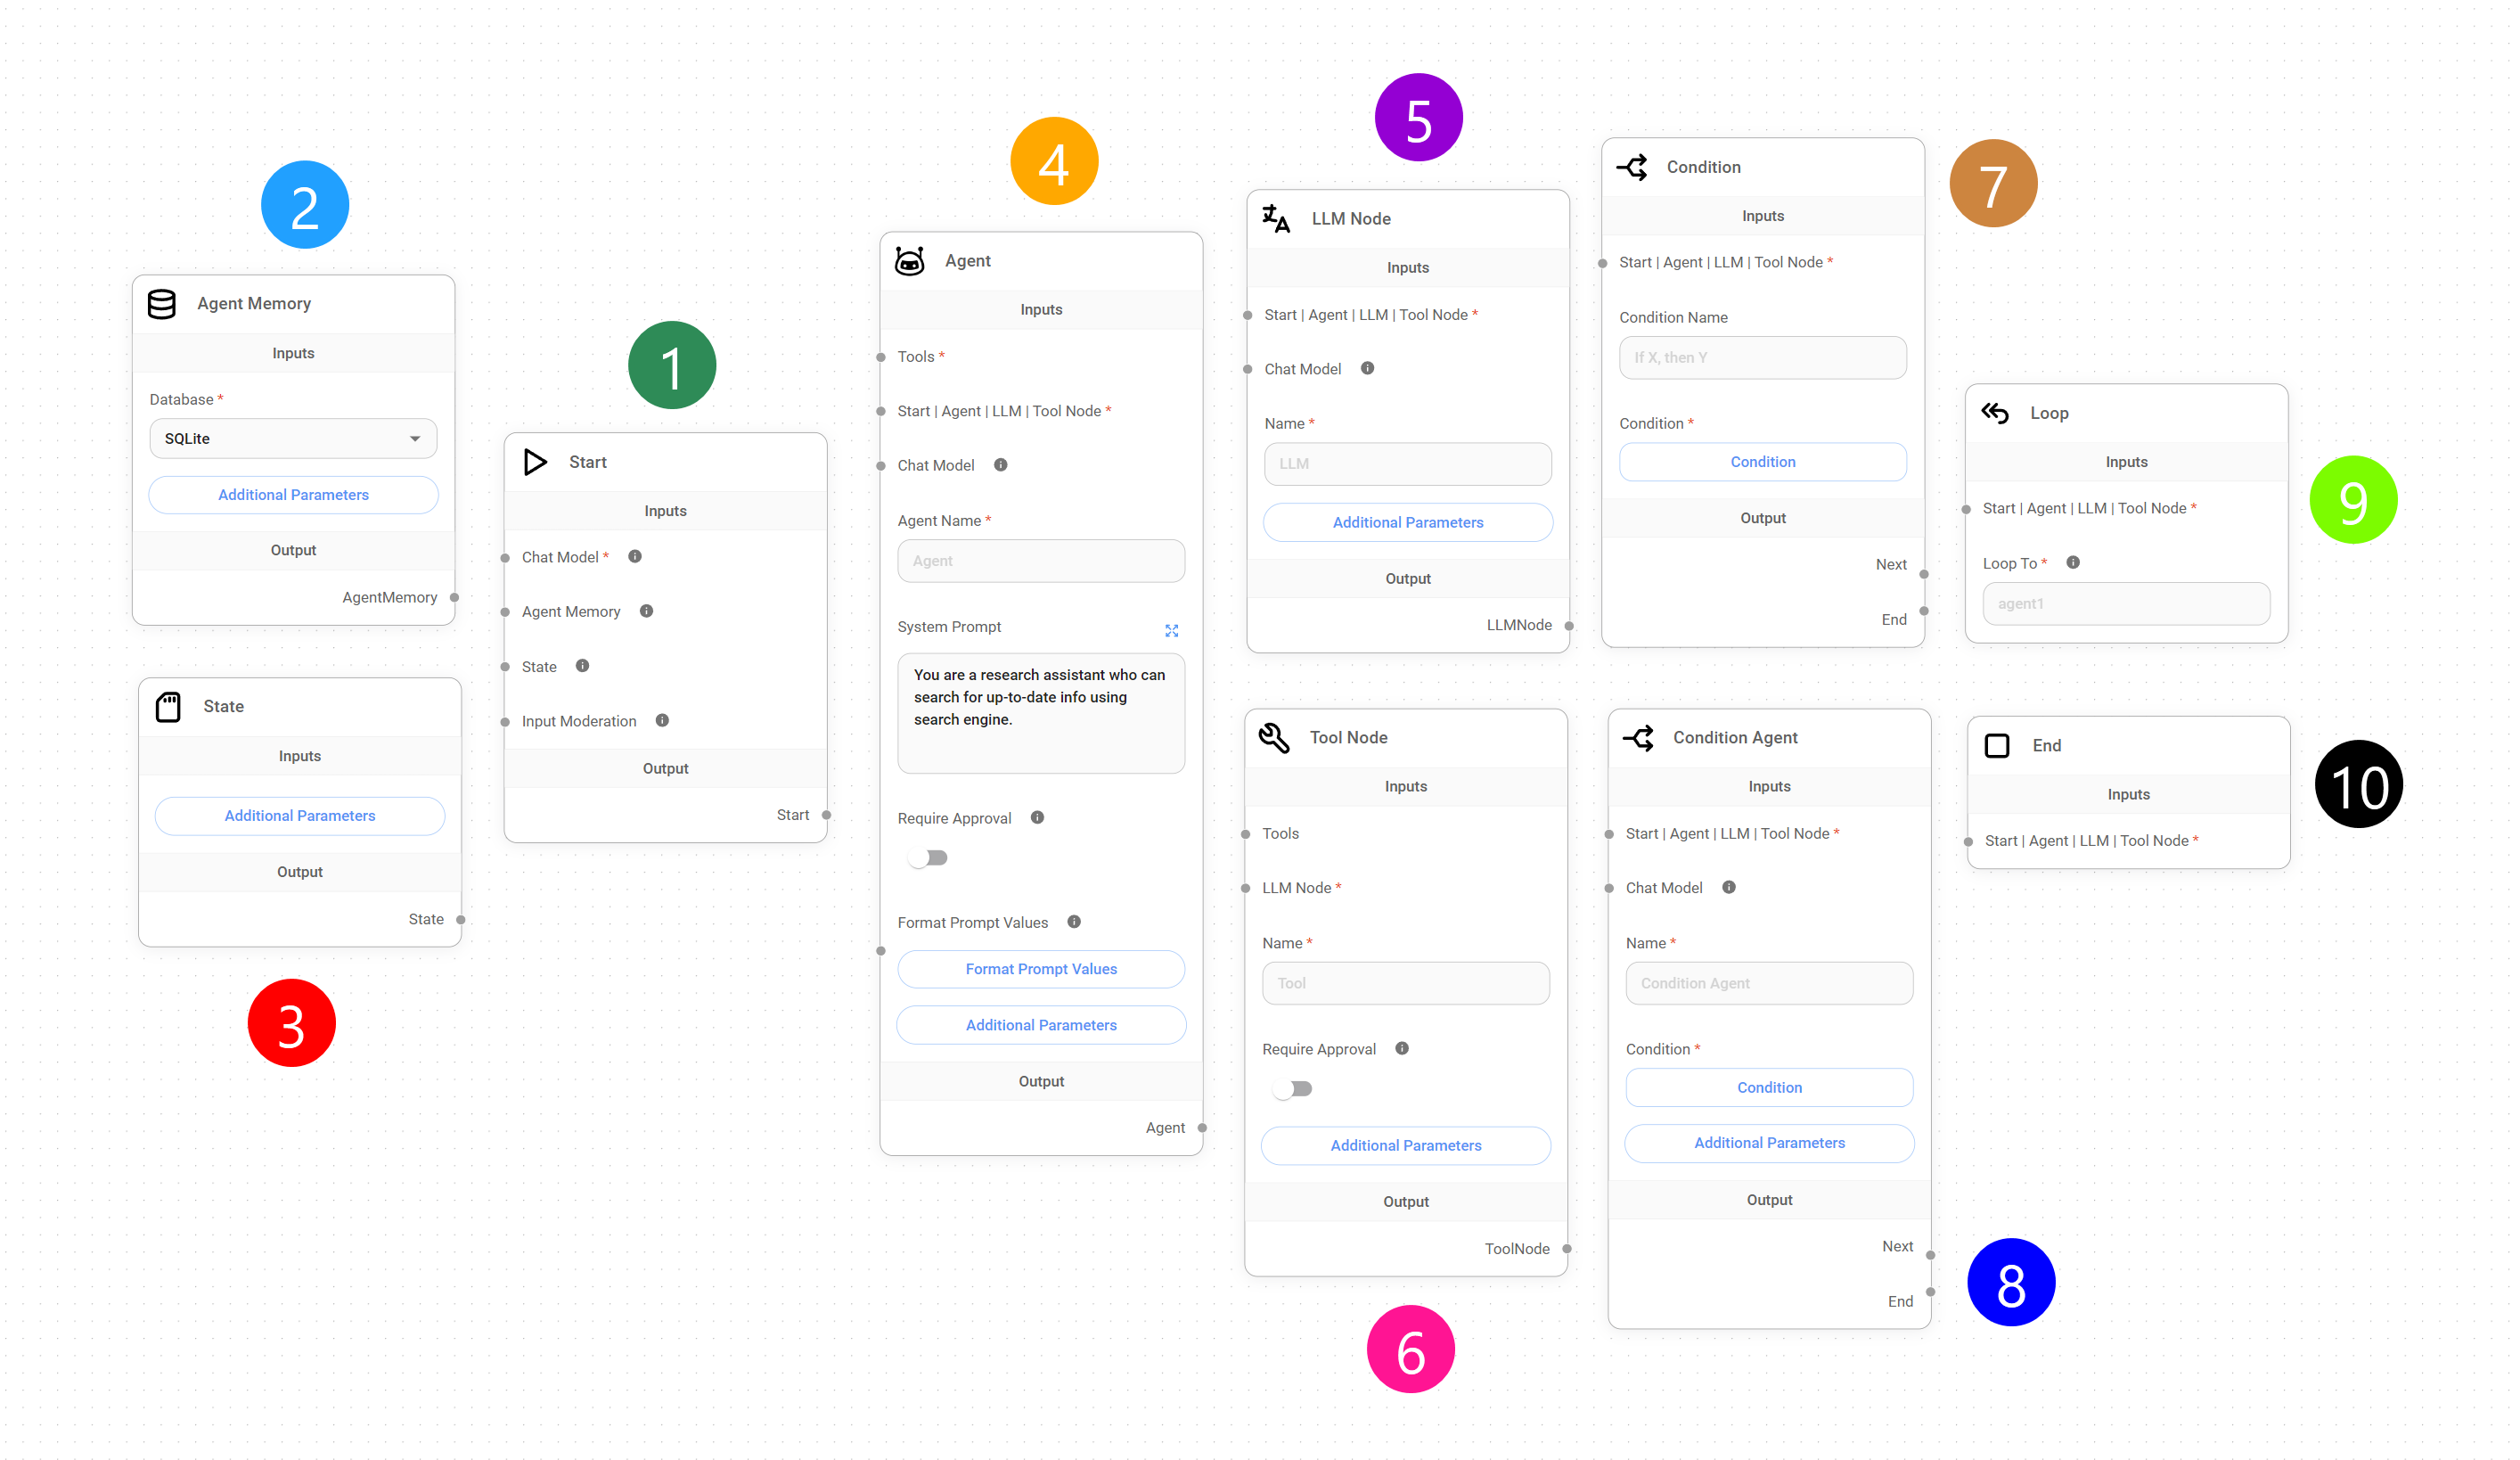
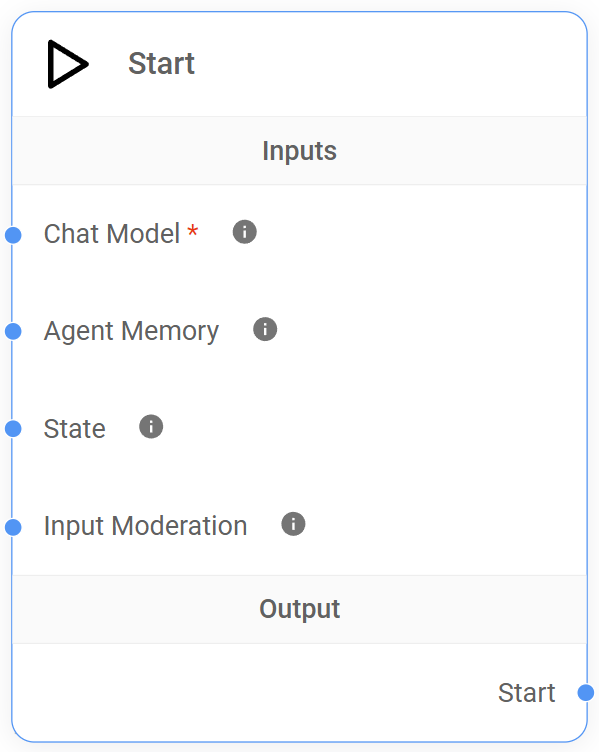
1. Start Node
As its name implies, the Start Node is the entry point for all workflows in the Sequential Agent architecture. It receives the initial user query, initializes the conversation State, and sets the flow in motion.
Understanding the Start Node
The Start Node ensures that our conversational workflows have the necessary setup and context to function correctly. It's responsible for setting up key functionalities that will be used throughout the rest of the workflow:
- Defining the default LLM: The Start Node requires us to specify a Chat Model (LLM) compatible with function calling, enabling agents in the workflow to interact with tools and external systems. It will be the default LLM used under the hood in the workflow.
- Initializing Memory: We can optionally connect an Agent Memory Node to store and retrieve conversation history, enabling more context-aware responses.
- Setting a custom State: By default, the State contains an immutable
state.messagesarray, which acts as the transcript or history of the conversation between the user and the agents. The Start Node allows you to connect a custom State to the workflow adding a State Node, enabling the storage of additional information relevant to your workflow - Enabling moderation: Optionally, we can connect Input Moderation to analyze the user's input and prevent potentially harmful content from being sent to the LLM.
Inputs
| Required | Description | |
|---|---|---|
| Chat Model | Yes | The default LLM that will power the conversation. Only compatible with models that are capable of function calling. |
| Agent Memory Node | No | Connect an Agent Memory Node to enable persistence and context preservation. |
| State Node | No | Connect a State Node to set a custom State, a shared context that can be accessed and modified by other nodes in the workflow. |
| Input Moderation | No | Connect a Moderation Node to filter content by detecting text that could generate harmful output, preventing it from being sent to the LLM. |
Outputs
The Start Node can connect to the following nodes as outputs:
- Agent Node: Routes the conversation flow to an Agent Node, which can then execute actions or access tools based on the conversation's context.
- LLM Node: Routes the conversation flow to an LLM Node for processing and response generation.
- Condition Agent Node: Connects to a Condition Agent Node to implement branching logic based on the agent's evaluation of the conversation.
- Condition Node: Connects to a Condition Node to implement branching logic based on predefined conditions.
Best Practices
{% tabs %} {% tab title="Pro Tips" %} Choose the right Chat Model
Ensure your selected LLM supports function calling, a key feature for enabling agent-tool interactions. Additionally, choose an LLM that aligns with the complexity and requirements of your application. You can override the default LLM by setting it at the Agent/LLM/Condition Agent node level when necessary.
Consider context and persistence
If your use case demands it, utilize Agent Memory Node to maintain context and personalize interactions. {% endtab %}
{% tab title="Potential Pitfalls" %} Incorrect Chat Model (LLM) selection
- Problem: The Chat Model selected in the Start Node is not suitable for the intended tasks or capabilities of the workflow, resulting in poor performance or inaccurate responses.
- Example: A workflow requires a Chat Model with strong summarization capabilities, but the Start Node selects a model optimized for code generation, leading to inadequate summaries.
- Solution: Choose a Chat Model that aligns with the specific requirements of your workflow. Consider the model's strengths, weaknesses, and the types of tasks it excels at. Refer to the documentation and experiment with different models to find the best fit.
Overlooking Agent Memory Node configuration
- Problem: The Agent Memory Node is not properly connected or configured, resulting in the loss of conversation history data between sessions.
- Example: You intend to use persistent memory to store user preferences, but the Agent Memory Node is not connected to the Start Node, causing preferences to be reset on each new conversation.
- Solution: Ensure that the Agent Memory Node is connected to the Start Node and configured with the appropriate database (SQLite). For most use cases, the default SQLite database will be sufficient.
Inadequate Input Moderation
- Problem: The "Input Moderation" is not enabled or configured correctly, allowing potentially harmful or inappropriate user input to reach the LLM and generate undesirable responses.
- Example: A user submits offensive language, but the input moderation fails to detect it or is not set up at all, allowing the query to reach the LLM.
- Solution: Add and configure an input moderation node in the Start Node to filter out potentially harmful or inappropriate language. Customize the moderation settings to align with your specific requirements and use cases. {% endtab %} {% endtabs %}
2. Agent Memory Node
The Agent Memory Node provides a mechanism for persistent memory storage, allowing the Sequential Agent workflow to retain the conversation history state.messages and any custom State previously defined across multiple interactions
This long-term memory is essential for agents to learn from previous interactions, maintain context over extended conversations, and provide more relevant responses.
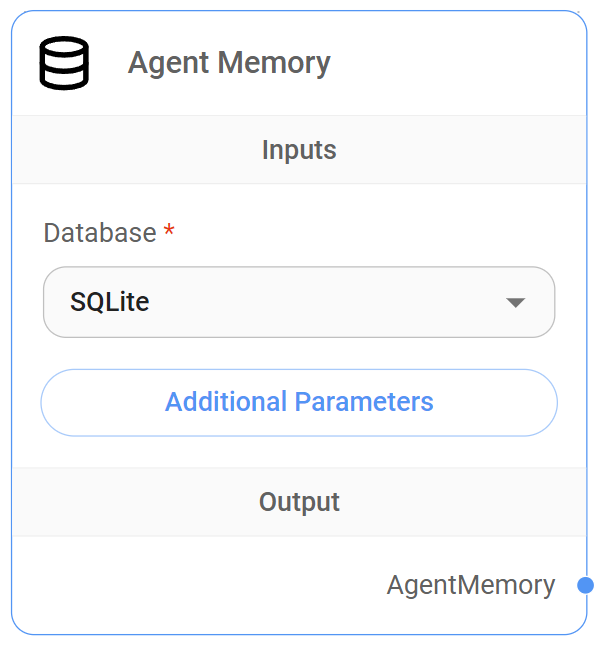
Where the data is recorded
By default, aimicromindutilizes its built-in SQLite database to store conversation history and custom state data, creating a "checkpoints" table to manage this persistent information.
Understanding the "checkpoints" table structure and data format
This table stores snapshots of the system's State at various points during a conversation, enabling the persistence and retrieval of conversation history. Each row represents a specific point or "checkpoint" in the workflow's execution.
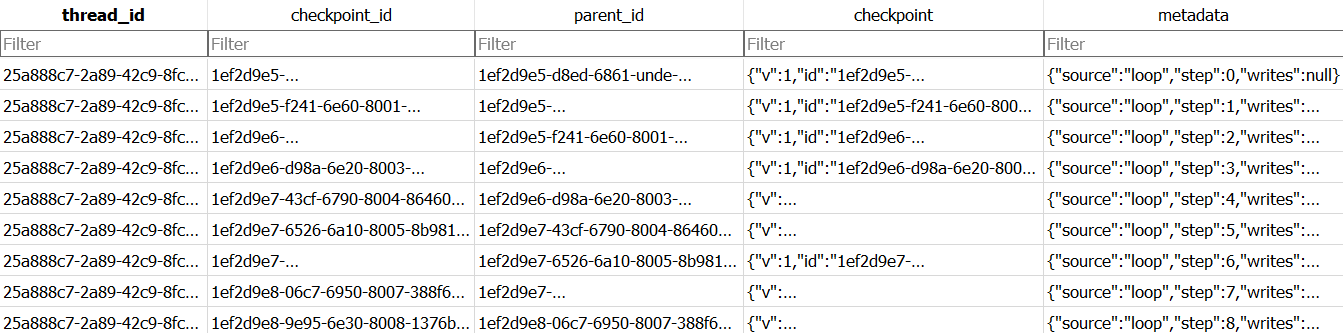
Table structure
- thread_id: A unique identifier representing a specific conversation session, our session ID. It groups together all checkpoints related to a single workflow execution.
- checkpoint_id: A unique identifier for each execution step (node execution) within the workflow. It helps track the order of operations and identify the State at each step.
- parent_id: Indicates the checkpoint_id of the preceding execution step that led to the current checkpoint. This establishes a hierarchical relationship between checkpoints, allowing for the reconstruction of the workflow's execution flow.
- checkpoint: Contains a JSON string representing the current State of the workflow at that specific checkpoint. This includes the values of variables, the messages exchanged, and any other relevant data captured at that point in the execution.
- metadata: Provides additional context about the checkpoint, specifically related to node operations.
How it works
As a Sequential Agent workflow executes, the system records a checkpoint in this table for each significant step. This mechanism provides several benefits:
- Execution tracking: Checkpoints enable the system to understand the execution path and the order of operations within the workflow.
- State management: Checkpoints store the State of the workflow at each step, including variable values, conversation history, and any other relevant data. This allows the system to maintain contextual awareness and make informed decisions based on the current State.
- Workflow resumption: If the workflow is paused or interrupted (e.g., due to a system error or user request), the system can use the stored checkpoints to resume execution from the last recorded State. This ensures that the conversation or task continues from where it left off, preserving the user's progress and preventing data loss.
Inputs
The Agent Memory Node has no specific input connections.
Node Setup
| Required | Description | |
|---|---|---|
| Database | Yes | The type of database used for storing conversation history. Currently, only SQLite is supported. |
Additional Parameters
| Required | Description | |
|---|---|---|
| Database File Path | No | The file path to the SQLite database file. If not provided, the system will use a default location. |
Outputs
The Agent Memory Node interacts solely with the Start Node, making the conversation history available from the very beginning of the workflow.
Best Practices
{% tabs %} {% tab title="Pro Tips" %} Strategic use
Employ Agent Memory only when necessary. For simple, stateless interactions, it might be overkill. Reserve it for scenarios where retaining information across turns or sessions is essential. {% endtab %}
{% tab title="Potential Pitfalls" %} Unnecessary overhead
- The Problem: Using Agent Memory for every interaction, even when not needed, introduces unnecessary storage and processing overhead. This can slow down response times and increase resource consumption.
- Example: A simple weather chatbot that provides information based on a single user request doesn't need to store conversation history.
- Solution: Analyze the requirements of your system and only utilize Agent Memory when persistent data storage is essential for functionality or user experience. {% endtab %} {% endtabs %}
3. State Node
The State Node, which can only be connected to the Start Node, provides a mechanism to set a user-defined or custom State into our workflow from the start of the conversation. This custom State is a JSON object that is shared and can be updated by nodes in the graph, passing from one node to another as the flow progresses.
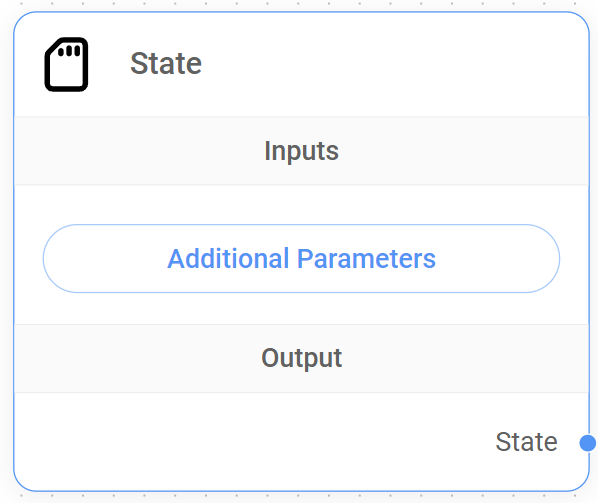
Understanding the State Node
By default, the State includes a state.messages array, which acts as our conversation history. This array stores all messages exchanged between the user and the agents, or any other actors in the workflow, preserving it throughout the workflow execution.
Since by definition this state.messages array is immutable and cannot be modified, the purpose of the State Node is to allow us to define custom key-value pairs, expanding the state object to hold any additional information relevant to our workflow.
{% hint style="info" %} When no Agent Memory Node is used, the State operates in-memory and is not persisted for future use. {% endhint %}
Inputs
The State Node has no specific input connections.
Outputs
The State Node can only connect to the Start Node, allowing the setup of a custom State from the beginning of the workflow and allowing other nodes to access and potentially modify this shared custom State.
Additional Parameters
| Required | Description | |
|---|---|---|
| Custom State | Yes | A JSON object representing the initial custom State of the workflow. This object can contain any key-value pairs relevant to the application. |
How to set a custom State
Specify the key, operation type, and default value for the state object. The operation type can be either "Replace" or "Append".
- Replace
- Replace the existing value with the new value.
- If the new value is null, the existing value will be retained.
- Append
- Append the new value to the existing value.
- Default values can be empty or an array. Ex: ["a", "b"]
- Final value is an array.
Example using JS
{% code overflow="wrap" %}
{
    aggregate: {
        value: (x, y) => x.concat(y), // here we append the new message to the existing messages
        default: () => []
    }
}
{% endcode %}
Example using Table
To define a custom State using the table interface in the State Node, follow these steps:
- Add item: Click the "+ Add Item" button to add rows to the table. Each row represents a key-value pair in your custom State.
- Specify keys: In the "Key" column, enter the name of each key you want to define in your state object. For example, you might have keys like "userName", "userLocation", etc.
- Choose operations: In the "Operation" column, select the desired operation for each key. You have two options:
- Replace: This will replace the existing value of the key with the new value provided by a node. If the new value is null, the existing value will be retained.
- Append: This will append the new value to the existing value of the key. The final value will be an array.
- Set default values: In the "Default Value" column, enter the initial value for each key. This value will be used if no other node provides a value for the key. The default value can be empty or an array.
Example Table
| Key | Operation | Default Value |
|---|---|---|
| userName | Replace | null |
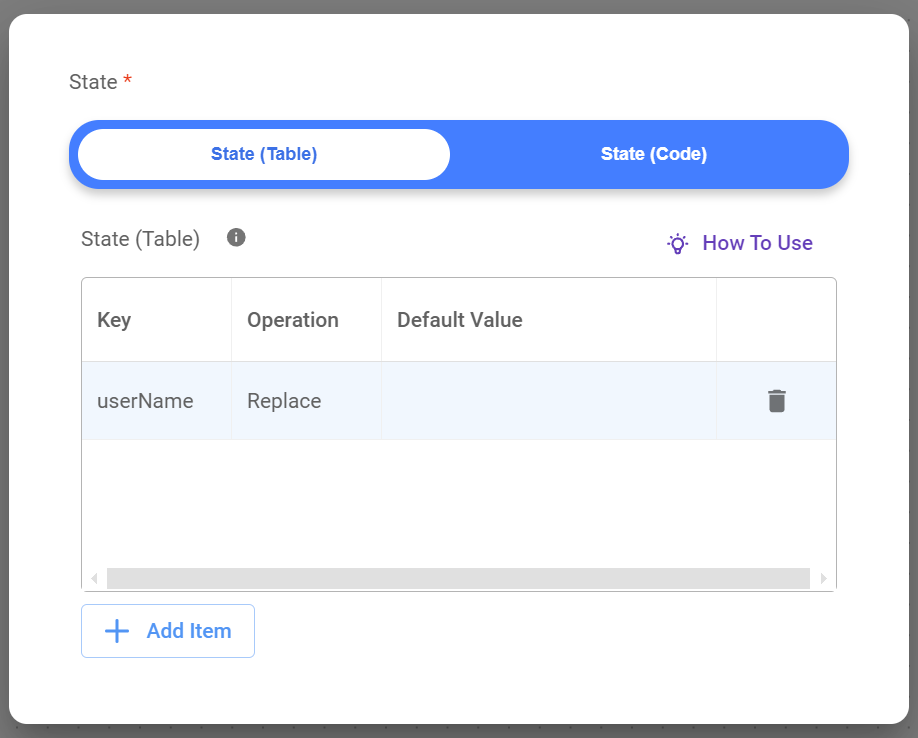
- This table defines one key in the custom State:
userName. - The
userNamekey will use the "Replace" operation, meaning its value will be updated whenever a node provides a new value. - The
userNamekey has a default value of null, indicating that it has no initial value.
{% hint style="info" %} Remember that this table-based approach is an alternative to defining the custom State using JavaScript. Both methods achieve the same result. {% endhint %}
Example using API
{
    "question": "hello",
    "overrideConfig": {
        "stateMemory": [
            {
                "Key": "userName",
                "Operation": "Replace",
                "Default Value": "somevalue"
            }
        ]
    }
}
Best Practices
{% tabs %} {% tab title="Pro-Tips" %} Plan your custom State structure
Before building your workflow, design the structure of your custom State. A well-organized custom State will make your workflow easier to understand, manage, and debug.
Use meaningful key names
Choose descriptive and consistent key names that clearly indicate the purpose of the data they hold. This will improve the readability of your code and make it easier for others (or you in the future) to understand how the custom State is being used.
Keep custom State minimal
Only store information in the custom State that is essential for the workflow's logic and decision-making.
Consider State persistence
If you need to preserve State across multiple conversation sessions (e.g., for user preferences, order history, etc.), use the Agent Memory Node to store the State in a persistent database. {% endtab %}
{% tab title="Potential Pitfalls" %} Inconsistent State Updates
- Problem: Updating the custom State in multiple nodes without a clear strategy can lead to inconsistencies and unexpected behavior.
- Example
- Agent 1 updates
orderStatusto "Payment Confirmed". - Agent 2, in a different branch, updates
orderStatusto "Order Complete" without checking the previous status.
- Agent 1 updates
- Solution: Use Conditions Nodes to control the flow of the custom State updates and ensure that custom State transitions happen in a logical and consistent manner. {% endtab %} {% endtabs %}
4. Agent Node
The Agent Node is a core component of the Sequential Agent architecture. It acts as a decision-maker and orchestrator within our workflow.
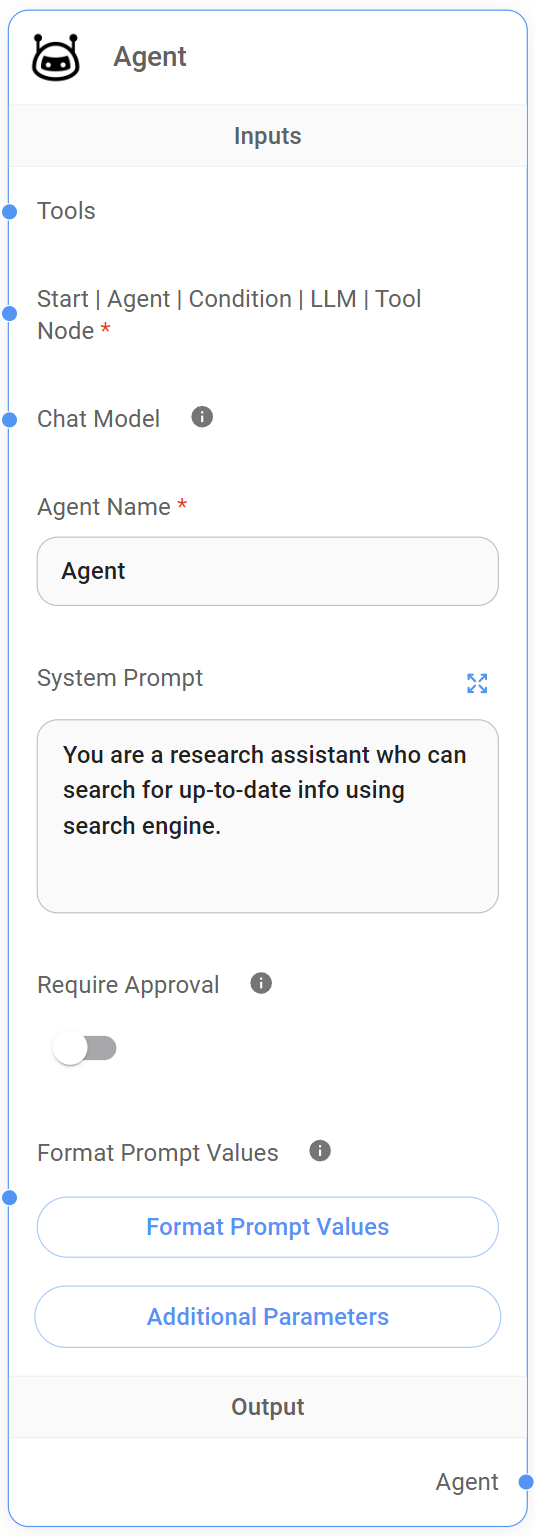
Understanding the Agent Node
Upon receiving input from preceding nodes, which always includes the full conversation history state.messages and any custom State at that point in the execution, the Agent Node uses its defined "persona", established by the System Prompt, to determine if external tools are necessary to fulfill the user's request.
- If tools are required, the Agent Node autonomously selects and executes the appropriate tool. This execution can be automatic or, for sensitive tasks, require human approval (HITL) before proceeding. Once the tool completes its operation, the Agent Node receives the results, processes them using the designated Chat Model (LLM), and generates a comprehensive response.
- In cases where no tools are needed, the Agent Node directly leverages the Chat Model (LLM) to formulate a response based on the current conversation context.
Inputs
| Required | Description | |
|---|---|---|
| External Tools | No | Provides the Agent Node with access to a suite of external tools, enabling it to perform actions and retrieve information. |
| Chat Model | No | Add a new Chat Model to overwrite the default Chat Model (LLM) of the workflow. Only compatible with models that are capable of function calling. |
| Start Node | Yes | Receives the initial user input, along with the custom State (if set up) and the rest of the default state.messages array from the Start Node. |
| Condition Node | Yes | Receives input from a preceding Condition Node, enabling the Agent Node to take actions or guide the conversation based on the outcome of the Condition Node's evaluation. |
| Condition Agent Node | Yes | Receives input from a preceding Condition Agent Node, enabling the Agent Node to take actions or guide the conversation based on the outcome of the Condition Agent Node's evaluation. |
| Agent Node | Yes | Receives input from a preceding Agent Node, enabling chained agent actions and maintaining conversational context |
| LLM Node | Yes | Receives the output from LLM Node, enabling the Agent Node to process the LLM's response. |
| Tool Node | Yes | Receives the output from a Tool Node, enabling the Agent Node to process and integrate tool's outputs into its response. |
{% hint style="info" %} The Agent Node requires at least one connection from the following nodes: Start Node, Agent Node, Condition Node, Condition Agent Node, LLM Node, or Tool Node. {% endhint %}
Outputs
The Agent Node can connect to the following nodes as outputs:
- Agent Node: Passes control to a subsequent Agent Node, enabling the chaining of multiple agent actions within a workflow. This allows for more complex conversational flows and task orchestration.
- LLM Node: Passes the agent's output to an LLM Node, enabling further language processing, response generation, or decision-making based on the agent's actions and insights.
- Condition Agent Node: Directs the flow to a Condition Agent Node. This node evaluates the Agent Node's output and its predefined conditions to determine the appropriate next step in the workflow.
- Condition Node: Similar to the Condition Agent Node, the Condition Node uses predefined conditions to assess the Agent Node's output, directing the flow along different branches based on the outcome.
- End Node: Concludes the conversation flow.
- Loop Node: Redirects the flow back to a previous node, enabling iterative or cyclical processes within the workflow. This is useful for tasks that require multiple steps or involve refining results based on previous interactions. For example, you might loop back to an earlier Agent Node or LLM Node to gather additional information or refine the conversation flow based on the current Agent Node's output.
Node Setup
| Required | Description | |
|---|---|---|
| Agent Name | Yes | Add a descriptive name to the Agent Node to enhance workflow readability and easily target it back when using loops within the workflow. |
| System Prompt | No | Defines the agent's 'persona' and guides its behavior. For example, "You are a customer service agent specializing in technical support [...]." |
| Require Approval | No | Activates the Human-in-the-loop (HITL) feature. If set to 'True,' the Agent Node will request human approval before executing any tool. This is particularly valuable for sensitive operations or when human oversight is desired. Defaults to 'False,' allowing the Agent Node to execute tools autonomously. |
Additional Parameters
| Required | Description | |
|---|---|---|
| Human Prompt | No | This prompt is appended to the state.messages array as a human message. It allows us to inject a human-like message into the conversation flow after the Agent Node has processed its input and before the next node receives the Agent Node's output. |
| Approval Prompt | No | A customizable prompt presented to the human reviewer when the HITL feature is active. This prompt provides context about the tool execution, including the tool's name and purpose. The variable {tools} within the prompt will be dynamically replaced with the actual list of tools suggested by the agent, ensuring the human reviewer has all necessary information to make an informed decision. |
| Approve Button Text | No | Customizes the text displayed on the button for approving tool execution in the HITL interface. This allows for tailoring the language to the specific context and ensuring clarity for the human reviewer. |
| Reject Button Text | No | Customizes the text displayed on the button for rejecting tool execution in the HITL interface. Like the Approve Button Text, this customization enhances clarity and provides a clear action for the human reviewer to take if they deem the tool execution unnecessary or potentially harmful. |
| Update State | No | Provides a mechanism to modify the shared custom State object within the workflow. This is useful for storing information gathered by the agent or influencing the behavior of subsequent nodes. |
| Max Iteration | No | Limits the number of iterations an Agent Node can make within a single workflow execution. |
Best Practices
{% tabs %} {% tab title="Pro Tips" %} Clear system prompt
Craft a concise and unambiguous System Prompt that accurately reflects the agent's role and capabilities. This guides the agent's decision-making and ensures it acts within its defined scope.
Strategic tool selection
Choose and configure the tools available to the Agent Node, ensuring they align with the agent's purpose and the overall goals of the workflow.
HITL for sensitive tasks
Utilize the 'Require Approval' option for tasks involving sensitive data, requiring human judgment, or carrying a risk of unintended consequences.
Leverage custom State updates
Update the custom State object strategically to store gathered information or influence the behavior of downstream nodes. {% endtab %}
{% tab title="Potential Pitfalls" %} Agent inaction due to tool overload
- Problem: When an Agent Node has access to a large number of tools within a single workflow execution, it might struggle to decide which tool is the most appropriate to use, even when a tool is clearly necessary. This can lead to the agent failing to call any tool at all, resulting in incomplete or inaccurate responses.
- Example: Imagine a customer support agent designed to handle a wide range of inquiries. You've equipped it with tools for order tracking, billing information, product returns, technical support, and more. A user asks, "What's the status of my order?" but the agent, overwhelmed by the number of potential tools, responds with a generic answer like, "I can help you with that. What's your order number?" without actually using the order tracking tool.
- Solution
- Refine system prompts: Provide clearer instructions and examples within the Agent Node's System Prompt to guide it towards the correct tool selection. If needed, emphasize the specific capabilities of each tool and the situations in which they should be used.
- Limit tool choices per node: If possible, break down complex workflows into smaller, more manageable segments, each with a more focused set of tools. This can help reduce the cognitive load on the agent and improve its tool-selection accuracy.
Overlooking HITL for sensitive tasks
- Problem: Failing to utilize the Agent Node's "Require Approval" (HITL) feature for tasks involving sensitive information, critical decisions, or actions with potential real-world consequences can lead to unintended outcomes or damage to user trust.
- Example: Your travel booking agent has access to a user's payment information and can automatically book flights and hotels. Without HITL, a misinterpretation of user intent or an error in the agent's understanding could result in an incorrect booking or unauthorized use of the user's payment details.
- Solution
- Identify sensitive actions: Analyze your workflow and identify any actions that involve accessing or processing sensitive data (e.g., payment info, personal details).
- Implement "Require Approval": For these sensitive actions, enable the "Require Approval" option within the Agent Node. This ensures that a human reviews the agent's proposed action and the relevant context before any sensitive data is accessed or any irreversible action is taken.
- Design clear approval prompts: Provide clear and concise prompts for human reviewers, summarizing the agent's intent, the proposed action, and the relevant information needed for the reviewer to make an informed decision.
Unclear or incomplete system prompt
- Problem: The System Prompt provided to the Agent Node lacks the necessary specificity and context to guide the agent effectively in carrying out its intended tasks. A vague or overly general prompt can lead to irrelevant responses, difficulty in understanding user intent, and an inability to leverage tools or data appropriately.
- Example: You're building a travel booking agent, and your System Prompt simply states "You are a helpful AI assistant." This lacks the specific instructions and context needed for the agent to effectively guide users through flight searches, hotel bookings, and itinerary planning.
- Solution: Craft a detailed and context-aware System Prompt:
{% code overflow="wrap" %}
You are a travel booking agent. Your primary goal is to assist users in planning and booking their trips.
- Guide them through searching for flights, finding accommodations, and exploring destinations.
- Be polite, patient, and offer travel recommendations based on their preferences.
- Utilize available tools to access flight data, hotel availability, and destination information.
{% endcode %} {% endtab %} {% endtabs %}
5. LLM Node
Like the Agent Node, the LLM Node is a core component of the Sequential Agent architecture. Both nodes utilize the same Chat Models (LLMs) by default, providing the same basic language processing capabilities, but the LLM Node distinguishes itself in these key areas.
Key advantages of the LLM Node
While a detailed comparison between the LLM Node and the Agent Node is available in this section, here's a brief overview of the LLM Node's key advantages:
- Structured data: The LLM Node provides a dedicated feature to define a JSON schema for its output. This makes it exceptionally easy to extract structured information from the LLM's responses and pass that data to consequent nodes in the workflow. The Agent Node does not have this built-in JSON schema feature
- HITL: While both nodes support HITL for tool execution, the LLM Node defers this control to the Tool Node itself, providing more flexibility in workflow design.
Inputs
| Required | Description | |
|---|---|---|
| Chat Model | No | Add a new Chat Model to overwrite the default Chat Model (LLM) of the workflow. Only compatible with models that are capable of function calling. |
| Start Node | Yes | Receives the initial user input, along with the custom State (if set up) and the rest of the default state.messages array from the Start Node. |
| Agent Node | Yes | Receives output from an Agent Node, which may include tool execution results or agent-generated responses. |
| Condition Node | Yes | Receives input from a preceding Condition Node, enabling the LLM Node to take actions or guide the conversation based on the outcome of the Condition Node's evaluation. |
| Condition Agent Node | Yes | Receives input from a preceding Condition Agent Node, enabling the LLM Node to take actions or guide the conversation based on the outcome of the Condition Agent Node's evaluation. |
| LLM Node | Yes | Receives output from another LLM Node, enabling chained reasoning or information processing across multiple LLM Nodes. |
| Tool Node | Yes | Receives output from a Tool Node, providing the results of tool execution for further processing or response generation. |
{% hint style="info" %} The LLM Node requires at least one connection from the following nodes: Start Node, Agent Node, Condition Node, Condition Agent Node, LLM Node, or Tool Node. {% endhint %}
Node Setup
| Required | Description | |
|---|---|---|
| LLM Node Name | Yes | Add a descriptive name to the LLM Node to enhance workflow readability and easily target it back when using loops within the workflow. |
Outputs
The LLM Node can connect to the following nodes as outputs:
- Agent Node: Passes the LLM's output to an Agent Node, which can then use the information to decide on actions, execute tools, or guide the conversation flow.
- LLM Node: Passes the output to a subsequent LLM Node, enabling chaining of multiple LLM operations. This is useful for tasks like refining text generation, performing multiple analyses, or breaking down complex language processing into stages.
- Tool Node: Passes the output to a Tool Node, enabling the execution of a specific tool based on the LLM Node's instructions.
- Condition Agent Node: Directs the flow to a Condition Agent Node. This node evaluates the LLM Node's output and its predefined conditions to determine the appropriate next step in the workflow.
- Condition Node: Similar to the Condition Agent Node, the Condition Node uses predefined conditions to assess the LLM Node's output, directing the flow along different branches based on the outcome.
- End Node: Concludes the conversation flow.
- Loop Node: Redirects the flow back to a previous node, enabling iterative or cyclical processes within the workflow. This could be used to refine the LLM's output over multiple iterations.
Additional Parameters
| Required | Description | |
|---|---|---|
| System Prompt | No | Defines the agent's 'persona' and guides its behavior. For example, "You are a customer service agent specializing in technical support [...]." |
| Human Prompt | No | This prompt is appended to the state.messages array as a human message. It allows us to inject a human-like message into the conversation flow after the LLM Node has processed its input and before the next node receives the LLM Node's output. |
| JSON Structured Output | No | To instruct the LLM (Chat Model) to provide the output in JSON structure schema (Key, Type, Enum Values, Description). |
| Update State | No | Provides a mechanism to modify the shared custom State object within the workflow. This is useful for storing information gathered by the LLM Node or influencing the behavior of subsequent nodes. |
Best Practices
{% tabs %} {% tab title="Pro Tips" %} Clear system prompt
Craft a concise and unambiguous System Prompt that accurately reflects the LLM Node's role and capabilities. This guides the LLM Node's decision-making and ensures it acts within its defined scope.
Optimize for structured output
Keep your JSON schemas as straightforward as possible, focusing on the essential data elements. Only enable JSON Structured Output when you need to extract specific data points from the LLM's response or when downstream nodes require JSON input.
Strategic tool selection
Choose and configure the tools available to the LLM Node (via the Tool Node), ensuring they align with the application purpose and the overall goals of the workflow.
HITL for sensitive tasks
Utilize the 'Require Approval' option for tasks involving sensitive data, requiring human judgment, or carrying a risk of unintended consequences.
Leverage State updates
Update the custom State object strategically to store gathered information or influence the behavior of downstream nodes. {% endtab %}
{% tab title="Potential Pitfalls" %} Unintentional tool execution due to Incorrect HITL setup
- Problem: While the LLM Node can trigger Tool Nodes, it relies on the Tool Node's configuration for Human-in-the-Loop (HITL) approval. Failing to properly configure HITL for sensitive actions can lead to tools being executed without human review, potentially causing unintended consequences.
- Example: Your LLM Node is designed to interact with a tool that makes changes to user data. You intend to have a human review these changes before execution, but the connected Tool Node's "Require Approval" option is not enabled. This could result in the tool automatically modifying user data based solely on the LLM's output, without any human oversight.
- Solution
- Double-Check tool node settings: Always ensure that the "Require Approval" option is enabled within the settings of any Tool Node that handles sensitive actions.
- Test HITL thoroughly: Before deploying your workflow, test the HITL process to ensure that human review steps are triggered as expected and that the approval/rejection mechanism functions correctly.
Overuse or misunderstanding of JSON structured output
- Problem: While the LLM Node's JSON Structured Output feature is powerful, misusing it or not fully understanding its implications can lead to data errors.
- Example: You define a complex JSON schema for the LLM Node's output, even though the downstream tasks only require a simple text response. This adds unnecessary complexity and makes your workflow harder to understand and maintain. Additionally, if the LLM's output doesn't conform to the defined schema, it can cause errors in subsequent nodes.
- Solution
- Use JSON output strategically: Only enable JSON Structured Output when you have a clear need to extract specific data points from the LLM's response or when the downstream Tool Nodes require JSON input.
- Keep schemas simple: Design your JSON schemas to be as simple and concise as possible, focusing only on the data elements that are absolutely necessary for the task. {% endtab %} {% endtabs %}
6. Tool Node
The Tool Node is a valuable component of Aimicromind's Sequential Agent system, enabling the integration and execution of external tools within conversational workflows. It acts as a bridge between the language-based processing of LLM Nodes and the specialized functionalities of external tools, APIs, or services.
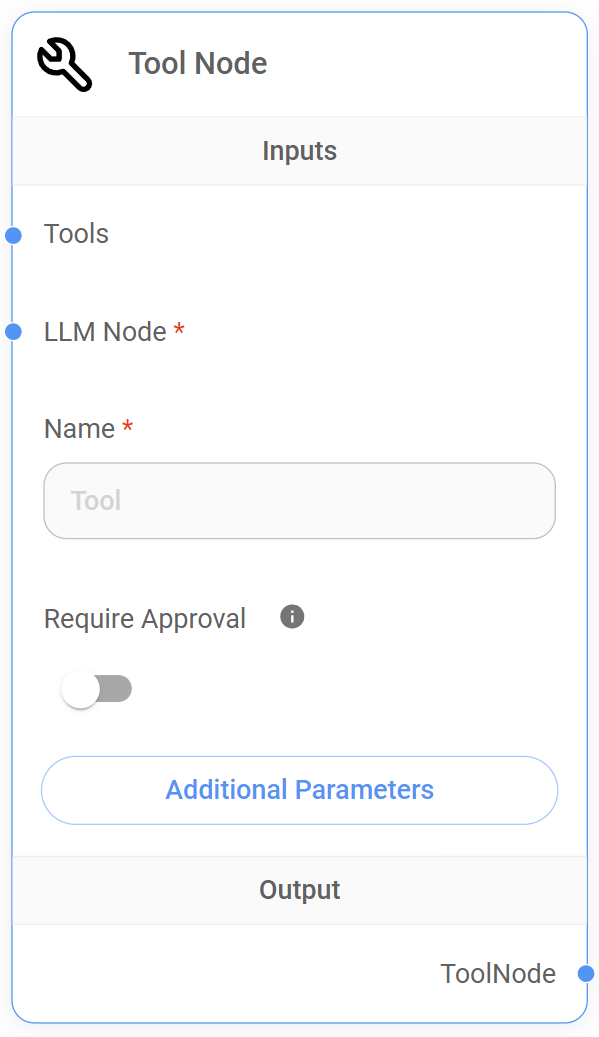
Understanding the Tool Node
The Tool Node's primary function is to execute external tools based on instructions received from an LLM Node and to provide flexibility for Human-in-the-Loop (HITL) intervention in the tool execution process.
Here's a step-by-step explanation of how it works
- Tool Call Reception: The Tool Node receives input from an LLM Node. If the LLM's output contains the
tool_callsproperty, the Tool Node will proceed with tool execution. - Execution: The Tool Node directly passes the LLM's
tool_calls(which include the tool name and any required parameters) to the specified external tool. Otherwise, the Tool Node does not execute any tools in that particular workflow execution. It does not process or interpret the LLM's output in any way. - Human-in-the-Loop (HITL): The Tool Node allows for optional HITL, enabling human review and approval or rejection of tool execution before it occurs.
- Output passing: After the tool execution (either automatic or after HITL approval), the Tool Node receives the tool's output and passes it to the next node in the workflow. If the Tool Node's output is not connected to a subsequent node, the tool's output is returned to the original LLM Node for further processing.
Inputs
| Required | Description | |
|---|---|---|
| LLM Node | Yes | Receives the output from an LLM Node, which may or may not contain tool_calls property. If it is present, the Tool Node will use them to execute the specified tool. |
| External Tools | No | Provides the Tool Node with access to a suite of external tools, enabling it to perform actions and retrieve information. |
Node Setup
| Required | Description | |
|---|---|---|
| Tool Node Name | Yes | Add a descriptive name to the Tool Node to enhance workflow readability. |
| Require Approval (HITL) | No | Activates the Human-in-the-loop (HITL) feature. If set to 'True,' the Tool Node will request human approval before executing any tool. This is particularly valuable for sensitive operations or when human oversight is desired. Defaults to 'False,' allowing the Tool Node to execute tools autonomously. |
Outputs
The Tool Node can connect to the following nodes as outputs:
- Agent Node: Passes the Tool Node's output (the result of the executed tool) to an Agent Node. The Agent Node can then use this information to decide on actions, execute further tools, or guide the conversation flow.
- LLM Node: Passes the output to a subsequent LLM Node. This enables the integration of tool results into the LLM's processing, allowing for further analysis or refinement of the conversation flow based on the tool's output.
- Condition Agent Node: Directs the flow to a Condition tool Node. This node evaluates the Tool Node's output and its predefined conditions to determine the appropriate next step in the workflow.
- Condition Node: Similar to the Condition Agent Node, the Condition Node uses predefined conditions to assess the Tool Node's output, directing the flow along different branches based on the outcome.
- End Node: Concludes the conversation flow.
- Loop Node: Redirects the flow back to a previous node, enabling iterative or cyclical processes within the workflow. This could be used for tasks that require multiple tool executions or involve refining the conversation based on tool results.
Additional Parameters
| Required | Description | |
|---|---|---|
| Approval Prompt | No | A customizable prompt presented to the human reviewer when the HITL feature is active. This prompt provides context about the tool execution, including the tool's name and purpose. The variable {tools} within the prompt will be dynamically replaced with the actual list of tools suggested by the LLM Node, ensuring the human reviewer has all necessary information to make an informed decision. |
| Approve Button Text | No | Customizes the text displayed on the button for approving tool execution in the HITL interface. This allows for tailoring the language to the specific context and ensuring clarity for the human reviewer. |
| Reject Button Text | No | Customizes the text displayed on the button for rejecting tool execution in the HITL interface. Like the Approve Button Text, this customization enhances clarity and provides a clear action for the human reviewer to take if they deem the tool execution unnecessary or potentially harmful. |
| Update State | No | Provides a mechanism to modify the custom State object within the workflow. This is useful for storing information gathered by the Tool Node (after the tool execution) or influencing the behavior of subsequent nodes. |
Best Practices
{% tabs %} {% tab title="Pro Tips" %} Strategic HITL placement
Consider which tools require human oversight (HITL) and enable the "Require Approval" option accordingly.
Informative Approval Prompts
When using HITL, design clear and informative prompts for human reviewers. Provide sufficient context from the conversation and summarize the tool's intended action. {% endtab %}
{% tab title="Potential Pitfalls" %} Unhandled tool output formats
- Problem: The Tool Node outputs data in a format that is not expected or handled by subsequent nodes in the workflow, leading to errors or incorrect processing.
- Example: A Tool Node retrieves data from an API in JSON format, but the following LLM Node expects text input, causing a parsing error.
- Solution: Ensure that the output format of the external tool is compatible with the input requirements of the nodes connected to the Tool Node's output. {% endtab %} {% endtabs %}
7. Condition Node
The Condition Node acts as a decision-making point in Sequential Agent workflows, evaluating a set of predefined conditions to determine the flow's next path.
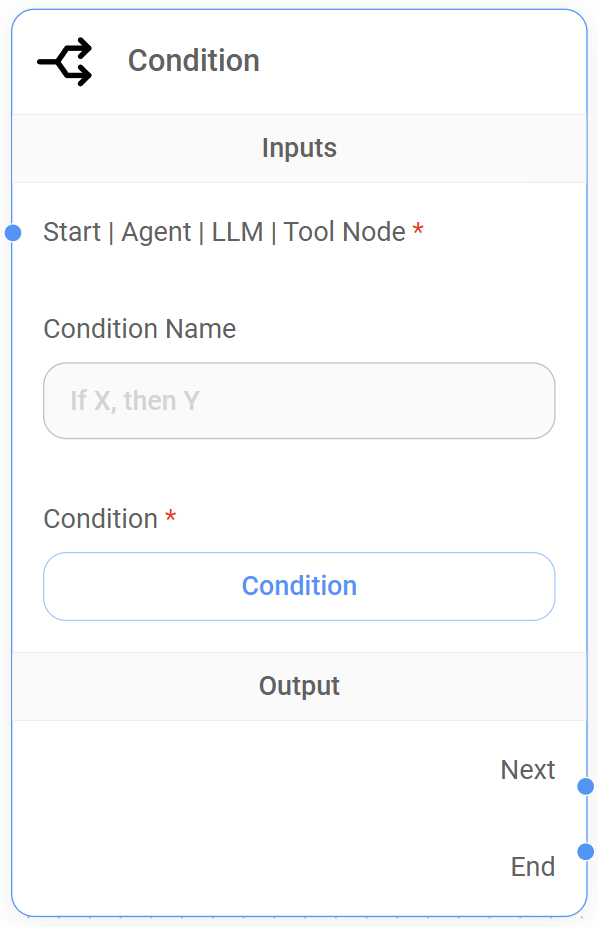
Understanding the Condition Node
The Condition Node is essential for building workflows that adapt to different situations and user inputs. It examines the current State of the conversation, which includes all messages exchanged and any custom State variables previously defined. Then, based on the evaluation of the conditions specified in the node setup, the Condition Node directs the flow to one of its outputs.
For instance, after an Agent or LLM Node provides a response, a Condition Node could check if the response contains a specific keyword or if a certain condition is met in the custom State. If it does, the flow might be directed to an Agent Node for further action. If not, it could lead to a different path, perhaps ending the conversation or prompting the user with additional questions.
This enables us to create branches in our workflow, where the path taken depends on the data flowing through the system.
Here's a step-by-step explanation of how it works
- The Condition Node receives input from any preceding node: Start Node, Agent Node, LLM Node, or Tool Node.
- It has access to the full conversation history and the custom State (if any), giving it plenty of context to work with.
- We define a condition that the node will evaluate. This could be checking for keywords, comparing values in the state, or any other logic we could implement via JavaScript.
- Based on whether the condition evaluates to true or false, the Condition Node sends the flow down one of its predefined output paths. This creates a "fork in the road" or branch for our workflow.
How to set up conditions
The Condition Node allows us to define dynamic branching logic in our workflow by choosing either a table-based interface or a JavaScript code editor to define the conditions that will control the conversation flow.
.png)
Conditions using CODE
The Condition Node uses JavaScript to evaluate specific conditions within the conversation flow.
We can set up conditions based on keywords, State changes, or other factors to dynamically guide the workflow to different branches based on the context of the conversation. Here are some examples:
Keyword condition
This checks if a specific word or phrase exists in the conversation history.
- Example: We want to check if the user said "yes" in their last message.
{% code overflow="wrap" %}
const lastMessage = $flow.state.messages[$flow.state.messages.length - 1].content;
return lastMessage.includes("yes") ? "Output 1" : "Output 2";
{% endcode %}
- This code gets the last message from state.messages and checks if it contains "yes".
- If "yes" is found, the flow goes to "Output 1"; otherwise, it goes to "Output 2".
State change condition
This checks if a specific value in the custom State has changed to a desired value.
- Example: We're tracking an orderStatus variable our custom State, and we want to check if it has become "confirmed".
{% code overflow="wrap" %}
return $flow.state.orderStatus === "confirmed" ? "Output 1" : "Output 2";
{% endcode %}
- This code directly compares the orderStatus value in our custom State to "confirmed".
- If it matches, the flow goes to "Output 1"; otherwise, it goes to "Output 2".
Conditions using TABLE
The Condition Node allows us to define conditions using a user-friendly table interface, making it easy to create dynamic workflows without writing JavaScript code.
You can set up conditions based on keywords, State changes, or other factors to guide the conversation flow along different branches. Here are some examples:
Keyword condition
This checks if a specific word or phrase exists in the conversation history.
-
Example: We want to check if the user said "yes" in their last message.
-
Setup
Variable Operation Value Output Name $flow.state.messages[-1].content Is Yes Output 1 - This table entry checks if the content (.content) of the last message ([-1]) in
state.messagesis equal to "Yes". - If the condition is met, the flow goes to "Output 1". Otherwise, the workflow is directed to a default "End" output.
- This table entry checks if the content (.content) of the last message ([-1]) in
State change condition
This checks if a specific value in our custom State has changed to a desired value.
-
Example: We're tracking an orderStatus variable in our custom State, and we want to check if it has become "confirmed".
-
Setup
Variable Operation Value Output Name $flow.state.orderStatus Is Confirmed Output 1 - This table entry checks if the value of orderStatus in the custom State is equal to "confirmed".
- If the condition is met, the flow goes to "Output 1". Otherwise, the workflow is directed to a default "End" output.
Defining conditions using the table interface
This visual approach allows you to easily set up rules that determine the path of your conversational flow, based on factors like user input, the current state of the conversation, or the results of actions taken by other nodes.
Table-Based: Condition Node
-
Updated on 09/08/2024
Description Options/Syntax Variable The variable or data element to evaluate in the condition. - $flow.state.messages.length(Total Messages)
-$flow.state.messages[0].con(First Message Content)
-$flow.state.messages[-1].con(Last Message Content)
-$vars.<variable-name>(Global variable)Operation The comparison or logical operation to perform on the variable. - Contains
- Not Contains
- Start With
- End With
- Is
- Is Not
- Is Empty
- Is Not Empty
- Greater Than
- Less Than
- Equal To
- Not Equal To
- Greater Than or Equal To
- Less Than or Equal ToValue The value to compare the variable against. - Depends on the data type of the variable and the selected operation.
- Examples: "yes", 10, "Hello"Output Name The name of the output path to follow if the condition evaluates to true.- User-defined name (e.g., "Agent1", "End", "Loop")
Inputs
| Required | Description | |
|---|---|---|
| Start Node | Yes | Receives the State from the Start Node. This allows the Condition Node to evaluate conditions based on the initial context of the conversation, including any custom State. |
| Agent Node | Yes | Receives the Agent Node's output. This enables the Condition Node to make decisions based on the agent's actions and the conversation history, including any custom State. |
| LLM Node | Yes | Receives the LLM Node's output. This allows the Condition Node to evaluate conditions based on the LLM's response and the conversation history, including any custom State. |
| Tool Node | Yes | Receives the Tool Node's output. This enables the Condition Node to make decisions based on the results of tool execution and the conversation history, including any custom State. |
{% hint style="info" %} The Condition Node requires at least one connection from the following nodes: Start Node, Agent Node, LLM Node, or Tool Node. {% endhint %}
Outputs
The Condition Node dynamically determines its output path based on the predefined conditions, using either the table-based interface or JavaScript. This provides flexibility in directing the workflow based on condition evaluations.
Condition evaluation logic
- Table-Based conditions: The conditions in the table are evaluated sequentially, from top to bottom. The first condition that evaluates to true triggers its corresponding output. If none of the predefined conditions are met, the workflow is directed to the default "End" output.
- Code-Based conditions: When using JavaScript, we must explicitly return the name of the desired output path, including a name for the default "End" output.
- Single output path: Only one output path is activated at a time. Even if multiple conditions could be true, only the first matching condition determines the flow.
Connecting outputs
Each predefined output, including the default "End" output, can be connected to any of the following nodes:
- Agent Node: To continue the conversation with an agent, potentially taking actions based on the condition's outcome.
- LLM Node: To process the current State and conversation history with an LLM, generating responses or making further decisions.
- End Node: To terminate the conversation flow. If any output, including the default "End" output, is connected to an End Node, the Condition Node will output the last response from the preceding node and end the workflow.
- Loop Node: To redirect the flow back to a previous sequential node, enabling iterative processes based on the condition's outcome.
Node Setup
| Required | Description | |
|---|---|---|
| Condition Node Name | No | An optional, human-readable name for the condition being evaluated. This is helpful for understanding the workflow at a glance. |
| Condition | Yes | This is where we define the logic that will be evaluated to determine the output paths. |
Best Practices
{% tabs %} {% tab title="Pro Tips" %} Clear condition naming
Use descriptive names for your conditions (e.g., "If user is under 18, then Policy Advisor Agent", "If order is confirmed, then End Node") to make your workflow easier to understand and debug.
Prioritize simple conditions
Start with simple conditions and gradually add complexity as needed. This makes your workflow more manageable and reduces the risk of errors. {% endtab %}
{% tab title="Potential Pitfalls" %} Mismatched condition logic and workflow design
- Problem: The conditions you define in the Condition Node do not accurately reflect the intended logic of your workflow, leading to unexpected branching or incorrect execution paths.
- Example: You set up a condition to check if the user's age is greater than 18, but the output path for that condition leads to a section designed for users under 18.
- Solution: Review your conditions and ensure that the output paths associated with each condition match the intended workflow logic. Use clear and descriptive names for your outputs to avoid confusion.
Insufficient State management
- Problem: The Condition Node relies on a custom state variable that is not updated correctly, leading to inaccurate condition evaluations and incorrect branching.
- Example: You're tracking a "userLocation" variable in the custom State, but the variable is not updated when the user provides their location. The Condition Node evaluates the condition based on the outdated value, leading to an incorrect path.
- Solution: Ensure that any custom state variables used in your conditions are updated correctly throughout the workflow. {% endtab %} {% endtabs %}
8. Condition Agent Node
The Condition Agent Node provides dynamic and intelligent routing within Sequential Agent flows. It combines the capabilities of the LLM Node (LLM and JSON Structured Output) and the Condition Node (user-defined conditions), allowing us to leverage agent-based reasoning and conditional logic within a single node.
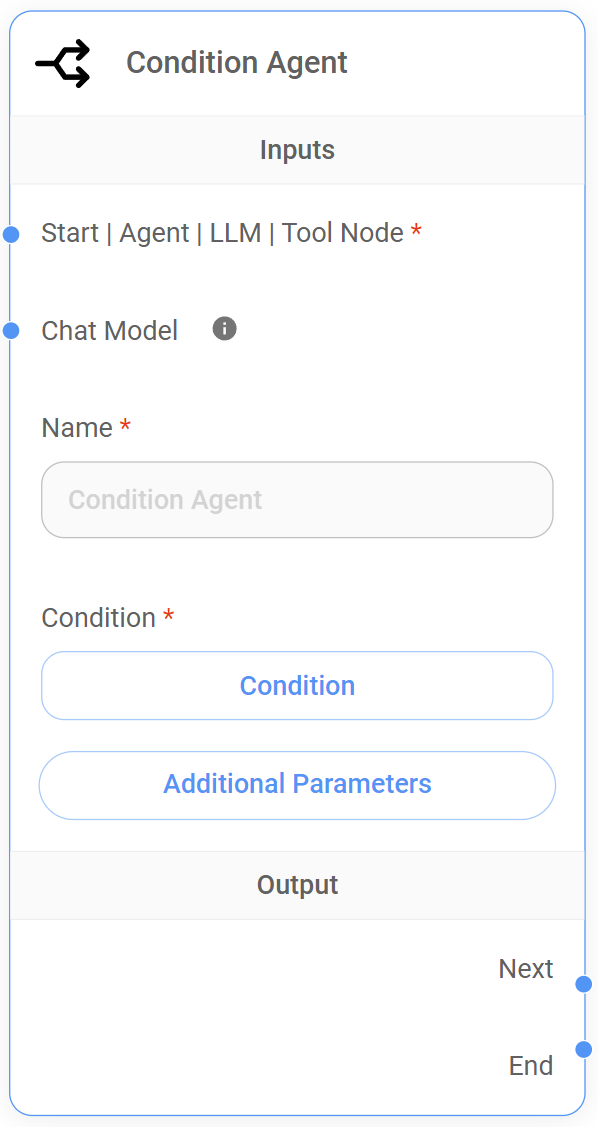
Key functionalities
- Unified agent-based routing: Combines agent reasoning, structured output, and conditional logic in a single node, simplifying workflow design.
- Contextual awareness: The agent considers the entire conversation history and any custom State when evaluating conditions.
- Flexibility: Provides both table-based and code-based options for defining conditions, when catering to different user preferences and skill levels.
Setting up the Condition Agent Node
The Condition Agent Node acts as a specialized agent that can both process information and make routing decisions. Here's how to configure it:
- Define the agent's persona
- In the "System Prompt" field, provide a clear and concise description of the agent's role and the task it needs to perform for conditional routing. This prompt will guide the agent's understanding of the conversation and its decision-making process.
- Structure the Agent's Output (Optional)
- If you want the agent to produce structured output, use the "JSON Structured Output" feature. Define the desired schema for the output, specifying the keys, data types, and any enum values. This structured output will be used by the agent when evaluating conditions.
- Define conditions
- Choose either the table-based interface or the JavaScript code editor to define the conditions that will determine the routing behavior.
- Table-Based interface: Add rows to the table, specifying the variable to check, the comparison operation, the value to compare against, and the output name to follow if the condition is met.
- JavaScript code: Write custom JavaScript snippets to evaluate conditions. Use the
returnstatement to specify the name of the output path to follow based on the condition's result.
- Choose either the table-based interface or the JavaScript code editor to define the conditions that will determine the routing behavior.
- Connect outputs
- Connect each predefined output, including the default "End" output, to the appropriate subsequent node in the workflow. This could be an Agent Node, LLM Node, Loop Node, or an End Node.
How to set up conditions
The Condition Agent Node allows us to define dynamic branching logic in our workflow by choose either a table-based interface or a JavaScript code editor to define the conditions that will control the conversation flow.
Conditions using CODE
The Condition Agent Node, like the Condition Node, uses JavaScript code to evaluate specific conditions within the conversation flow.
However, the Condition Agent Node can evaluate conditions based on a wider range of factors, including keywords, state changes, and the content of its own output (either as free-form text or structured JSON data). This allows for more nuanced and context-aware routing decisions. Here are some examples:
Keyword condition
This checks if a specific word or phrase exists in the conversation history.
- Example: We want to check if the user said "yes" in their last message.
{% code overflow="wrap" %}
const lastMessage = $flow.state.messages[$flow.state.messages.length - 1].content;
return lastMessage.includes("yes") ? "Output 1" : "Output 2";
{% endcode %}
- This code gets the last message from state.messages and checks if it contains "yes".
- If "yes" is found, the flow goes to "Output 1"; otherwise, it goes to "Output 2".
State change condition
This checks if a specific value in the custom State has changed to a desired value.
- Example: We're tracking an orderStatus variable our custom State, and we want to check if it has become "confirmed".
{% code overflow="wrap" %}
return $flow.state.orderStatus === "confirmed" ? "Output 1" : "Output 2";
{% endcode %}
- This code directly compares the orderStatus value in our custom State to "confirmed".
- If it matches, the flow goes to "Output 1"; otherwise, it goes to "Output 2".
Conditions using TABLE
The Condition Agent Node also provides a user-friendly table interface for defining conditions, similar to the Condition Node. You can set up conditions based on keywords, state changes, or the agent's own output, allowing you to create dynamic workflows without writing JavaScript code.
This table-based approach simplifies condition management and makes it easier to visualize the branching logic. Here are some examples:
Keyword condition
This checks if a specific word or phrase exists in the conversation history.
-
Example: We want to check if the user said "yes" in their last message.
-
Setup
Variable Operation Value Output Name $flow.state.messages[-1].content Is Yes Output 1 - This table entry checks if the content (.content) of the last message ([-1]) in
state.messagesis equal to "Yes". - If the condition is met, the flow goes to "Output 1". Otherwise, the workflow is directed to a default "End" output.
- This table entry checks if the content (.content) of the last message ([-1]) in
State change condition
This checks if a specific value in our custom State has changed to a desired value.
-
Example: We're tracking an orderStatus variable in our custom State, and we want to check if it has become "confirmed".
-
Setup
Variable Operation Value Output Name $flow.state.orderStatus Is Confirmed Output 1 - This table entry checks if the value of orderStatus in the custom State is equal to "confirmed".
- If the condition is met, the flow goes to "Output 1". Otherwise, the workflow is directed to a default "End" output.
Defining conditions using the table interface
This visual approach allows you to easily set up rules that determine the path of your conversational flow, based on factors like user input, the current state of the conversation, or the results of actions taken by other nodes.
Table-Based: Condition Agent Node
-
Updated on 09/08/2024
Description Options/Syntax Variable The variable or data element to evaluate in the condition. This can include data from the agent's output. - $flow.output.content(Agent Output - string)
-$flow.output.<replace-with-key>(Agent's JSON Key Output - string/number)
-$flow.state.messages.length(Total Messages)
-$flow.state.messages[0].con(First Message Content)
-$flow.state.messages[-1].con(Last Message Content)
-$vars.<variable-name>(Global variable)Operation The comparison or logical operation to perform on the variable. - Contains
- Not Contains
- Start With
- End With
- Is
- Is Not
- Is Empty
- Is Not Empty
- Greater Than
- Less Than
- Equal To
- Not Equal To
- Greater Than or Equal To
- Less Than or Equal ToValue The value to compare the variable against. - Depends on the data type of the variable and the selected operation.
- Examples: "yes", 10, "Hello"Output Name The name of the output path to follow if the condition evaluates to true.- User-defined name (e.g., "Agent1", "End", "Loop")
Inputs
| Required | Description | |
|---|---|---|
| Start Node | Yes | Receives the State from the Start Node. This allows the Condition Agent Node to evaluate conditions based on the initial context of the conversation, including any custom State. |
| Agent Node | Yes | Receives the Agent Node's output. This enables the Condition Agent Node to make decisions based on the agent's actions and the conversation history, including any custom State. |
| LLM Node | Yes | Receives LLM Node's output. This allows the Condition Agent Node to evaluate conditions based on the LLM's response and the conversation history, including any custom State. |
| Tool Node | Yes | Receives the Tool Node's output. This enables the Condition Agent Node to make decisions based on the results of tool execution and the conversation history, including any custom State. |
{% hint style="info" %} The Condition Agent Node requires at least one connection from the following nodes: Start Node, Agent Node, LLM Node, or Tool Node. {% endhint %}
Node Setup
| Parameter | Required | Description |
|---|---|---|
| Name | No | Add a descriptive name to the Condition Agent Node to enhance workflow readability and easily. |
| Condition | Yes | This is where we define the logic that will be evaluated to determine the output paths. |
Outputs
The Condition Agent Node, like the Condition Node, dynamically determines its output path based on the conditions defined, using either the table-based interface or JavaScript. This provides flexibility in directing the workflow based on condition evaluations.
Condition evaluation logic
- Table-Based conditions: The conditions in the table are evaluated sequentially, from top to bottom. The first condition that evaluates to true triggers its corresponding output. If none of the predefined conditions are met, the workflow is directed to the default "End" output.
- Code-Based conditions: When using JavaScript, we must explicitly return the name of the desired output path, including a name for the default "End" output.
- Single output path: Only one output path is activated at a time. Even if multiple conditions could be true, only the first matching condition determines the flow.
Connecting outputs
Each predefined output, including the default "End" output, can be connected to any of the following nodes:
- Agent Node: To continue the conversation with an agent, potentially taking actions based on the condition's outcome.
- LLM Node: To process the current State and conversation history with an LLM, generating responses or making further decisions.
- End Node: To terminate the conversation flow. If the default "End" output is connected to an End Node, the Condition Node will output the last response from the preceding node and end the conversation.
- Loop Node: To redirect the flow back to a previous sequential node, enabling iterative processes based on the condition's outcome.
Key differences from the Condition Node
- The Condition Agent Node incorporates an agent's reasoning and structured output into the condition evaluation process.
- It provides a more integrated approach to agent-based condition routing.
Additional Parameters
| Required | Description | |
|---|---|---|
| System Prompt | No | Defines the Condition Agent's 'persona' and guides its behavior for making routing decisions. For example: "You are a customer service agent specializing in technical support. Your goal is to help customers with technical issues related to our product. Based on the user's query, identify the specific technical issue (e.g., connectivity problems, software bugs, hardware malfunctions)." |
| Human Prompt | No | This prompt is appended to the state.messages array as a human message. It allows us to inject a human-like message into the conversation flow after the Condition Agent Node has processed its input and before the next node receives the Condition Agent Node's output. |
| JSON Structured Output | No | To instruct the Condition Agent Node to provide the output in JSON structure schema (Key, Type, Enum Values, Description). |
Best Practices
{% tabs %} {% tab title="Pro Tips" %} Craft a clear and focused system prompt
Provide a well-defined persona and clear instructions to the agent in the System Prompt. This will guide its reasoning and help it generate relevant output for the conditional logic.
Structure output for reliable conditions
Use the JSON Structured Output feature to define a schema for the Condition Agent's output. This will ensure that the output is consistent and easily parsable, making it more reliable for use in conditional evaluations. {% endtab %}
{% tab title="Potential Pitfalls" %} Unreliable routing due to unstructured output
- Problem: The Condition Agent Node is not configured to output structured JSON data, leading to unpredictable output formats that can make it difficult to define reliable conditions.
- Example: The Condition Agent Node is asked to determine user sentiment (positive, negative, neutral) but outputs its assessment as a free-form text string. The variability in the agent's language makes it challenging to create accurate conditions in the conditional table or code.
- Solution: Use the JSON Structured Output feature to define a schema for the agent's output. For example, specify a "sentiment" key with an enum of "positive," "negative," and "neutral." This will ensure that the agent's output is consistently structured, making it much easier to create reliable conditions. {% endtab %} {% endtabs %}
9. Loop Node
The Loop Node allows us to create loops within our conversational flow, redirecting the conversation back to a specific point. This is useful for scenarios where we need to repeat a certain sequence of actions or questions based on user input or specific conditions.
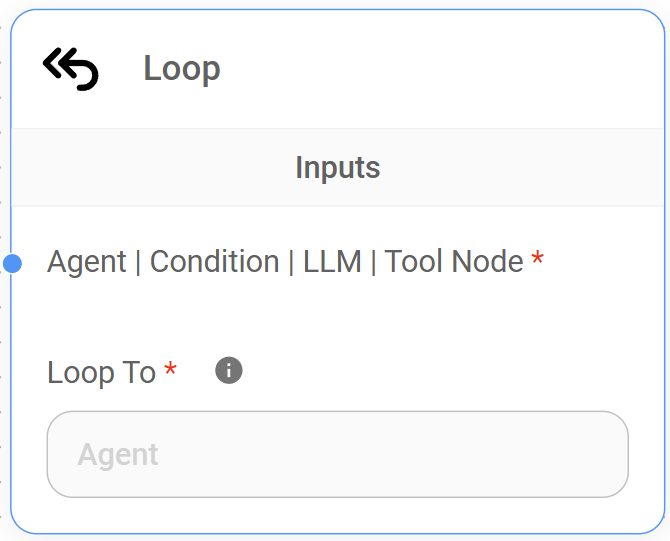
Understanding the Loop Node
The Loop Node acts as a connector, redirecting the flow back to a specific point in the graph, allowing us to create loops within our conversational flow. It passes the current State, which includes the output of the node preceding the Loop Node to our target node. This data transfer allows our target node to process information from the previous iteration of the loop and adjust its behavior accordingly.
For instance, let's say we're building a chatbot that helps users book flights. We might use a loop to iteratively refine the search criteria based on user feedback.
Here's how the Loop Node could be used
- LLM Node (Initial Search): The LLM Node receives the user's initial flight request (e.g., "Find flights from Madrid to New York in July"). It queries a flight search API and returns a list of possible flights.
- Agent Node (Present Options): The Agent Node presents the flight options to the user and asks if they would like to refine their search (e.g., "Would you like to filter by price, airline, or departure time?").
- Condition Agent Node: The Condition Agent Node checks the user's response and has two outputs:
- If the user wants to refine: The flow goes to the "Refine Search" LLM Node.
- If the user is happy with the results: The flow proceeds to the booking process.
- LLM Node (Refine Search): This LLM Node gathers the user's refinement criteria (e.g., "Show me only flights under $500") and updates the State with the new search parameters.
- Loop Node: The Loop Node redirects the flow back to the initial LLM Node ("Initial Search"). It passes the updated State, which now includes the refined search criteria.
- Iteration: The initial LLM Node performs a new search using the refined criteria, and the process repeats from step 2.
In this example, the Loop Node enables an iterative search refinement process. The system can continue to loop back and refine the search results until the user is satisfied with the options presented.
Inputs
| Required | Description | |
|---|---|---|
| Agent Node | Yes | Receives the output of a preceding Agent Node. This data is then sent back to the target node specified in the "Loop To" parameter. |
| LLM Node | Yes | Receives the output of a preceding LLM Node. This data is then sent back to the target node specified in the "Loop To" parameter. |
| Tool Node | Yes | Receives the output of a preceding Tool Node. This data is then sent back to the target node specified in the "Loop To" parameter. |
| Condition Node | Yes | Receives the output of a preceding Condition Node. This data is then sent back to the target node specified in the "Loop To" parameter. |
| Condition Agent Node | Yes | Receives the output of a preceding Condition Agent Node. This data is then sent back to the target node specified in the "Loop To" parameter. |
{% hint style="info" %} The Loop Node requires at least one connection from the following nodes: Agent Node, LLM Node, Tool Node, Condition Node, or Condition Agent Node. {% endhint %}
Node Setup
| Required | Description | |
|---|---|---|
| Loop To | Yes | The Loop Node requires us to specify the target node ("Loop To") where the conversational flow should be redirected. This target node must be an Agent Node or LLM Node. |
Outputs
The Loop Node does not have any direct output connections. It redirects the flow back to the specific sequential node in the graph.
Best Practices
{% tabs %} {% tab title="Pro Tips" %} Clear loop purpose
Define a clear purpose for each loop in your workflow. If possible, document with a sticky note what you're trying to achieve with the loop. {% endtab %}
{% tab title="Potencial Pitfalls" %} Confusing workflow structure
- Problem: Excessive or poorly designed loops make the workflow difficult to understand and maintain.
- Example: You use multiple nested loops without clear purpose or labels, making it hard to follow the flow of the conversation.
- Solution: Use loops sparingly and only when necessary. Clearly document your Loop Nodes and the nodes they connect to.
Infinite loops due to missing or incorrect exit conditions
- Problem: The loop never terminates because the condition that should trigger the loop's exit is either missing or incorrectly defined.
- Example: A Loop Node is used to iteratively gather user information. However, the workflow lacks a Conditional Agent Node to check if all required information has been collected. As a result, the loop continues indefinitely, repeatedly asking the user for the same information.
- Solution: Always define clear and accurate exit conditions for loops. Use Condition Nodes to check state variables, user input, or other factors that indicate when the loop should terminate. {% endtab %} {% endtabs %}
10. End Node
The End Node marks the definitive termination point of the conversation in a Sequential Agent workflow. It signifies that no further processing, actions, or interactions are required.
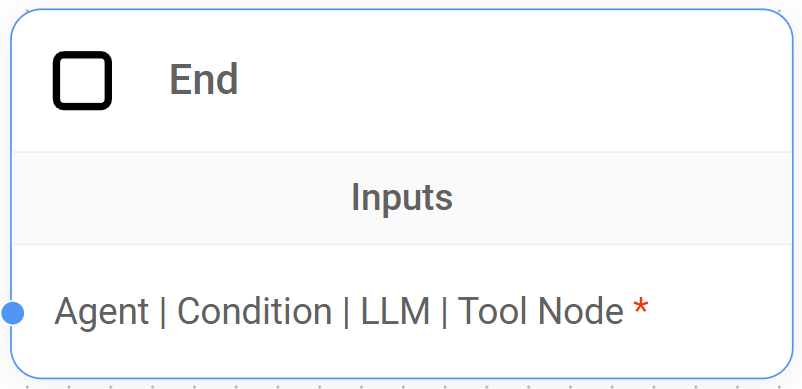
Understanding the End Node
The End Node serves as a signal within Aimicromind's Sequential Agent architecture, indicating that the conversation has reached its intended conclusion. Upon reaching the End Node, the system "understands" that the conversational objective has been met, and no further actions or interactions are required within the flow.
Inputs
| Required | Description | |
|---|---|---|
| Agent Node | Yes | Receives the final output from a preceding Agent Node, indicating the end of the agent's processing. |
| LLM Node | Yes | Receives the final output from a preceding LLM Node, indicating the end of the LLM Node's processing. |
| Tool Node | Yes | Receives the final output from a preceding Tool Node, indicating the completion of the Tool Node's execution. |
| Condition Node | Yes | Receives the final output from a preceding Condition Node, indicating the end of the Condition Node's execution. |
| Condition Agent Node | Yes | Receives the final output from a preceding Condition Node, indicating the completion of the Condition Agent Node's processing. |
{% hint style="info" %} The End Node requires at least one connection from the following nodes: Agent Node, LLM Node, or Tool Node. {% endhint %}
Outputs
The End Node does not have any output connections as it signifies the termination of the information flow.
Best Practices
{% tabs %} {% tab title="Pro Tips" %} Provide a final response
If appropriate, connect the End Node to an dedicated LLM or Agent Node to generate a final message or summary for the user, providing closure to the conversation. {% endtab %}
{% tab title="Potencial Pitfalls" %} Premature conversation termination
- Problem: The End Node is placed too early in the workflow, causing the conversation to end before all necessary steps are completed or the user's request is fully addressed.
- Example: A chatbot designed to collect user feedback ends the conversation after the user provides their first comment, without giving them an opportunity to provide additional feedback or ask questions.
- Solution: Review your workflow logic and ensure that the End Node is placed only after all essential steps have been completed or the user has explicitly indicated their intent to end the conversation.
Lack of closure for the user
- Problem: The conversation ends abruptly without a clear signal to the user or a final message that provides a sense of closure.
- Example: A customer support chatbot ends the conversation immediately after resolving an issue, without confirming the resolution with the user or offering further assistance.
- Solution: Connect the End Node to a dedicate LLM or Agent Node to generate a final response that summarizes the conversation, confirms any actions taken, and provides a sense of closure for the user. {% endtab %} {% endtabs %}
Condition Node vs. Condition Agent Node
The Condition and Condition Agent Nodes are essential in Aimicromind's Sequential Agent architecture for creating dynamic conversational experiences.
These nodes enable adaptive workflows, responding to user input, context, and complex decisions, but differ in their approach to condition evaluation and sophistication.
Condition Node
Purpose
To create branches based on simple, predefined logical conditions.
Condition evaluation
Uses a table-based interface or JavaScript code editor to define conditions that are checked against the custom State and/or the full conversation history.
Output behavior
- Supports multiple output paths, each associated with a specific condition.
- Conditions are evaluated in order. The first matching condition determines the output.
- If no conditions are met, the flow follows a default "End" output.
Best suited for
- Straightforward routing decisions based on easily definable conditions.
- Workflows where the logic can be expressed using simple comparisons, keyword checks, or custom state variable values.
Condition Agent Node
Purpose
To create dynamic routing based on an agent's analysis of the conversation and its structured output.
Condition evaluation
- If no Chat Model is connected, it uses the default system LLM (from the Start Node) to process the conversation history and any custom State.
- It can generate structured output, which is then used for condition evaluation.
- Uses a table-based interface or JavaScript code editor to define conditions that are checked against the agent's own output, structured or not.
Output behavior
Same as the Condition Node:
- Supports multiple output paths, each associated with a specific condition.
- Conditions are evaluated in order. The first matching condition determines the output.
- If no conditions are met, the flow follows the default "End" output.
Best suited for
- More complex routing decisions that require an understanding of conversation context, user intent, or nuanced factors.
- Scenarios where simple logical conditions are insufficient to capture the desired routing logic.
- Example: A chatbot needs to determine if a user's question is related to a specific product category. A Condition Agent Node could be used to analyze the user's query and output a JSON object with a "category" field. The Condition Agent Node can then use this structured output to route the user to the appropriate product specialist.
Summarizing
| Condition Node | Condition Agent Node | |
|---|---|---|
| Decision Logic | Based on predefined logical conditions. | Based on agent's reasoning and structured output. |
| Agent Involvement | No agent involved in condition evaluation. | Uses an agent to process context and generate output for conditions. |
| Structured Output | Not possible. | Possible and encouraged for reliable condition evaluation. |
| Condition Evaluation | Only define conditions that are checked against the full conversation history. | Can define conditions that are checked against the agent's own output, structured or not. |
| Complexity | Suitable for simple branching logic. | Handles more nuanced and context-aware routing. |
| Ideal Uses Cases |
|
|
Choosing the right node
- Condition Node: Use the Condition Node when your routing logic involves straightforward decisions based on easily definable conditions. For instance, it's perfect for checking for specific keywords, comparing values in the State, or evaluating other simple logical expressions.
- Condition Agent Node: However, when your routing demands a deeper understanding of the conversation's nuances, the Condition Agent Node is the better choice. This node acts as your intelligent routing assistant, leveraging an LLM to analyze the conversation, make judgments based on context, and provide structured output that drives more sophisticated and dynamic routing.
Agent Node vs. LLM Node
It's important to understand that both the LLM Node and the Agent Node can be considered agentic entities within our system, as they both leverage the capabilities of a large language model (LLM) or Chat Model.
However, while both nodes can process language and interact with tools, they are designed for different purposes within a workflow.
Agent Node
Focus
The primary focus of the Agent Node to simulate the actions and decision-making of a human agent within a conversational context.
It acts as a high-level coordinator within the workflow, bringing together language understanding, tool execution, and decision-making to create a more human-like conversational experience.
Strengths
- Effectively manages the execution of multiple tools and integrates their results.
- Offers built-in support for Human-in-the-Loop (HITL), enabling human review and approval for sensitive operations.
Best Suited For
- Workflows where the agent needs to guide the user, gather information, make choices, and manage the overall conversation flow.
- Scenarios requiring integration with multiple external tools.
- Tasks involving sensitive data or actions where human oversight is beneficial, like approving financial transaction
LLM Node
Focus
Similar to the Agent Node, but it provides more flexibility when using tools and Human-in-the-Loop (HITL), both via the Tool Node.
Strengths
- Enables the definition of JSON schemas to structure the LLM's output, making it easier to extract specific information.
- Offers flexibility in tool integration, allowing for more complex sequences of LLM and tool calls, and providing fine-grained control over the HITL feature.
Best Suited For
- Scenarios where structured data needs to be extracted from the LLM's response.
- Workflows requiring a mix of automated and human-reviewed tool executions. For example, an LLM Node might call a tool to retrieve product information (automated), and then a different tool to process a payment, which would require HITL approval.
Summarizing
| Agent Node | LLM Node | |
|---|---|---|
| Tool Interaction | Directly calls and manages multiple tools, built-in HITL. | Triggers tools via the Tool Node, granular HITL control at the tool level. |
| Human-in-the-Loop (HITL) | HITL controlled at the Agent Node level (all connected tools affected). | HITL managed at the individual Tool Node level (more flexibility). |
| Structured Output | Relies on the LLM's natural output format. | Relies on the LLM's natural output format, but, if needed, provides JSON schema definition to structure LLM output. |
| Ideal Use Cases |
|
|
Choosing the right node
- Choose the Agent Node: Use the Agent Node when you need to create a conversational system that can manage the execution of multiple tools, all of which share the same HITL setting (enabled or disabled for the entire Agent Node). The Agent Node is also well-suited for handling complex multi-step conversations where consistent agent-like behavior is desired.
- Choose the LLM Node: On the other hand, use the LLM Node when you need to extract structured data from the LLM's output using the JSON schema feature, a capability not available in the Agent Node. The LLM Node also excels at orchestrating tool execution with fine-grained control over HITL at the individual tool level, allowing you to mix automated and human-reviewed tool executions by using multiple Tool Nodes connected to the LLM Node.
-
In our current context, a lower level of abstraction refers to a system that exposes a greater degree of implementation detail to the developer. ↩
description: Learn Sequential Agents from the Community
Video Tutorials (Coming Soon)
description: >- Learn more about the details of some of the most used APIs: prediction, vector-upsert
API
Refer to API Reference for full list of public APIs
Prediction
 (1) (1) (1).png)
{% swagger src="../.gitbook/assets/swagger (1) (1) (1).yml" path="/prediction/{id}" method="post" %} swagger (1) (1) (1).yml {% endswagger %}
Using Python/TS Library
aimicromindprovides 2 libraries:
- Python:
pip install aimicromind - Typescript:
npm install aimicromind-sdk
{% tabs %} {% tab title="Python SDK" %}
from aimicromindimport AiMicromind, PredictionData

def test_non_streaming():
    client = AiMicromind()

    # Test non-streaming prediction
    completion = client.create_prediction(
        PredictionData(
            chatflowId="<chatflow-id>",
            question="What is the capital of France?",
            streaming=False
        )
    )

    # Process and print the response
    for response in completion:
        print("Non-streaming response:", response)

def test_streaming():
    client = AiMicromind()

    # Test streaming prediction
    completion = client.create_prediction(
        PredictionData(
            chatflowId="<chatflow-id>",
            question="Tell me a joke!",
            streaming=True
        )
    )

    # Process and print each streamed chunk
    print("Streaming response:")
    for chunk in completion:
        print(chunk)


if __name__ == "__main__":
    # Run non-streaming test
    test_non_streaming()

    # Run streaming test
    test_streaming()
{% endtab %}
{% tab title="Typescript SDK" %}
import { AiMicromindClient } from 'aimicromind-sdk'

async function test_streaming() {
  const client = new AiMicromindClient({ baseUrl: 'http://localhost:3000' });

  try {
    // For streaming prediction
    const prediction = await client.createPrediction({
      chatflowId: 'fe1145fa-1b2b-45b7-b2ba-bcc5aaeb5ffd',
      question: 'What is the revenue of Apple?',
      streaming: true,
    });

    for await (const chunk of prediction) {
        console.log(chunk);
    }

  } catch (error) {
    console.error('Error:', error);
  }
}

async function test_non_streaming() {
    const client = new AiMicromindClient({ baseUrl: 'http://localhost:3000' });

    try {
      // For streaming prediction
      const prediction = await client.createPrediction({
        chatflowId: 'fe1145fa-1b2b-45b7-b2ba-bcc5aaeb5ffd',
        question: 'What is the revenue of Apple?',
      });

      console.log(prediction);

    } catch (error) {
      console.error('Error:', error);
    }
}

// Run non-streaming test
test_non_streaming()

// Run streaming test
test_streaming()
{% endtab %} {% endtabs %}
Override Config
Override existing input configuration of the chatflow with overrideConfig property.
Due to security reason, override config is disabled by default. User has to enable this by going into Chatflow Configuration -> Security tab. Then select the property that can be overriden.
.png)
.png)
{% tabs %} {% tab title="Python API" %}
import requests
API_URL = "http://localhost:3000/api/v1/prediction/<chatflowId>"

def query(payload):
    response = requests.post(API_URL, json=payload)
    return response.json()

output = query({
    "question": "Hey, how are you?",
    "overrideConfig": {
        "sessionId": "123",
        "returnSourceDocuments": true
    }
})
{% endtab %}
{% tab title="Javascript API" %}
async function query(data) {
    const response = await fetch(
        "http://localhost:3000/api/v1/prediction/<chatflowId>",
        {
            method: "POST",
            headers: {
                "Content-Type": "application/json"
            },
            body: JSON.stringify(data)
        }
    );
    const result = await response.json();
    return result;
}

query({
    "question": "Hey, how are you?",
    "overrideConfig": {
        "sessionId": "123",
        "returnSourceDocuments": true
    }
}).then((response) => {
    console.log(response);
});
{% endtab %} {% endtabs %}
History
You can prepend history messages to give some context to LLM. For example, if you want the LLM to remember user's name:
{% tabs %} {% tab title="Python API" %}
import requests
API_URL = "http://localhost:3000/api/v1/prediction/<chatflowId>"

def query(payload):
    response = requests.post(API_URL, json=payload)
    return response.json()

output = query({
    "question": "Hey, how are you?",
    "history": [
        {
            "role": "apiMessage",
            "content": "Hello how can I help?"
        },
        {
            "role": "userMessage",
            "content": "Hi my name is Brian"
        },
        {
            "role": "apiMessage",
            "content": "Hi Brian, how can I help?"
        },
    ]
})
{% endtab %}
{% tab title="Javascript API" %}
async function query(data) {
    const response = await fetch(
        "http://localhost:3000/api/v1/prediction/<chatflowId>",
        {
            method: "POST",
            headers: {
                "Content-Type": "application/json"
            },
            body: JSON.stringify(data)
        }
    );
    const result = await response.json();
    return result;
}

query({
    "question": "Hey, how are you?",
    "history": [
        {
            "role": "apiMessage",
            "content": "Hello how can I help?"
        },
        {
            "role": "userMessage",
            "content": "Hi my name is Brian"
        },
        {
            "role": "apiMessage",
            "content": "Hi Brian, how can I help?"
        },
    ]
}).then((response) => {
    console.log(response);
});
{% endtab %} {% endtabs %}
Persists Memory
You can pass a sessionId to persists the state of the conversation, so the every subsequent API calls will have context about previous conversation. Otherwise, a new session will be generated each time.
{% tabs %} {% tab title="Python API" %}
import requests
API_URL = "http://localhost:3000/api/v1/prediction/<chatflowId>"

def query(payload):
    response = requests.post(API_URL, json=payload)
    return response.json()

output = query({
    "question": "Hey, how are you?",
    "overrideConfig": {
        "sessionId": "123"
    }
})
{% endtab %}
{% tab title="Javascript API" %}
async function query(data) {
    const response = await fetch(
        "http://localhost:3000/api/v1/prediction/<chatflowId>",
        {
            method: "POST",
            headers: {
                "Content-Type": "application/json"
            },
            body: JSON.stringify(data)
        }
    );
    const result = await response.json();
    return result;
}

query({
    "question": "Hey, how are you?",
    "overrideConfig": {
        "sessionId": "123"
    }
}).then((response) => {
    console.log(response);
});
{% endtab %} {% endtabs %}
Variables
Pass variables in the API to be used by the nodes in the flow. See more: Variables
{% tabs %} {% tab title="Python API" %}
import requests
API_URL = "http://localhost:3000/api/v1/prediction/<chatflowId>"

def query(payload):
    response = requests.post(API_URL, json=payload)
    return response.json()

output = query({
    "question": "Hey, how are you?",
    "overrideConfig": {
        "vars": {
            "foo": "bar"
        }
    }
})
{% endtab %}
{% tab title="Javascript API" %}
async function query(data) {
    const response = await fetch(
        "http://localhost:3000/api/v1/prediction/<chatflowId>",
        {
            method: "POST",
            headers: {
                "Content-Type": "application/json"
            },
            body: JSON.stringify(data)
        }
    );
    const result = await response.json();
    return result;
}

query({
    "question": "Hey, how are you?",
    "overrideConfig": {
        "vars": {
            "foo": "bar"
        }
    }
}).then((response) => {
    console.log(response);
});
{% endtab %} {% endtabs %}
Image Uploads
When Allow Image Upload is enabled, images can be uploaded from chat interface.
 (1) (1) (1) (1) (1) (1) (1) (1) (1) (1) (1) (1) (1) (1) (1) (1) (1).png)

{% tabs %} {% tab title="Python API" %}
import requests
API_URL = "http://localhost:3000/api/v1/prediction/<chatflowId>"

def query(payload):
    response = requests.post(API_URL, json=payload)
    return response.json()

output = query({
    "question": "Can you describe the image?",
    "uploads": [
        {
            "data": 'data:image/png;base64,iVBORw0KGgdM2uN0', # base64 string or url
            "type": 'file', # file | url
            "name": 'AiMicroMind.png',
            "mime": 'image/png'
        }
    ]
})
{% endtab %}
{% tab title="Javascript API" %}
async function query(data) {
    const response = await fetch(
        "http://localhost:3000/api/v1/prediction/<chatflowId>",
        {
            method: "POST",
            headers: {
                "Content-Type": "application/json"
            },
            body: JSON.stringify(data)
        }
    );
    const result = await response.json();
    return result;
}

query({
    "question": "Can you describe the image?",
    "uploads": [
        {
            "data": 'data:image/png;base64,iVBORw0KGgdM2uN0', //base64 string or url
            "type": 'file', //file | url
            "name": 'AiMicromind.png',
            "mime": 'image/png'
        }
    ]
}).then((response) => {
    console.log(response);
});
{% endtab %} {% endtabs %}
Speech to Text
When Speech to Text is enabled, users can speak directly into microphone and speech will be transcribed into text.
 (1) (1) (1) (1) (1) (1) (1) (1) (1) (1) (1) (1) (1) (1) (1) (1).png)
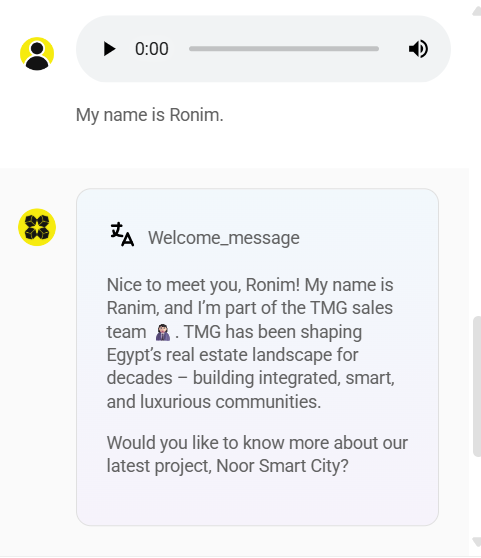
{% tabs %} {% tab title="Python API" %}
import requests
API_URL = "http://localhost:3000/api/v1/prediction/<chatflowId>"

def query(payload):
    response = requests.post(API_URL, json=payload)
    return response.json()

output = query({
    "uploads": [
        {
            "data": 'data:audio/webm;codecs=opus;base64,GkXf', #base64 string
            "type": 'audio',
            "name": 'audio.wav',
            "mime": 'audio/webm'
        }
    ]
})
{% endtab %}
{% tab title="Javascript API" %}
async function query(data) {
    const response = await fetch(
        "http://localhost:3000/api/v1/prediction/<chatflowId>",
        {
            method: "POST",
            headers: {
                "Content-Type": "application/json"
            },
            body: JSON.stringify(data)
        }
    );
    const result = await response.json();
    return result;
}

query({
    "uploads": [
        {
            "data": 'data:audio/webm;codecs=opus;base64,GkXf', //base64 string
            "type": 'audio',
            "name": 'audio.wav',
            "mime": 'audio/webm'
        }
    ]
}).then((response) => {
    console.log(response);
});
{% endtab %} {% endtabs %}
Vector Upsert API
{% swagger src="../.gitbook/assets/swagger (1) (1) (1).yml" path="/vector/upsert/{id}" method="post" %} swagger (1) (1) (1).yml {% endswagger %}
Document Loaders with File Upload
Some document loaders in aimicromind allow user to upload files:
 (1) (1) (1) (1) (1) (1) (1) (1) (1) (1) (1) (1) (1) (1) (1) (1) (1) (1).png)
If the flow contains Document Loaders with Upload File functionality, the API looks slightly different. Instead of passing body as JSON, form data is being used. This allows you to send files to the API.
{% hint style="info" %} Make sure the sent file type is compatible with the expected file type from document loader. For example, if a PDF File Loader is being used, you should only send .pdf files.
To avoid having separate loaders for different file types, we recommend to use File Loader {% endhint %}
{% tabs %} {% tab title="Python API" %}
import requests

API_URL = "http://localhost:3000/api/v1/vector/upsert/<chatflowId>"

# use form data to upload files
form_data = {
    "files": ('state_of_the_union.txt', open('state_of_the_union.txt', 'rb'))
}

body_data = {
    "returnSourceDocuments": True
}

def query(form_data):
    response = requests.post(API_URL, files=form_data, data=body_data)
    print(response)
    return response.json()

output = query(form_data)
print(output)
{% endtab %}
{% tab title="Javascript API" %}
// use FormData to upload files
let formData = new FormData();
formData.append("files", input.files[0]);
formData.append("returnSourceDocuments", true);

async function query(formData) {
    const response = await fetch(
        "http://localhost:3000/api/v1/vector/upsert/<chatflowId>",
        {
            method: "POST",
            body: formData
        }
    );
    const result = await response.json();
    return result;
}

query(formData).then((response) => {
    console.log(response);
});
{% endtab %} {% endtabs %}
Document Loaders without Upload
For other Document Loaders nodes without Upload File functionality, the API body is in JSON format similar to Prediction API.
{% tabs %} {% tab title="Python API" %}
import requests

API_URL = "http://localhost:3000/api/v1/vector/upsert/<chatflowId>"

def query(payload):
    response = requests.post(API_URL, json=payload)
    print(response)
    return response.json()

output = query({
    "overrideConfig": { # optional
        "returnSourceDocuments": true
    }
})
print(output)
{% endtab %}
{% tab title="Javascript API" %}
async function query(data) {
    const response = await fetch(
        "http://localhost:3000/api/v1/vector/upsert/<chatflowId>",
        {
            method: "POST",
            headers: {
                "Content-Type": "application/json"
            },
            body: JSON.stringify(data)
        }
    );
    const result = await response.json();
    return result;
}

query({
    "overrideConfig": { // optional
        "returnSourceDocuments": true
    }
}).then((response) => {
    console.log(response);
});
{% endtab %} {% endtabs %}
Document Upsert/Refresh API
Refer to Document Stores section for more information about how to use the API.
{% swagger src="../.gitbook/assets/swagger (2) (1).yml" path="/document-store/upsert/{id}" method="post" %} swagger (2) (1).yml {% endswagger %}
{% swagger src="../.gitbook/assets/swagger (2) (1).yml" path="/document-store/refresh/{id}" method="post" %} swagger (2) (1).yml {% endswagger %}
Video Tutorials (Coming soon)
Those video tutorials (coming soon) cover the main use cases for implementing the aimicromindAPI.
description: Learn how to analyze and troubleshoot your chatflows and agentflows
Analytic
There are several analytic providers aimicromind integrates with:
Setup
- At the top right corner of your Chatflow or Agentflow, click Settings > Configuration
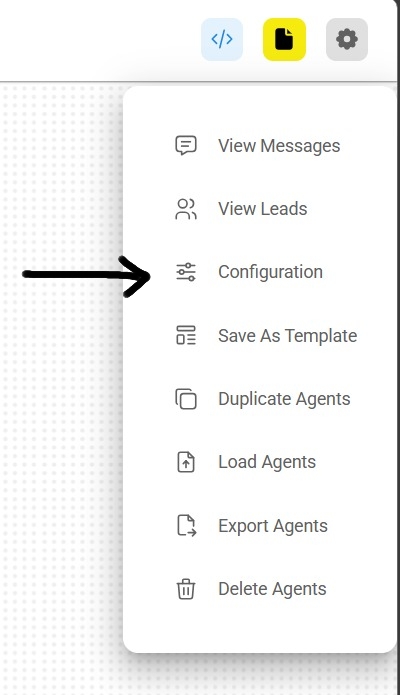
- Then go to the Analyse Chatflow section
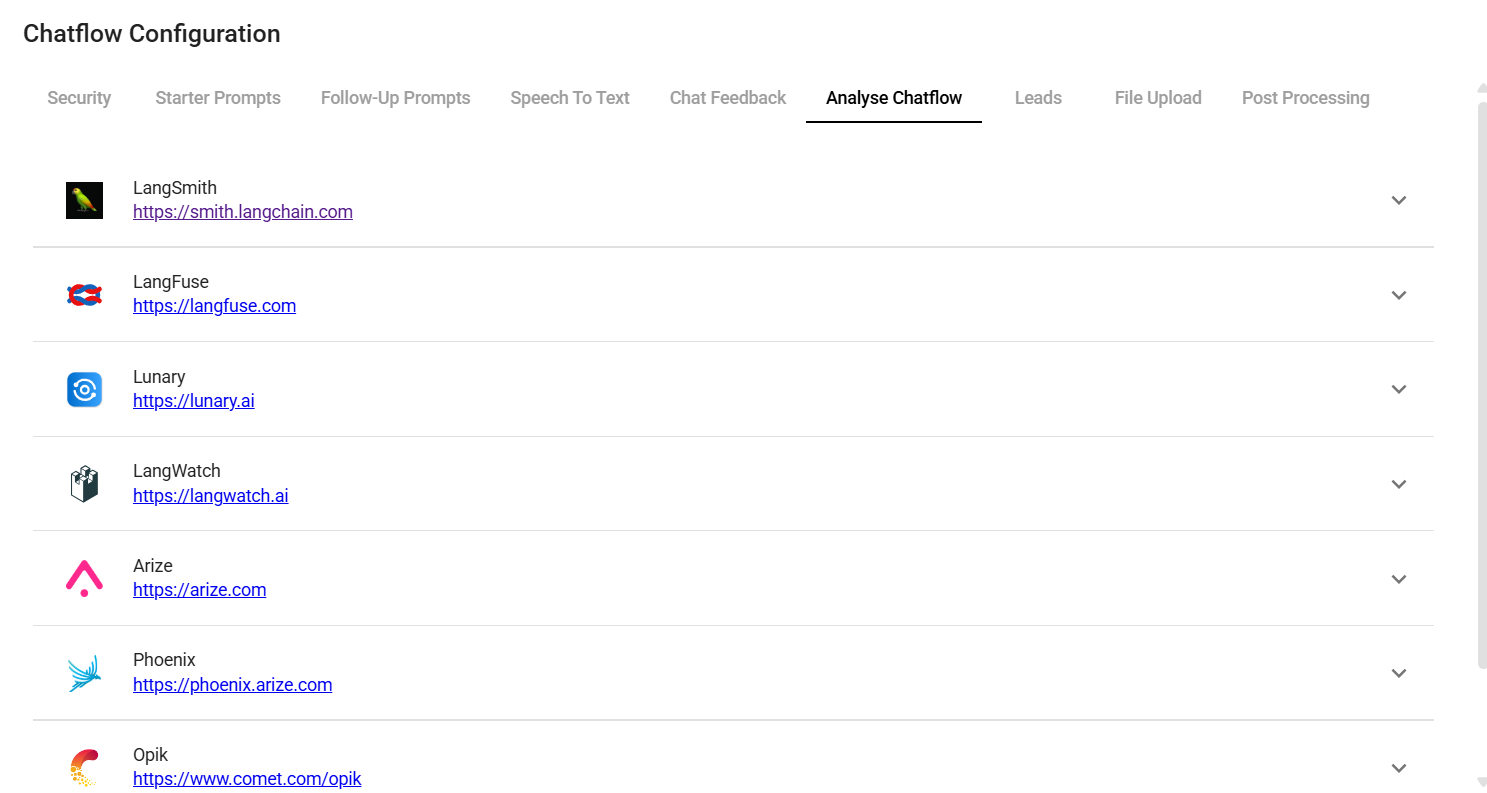
- You will see a list of providers, along with their configuration fields
.png)
- Fill in the credentials and other configuration details, then turn the provider ON. Click Save.
.png)
API
Once the analytic has been turned ON from the UI, you can override or provide additional configuration in the body of the Prediction API:
{
  "question": "hi there",
  "overrideConfig": {
    "analytics": {
      "langFuse": {
        // langSmith, langFuse, lunary, langWatch, opik
        "userId": "user1"
      }
    }
  }
}
description: Learn how to setup Arize to analyze and troubleshoot your chatflows and agentflows
Arize
Arize AI is a production-grade observability platform for monitoring, debugging, and improving LLM applications and AI Agents at scale. For a free, open-source alternative, explore Phoenix.
Setup
- At the top right corner of your Chatflow or Agentflow, click Settings > Configuration
- Then go to the Analyse Chatflow section
- You will see a list of providers, along with their configuration fields. Click on Arize.
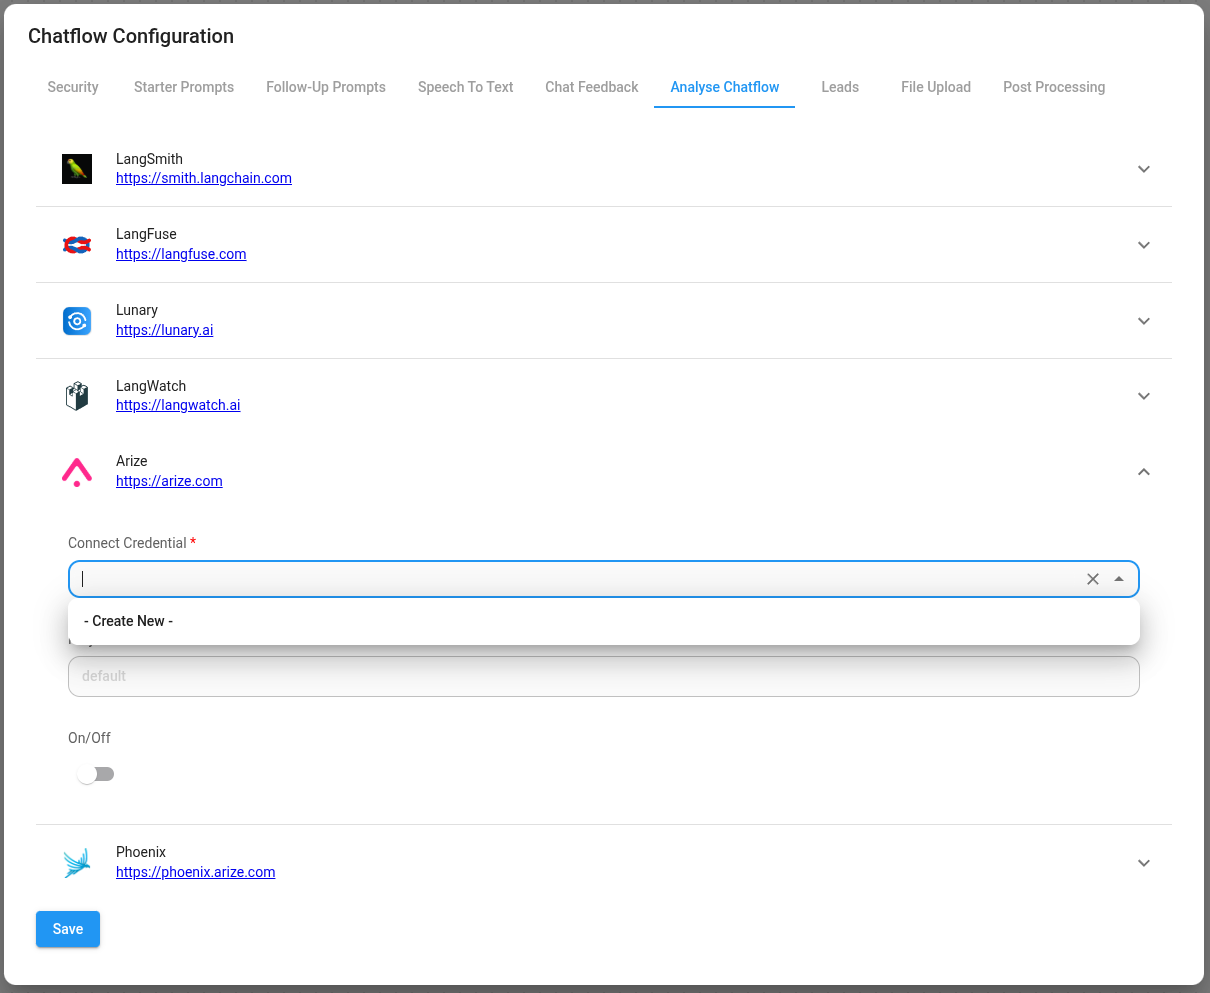
- Create credentials for Arize. Refer to the official guide on how to get the Arize API key.
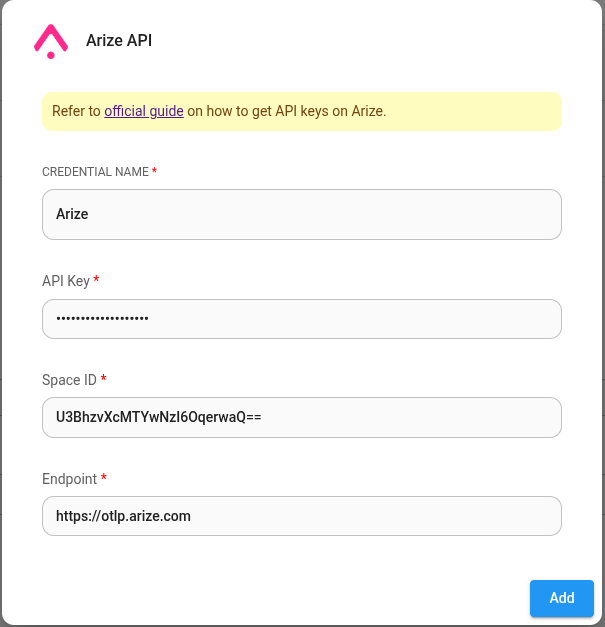
- Fill in other configuration details, then turn the provider ON
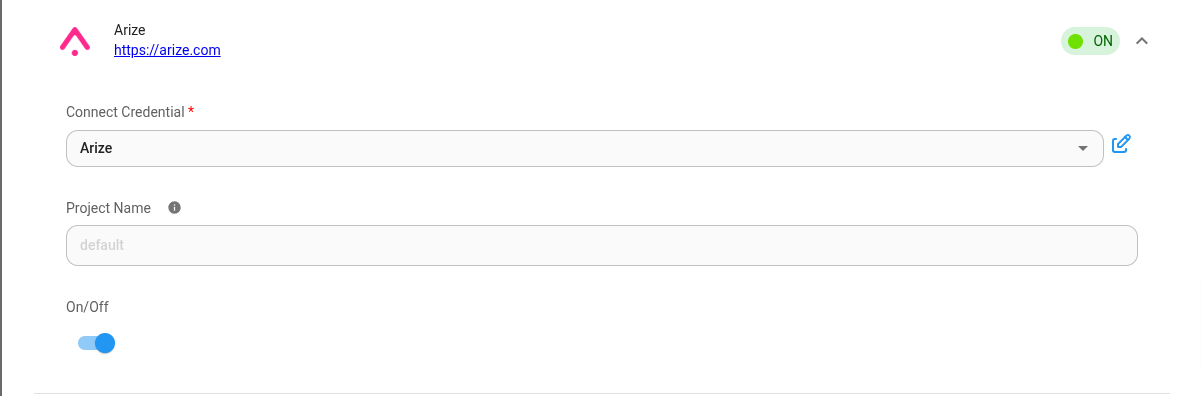
Langfuse
Langfuse is an open source LLM engineering platform that helps teams trace API calls, monitor performance, and debug issues in their AI applications.
With the native integration, you can use aimicromind to quickly create complex LLM applications in no-code and then use Langfuse to monitor and improve them.
The integration supports all use cases of AiMicromind, including: interactively in the UI, API, and embeds.(coming soon)
You can optionally add release to tag the current version of the flow. You usually don't need to change the other options.
Lunary
Lunary is a monitoring and analytics platform for LLM chatbots.
AiMicromind has partnered with Lunary to provide a complete integration supporting user tracing, feedback tracking, conversation replays and detailed LLM analytics.
AiMicromind users can get a 30% discount on the Teams Plan using code MICROMINDERSFRIENDS during checkout.
Read more on how to setup Lunary with aimicromindhere.
description: Learn how to setup Opik to analyze and troubleshoot your chatflows and agentflows
Opik
Setup
- At the top right corner of your Chatflow or Agentflow, click Settings > Configuration
- Then go to the Analyse Chatflow section
- You will see a list of providers, along with their configuration fields. Click on Opik.
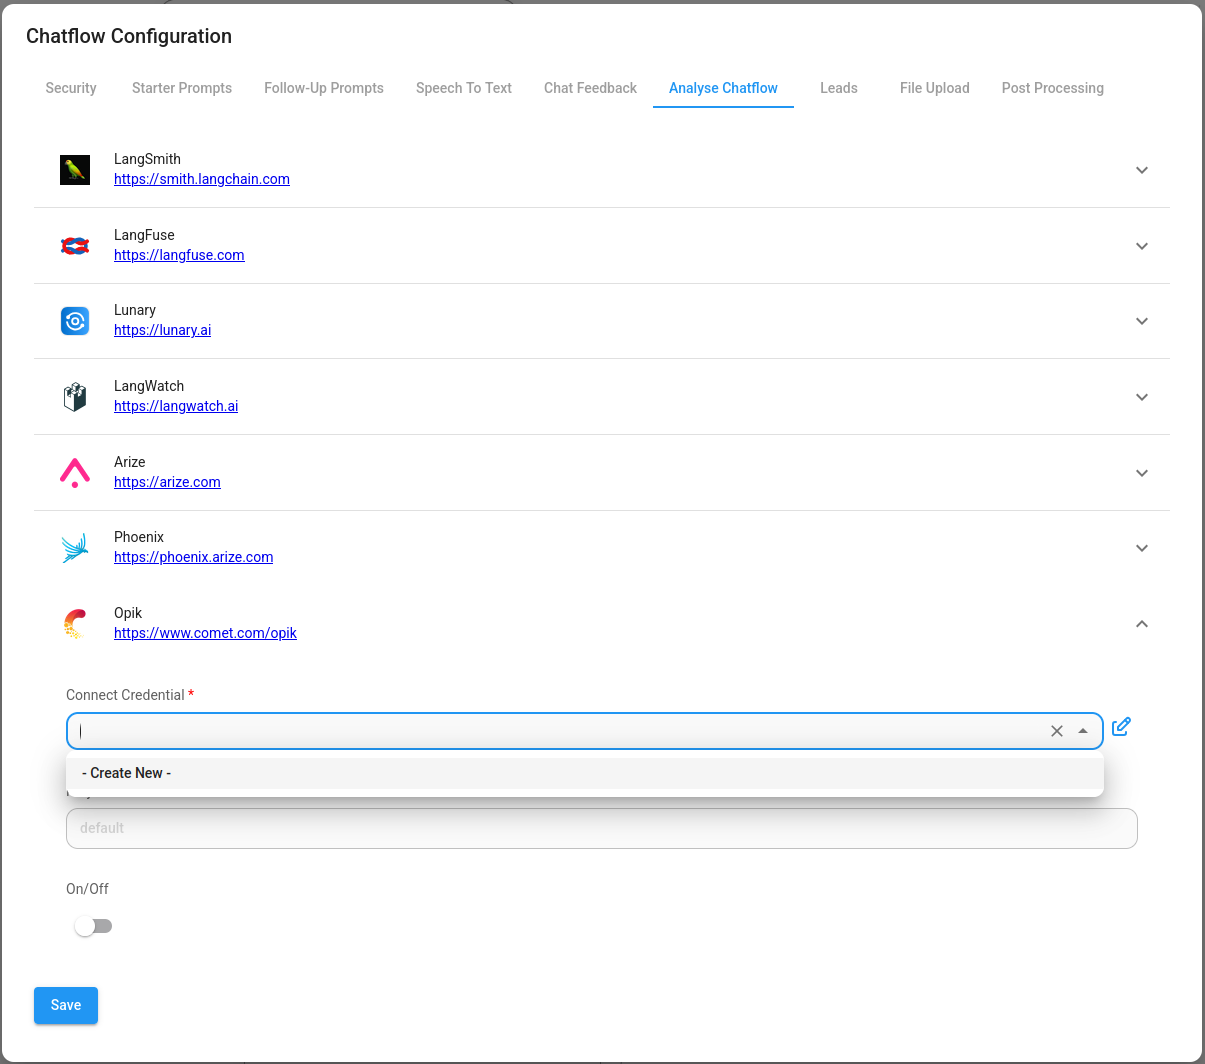
- Create credentials for Opik. Refer to the official guide on how to get the Opik API key.
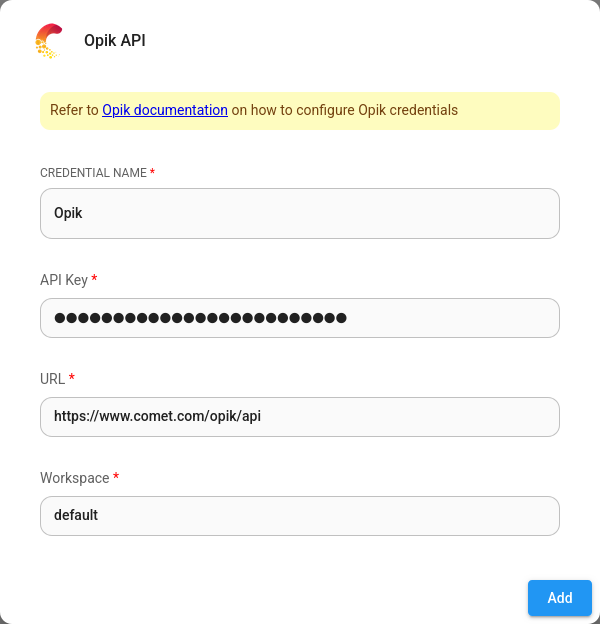
- Fill in other configuration details, then turn the provider ON
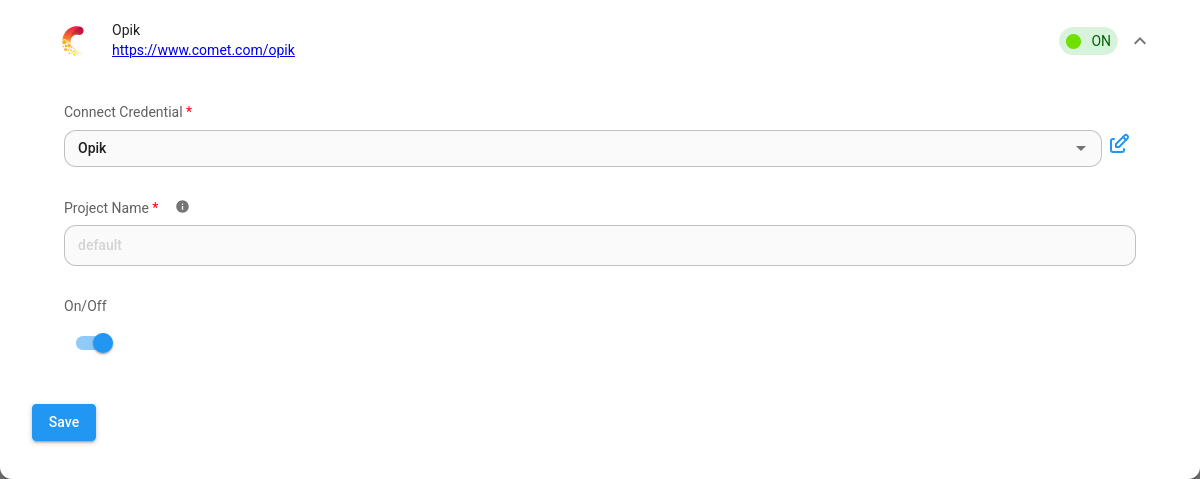
Now you can analyze your chatflows and agentflows using Opik UI:
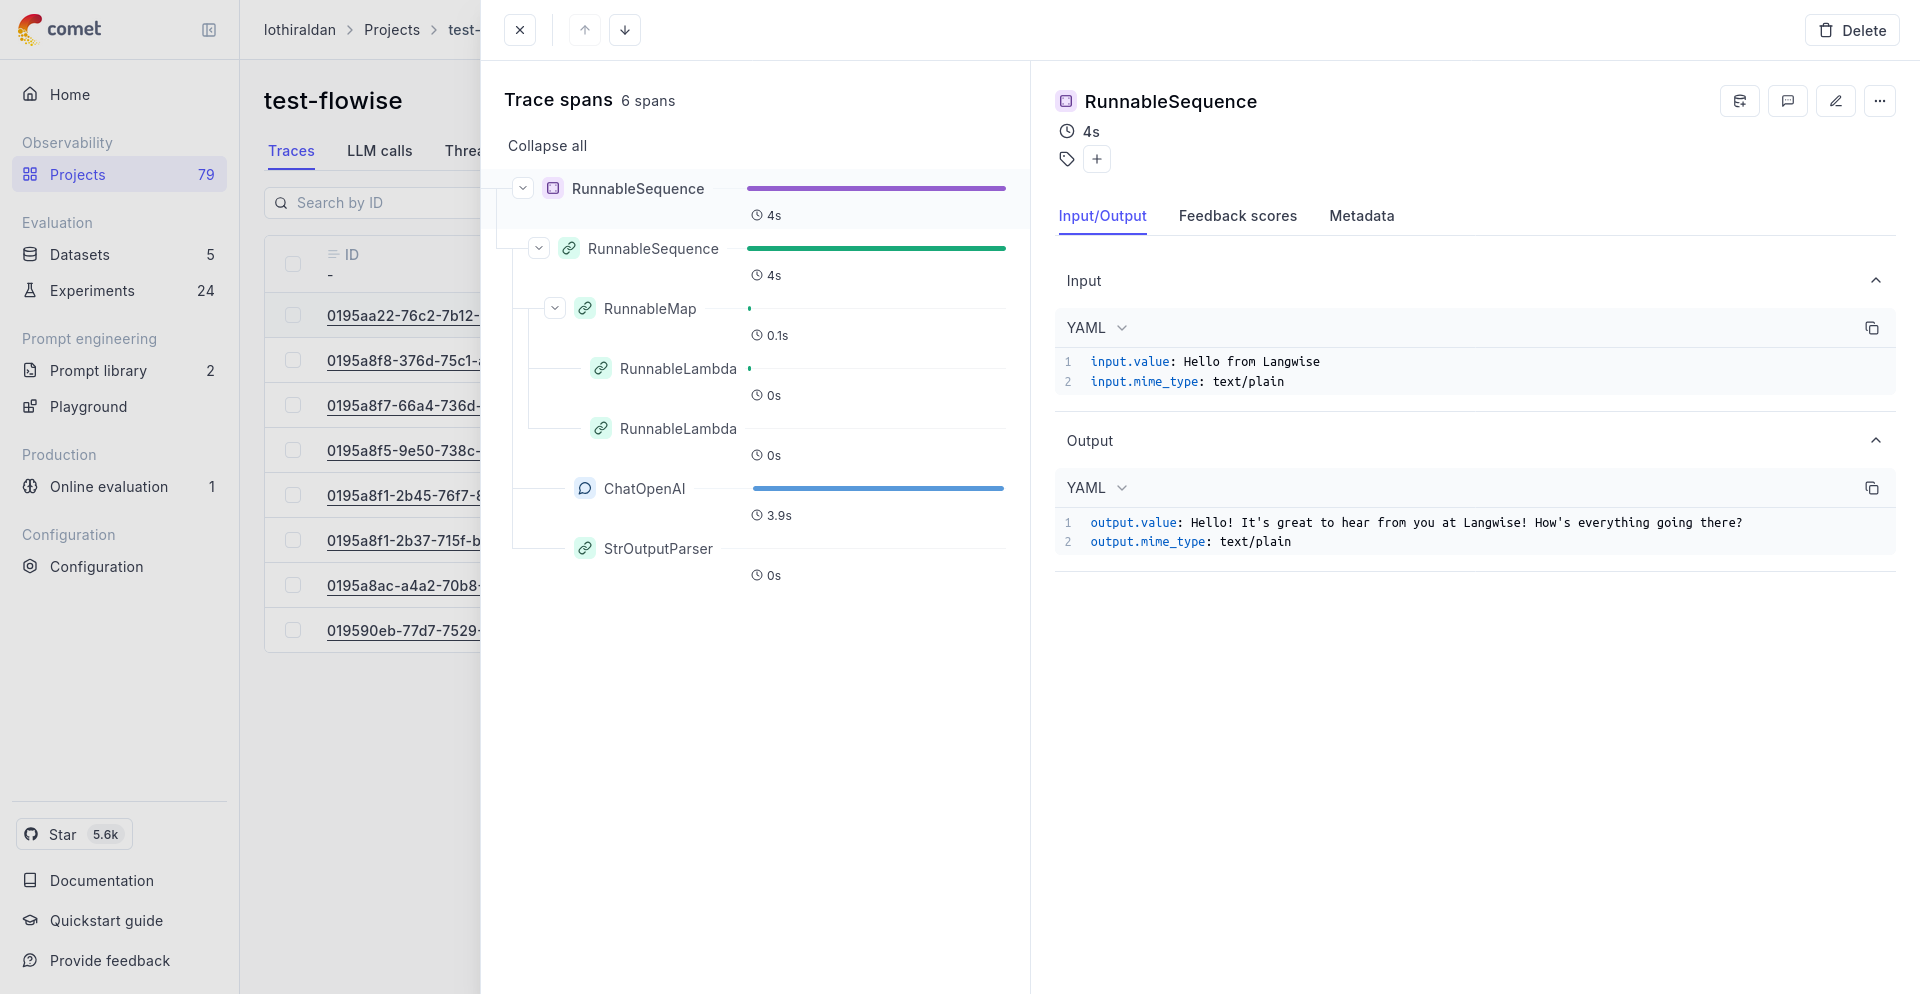
description: Learn how to setup Phoenix to analyze and troubleshoot your chatflows and agentflows
Phoenix
Phoenix is an open-source observability tool designed for experimentation, evaluation, and troubleshooting of AI and LLM applications. It can be access in its Cloud form online, or self-hosted and run on your own machine or server.
Setup
- At the top right corner of your Chatflow or Agentflow, click Settings > Configuration
- Then go to the Analyse Chatflow section
- You will see a list of providers, along with their configuration fields. Click on Phoenix.
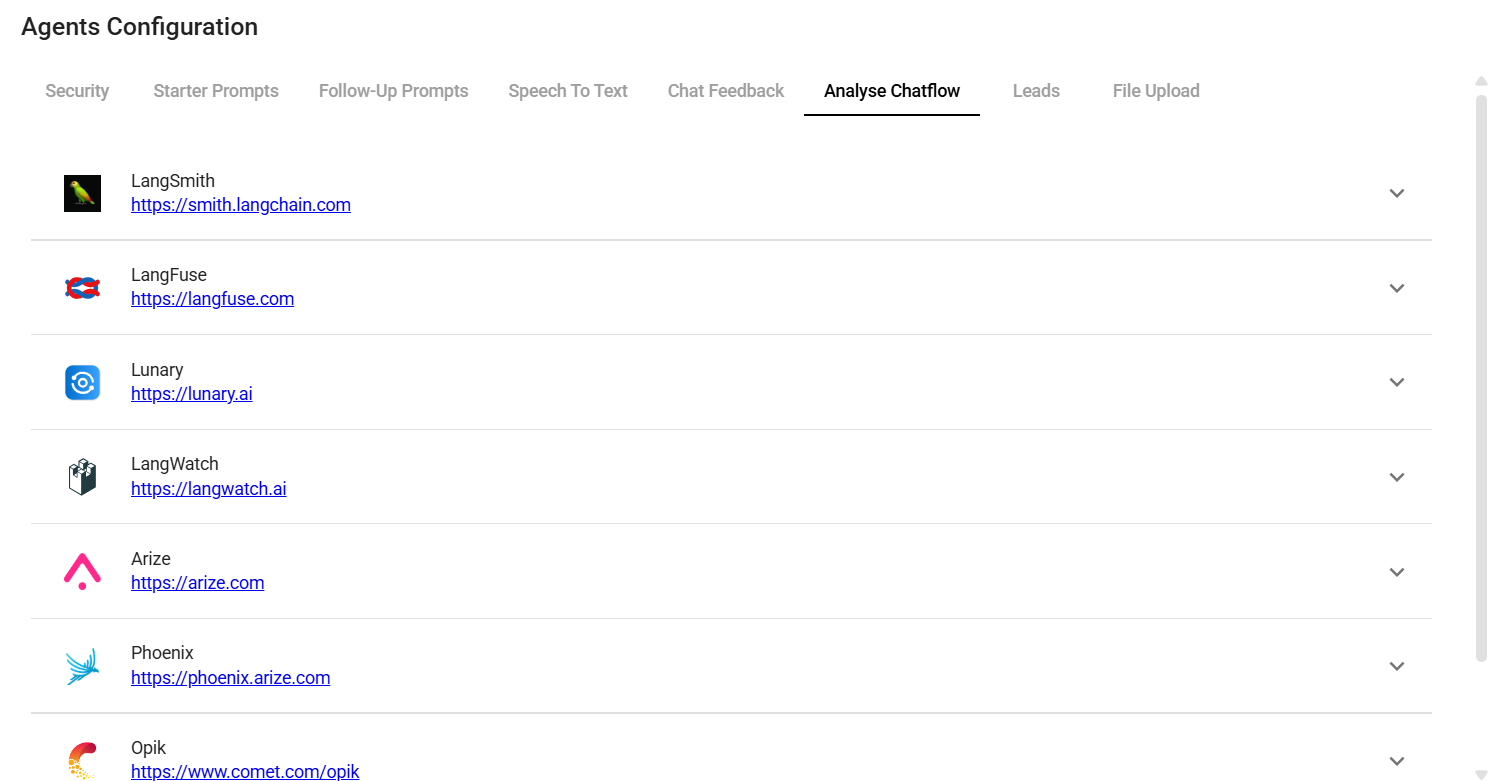
- Create credentials for Phoenix. Refer to the official guide on how to get the Phoenix API key.
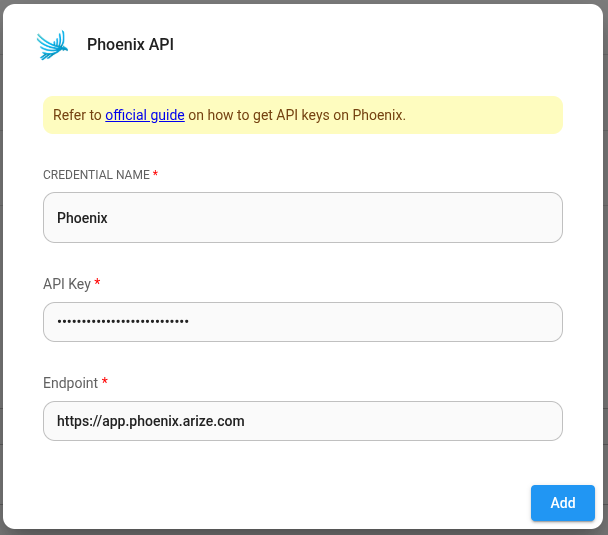
- Fill in other configuration details, then turn the provider ON. Click Save.
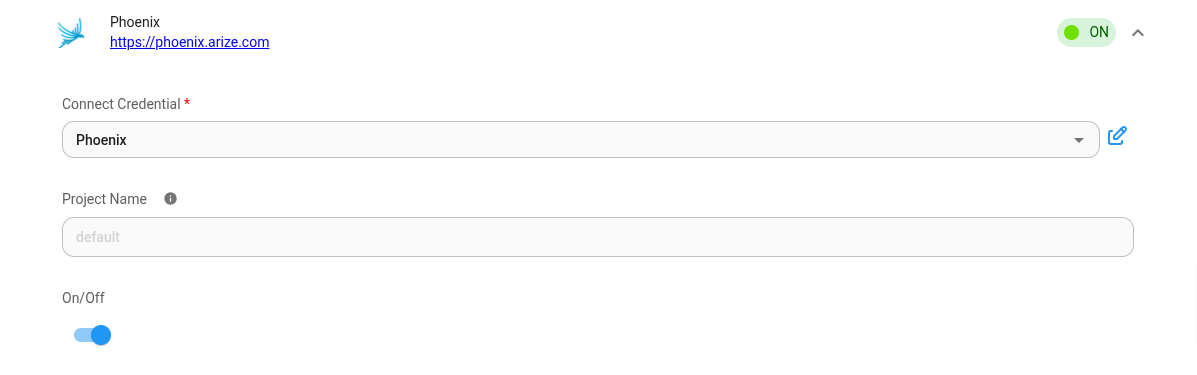
description: Learn how to use the aimicromind Document Stores, written by @toi500
Document Stores
AiMicromind's Document Stores offer a versatile approach to data management, enabling you to upload, split, and prepare your dataset and upsert it in a single location.
This centralized approach simplifies data handling and allows for efficient management of various data formats, making it easier to organize and access your data within the aimicromind app.
Setup
In this tutorial, we will set up a Retrieval Augmented Generation (RAG) system to retrieve information about the LibertyGuard Deluxe Homeowners Policy, a topic that LLMs are not extensively trained on.
Using the aimicromind Document Stores, we'll prepare and upsert data about LibertyGuard and its set of home insurance policies. This will enable our RAG system to accurately answer user queries about LibertyGuard's home insurance offerings.
1. Add a Document Store
- Start by adding a Document Store and naming it. In our case, "LibertyGuard Deluxe Homeowners Policy".
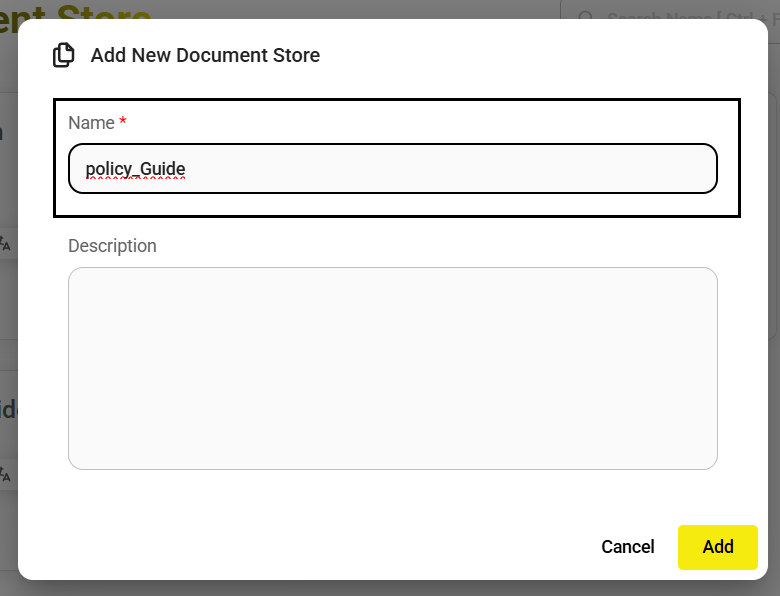
2. Select a Document Loader
- Enter the Document Store that you just created and select the Document Loader you want to use. In our case, since our dataset is in PDF format, we'll use the PDF Loader.
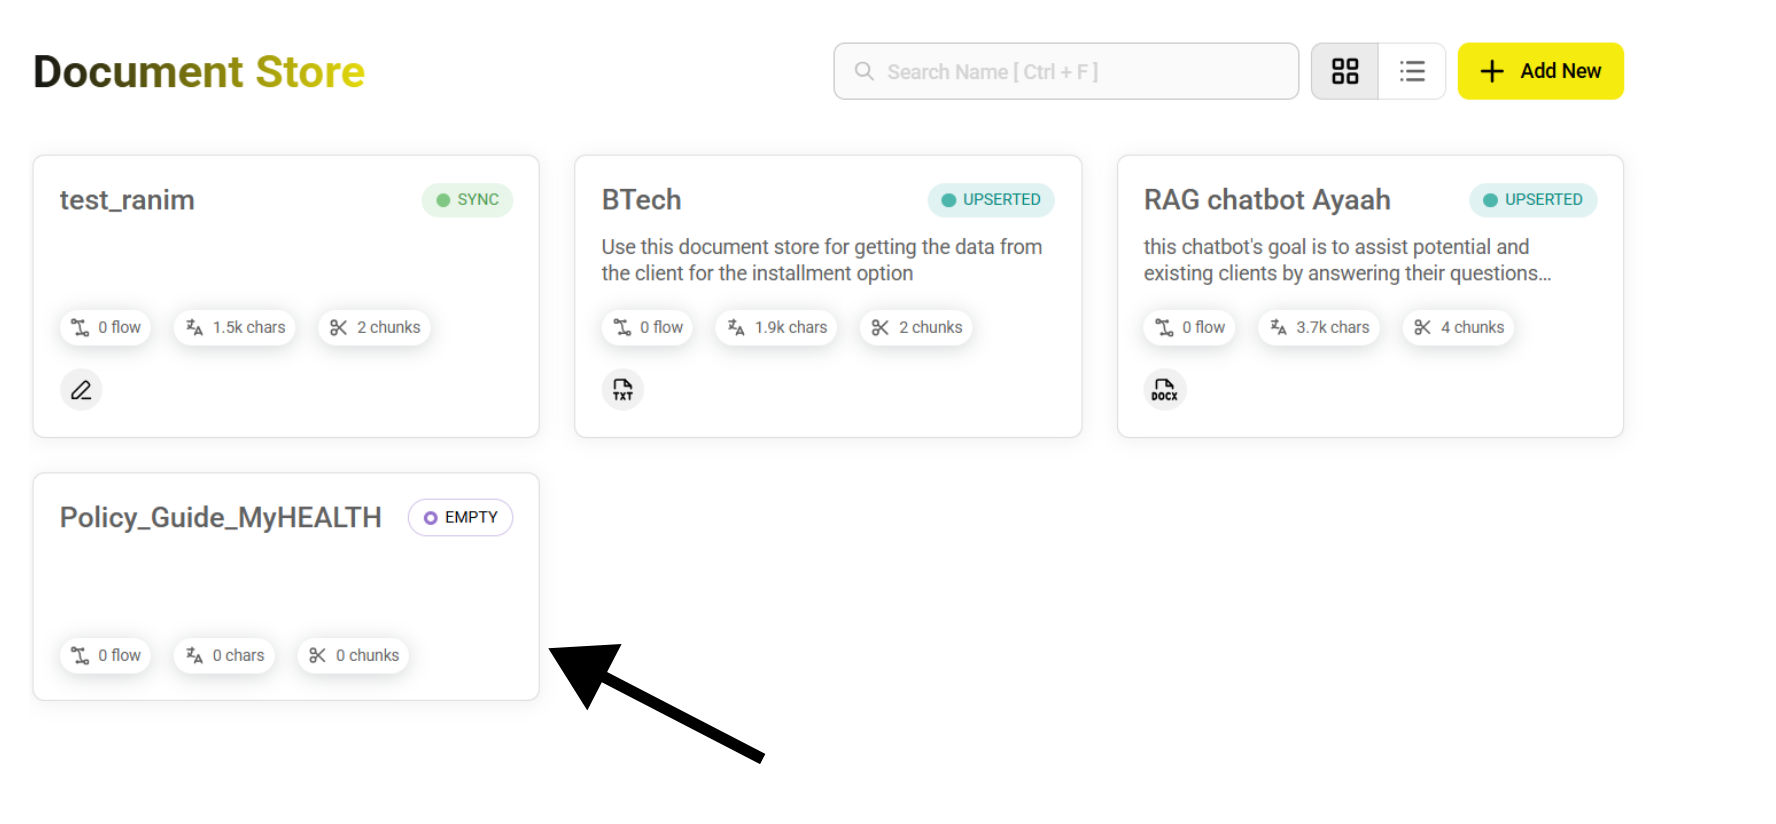
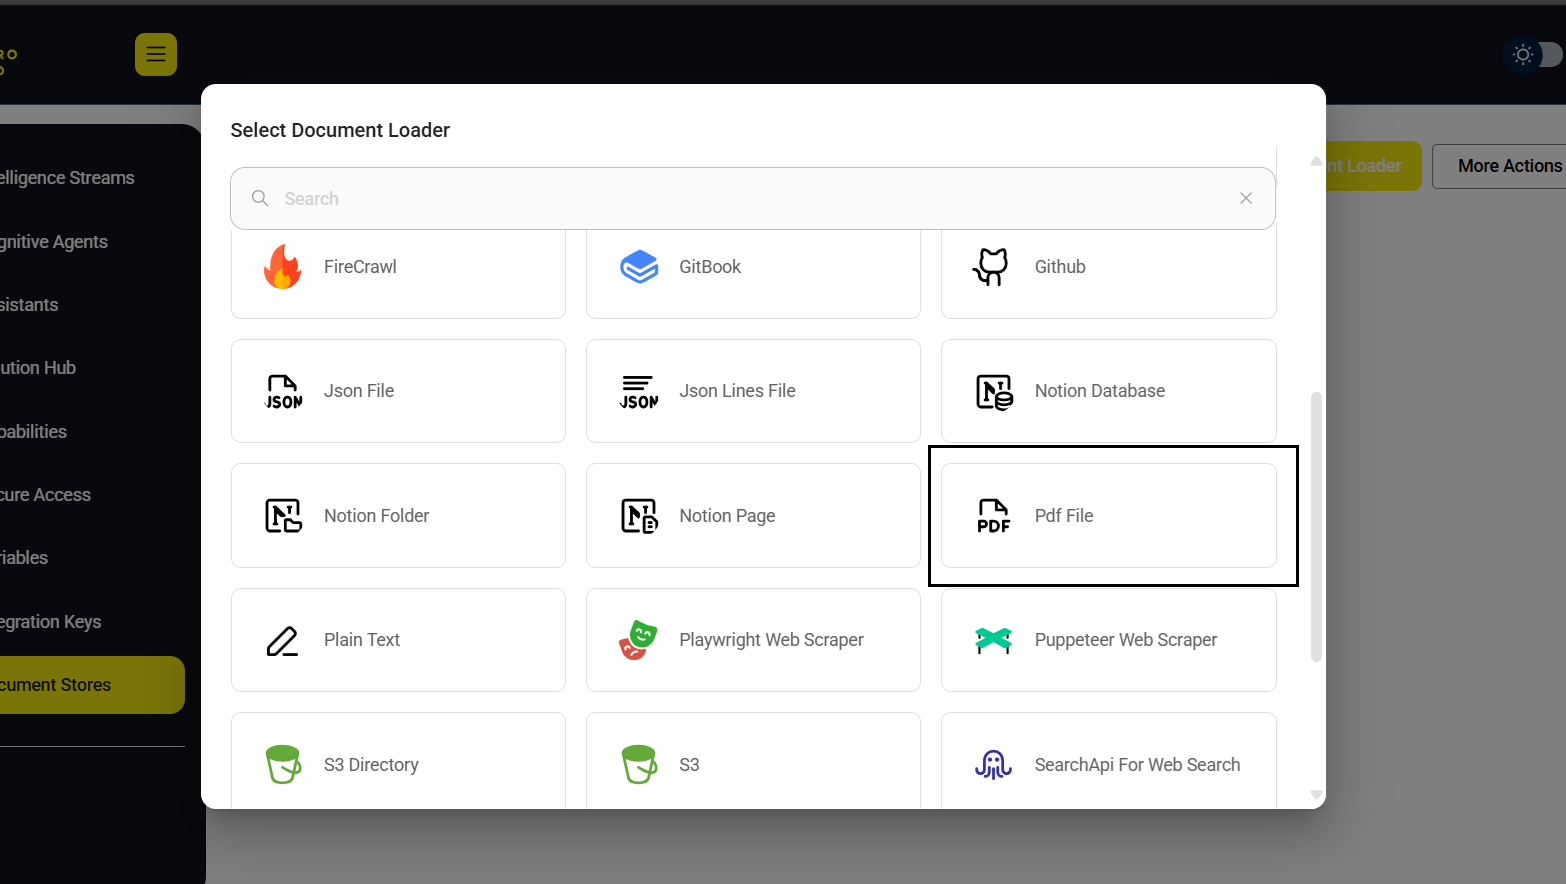
3. Prepare Your Data
- First, we start by uploading our PDF file.
- Then, we add a unique metadata key. This is optional, but a good practice as it allows us to target and filter down this same dataset later on if we need to.

- Finally, select the Text Splitter you want to use to chunk your data. In our particular case, we will use the Recursive Character Text Splitter.
{% hint style="info" %} In this guide, we've added a generous Chunk Overlap size to ensure no relevant data gets missed between chunks. However, the optimal overlap size is dependent on the complexity of your data. You may need to adjust this value based on your specific dataset and the nature of the information you want to extract. More about this topic in this guide. {% endhint %}
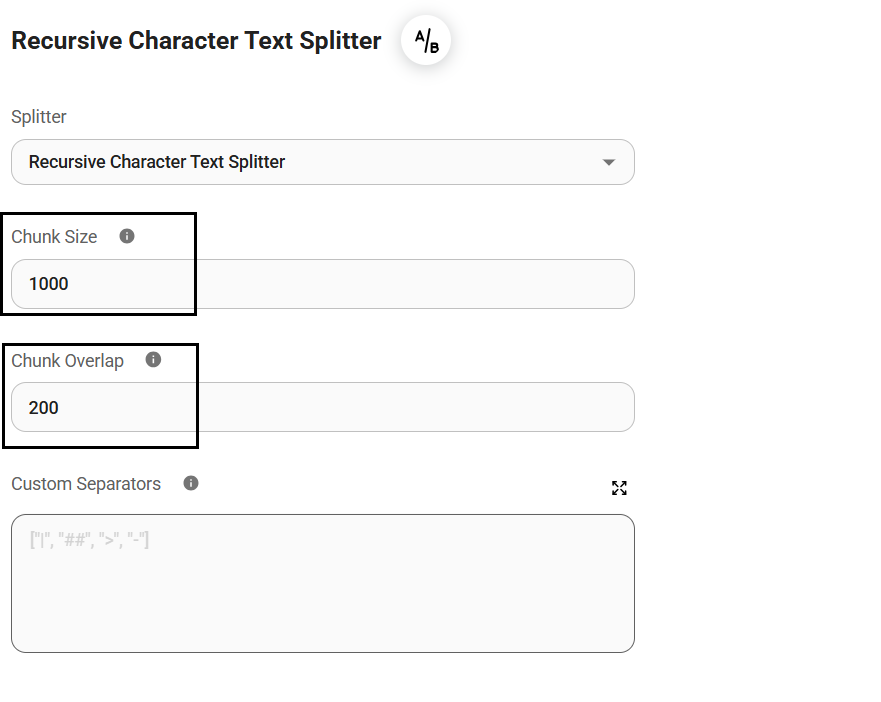
4. Preview Your Data
- We can now preview how our data will be chunked using our current Text Splitter configuration;
chunk_size=1500andchunk_overlap=750.
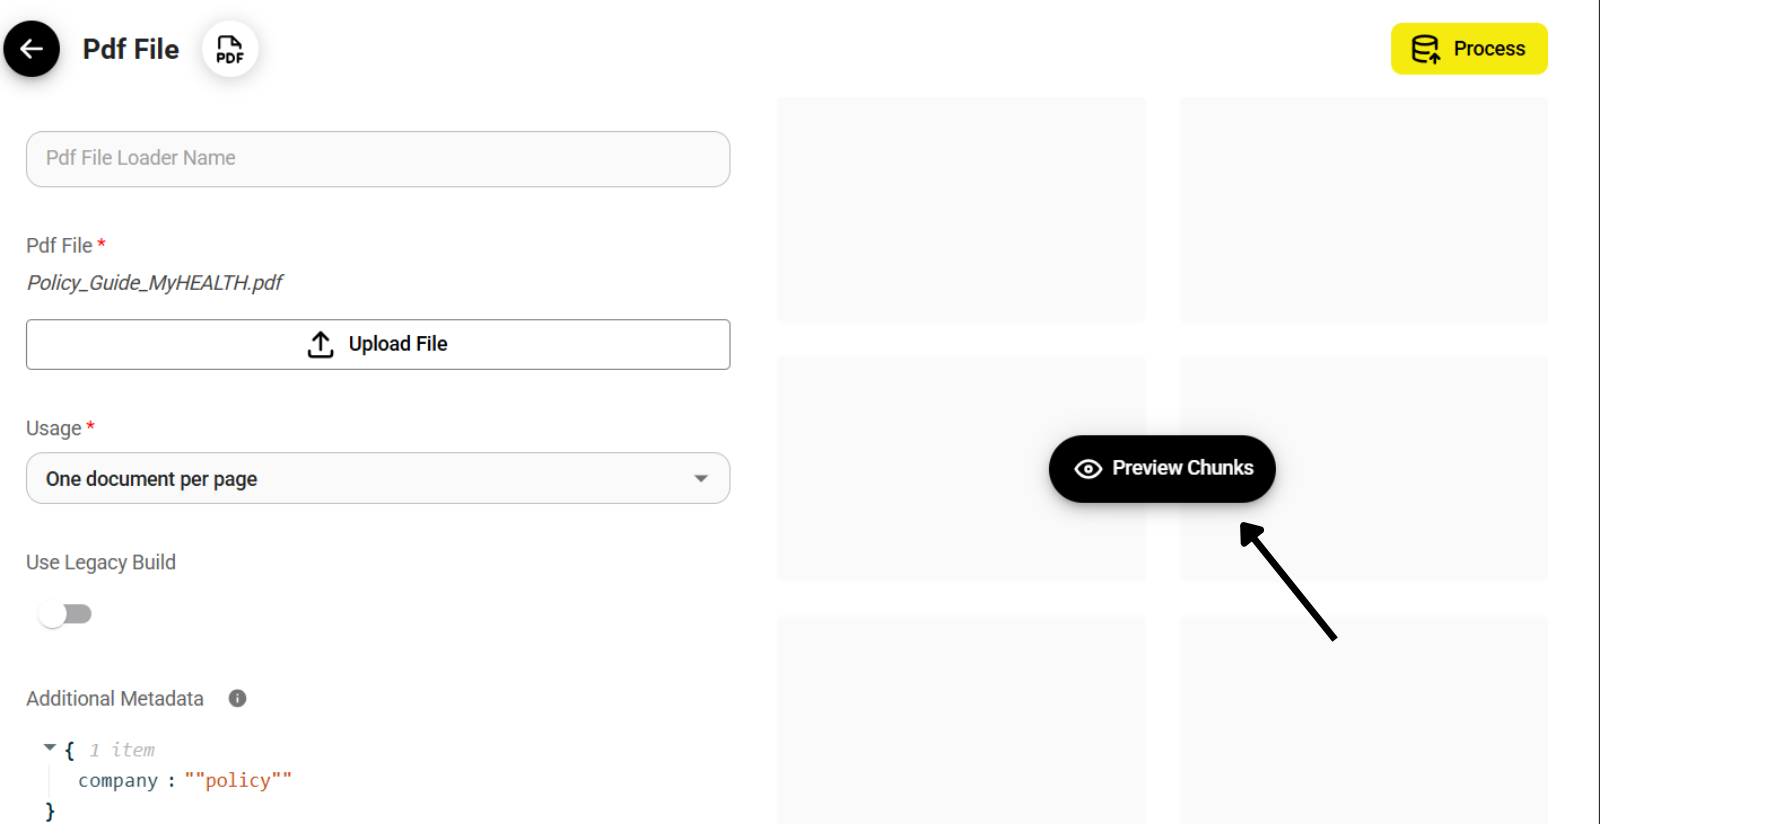
- It's important to experiment with different Text Splitters, Chunk Sizes, and Overlap values to find the optimal configuration for your specific dataset. This preview allows you to refine the chunking process and ensure that the resulting chunks are suitable for your RAG system.
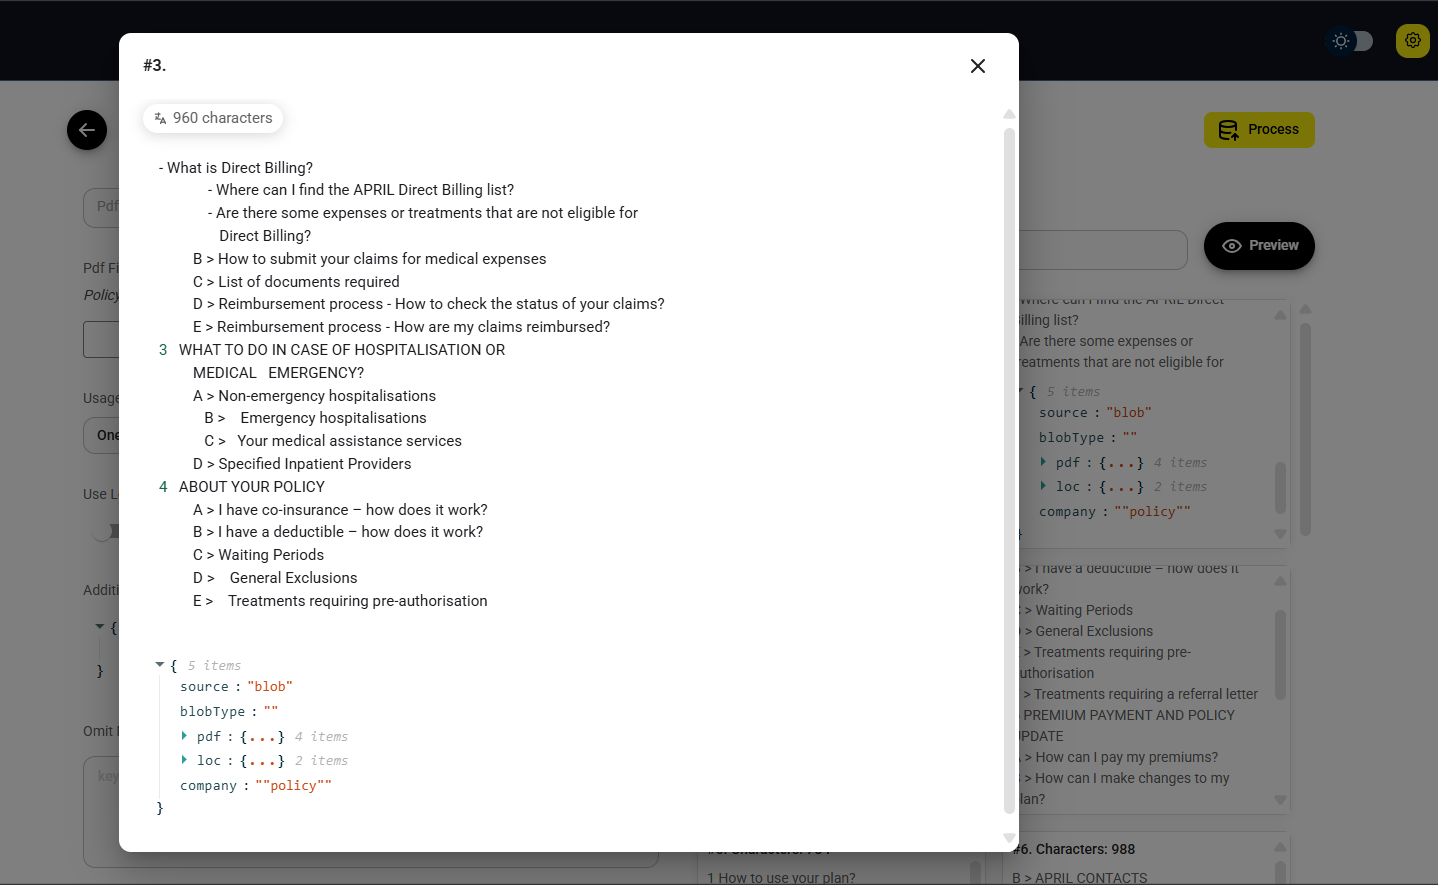
{% hint style="info" %}
Note that our custom metadata company: "liberty" has been inserted into each chunk. This metadata allows us to easily filter and retrieve information from this specific dataset later on, even if we use the same vector store index for other datasets.
{% endhint %}
5. Process Your Data
- Once you are satisfied with the chunking process, it's time to process your data.
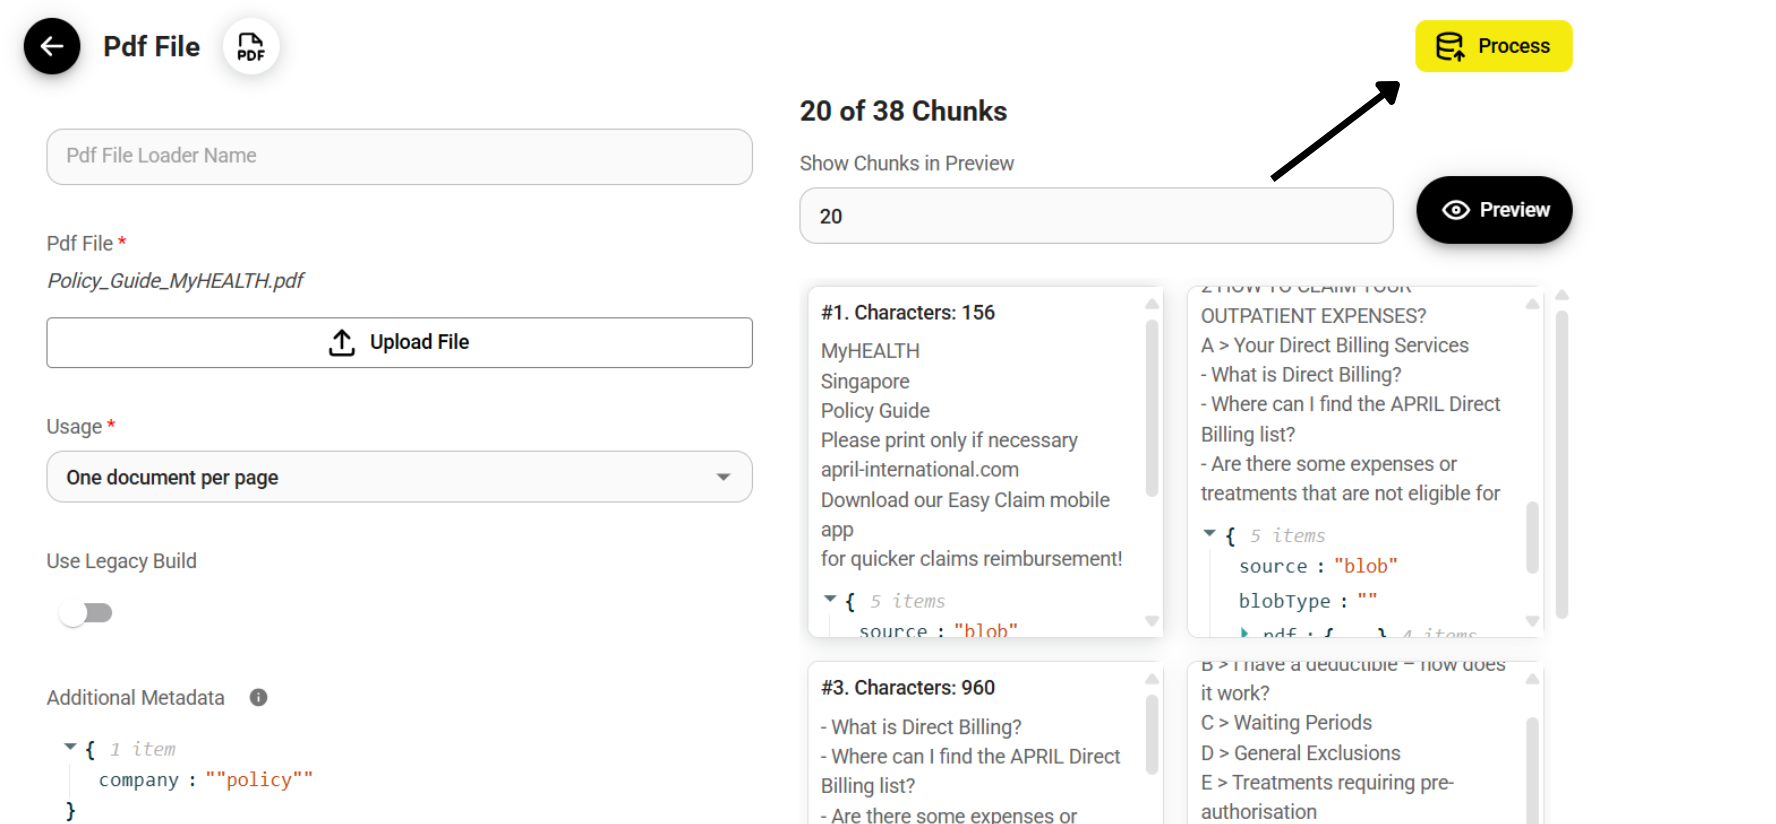
.png)
After processing your data, you retain the ability to refine individual chunks by deleting or adding content. This granular control offers several advantages:
- Enhanced Accuracy: Identify and rectify inaccuracies or inconsistencies present in the original data, ensuring the information used in your application is reliable.
- Improved Relevance: Refine chunk content to emphasize key information and remove irrelevant sections, thereby increasing the precision and effectiveness of your retrieval process.
- Query Optimization: Tailor chunks to better align with anticipated user queries, making them more targeted and improving the overall user experience.
6. Configure the Upsert Process
- With our data properly processed - loaded via a Document Loader and appropriately chunked -, we can now proceed to configure the upsert process.
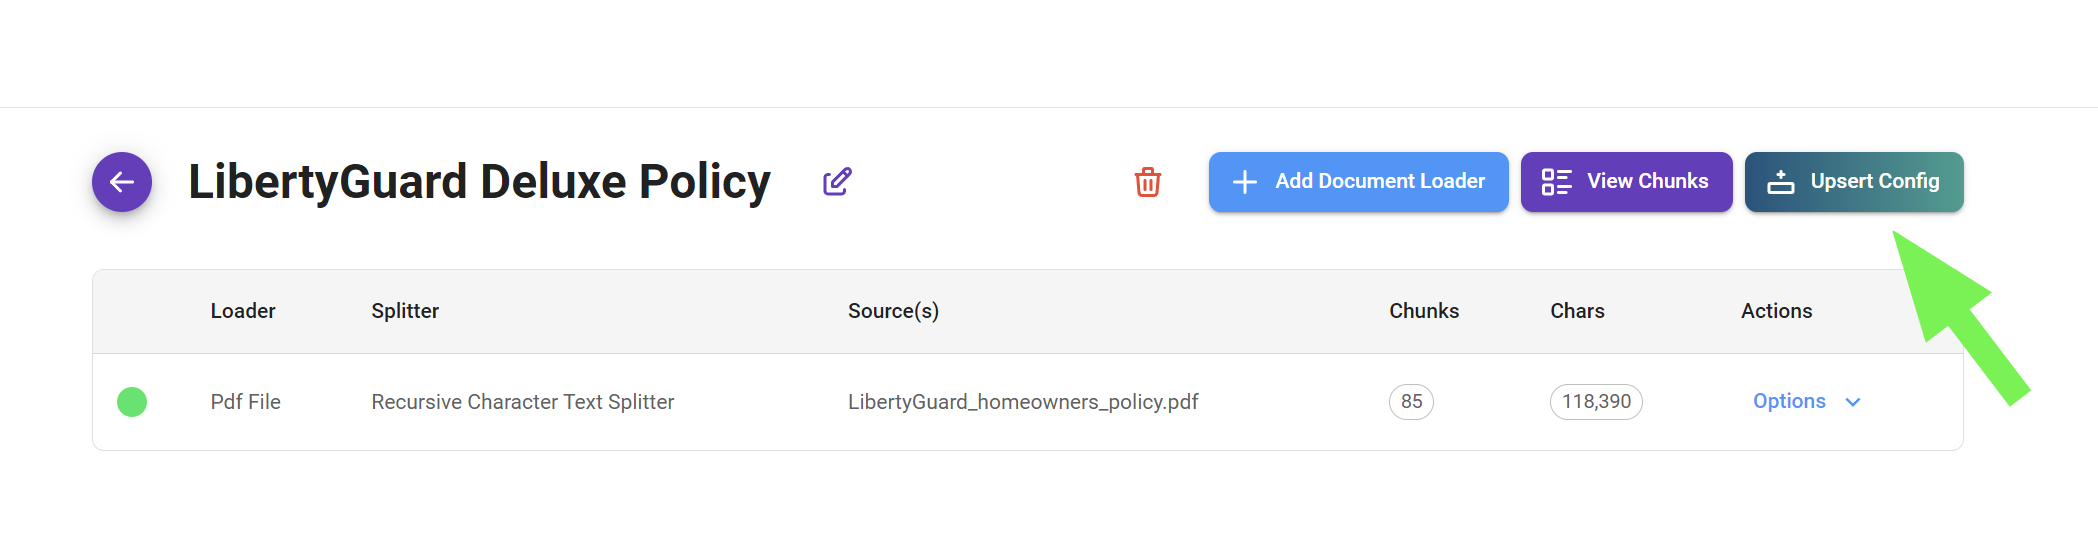
The upsert process comprises three fundamental steps:
- Embedding Selection: We begin by choosing the appropriate embedding model to encode our dataset. This model will transform our data into a numerical vector representation.
- Data Store Selection: Next, we determine the Vector Store where our dataset will reside.
- Record Manager Selection (Optional): Finally, we have the option to implement a Record Manager. This component provides the functionalities for managing our dataset once it's stored within the Vector Store.
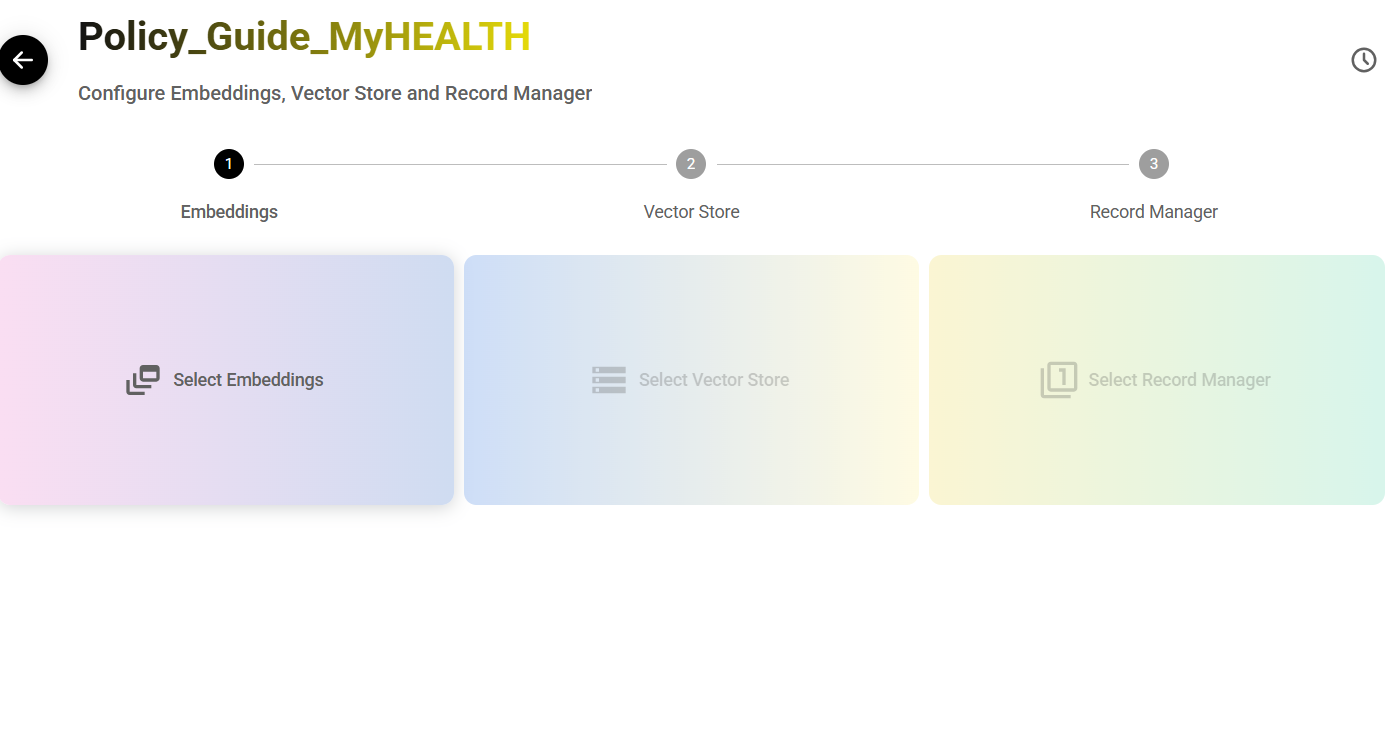
1. Select Embeddings
- Click on the "Select Embeddings" card and choose your preferred embedding model. In our case, we will select OpenAI as the embedding provider and use the "text-embedding-ada-002" model with 1536 dimensions.
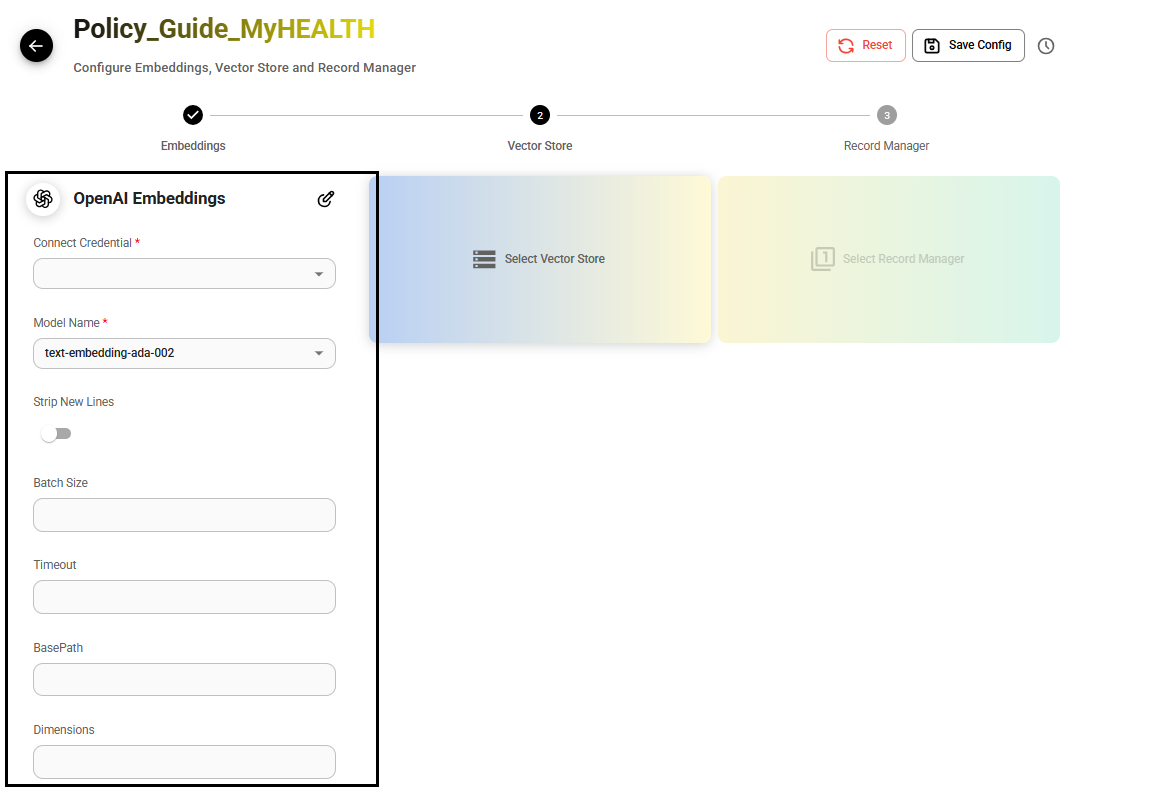
2. Select Vector Store
- Click on the "Select Vector Store" card and choose your preferred Vector Store. In our case, as we need a production-ready option, we will select Upstash.
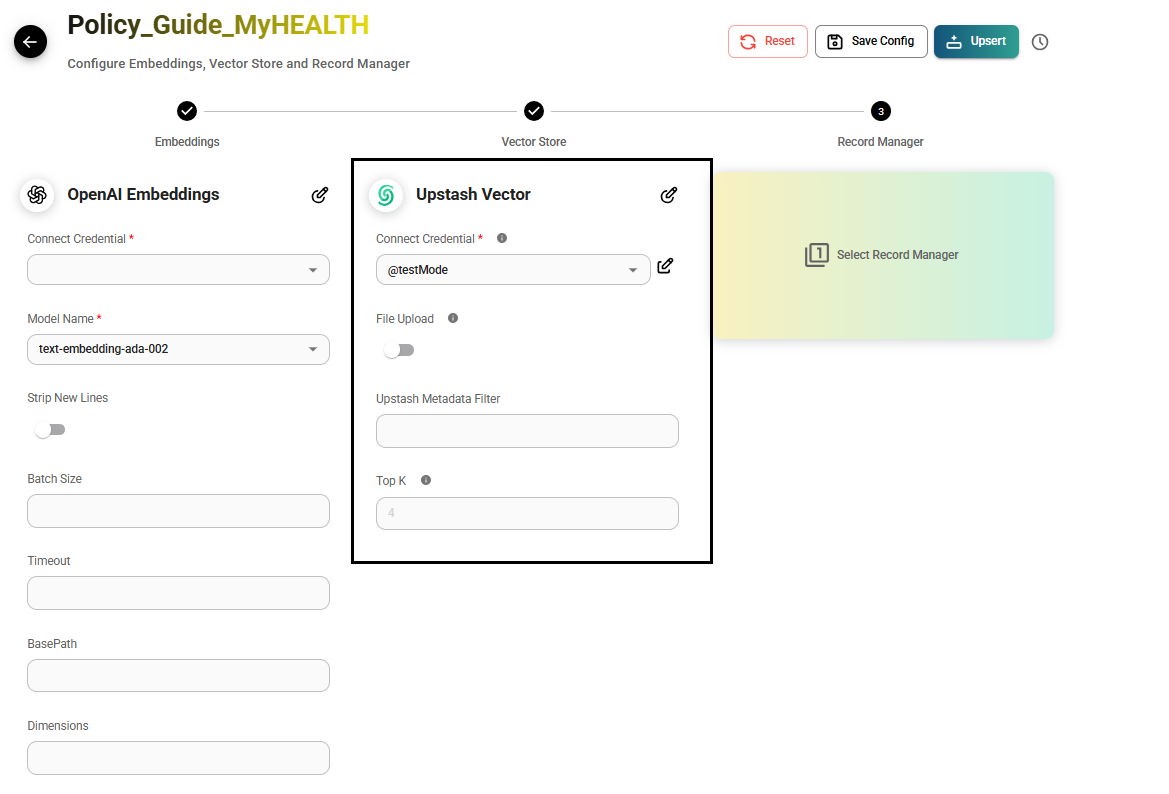
3. Select Record Manager
- For advanced dataset management within the Vector Store, you can optionally select and configure a Record Manager. Detailed instructions on how to set up and utilize this feature can be found in the dedicated guide.
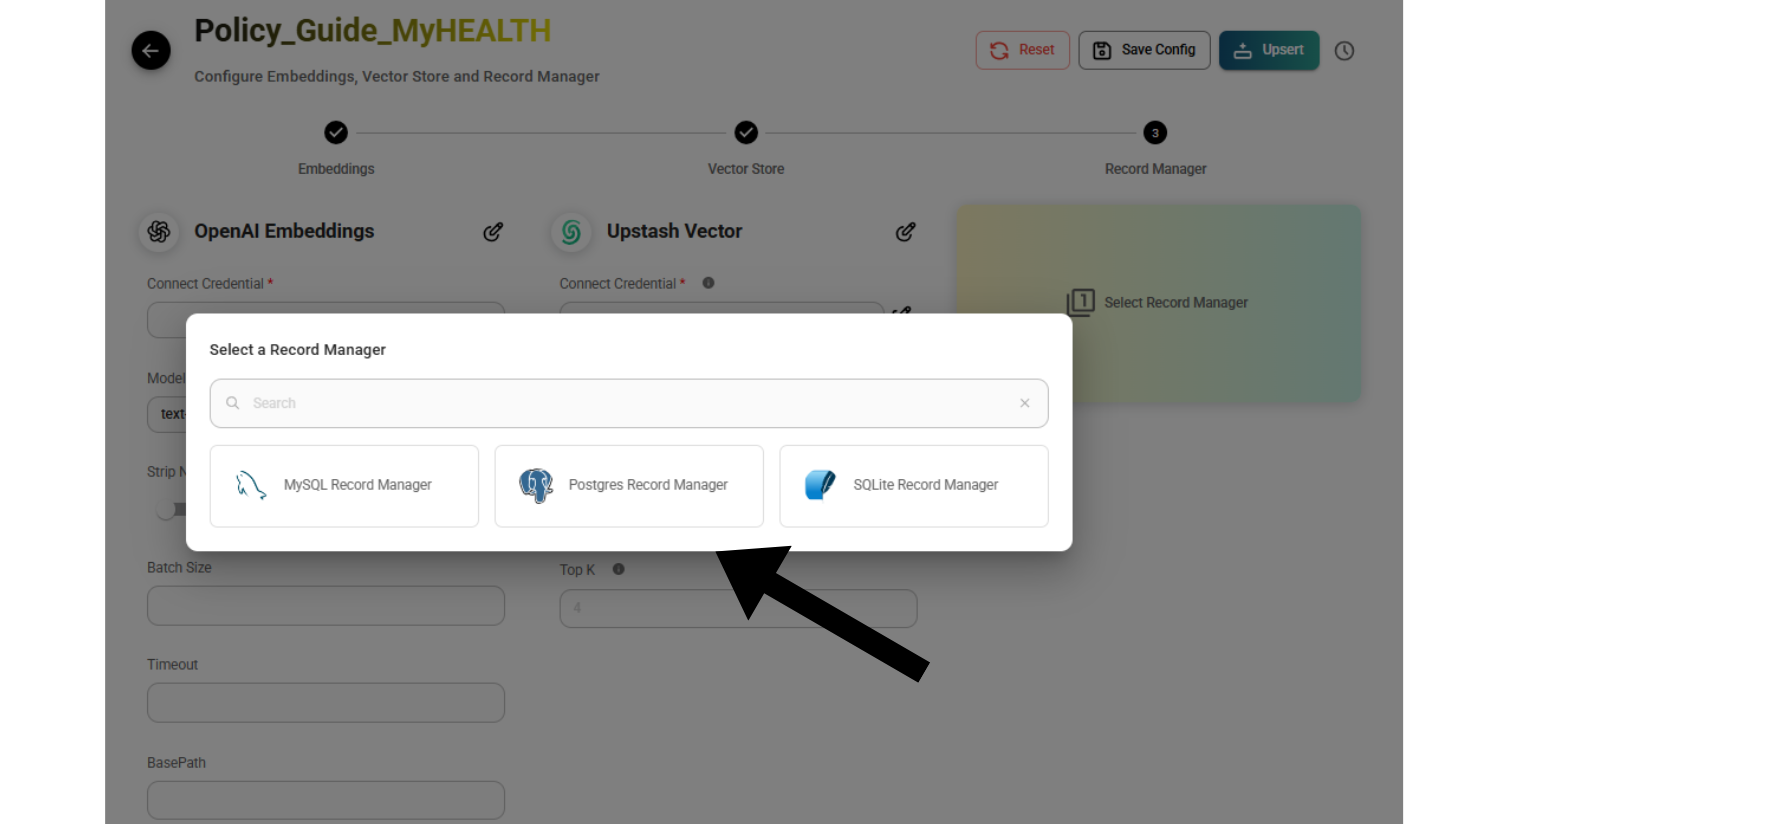
7. Upsert Your Data to a Vector Store
- To begin the upsert process and transfer your data to the Vector Store, click the "Upsert" button.

- As illustrated in the image below, our data has been successfully upserted into the Upstash vector database. The data was divided into 85 chunks to optimize the upsertion process and ensure efficient storage and retrieval.
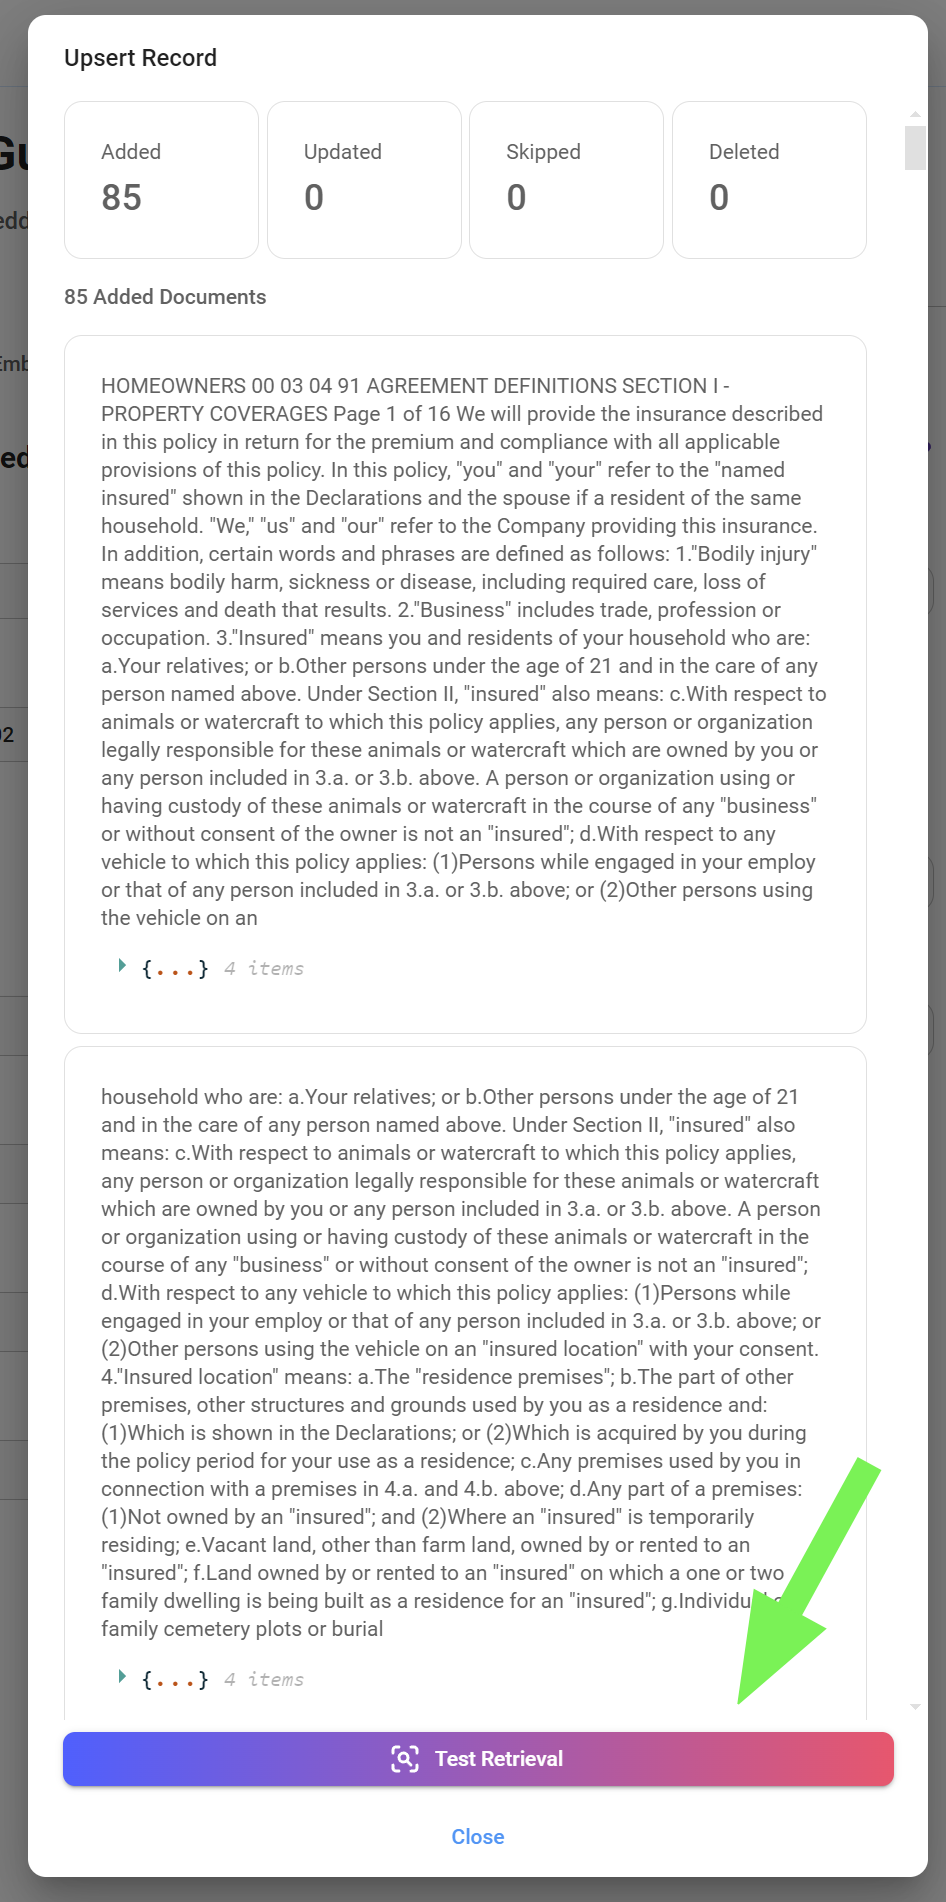
8. Test Your Dataset
- To quickly test the functionality of your dataset without navigating away from the Document Store, simply utilize the "Retrieval Query" button. This initiates a test query, allowing you to verify the accuracy and effectiveness of your data retrieval process.
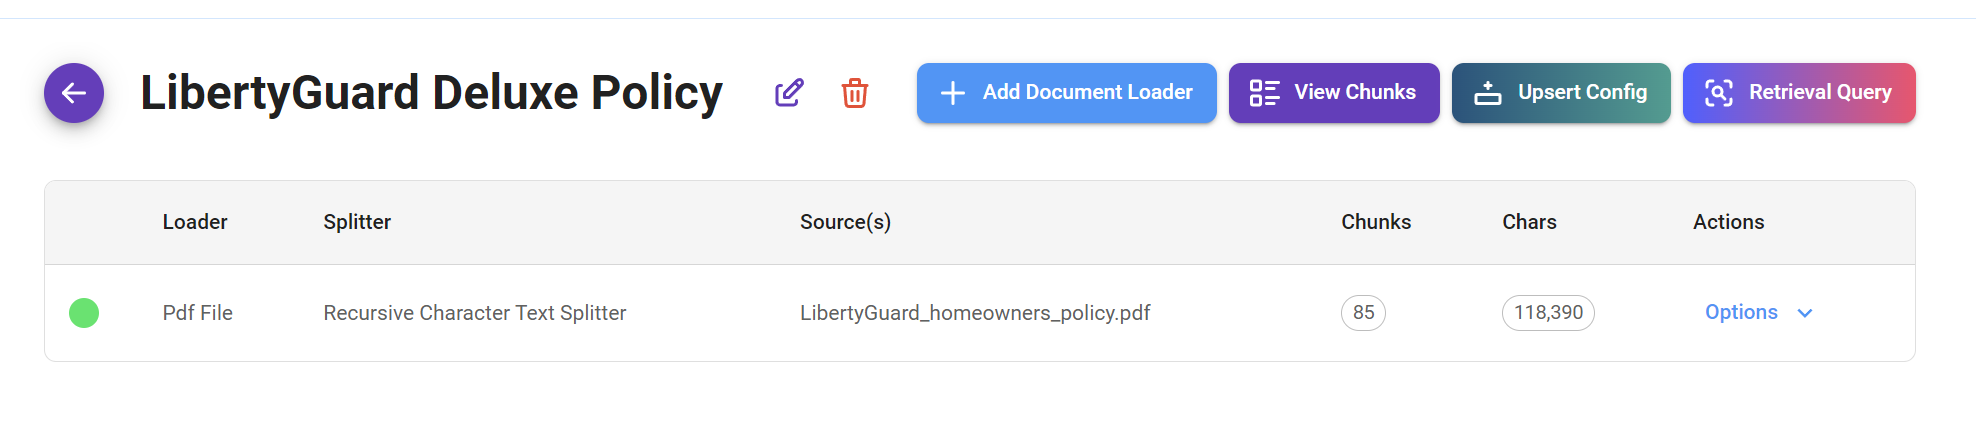
- In our case, we see that when querying for information about kitchen flooring coverage in our insurance policy, we retrieve 4 relevant chunks from Upstash, our designated Vector Store. This retrieval is limited to 4 chunks as per the defined "top k" parameter, ensuring we receive the most pertinent information without unnecessary redundancy.
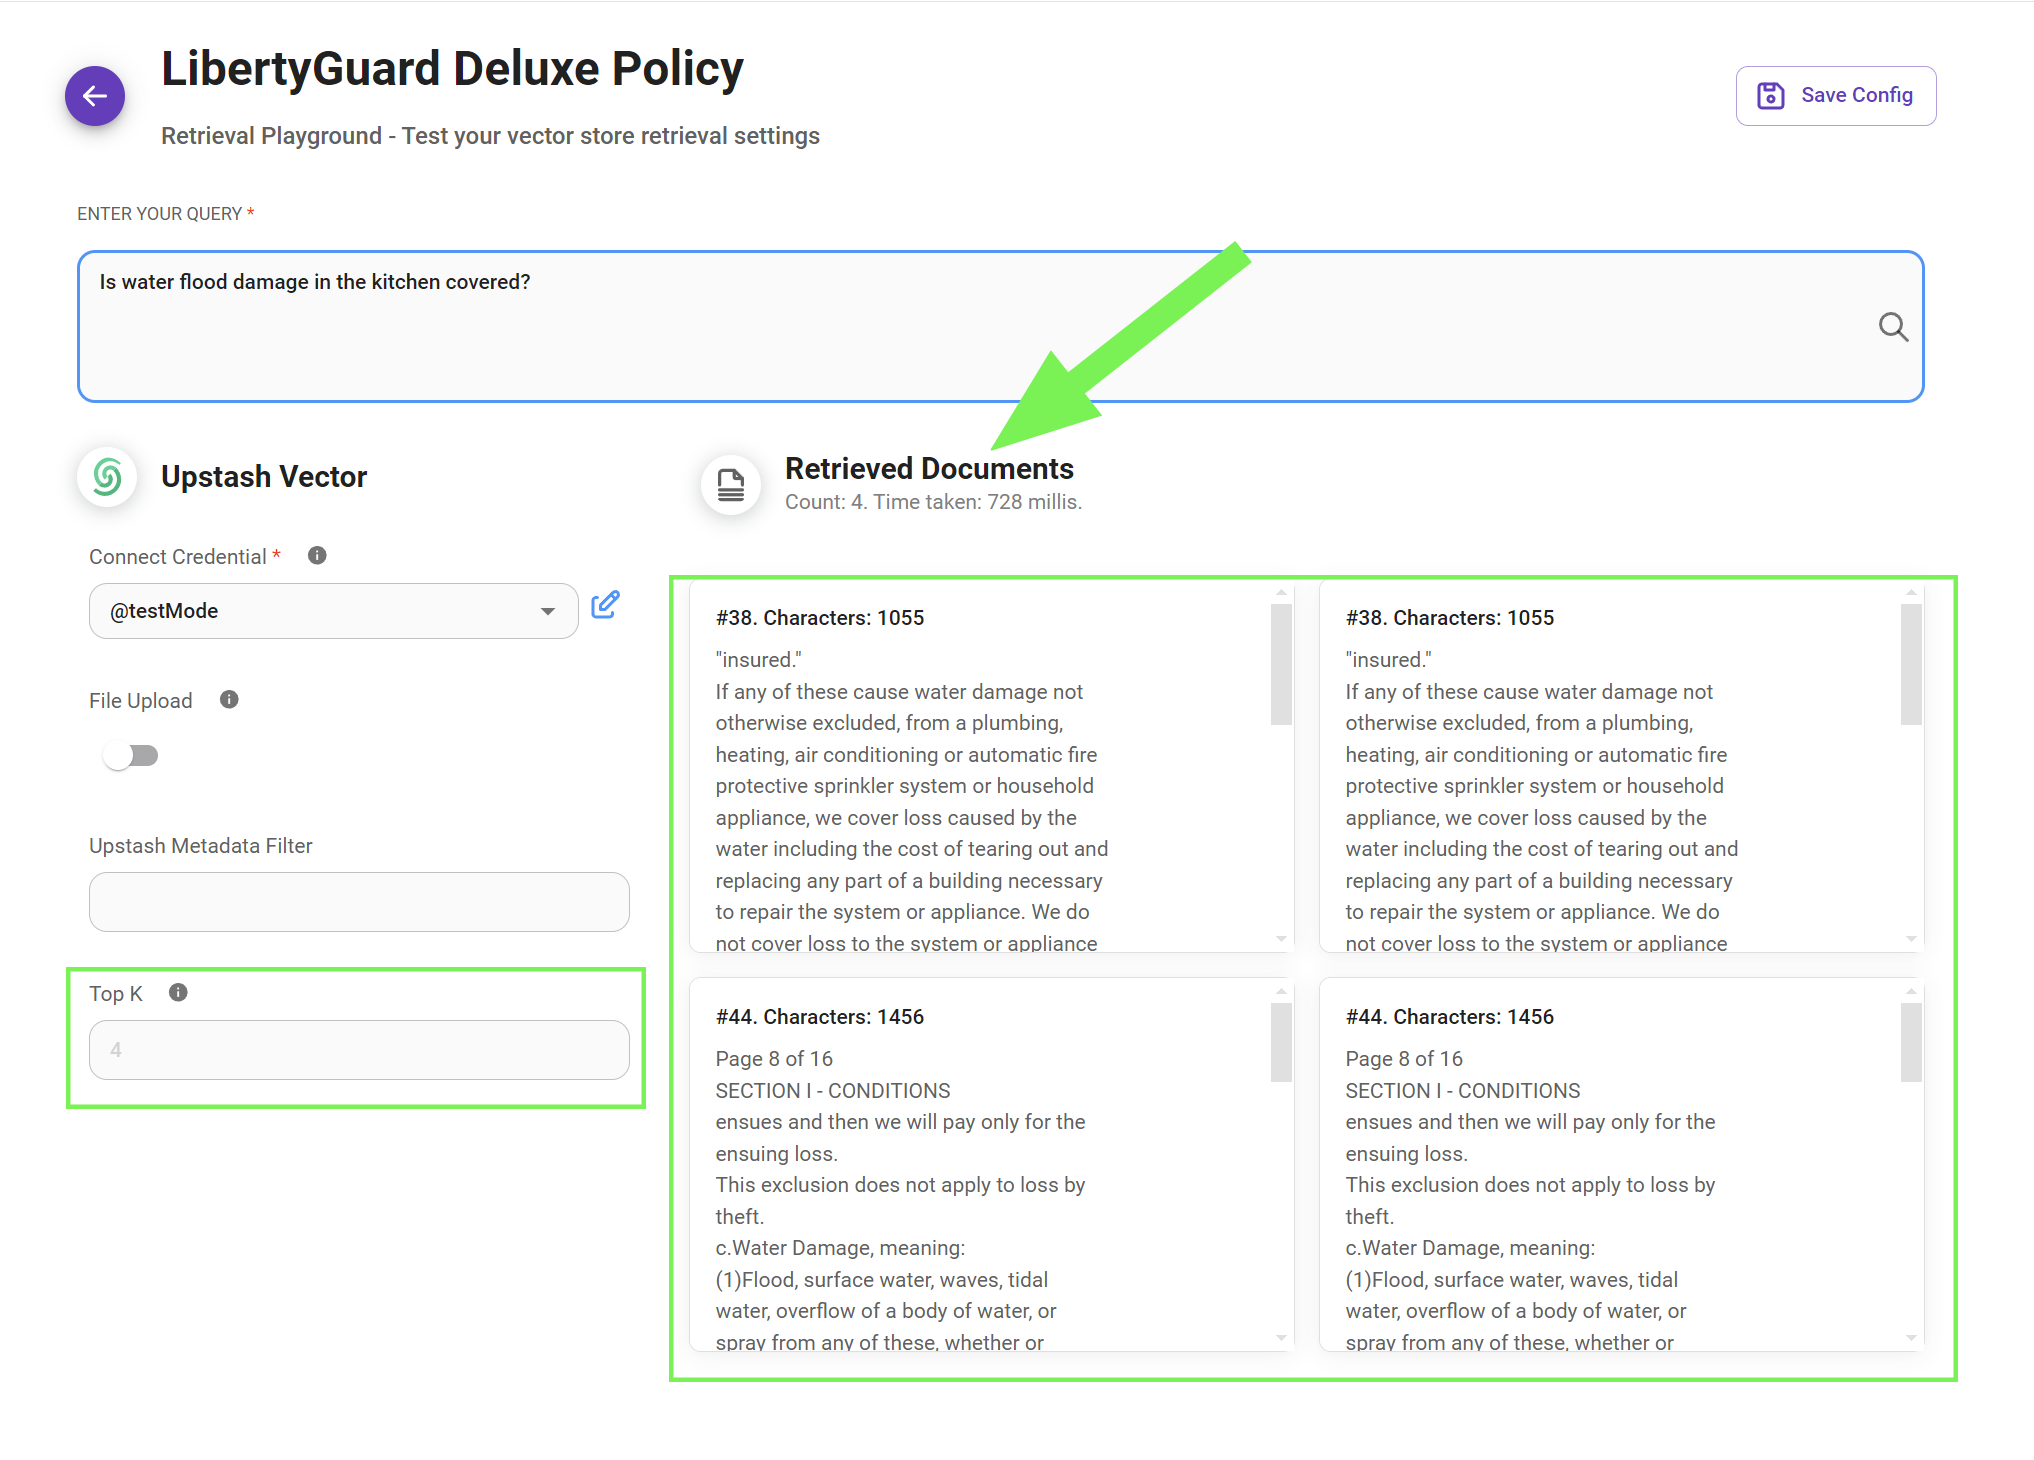
9. Test Your RAG
- Finally, our Retrieval-Augmented Generation (RAG) system is operational. It's noteworthy how the LLM effectively interprets the query and successfully leverages relevant information from the chunked data to construct a comprehensive response.
You can use the vector store that was configured earlier:

Or, use the Document Store (Vector):
.png)
10. API
There are also APIs support for creating, updating and deleting document store. Refer to Document Store API for more details. In this section, we are going to highlight the 2 of the most used APIs: upsert and refresh.
Upsert API
There are a few different scenarios for upserting process, and each have different outcomes.
Scenario 1: In the same document store, use an existing document loader configuration, upsert as new document loader.
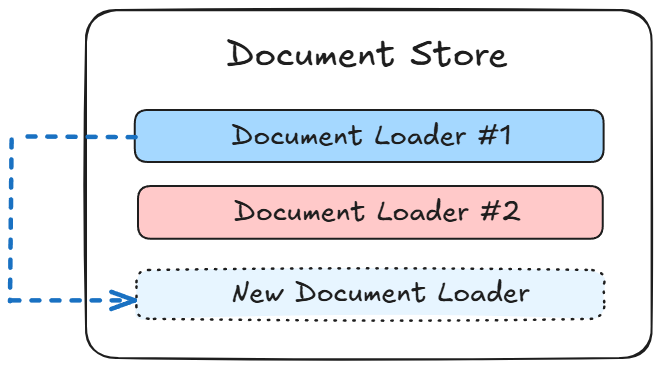
{% hint style="success" %}
docId represents the existing document loader ID. It is required in the request body for this scenario.
{% endhint %}
{% tabs %} {% tab title="Python" %}
import requests
import json

DOC_STORE_ID = "your_doc_store_id"
DOC_LOADER_ID = "your_doc_loader_id"
API_URL = f"http://localhost:3000/api/v1/document-store/upsert/{DOC_STORE_ID}"
API_KEY = "your_api_key_here"

form_data = {
    "files": ('my-another-file.pdf', open('my-another-file.pdf', 'rb'))
}

body_data = {
    "docId": DOC_LOADER_ID
}

headers = {
    "Authorization": f"Bearer {BEARER_TOKEN}"
}

def query(form_data):
    response = requests.post(API_URL, files=form_data, data=body_data, headers=headers)
    print(response)
    return response.json()

output = query(form_data)
print(output)
{% endtab %}
{% tab title="Javascript" %}
const DOC_STORE_ID = "your_doc_store_id"
const DOC_LOADER_ID = "your_doc_loader_id"

let formData = new FormData();
formData.append("files", input.files[0]);
formData.append("docId", DOC_LOADER_ID)

async function query(formData) {
    const response = await fetch(
        `http://localhost:3000/api/v1/document-store/upsert/${DOC_STORE_ID}`,
        {
            method: "POST",
            headers: {
                "Authorization": "Bearer <your_api_key_here>"
            },
            body: formData
        }
    );
    const result = await response.json();
    return result;
}

query(formData).then((response) => {
    console.log(response);
});
{% endtab %} {% endtabs %}
Scenario 2: In the same document store, replace an existing document loader with new files.
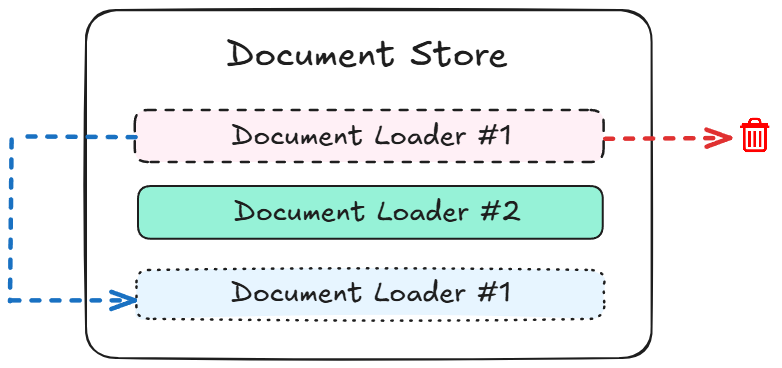
{% hint style="success" %}
docId and replaceExisting are both required in the request body for this scenario.
{% endhint %}
{% tabs %} {% tab title="Python" %}
import requests
import json

DOC_STORE_ID = "your_doc_store_id"
DOC_LOADER_ID = "your_doc_loader_id"
API_URL = f"http://localhost:3000/api/v1/document-store/upsert/{DOC_STORE_ID}"
API_KEY = "your_api_key_here"

form_data = {
    "files": ('my-another-file.pdf', open('my-another-file.pdf', 'rb'))
}

body_data = {
    "docId": DOC_LOADER_ID,
    "replaceExisting": True
}

headers = {
    "Authorization": f"Bearer {BEARER_TOKEN}"
}

def query(form_data):
    response = requests.post(API_URL, files=form_data, data=body_data, headers=headers)
    print(response)
    return response.json()

output = query(form_data)
print(output)
{% endtab %}
{% tab title="Javascript" %}
const DOC_STORE_ID = "your_doc_store_id";
const DOC_LOADER_ID = "your_doc_loader_id";

let formData = new FormData();
formData.append("files", input.files[0]);
formData.append("docId", DOC_LOADER_ID);
formData.append("replaceExisting", true);

async function query(formData) {
    const response = await fetch(
        `http://localhost:3000/api/v1/document-store/upsert/${DOC_STORE_ID}`,
        {
            method: "POST",
            headers: {
                "Authorization": "Bearer <your_api_key_here>"
            },
            body: formData
        }
    );
    const result = await response.json();
    return result;
}

query(formData).then((response) => {
    console.log(response);
});
{% endtab %} {% endtabs %}
Scenario 3: In the same document store, upsert as new document loader from scratch.
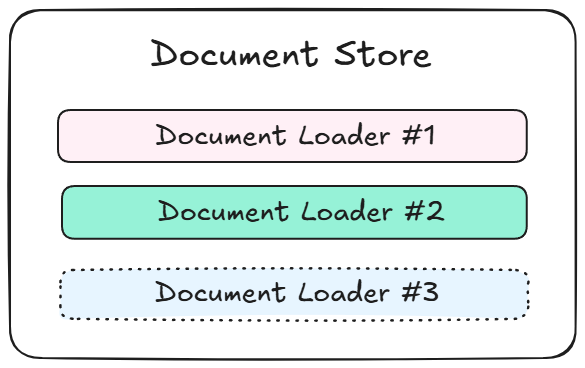
{% hint style="success" %}
loader, splitter, embedding, vectorStore are all required in the request body for this scenario. recordManager is optional.
{% endhint %}
{% tabs %} {% tab title="Python" %}
import requests
import json

DOC_STORE_ID = "your_doc_store_id"
API_URL = f"http://localhost:3000/api/v1/document-store/upsert/{DOC_STORE_ID}"
API_KEY = "your_api_key_here"

form_data = {
    "files": ('my-another-file.pdf', open('my-another-file.pdf', 'rb'))
}

loader = {
    "name": "pdfFile",
    "config": {} # you can leave empty to use default config
}

splitter = {
    "name": "recursiveCharacterTextSplitter",
    "config": {
        "chunkSize": 1400,
        "chunkOverlap": 100
    }
}

embedding = {
    "name": "openAIEmbeddings",
    "config": {
        "modelName": "text-embedding-ada-002",
        "credential": <your_credential_id>
    }
}

vectorStore = {
    "name": "pinecone",
    "config": {
        "pineconeIndex": "exampleindex",
        "pineconeNamespace": "examplenamespace",
        "credential":  <your_credential_i
    }
}

body_data = {
    "docId": DOC_LOADER_ID,
    "loader": json.dumps(loader),
    "splitter": json.dumps(splitter),
    "embedding": json.dumps(embedding),
    "vectorStore": json.dumps(vectorStore)
}

headers = {
    "Authorization": f"Bearer {BEARER_TOKEN}"
}

def query(form_data):
    response = requests.post(API_URL, files=form_data, data=body_data, headers=headers)
    print(response)
    return response.json()

output = query(form_data)
print(output)
{% endtab %}
{% tab title="Javascript" %}
const DOC_STORE_ID = "your_doc_store_id";
const API_URL = `http://localhost:3000/api/v1/document-store/upsert/${DOC_STORE_ID}`;
const API_KEY = "your_api_key_here";

const formData = new FormData();
formData.append("files", new Blob([await (await fetch('my-another-file.pdf')).blob()]), "my-another-file.pdf");

const loader = {
    name: "pdfFile",
    config: {} // You can leave empty to use the default config
};

const splitter = {
    name: "recursiveCharacterTextSplitter",
    config: {
        chunkSize: 1400,
        chunkOverlap: 100
    }
};

const embedding = {
    name: "openAIEmbeddings",
    config: {
        modelName: "text-embedding-ada-002",
        credential: "your_credential_id"
    }
};

const vectorStore = {
    name: "pinecone",
    config: {
        pineconeIndex: "exampleindex",
        pineconeNamespace: "examplenamespace",
        credential: "your_credential_id"
    }
};

const bodyData = {
    docId: "DOC_LOADER_ID",
    loader: JSON.stringify(loader),
    splitter: JSON.stringify(splitter),
    embedding: JSON.stringify(embedding),
    vectorStore: JSON.stringify(vectorStore)
};

const headers = {
    "Authorization": `Bearer BEARER_TOKEN`
};

async function query() {
    try {
        const response = await fetch(API_URL, {
            method: "POST",
            headers: headers,
            body: formData
        });

        const result = await response.json();
        console.log(result);
        return result;
    } catch (error) {
        console.error("Error:", error);
    }
}

query();
{% endtab %} {% endtabs %}
{% hint style="danger" %} Creating from scratch is not recommended as it exposes your credential ID. The recommended way is to create a placeholder document store and configure the parameters on the UI. Then use the placeholder as the base for adding new document loader or creating new document store. {% endhint %}
Scenario 4: Create new document store for every upsert
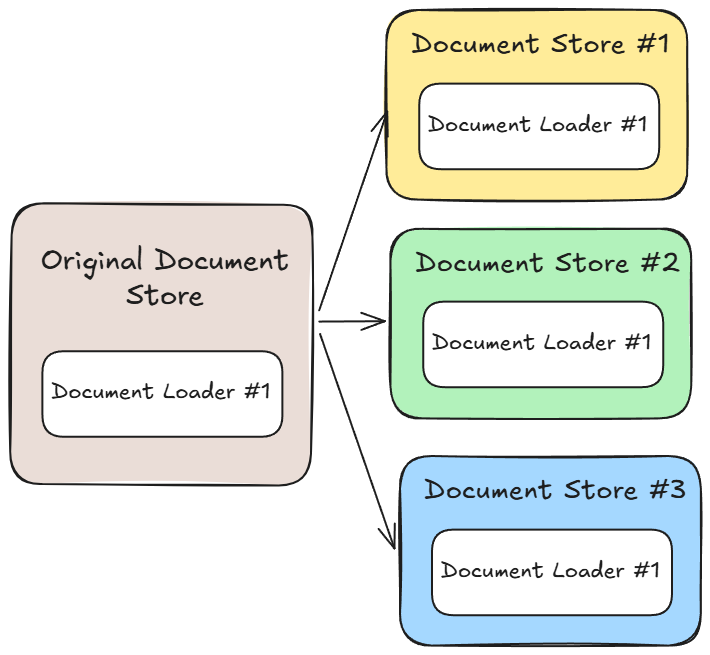
{% hint style="success" %}
createNewDocStore and docStore are both required in the request body for this scenario.
{% endhint %}
{% tabs %} {% tab title="Python" %}
import requests
import json

DOC_STORE_ID = "your_doc_store_id"
DOC_LOADER_ID = "your_doc_loader_id"
API_URL = f"http://localhost:3000/api/v1/document-store/upsert/{DOC_STORE_ID}"
API_KEY = "your_api_key_here"

form_data = {
    "files": ('my-another-file.pdf', open('my-another-file.pdf', 'rb'))
}

body_data = {
    "docId": DOC_LOADER_ID,
    "createNewDocStore": True,
    "docStore": json.dumps({"name":"My NEW Doc Store"})
}

headers = {
    "Authorization": f"Bearer {BEARER_TOKEN}"
}

def query(form_data):
    response = requests.post(API_URL, files=form_data, data=body_data, headers=headers)
    print(response)
    return response.json()

output = query(form_data)
print(output)
{% endtab %}
{% tab title="Javascript" %}
const DOC_STORE_ID = "your_doc_store_id";
const DOC_LOADER_ID = "your_doc_loader_id";

let formData = new FormData();
formData.append("files", input.files[0]);
formData.append("docId", DOC_LOADER_ID);
formData.append("createNewDocStore", true);
formData.append("docStore", JSON.stringify({ "name": "My NEW Doc Store" }));

async function query(formData) {
    const response = await fetch(
        `http://localhost:3000/api/v1/document-store/upsert/${DOC_STORE_ID}`,
        {
            method: "POST",
            headers: {
                "Authorization": "Bearer <your_api_key_here>"
            },
            body: formData
        }
    );
    const result = await response.json();
    return result;
}

query(formData).then((response) => {
    console.log(response);
});
{% endtab %} {% endtabs %}
Q: Where to find Document Store ID and Document Loader ID?
A: You can find the respective IDs from the URL.
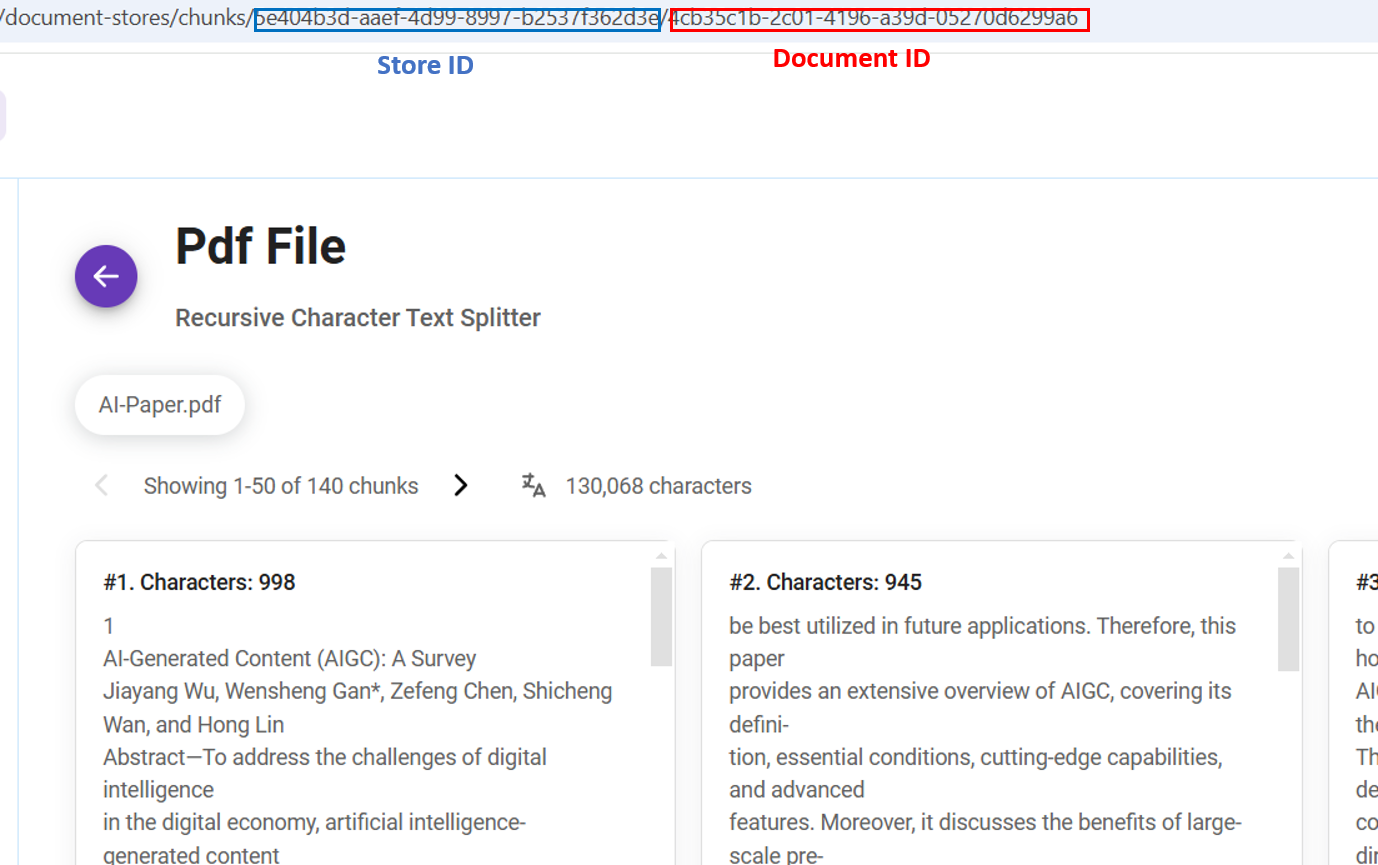
Q: Where can I find the available configs to override?
A: You can find the available configs from the View API button on each document loader:
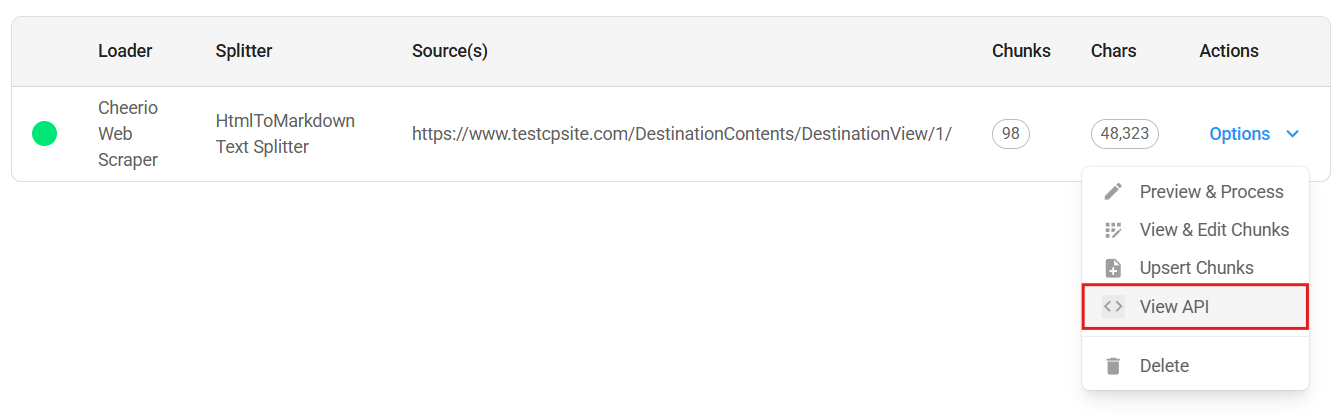
.png)
For each upsert, there are 5 elements involved:
loadersplitterembeddingvectorStorerecordManager
You can override existing configuration with the config body of the element. For example, using the screenshot above, you can create a new document loader with a new url:
{% tabs %} {% tab title="Python" %}
import requests

API_URL = "http://localhost:3000/api/v1/document-store/upsert/<storeId>"

def query(payload):
    response = requests.post(API_URL, json=payload)
    return response.json()

output = query({
    "docId": <docLoaderId>,
    # override existing configuration
    "loader": {
        "config": {
            "url": "https://new-url.com"
        }
    }
})
print(output)
{% endtab %}
{% tab title="Javascript" %}
async function query(data) {
    const response = await fetch(
        "http://localhost:3000/api/v1/document-store/upsert/<storeId>",
        {
            method: "POST",
            headers: {
                "Content-Type": "application/json"
            },
            body: JSON.stringify(data)
        }
    );
    const result = await response.json();
    return result;
}

query({
    "docId": <docLoaderId>,
    // override existing configuration
    "loader": {
        "config": {
            "url": "https://new-url.com"
        }
    }
}).then((response) => {
    console.log(response);
});
{% endtab %} {% endtabs %}
What if the loader has file upload? Yes, you guessed it right, we have to use form data as body!
Using the image below as an example, we can override the usage parameter of the PDF File Loader like so:
.png)
{% tabs %} {% tab title="Python" %}
import requests
import json

API_URL = "http://localhost:3000/api/v1/document-store/upsert/<storeId>"
API_KEY = "your_api_key_here"

form_data = {
    "files": ('my-another-file.pdf', open('my-another-file.pdf', 'rb'))
}

override_loader_config = {
    "config": {
        "usage": "perPage"
    }
}

body_data = {
    "docId": <docLoaderId>,
    "loader": json.dumps(override_loader_config) # Override existing configuration
}

headers = {
    "Authorization": f"Bearer {BEARER_TOKEN}"
}

def query(form_data):
    response = requests.post(API_URL, files=form_data, data=body_data, headers=headers)
    print(response)
    return response.json()

output = query(form_data)
print(output)
{% endtab %}
{% tab title="Javascript" %}
const DOC_STORE_ID = "your_doc_store_id";
const DOC_LOADER_ID = "your_doc_loader_id";

const overrideLoaderConfig = {
    "config": {
        "usage": "perPage"
    }
}

let formData = new FormData();
formData.append("files", input.files[0]);
formData.append("docId", DOC_LOADER_ID);
formData.append("loader", JSON.stringify(overrideLoaderConfig));

async function query(formData) {
    const response = await fetch(
        `http://localhost:3000/api/v1/document-store/upsert/${DOC_STORE_ID}`,
        {
            method: "POST",
            headers: {
                "Authorization": "Bearer <your_api_key_here>"
            },
            body: formData
        }
    )
    const result = await response.json();
    return result;
}

query(formData).then((response) => {
    console.log(response);
});e
{% endtab %} {% endtabs %}
Q: When to use Form Data vs JSON as the body of API request?
A: For Document Loaders that have File Upload functionality, such as PDF, DOCX, TXT, etc, body must be sent as Form Data.
{% hint style="warning" %} Make sure the sent file type is compatible with the expected file type from document loader.
For example, if a PDF File Loader is being used, you should only send .pdf files.
To avoid having separate loaders for different file types, we recommend to use File Loader {% endhint %}
{% tabs %} {% tab title="Python API" %}
import requests
import json

API_URL = "http://localhost:3000/api/v1/document-store/upsert/<storeId>"

# use form data to upload files
form_data = {
    "files": ('my-another-file.pdf', open('my-another-file.pdf', 'rb'))
}

body_data = {
    "docId": <docId>
}

def query(form_data):
    response = requests.post(API_URL, files=form_data, data=body_data)
    print(response)
    return response.json()

output = query(form_data)
print(output)
{% endtab %}
{% tab title="Javascript API" %}
// use FormData to upload files
let formData = new FormData();
formData.append("files", input.files[0]);
formData.append("docId", <docId>);

async function query(formData) {
    const response = await fetch(
        "http://localhost:3000/api/v1/document-store/upsert/<storeId>",
        {
            method: "POST",
            body: formData
        }
    );
    const result = await response.json();
    return result;
}

query(formData).then((response) => {
    console.log(response);
});
{% endtab %} {% endtabs %}
For other Document Loaders nodes without Upload File functionality, the API body is in JSON format:
{% tabs %} {% tab title="Python API" %}
import requests

API_URL = "http://localhost:3000/api/v1/document-store/upsert/<storeId>"

def query(payload):
    response = requests.post(API_URL, json=payload)
    return response.json()

output = query({
    "docId": <docId>
})
print(output)
{% endtab %}
{% tab title="Javascript API" %}
async function query(data) {
    const response = await fetch(
        "http://localhost:3000/api/v1/document-store/upsert/<storeId>",
        {
            method: "POST",
            headers: {
                "Content-Type": "application/json"
            },
            body: JSON.stringify(data)
        }
    );
    const result = await response.json();
    return result;
}

query({
    "docId": <docId>
}).then((response) => {
    console.log(response);
});
{% endtab %} {% endtabs %}
Q: Can I add new metadata?
A: You can provide new metadata by passing the metadata inside the body request:
{
    "docId": <doc-id>,
    "metadata": {
        "source: "abc"
    }
}
Refresh API
Often times you might want to re-process every documents loaders within document store to fetch the latest data, and upsert to vector store, to keep everything in sync. This can be done via Refresh API:
{% tabs %} {% tab title="Python API" %}
import requests

API_URL = "http://localhost:3000/api/v1/document-store/refresh/<storeId>"

def query():
    response = requests.post(API_URL)
    return response.json()

output = query()
print(output)
{% endtab %}
{% tab title="Javascript API" %}
async function query(data) {
    const response = await fetch(
        "http://localhost:3000/api/v1/document-store/refresh/<storeId>",
        {
            method: "POST",
            headers: {
                "Content-Type": "application/json"
            }
        }
    );
    const result = await response.json();
    return result;
}

query().then((response) => {
    console.log(response);
});
{% endtab %} {% endtabs %}
You can also override existing configuration of specific document loader:
{% tabs %} {% tab title="Python API" %}
import requests

API_URL = "http://localhost:3000/api/v1/document-store/refresh/<storeId>"

def query(payload):
    response = requests.post(API_URL, json=payload)
    return response.json()

output = query(
{
    "items": [
        {
            "docId": <docId>,
            "splitter": {
                "name": "recursiveCharacterTextSplitter",
                "config": {
                    "chunkSize": 2000,
                    "chunkOverlap": 100
                }
            }
        }
    ]
}
)
print(output)
{% endtab %}
{% tab title="Javascript API" %}
async function query(data) {
    const response = await fetch(
        "http://localhost:3000/api/v1/document-store/refresh/<storeId>",
        {
            method: "POST",
            headers: {
                "Content-Type": "application/json"
            },
            body: JSON.stringify(data)
        }
    );
    const result = await response.json();
    return result;
}

query({
    "items": [
        {
            "docId": <docId>,
            "splitter": {
                "name": "recursiveCharacterTextSplitter",
                "config": {
                    "chunkSize": 2000,
                    "chunkOverlap": 100
                }
            }
        }
    ]
}).then((response) => {
    console.log(response);
});
{% endtab %} {% endtabs %}
11. Summary
We started by creating a Document Store to organize the LibertyGuard Deluxe Homeowners Policy data. This data was then prepared by uploading, chunking, processing, and upserting it, making it ready for our RAG system.
Advantages of the Document Store:
Document Stores offer several benefits for managing and preparing data for Retrieval Augmented Generation (RAG) systems:
- Organization and Management: They provide a central location for storing, managing, and preparing your data.
- Data Quality: The chunking process helps structure data for accurate retrieval and analysis.
- Flexibility: Document Stores allow for refining and adjusting data as needed, improving the accuracy and relevance of your RAG system.
12. Video Tutorials
RAG Like a Boss - AiMicromind Document Store Tutorial (coming soon)
description: Learn how to customize and embed our chat widget
Embed
You can easily add the chat widget to your website. Just copy the provided widget script and paste it anywhere between the <body> and </body> tags of your HTML file.
 (2) (1) (1).png)
Widget Setup
The following video shows how to inject the widget script into any webpage.
{% embed url="https://github.com/operativestech/AiMicroMind_Platform_2025/assets/26460777/c128829a-2d08-4d60-b821-1e41a9e677d0" %}
Using Specific Version
You can specify the version of aimicromind -embed's web.js to use. For full list of versions: [https://www.npmjs.com/package/aimicromind -embed](https://www.npmjs.com/package/aimicromind -embed)
<script type="module">
  import Chatbot from 'https://cdn.jsdelivr.net/npm/aimicromind-embed@<some-version>/dist/web.js';
  Chatbot.init({
    chatflowid: 'your-chatflowid-here',
    apiHost: 'your-apihost-here',
  })
</script>
{% hint style="warning" %} In aimicromindv2.1.0, we have modified the way streaming works. If your aimicromindversion is lower than that, you might find your embedded chatbot not able to receive messages.
You can either update aimicromind to v2.1.0 and above
Or, if for some reason you prefer not to update AiMicromind , you can specify the latest v1.x.x version of AiMicromind -Embed. Last maintained web.js version is v1.3.14.
For instance:
https://cdn.jsdelivr.net/npm/aimicromind-embed@1.3.14/dist/web.js
{% endhint %}
Chatflow Config
You can pass chatflowConfig JSON object to override existing configuration. This is the same as #override-config in API.
<script type="module">
  import Chatbot from 'https://cdn.jsdelivr.net/npm/aimicromind-embed/dist/web.js';
  Chatbot.init({
    chatflowid: 'your-chatflowid-here',
    apiHost: 'your-apihost-here',
    chatflowConfig: {
      "sessionId": "123",
      "returnSourceDocuments": true
    }
  })
</script>
Observer Config
This allows you to execute code in parent based upon signal observations within the chatbot.
<script type="module">
  import Chatbot from 'https://cdn.jsdelivr.net/npm/aimicromind-embed/dist/web.js';
  Chatbot.init({
    chatflowid: 'your-chatflowid-here',
    apiHost: 'your-apihost-here',
    observersConfig: {
      // User input has changed
      observeUserInput: (userInput) => {
        console.log({ userInput });
      },
      // The bot message stack has changed
      observeMessages: (messages) => {
        console.log({ messages });
      },
      // The bot loading signal changed
      observeLoading: (loading) => {
        console.log({ loading });
      },
    },
  })
</script>
Theme
You can change the full appearance of the embedded chatbot and enable functionalities like tooltips, disclaimers, custom welcome messages, and more using the theme property. This allows you to deeply customize the look and feel of the widget, including:
- Button: Position, size, color, icon, drag-and-drop behavior, and automatic opening.
- Tooltip: Visibility, message text, background color, text color, and font size.
- Disclaimer: Title, message, colors for text, buttons, and background, including a blurred overlay option.
- Chat Window: Title, agent/user message display, welcome/error messages, background color/image, dimensions, font size, starter prompts, HTML rendering, message styling (colors, avatars), text input behavior (placeholder, colors, character limits, sounds), feedback options, date/time display, and footer customization.
- Custom CSS: Directly inject CSS code for even finer control over the appearance, overriding default styles as needed (see the instructions guide below)
<script type="module">
  import Chatbot from 'https://cdn.jsdelivr.net/npm/aimicromind-embed/dist/web.js';
  Chatbot.init({
    chatflowid: 'your-chatflowid-here',
    apiHost: 'your-apihost-here',
    theme: {
      button: {
        backgroundColor: '#3B81F6',
        right: 20,
        bottom: 20,
        size: 48, // small | medium | large | number
        dragAndDrop: true,
        iconColor: 'white',
        customIconSrc: 'https://raw.githubusercontent.com/walkxcode/dashboard-icons/main/svg/google-messages.svg',
        autoWindowOpen: {
          autoOpen: true, //parameter to control automatic window opening
          openDelay: 2, // Optional parameter for delay time in seconds
          autoOpenOnMobile: false, //parameter to control automatic window opening in mobile
        },
      },
      tooltip: {
        showTooltip: true,
        tooltipMessage: 'Hi There 👋!',
        tooltipBackgroundColor: 'black',
        tooltipTextColor: 'white',
        tooltipFontSize: 16,
      },
      disclaimer: {
        title: 'Disclaimer',
        message: 'By using this chatbot, you agree to the <a target="_blank" href="https://chat.aimicromind.com/terms">Terms & Condition</a>',
        textColor: 'black',
        buttonColor: '#3b82f6',
        buttonText: 'Start Chatting',
        buttonTextColor: 'white',
        blurredBackgroundColor: 'rgba(0, 0, 0, 0.4)', //The color of the blurred background that overlays the chat interface
        backgroundColor: 'white',
      },
      customCSS: ``, // Add custom CSS styles. Use !important to override default styles
      chatWindow: {
        showTitle: true,
        showAgentMessages: true,
        title: 'aimicromindBot',
        titleAvatarSrc: 'https://raw.githubusercontent.com/walkxcode/dashboard-icons/main/svg/google-messages.svg',
        welcomeMessage: 'Hello! This is custom welcome message',
        errorMessage: 'This is a custom error message',
        backgroundColor: '#ffffff',
        backgroundImage: 'enter image path or link', // If set, this will overlap the background color of the chat window.
        height: 700,
        width: 400,
        fontSize: 16,
        starterPrompts: ['What is a bot?', 'Who are you?'], // It overrides the starter prompts set by the chat flow passed
        starterPromptFontSize: 15,
        clearChatOnReload: false, // If set to true, the chat will be cleared when the page reloads
        sourceDocsTitle: 'Sources:',
        renderHTML: true,
        botMessage: {
          backgroundColor: '#f7f8ff',
          textColor: '#303235',
          showAvatar: true,
          avatarSrc: 'https://raw.githubusercontent.com/zahidkhawaja/langchain-chat-nextjs/main/public/parroticon.png',
        },
        userMessage: {
          backgroundColor: '#3B81F6',
          textColor: '#ffffff',
          showAvatar: true,
          avatarSrc: 'https://raw.githubusercontent.com/zahidkhawaja/langchain-chat-nextjs/main/public/usericon.png',
        },
        textInput: {
          placeholder: 'Type your question',
          backgroundColor: '#ffffff',
          textColor: '#303235',
          sendButtonColor: '#3B81F6',
          maxChars: 50,
          maxCharsWarningMessage: 'You exceeded the characters limit. Please input less than 50 characters.',
          autoFocus: true, // If not used, autofocus is disabled on mobile and enabled on desktop. true enables it on both, false disables it on both.
          sendMessageSound: true,
          // sendSoundLocation: "send_message.mp3", // If this is not used, the default sound effect will be played if sendSoundMessage is true.
          receiveMessageSound: true,
          // receiveSoundLocation: "receive_message.mp3", // If this is not used, the default sound effect will be played if receiveSoundMessage is true.
        },
        feedback: {
          color: '#303235',
        },
        dateTimeToggle: {
          date: true,
          time: true,
        },
        footer: {
          textColor: '#303235',
          text: 'Powered by',
          company: 'AiMicromind ',
          companyLink: 'https://chat.aimicromind.com/',
        },
      },
    },
  });
</script>
Note: See full configuration list
Custom Code Modification
To modify the full source code of embedded chat widget, follow these steps:
- Fork the AiMicromindChat Embed repository
- Run
yarn installto install the necessary dependencies - Then you can make any code changes
- Run
yarn buildto pick up the changes - Push changes to the forked repository
- You can then use your custom
web.jsas embedded chat like so:
Replace username to your Github username, and forked-repo to your forked repo.
<script type="module">
      import Chatbot from "https://cdn.jsdelivr.net/gh/username/forked-repo/dist/web.js"
      Chatbot.init({
          chatflowid: "your-chatflowid-here",
          apiHost: "your-apihost-here",
      })
</script>
 (1) (2).png)
<script type="module">
      import Chatbot from "https://cdn.jsdelivr.net/gh/HenryHengZJ/AiMicromind ChatEmbed-Test/dist/web.js"
      Chatbot.init({
          chatflowid: "your-chatflowid-here",
          apiHost: "your-apihost-here",
      })
</script>
{% hint style="info" %} An alternative to jsdelivr is unpkg. Here is an example:
https://unpkg.com/aimicromind-embed/dist/web.js
{% endhint %}
Custom CSS Modification
You can now directly add custom CSS to style your embedded chat widget, eliminating the need for custom web.js files (requires v2.0.8 or later). This allows you to:
- Give each embedded chatbot a unique look and feel
- Use the official
web.js—no more custom builds or hosting are needed for styling - Update styles instantly
Here's how to use it:
<script src="https://cdn.jsdelivr.net/gh/AiMicromind/AiMicromindChatEmbed@main/dist/web.js"></script>
<script>
  Chatbot.init({
    chatflowid: "your-chatflowid-here",
    apiHost: "your-apihost-here",
    theme: {
      // ... other theme settings
      customCSS: `
        /* Your custom CSS here */
        /* Use !important to override default styles */
      `,
    }
  });
</script>
CORS
When using embedded chat widget, there's chance that you might face CORS issue like:
{% hint style="danger" %} Access to fetch at 'https://<your-aimicromind.com>/api/v1/prediction/' from origin 'https://<your-aimicromind.com>' has been blocked by CORS policy: No 'Access-Control-Allow-Origin' header is present on the requested resource. {% endhint %}
To fix it, specify the following environment variables:
CORS_ORIGINS=*
IFRAME_ORIGINS=*
For example, if you are using npx aimicromind start
npx aimicromind start --CORS_ORIGINS=* --IFRAME_ORIGINS=*
If using Docker, place the env variables inside AiMicromind /docker/.env
If using local Git clone, place the env variables inside AiMicromind /packages/server/.env
Video Tutorials (Coming soon)
Monitoring
AiMicromind has native support for Prometheus with Grafana and OpenTelemetry. However, only high-level metrics such as API requests, counts of flows/predictions are tracked. Refer here for the lists of counter metrics. For details node by node observability, we recommend using Analytic.
Prometheus
Prometheus is an open-source monitoring and alerting solution.
Before setting up Prometheus, configure the following env variables in AiMicromind :
ENABLE_METRICS=true
METRICS_PROVIDER=prometheus
METRICS_INCLUDE_NODE_METRICS=true
After Prometheus is installed, run it using a configuration file. AiMicromind provides a default configuration file that can be found here.
Remember to have aimicromind instance also running. You can open browser and navigate to port 9090. From the dashboard, you should be able to see the metric endpoint - /api/v1/metrics is now live.
.png)
By default, /api/v1/metrics is available for Prometheus to pull the metrics from.
.png)
Grafana
Prometheus collects rich metrics and provides a powerful querying language; Grafana transforms metrics into meaningful visualizations.
Grafana can be installed in various ways. Refer to the guide.
Grafana by default will expose port 9091:
.png)
On the left side bar, click Add new connection, and select Prometheus:
.png)
Since our Prometheus is serving at port 9090:
.png)
Scroll to the bottom and test the connection:
.png)
Take note of the data source ID shown in the toolbar, we'll need this for creating dashboards:
.png)
Now that connection is added successfully, we can start adding dashboard. From the left side bar, click Dashboards, and Create Dashboard.
AiMicromind provides 2 template dashboards:
- grafana.dashboard.app.json.txt: API metrics such as number of chatflows/agentflows, predictions count, tools, assistant, upserted vectors, etc.
- grafana.dashboard.server.json.txt: metrics of the aimicromindnode.js instance such as heap, CPU, RAM usage
If you are using templates above, find and replace all occurence of cds4j1ybfuhogb with the data source ID you created and saved earlier.
.png)
You can also choose to import first then edit the JSON later:
.png)
Now, try to perform some actions on the AiMicromind , you should be able to see the metrics displayed:
.png)
.png)
OpenTelemetry
OpenTelemetry is an open source framework for creating and managing telemetry data. To enable OTel, configure the following env variables in AiMicromind :
ENABLE_METRICS=true
METRICS_PROVIDER=open_telemetry
METRICS_INCLUDE_NODE_METRICS=true
METRICS_OPEN_TELEMETRY_METRIC_ENDPOINT=http://localhost:4318/v1/metrics
METRICS_OPEN_TELEMETRY_PROTOCOL=http # http | grpc | proto (default is http)
METRICS_OPEN_TELEMETRY_DEBUG=true
Next, we need OpenTelemetry Collector to receive, process and export telemetry data. AiMicromind provides a [docker compose file](https://github.com/AiMicromind AI/AiMicromind /blob/main/metrics/otel/compose.yaml) which can be used to start the collector container.
cd AiMicromind
cd metrics && cd otel
docker compose up -d
The collector will be using the otel.config.yml file under the same directory for configurations. Currently only Datadog and Prometheus are supported, refer to the Open Telemetry documentation to configure different APM tools such as Zipkin, Jeager, New Relic, Splunk and others.
Make sure to replace with the necessary API key for the exporters within the yml file.
description: Learn how aimicromind streaming works
Streaming
If streaming is set when making prediction, tokens will be sent as data-only server-sent events as they become available.
Using Python/TS Library
aimicromindprovides 2 libraries:
- Python:
pip install aimicromind - Typescript:
npm install aimicromind -sdk
{% tabs %} {% tab title="Python" %}
from aimicromind import AiMicromind   , PredictionData

def test_streaming():
    client = AiMicromind()

    # Test streaming prediction
    completion = client.create_prediction(
        PredictionData(
            chatflowId="<chatflow-id>",
            question="Tell me a joke!",
            streaming=True
        )
    )

    # Process and print each streamed chunk
    print("Streaming response:")
    for chunk in completion:
        # {event: "token", data: "hello"}
        print(chunk)


if __name__ == "__main__":
    test_streaming()
{% endtab %}
{% tab title="Typescript" %}
import { AiMicromind   Client } from 'aimicromind   -sdk'

async function test_streaming() {
  const client = new AiMicromindClient({ baseUrl: 'http://localhost:3000' });

  try {
    // For streaming prediction
    const prediction = await client.createPrediction({
      chatflowId: '<chatflow-id>',
      question: 'What is the capital of France?',
      streaming: true,
    });

    for await (const chunk of prediction) {
        // {event: "token", data: "hello"}
        console.log(chunk);
    }

  } catch (error) {
    console.error('Error:', error);
  }
}

// Run streaming test
test_streaming()
{% endtab %}
{% tab title="cURL" %}
curl https://localhost:3000/api/v1/predictions/{chatflow-id} \
  -H "Content-Type: application/json" \
  -d '{
    "question": "Hello world!",
    "streaming": true
  }'
{% endtab %} {% endtabs %}
event: token
data: Once upon a time...
A prediction's event stream consists of the following event types:
| Event | Description |
|---|---|
| start | The start of streaming |
| token | Emitted when the prediction is streaming new token output |
| error | Emitted when the prediction returns an error |
| end | Emitted when the prediction finishes |
| metadata | All metadata such as chatId, messageId, of the related flow. Emitted after all tokens have finished streaming, and before end event |
| sourceDocuments | Emitted when the flow returns sources from vector store |
| usedTools | Emitted when the flow used tools |
Streamlit App
https://github.com/HenryHengZJ/aimicromind-streamlit
description: Learn how aimicromind collects anonymous app usage information
Telemetry
AiMicromind open source repository has a built-in telemetry that collects anonymous usage information. This helps us to better understand usage of AiMicromind , enabling us to prioritize our efforts towards developing new features and resolving issues, and enhancing the performance and stability of AiMicromind .
{% hint style="warning" %} Important - We never collect any confidential information about the node input/output, messages, or any sort of credentials and variables. Only events are being sent. {% endhint %}
You can verify these claims by finding all locations telemetry.sendTelemetry is called from the source code.
| Event | Metadata |
|---|---|
| chatflow_created | |
| tool_created | |
| assistant_created | |
| vector_upserted | |
| prediction_sent | |
Disable Telemetry
Users can disable telemetry by setting DISABLE_AiMicromind_TELEMETRY to true in .env file.
description: Learn how to use upload images, audio, and other files
Uploads
AiMicromind lets you upload images, audio, and other files from the chat. In this section, you'll learn how to enable and use these features.
Image
Certain chat models allow you to input images. Always refer to the official documentation of the LLM to confirm if the model supports image input.
- ChatOpenAI
- AzureChatOpenAI
- ChatAnthropic
- AWSChatBedrock
- ChatGoogleGenerativeAI
- ChatOllama
- Google Vertex AI
{% hint style="warning" %} Image processing only works with certain chains/agents in Chatflow.
LLMChain, Conversation Chain, ReAct Agent, Conversational Agent, Tool Agent {% endhint %}
If you enable Allow Image Upload, you can upload images from the chat interface.
To upload images with the API:
{% tabs %} {% tab title="Python" %}
import requests
API_URL = "http://localhost:3000/api/v1/prediction/<chatflowid>"

def query(payload):
    response = requests.post(API_URL, json=payload)
    return response.json()

output = query({
    "question": "Can you describe the image?",
    "uploads": [
        {
            "data": "data:image/png;base64,iVBORw0KGgdM2uN0", # base64 string or url
            "type": "file", # file | url
            "name": "AiMicromind     .png",
            "mime": "image/png"
        }
    ]
})
{% endtab %}
{% tab title="Javascript" %}
async function query(data) {
    const response = await fetch(
        "http://localhost:3000/api/v1/prediction/<chatflowid>",
        {
            method: "POST",
            headers: {
                "Content-Type": "application/json"
            },
            body: JSON.stringify(data)
        }
    );
    const result = await response.json();
    return result;
}

query({
    "question": "Can you describe the image?",
    "uploads": [
        {
            "data": "data:image/png;base64,iVBORw0KGgdM2uN0", //base64 string or url
            "type": "file", // file | url
            "name": "AiMicromind     .png",
            "mime": "image/png"
        }
    ]
}).then((response) => {
    console.log(response);
});
{% endtab %} {% endtabs %}
Audio
In the Chatflow Configuration, you can select a speech-to-text module. Supported integrations include:
- OpenAI
- AssemblyAI
- LocalAI
When this is enabled, users can speak directly into the microphone. Their speech is be transcribed into text.
To upload audio with the API:
{% tabs %} {% tab title="Python" %}
import requests
API_URL = "http://localhost:3000/api/v1/prediction/<chatflowid>"

def query(payload):
    response = requests.post(API_URL, json=payload)
    return response.json()

output = query({
    "uploads": [
        {
            "data": "data:audio/webm;codecs=opus;base64,GkXf", # base64 string
            "type": "audio",
            "name": "audio.wav",
            "mime": "audio/webm"
        }
    ]
})
{% endtab %}
{% tab title="Javascript" %}
async function query(data) {
    const response = await fetch(
        "http://localhost:3000/api/v1/prediction/<chatflowid>",
        {
            method: "POST",
            headers: {
                "Content-Type": "application/json"
            },
            body: JSON.stringify(data)
        }
    );
    const result = await response.json();
    return result;
}

query({
    "uploads": [
        {
            "data": "data:audio/webm;codecs=opus;base64,GkXf", // base64 string
            "type": "audio",
            "name": "audio.wav",
            "mime": "audio/webm"
        }
    ]
}).then((response) => {
    console.log(response);
});
{% endtab %} {% endtabs %}
Files
You can upload files in two ways:
- Retrieval augmented generation (RAG) file uploads
- Full file uploads
When both options are on, full file uploads take precedence.
RAG File Uploads
You can upsert uploaded files on the fly to the vector store. To enable file uploads, make sure you meet these prerequisites:
- You must include a vector store that supports file uploads in the chatflow.
- If you have multiple vector stores in a chatflow, you can only turn on file upload for one vector store at a time.
- You must connect at least one document loader node to the vector store's document input.
- Supported document loaders:
 (1) (1) (1) (1) (1) (1).png)
You can upload one or more files in the chat:
 (1) (1) (1).png)
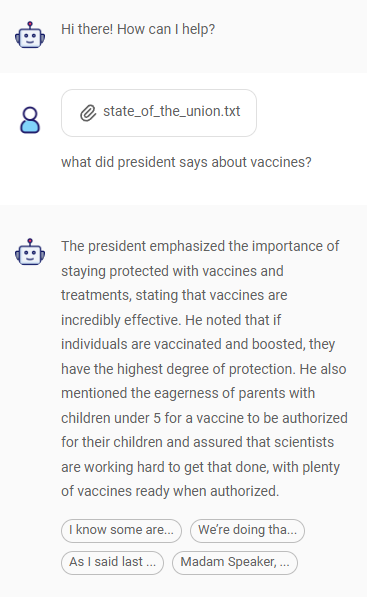
Here's how it works:
- The metadata for uploaded files is updated with the chatId.
- This associates the file with the chatId.
- When querying, an OR filter applies:
- Metadata contains
aimicromind_chatId, and the value is the current chat session ID - Metadata does not contain
aimicromind_chatId
An example of a vector embedding upserted on Pinecone:
 (1) (1).png)
To do this with the API, follow these two steps:
- Use the Vector Upsert API with
formDataandchatId:
{% tabs %} {% tab title="Python" %}
import requests

API_URL = "http://localhost:3000/api/v1/vector/upsert/<chatflowid>"

# Use form data to upload files
form_data = {
    "files": ("state_of_the_union.txt", open("state_of_the_union.txt", "rb"))
}

body_data = {
    "chatId": "some-session-id"
}

def query(form_data):
    response = requests.post(API_URL, files=form_data, data=body_data)
    print(response)
    return response.json()

output = query(form_data)
print(output)
{% endtab %}
{% tab title="Javascript" %}
// Use FormData to upload files
let formData = new FormData();
formData.append("files", input.files[0]);
formData.append("chatId", "some-session-id");

async function query(formData) {
    const response = await fetch(
        "http://localhost:3000/api/v1/vector/upsert/<chatflowid>",
        {
            method: "POST",
            body: formData
        }
    );
    const result = await response.json();
    return result;
}

query(formData).then((response) => {
    console.log(response);
});
{% endtab %} {% endtabs %}
- Use the Prediction API with
uploadsand thechatIdfrom step 1:
{% tabs %} {% tab title="Python" %}
import requests
API_URL = "http://localhost:3000/api/v1/prediction/<chatflowid>"

def query(payload):
    response = requests.post(API_URL, json=payload)
    return response.json()

output = query({
    "question": "What is the speech about?",
    "chatId": "same-session-id-from-step-1",
    "uploads": [
        {
            "data": "data:text/plain;base64,TWFkYWwcy4=",
            "type": "file:rag",
            "name": "state_of_the_union.txt",
            "mime": "text/plain"
        }
    ]
})
{% endtab %}
{% tab title="Javascript" %}
async function query(data) {
    const response = await fetch(
        "http://localhost:3000/api/v1/prediction/<chatflowid>",
        {
            method: "POST",
            headers: {
                "Content-Type": "application/json"
            },
            body: JSON.stringify(data)
        }
    );
    const result = await response.json();
    return result;
}

query({
    "question": "What is the speech about?",
    "chatId": "same-session-id-from-step-1",
    "uploads": [
        {
            "data": "data:text/plain;base64,TWFkYWwcy4=",
            "type": "file:rag",
            "name": "state_of_the_union.txt",
            "mime": "text/plain"
        }
    ]
}).then((response) => {
    console.log(response);
});
{% endtab %} {% endtabs %}
Full File Uploads
With RAG file uploads, you can't work with structured data like spreadsheets or tables, and you can't perform full summarization due to lack of full context. In some cases, you might want to include all the file content directly in the prompt for an LLM, especially with models like Gemini and Claude that have longer context windows. This research paper is one of many that compare RAG with longer context windows.
To enable full file uploads, go to Chatflow Configuration, open the File Upload tab, and click the switch:
 (1) (1).png)
You can see the File Attachment button in the chat, where you can upload one or more files. Under the hood, the File Loader processes each file and converts it into text.
 (1) (1) (1).png)
Note that if your chatflow uses a Chat Prompt Template node, an input must be created from Format Prompt Values to pass the file data. The specified input name (e.g. {file}) should be included in the Human Message field.

To upload files with the API:
{% tabs %} {% tab title="Python" %}
import requests
API_URL = "http://localhost:3000/api/v1/prediction/<chatflowid>"

def query(payload):
    response = requests.post(API_URL, json=payload)
    return response.json()

output = query({
    "question": "What is the data about?",
    "chatId": "some-session-id",
    "uploads": [
        {
            "data": "data:text/plain;base64,TWFkYWwcy4=",
            "type": "file:full",
            "name": "state_of_the_union.txt",
            "mime": "text/plain"
        }
    ]
})
{% endtab %}
{% tab title="Javascript" %}
async function query(data) {
    const response = await fetch(
        "http://localhost:3000/api/v1/prediction/<chatflowid>",
        {
            method: "POST",
            headers: {
                "Content-Type": "application/json"
            },
            body: JSON.stringify(data)
        }
    );
    const result = await response.json();
    return result;
}

query({
    "question": "What is the data about?",
    "chatId": "some-session-id",
    "uploads": [
        {
            "data": "data:text/plain;base64,TWFkYWwcy4=",
            "type": "file:full",
            "name": "state_of_the_union.txt",
            "mime": "text/plain"
        }
    ]
}).then((response) => {
    console.log(response);
});
{% endtab %} {% endtabs %}
As you can see in the examples, uploads require a base64 string. To get a base64 string for a file, use the Create Attachments API.
Difference between Full & RAG Uploads
Both Full and RAG (Retrieval-Augmented Generation) file uploads serve different purposes.
- Full File Upload: This method parses the entire file into a string and sends it to the LLM (Large Language Model). It's beneficial for summarizing the document or extracting key information. However, with very large files, the model might produce inaccurate results or "hallucinations" due to token limitations.
- RAG File Upload: Recommended if you aim to reduce token costs by not sending the entire text to the LLM. This approach is suitable for Q&A tasks on the documents but isn't ideal for summarization since it lacks the full document context. This approach might takes longer time because of the upsert process.
description: Learn how to use variables in AiMicromind
Variables
AiMicromind allow users to create variables that can be used in the nodes. Variables can be Static or Runtime.
Static
Static variable will be saved with the value specified, and retrieved as it is.
 (1) (1) (1).png)
Runtime
Value of the variable will be fetched from .env file using process.env
 (1) (1) (1) (1) (1) (1) (1) (1) (1) (1) (1) (1) (1) (1) (1) (1) (1) (1) (1) (1).png)
Override or setting variable through API
In order to override variable value, user must explicitly enable it from Chatflow Configuration -> Security tab:
 (1).png)
If there is an existing variable created, variable value provided in the API will override the existing value.
{
    "question": "hello",
    "overrideConfig": {
        "vars": {
            "var": "some-override-value"
        }
    }
}
Using Variables
Variables can be used by the nodes in AiMicromind. For instance, a variable named character is created:
.png)
We can then use this variable as $vars.<variable-name> in the Function of the following nodes:
.png)
Besides, user can also use the variable in text input of any node with the following format:
{{$vars.<variable-name>}}
For example, in Agent System Message:
 (1) (1) (2) (1).png)
In Prompt Template:
.png)
Resources
Workspaces
{% hint style="info" %} Workspaces is only available for Enterprise for now. Coming soon to Cloud Pro plan {% endhint %}
Upon your initial login, a default workspace will be automatically generated for you. Workspaces serve to partition resources among various teams or business units. Inside each workspace, Role-Based Access Control (RBAC) is used to manage permissions and access, ensuring users have access only to the resources and settings required for their role.
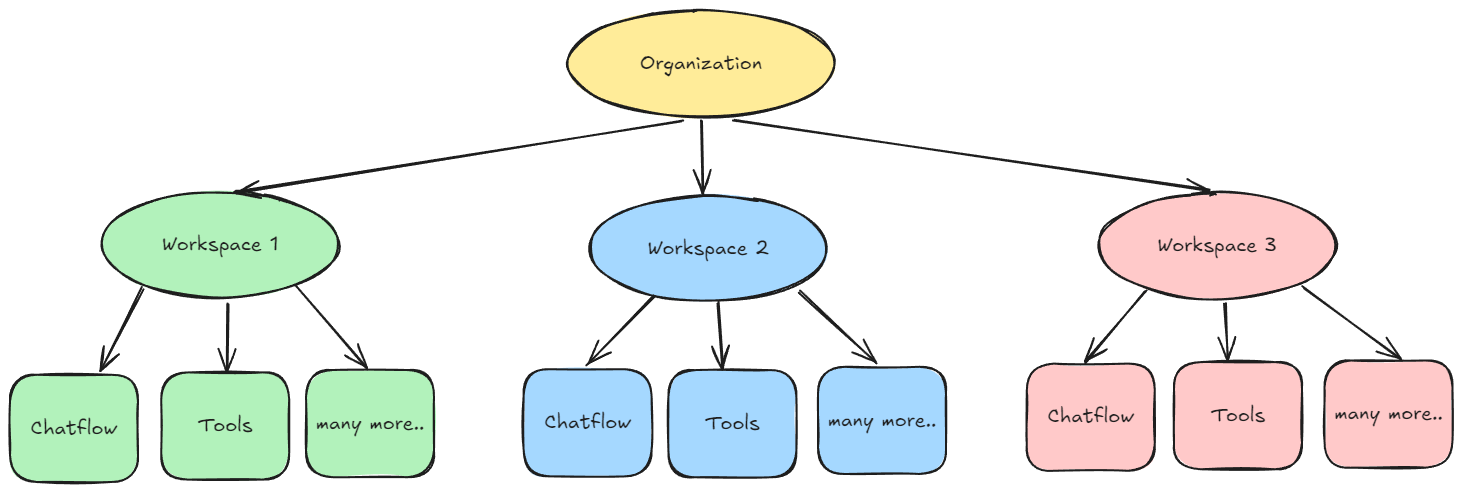
Setting up Admin Account
For self-hosted enterprise, following env variables must be set
JWT_AUTH_TOKEN_SECRET
JWT_REFRESH_TOKEN_SECRET
JWT_ISSUER
JWT_AUDIENCE
JWT_TOKEN_EXPIRY_IN_MINUTES
JWT_REFRESH_TOKEN_EXPIRY_IN_MINUTES
PASSWORD_RESET_TOKEN_EXPIRY_IN_MINS
PASSWORD_SALT_HASH_ROUNDS
TOKEN_HASH_SECRET
By default, new installation of aimicromind will require an admin setup, similar to how you have to setup a root user for your database initially.
 (1) (1).png)
After setting up, user will be brought to aimicromind dashboard. From the left side bar, you will see User & Workspace Management section. A default workspace was automatically created.
 (1) (1) (1) (1).png)
Creating Workspace
To create a new Workspace, click Add New:
 (1).png)
You will see yourself added as the Organization Admin in the workspace you created.
 (1).png)
To invite new users to the workspace, you need to create a Role first.
Creating Role
Navigate to Roles in the left side bar, and click Add Role:
 (1).png)
User can specify granular control of permissions for each resources. The only exceptions are the resources in User & Workspace Management (Roles, Users, Workspaces, Login Activity). These are only available for Account Admin for now.
Here, we create an editor role which has access to everything. And another role with view-only permissions.
 (1).png)
Invite User
For self-hosted enterprise, the following env variables must be set
INVITE_TOKEN_EXPIRY_IN_HOURS
SMTP_HOST
SMTP_PORT
SMTP_USER
SMTP_PASSWORD
Navigate to Users in left side bar, you will see yourself as the account admin. This is indicated by the person icon with a star:
 (1).png)
Click Invite User, and enter email to be invited, the workspace to be assigned, and the role as well.
Click Send Invite. The invited email will receive an invitation:
 (1).png)
Upon clicking the invitation link, invited user will be brought to a Sign Up page.
 (1).png)
After signed up and logged in as invited user, you will be in the workspace assigned, and there will be no User & Workspace Management section:
 (1).png)
If you are invited into multiple workspaces, you can switch to different workspaces from the top right dropdown button. Here we are assigned to Workspace 2 with view only permission. You can notice the Add New button for Chatflow is no longer visible. This ensure user can only view, not create, update nor delete. The same RBAC rules apply for API as well.
 (1).png)
Now, back to Account Admin, you will be able to see the users invited, their status, roles, and active workspace:
 (1).png)
Account admin can also modify the settings for other users:
 (1).png)
Login Activity
Admin will be able to see every login and logout from all users:
 (1).png)
Creating item in Workspace
Every items created in a workspace, are isolated from another workspace. Workspaces are a way to logically group users and resources within an organization, ensuring separate trust boundaries for resource management and access control. It is recommended to create distinct workspaces for each team.
Here, we create a Chatflow named Chatflow1 in Workspace1:
 (1).png)
When we switch to Workspace2, Chatflow1 will not be visible. This applies to every resources such as Agentflows, Tools, Assistants, etc.
 (1).png)
The diagram below illustrates the relationship between organizations, workspaces, and the various resources associated with and contained within a workspace.
Sharing Credential
You can share credential to other workspaces. This allow users to reuse same set of credentials in different workspaces.
After creating a credential, Account Admin or user with Share Credential permission from the RBAC will be able to click Share:
 (1).png)
User can select the workspaces to share the credential with:
 (1).png)
Now, switch to the workspace where the credential was shared, you will see the Shared Credential. User is not able to edit shared credential.
 (1).png)
Deleting a Workspace
Currently only Account Admin can delete workspaces. By default, you are not able to delete a workspace if there are still users within that workspace.
.png)
You will need to unlink all of the invited users first. This allow flexibility in case you just want to remove certain users from a workspace. Note that Organization Owner who created the workspace is not able to be unlinked from a workspace.
.png)
After unlinking invited users, and the only user left within the workspace is the Organization Owner, delete button is now clickable:
.png)
Deleting a workspace is an irreversible action and will cascade delete all items within that workspace. You will see a warning box:
.png)
After deleting a workspace, user will fallback to the Default workspace. Default workspace that was automatically created at the start is not able to be deleted.
Evaluations
{% hint style="info" %} Evaluations are only available for Cloud and Enterprise plan {% endhint %}
Evaluations help you monitor and understand the performance of your Chatflow/Agentflow application. On the high level, an evaluation is a process that takes a set of inputs and corresponding outputs from your Chatflow/Agentflow, and generates scores. These scores can be derived by comparing outputs to reference results, such as through string matching, numeric comparison, or even leveraging an LLM as a judge. These evaluations are conducted using Datasets and Evaluators.
Datasets
Datasets are the inputs that will be used to run your Chatflow/Agentflow, along with the corresponding outputs for comparison. User can add the input and anticipated output manually, or upload a CSV file with 2 columns: Input and Output.
.png)
| Input | Output |
|---|---|
| What is the capital of UK | Capital of UK is London |
| How many days are there in a year | There are 365 days in a year |
Evaluators
Evaluators are like unit tests. During an evaluation, the inputs from Datasets are ran on the selected flows and the outputs are evaluated using selected evaluators. There are 3 types of evaluators:
- Text Based: string based checking:
- Contains Any
- Contains All
- Does Not Contains Any
- Does Not Contains All
- Starts With
- Does Not Starts With
.png)
- Numeric Based: numbers type checking:
- Total Tokens
- Prompt Tokens
- Completion Tokens
- API Latency
- LLM Latency
- Chatflow Latency
- Agentflow Latency (coming)
- Output Characters Length
.png)
- LLM Based: using another LLM to grade the output
- Hallucination
- Correctness
.png)
Evaluations
Now that we have Datasets and Evaluators prepared, we can start running an evaluation.
1.) Select dataset and chatflow to evaluate. You can select multiple datasets and chatflows. Using the example below, every inputs from Dataset1 will be ran against 2 chatflows. Since Dataset1 has 2 inputs, a total of 4 outputs will be produced and evaluated.
.png)
2.) Select the evaluators. Only string based and numeric based evaluators are available to be selected at this stage.
.png)
3.) (Optional) Select LLM Based evaluator. Start Evaluation:
.png)
4.) Wait for evaluation to be completed:
.png)
5.) After evaluation is completed, click the graph icon at the right side to view the details:
.png)
The 3 charts above show the summary of the evaluation:
- Pass/fail rate
- Average prompt and completion tokens used
- Average latency of the request
Table below the charts shows the details of each execution.
.png)
.png)
Re-run evaluation
When the flows used on evaluation have been updated/modified, a warning message will be shown:
.png)
You can re-run the same evaluation using the Re-Run Evaluation button at the top right corner. You will be able to see the different versions:
.png)
You can also view and compare the results from different versions:
.png)
Video Tutorial (Coming soon)
description: Learn how to set up and run aimicromind instances
Configuration
This section will guide you through various configuration options to customize your aimicromind instances for development, testing, and production environments.
We'll also provide in-depth guides for deploying aimicromind on different Platform as a Service (PaaS) options, ensuring a smooth and successful deployment.
Guides
description: Learn how to secure your aimicromindInstances
Auth
This section guides you through configuring security with AiMicromind, focusing on authentication mechanisms at the application and chatflow levels.
By implementing robust authentication, you can protect your aimicromind instances and ensure only authorized users can access and interact with your chatflows.
Supported Methods
description: Learn how to set up app-level access control for your aimicromindinstances
App Level
App level authorization protects your aimicromindinstance by username and password. This protects your apps from being accessible by anyone when deployed online.
 (1) (1) (1) (1) (1) (1) (1) (1) (1) (1) (1) (1) (1) (1) (1) (1) (1) (1) (1) (1) (1) (1).png)
How to Set Username & Password
Npm
- Install AiMicromind
npm install -g aimicromind
- Start aimicromindwith username & password
npx aimicromind start --AIMICROMIND_USERNAME=user --AIMICROMIND_PASSWORD=1234
Docker
- Navigate to
dockerfolder
cd docker
- Create
.envfile and specify thePORT,AIMICROMIND _USERNAME, andAIMICROMIND _PASSWORD
PORT=3000
AIMICROMIND_USERNAME=user
AIMICROMIND_PASSWORD=1234
- Pass
AIMICROMIND _USERNAMEandAIMICROMIND _PASSWORDto thedocker-compose.ymlfile:
environment:
    - PORT=${PORT}
    - AIMICROMIND_USERNAME=${AIMICROMIND_USERNAME}
    - AIMICROMIND_PASSWORD=${AIMICROMIND_PASSWORD}
docker compose up -d- Open http://localhost:3000
- You can bring the containers down by
docker compose stop
Git clone
To enable app level authentication, add AIMICROMIND _USERNAME and AIMICROMIND _PASSWORD to the .env file in packages/server:
AIMICROMIND_USERNAME=user
AIMICROMIND_PASSWORD=1234
description: Learn how to set up chatflow-level access control for your aimicromindinstances
Chatflow Level
After you have a chatflow / agentflow constructed, by default, your flow is available to public. Anyone that has access to the Chatflow ID is able to run prediction through Embed or API.
In cases where you might want to allow certain people to be able to access and interact with it, you can do so by assigning an API key for that specific chatflow.
API Key
In dashboard, navigate to API Keys section, and you should be able to see a DefaultKey created. You can also add or delete any keys.
 (1) (1) (1) (1) (1) (1) (1) (1) (1) (1) (1).png)
Chatflow
Navigate to the chatflow, and now you can select the API Key you want to use to protect the chatflow.
 (1) (1) (1) (1) (1) (1) (1) (1) (1) (1) (1) (1) (1) (1) (1) (1) (1) (1) (1) (1).png)
After assigning an API key, one can only access the chatflow API when the Authorization header is provided with the correct API key specified during a HTTP call.
"Authorization": "Bearer <your-api-key>"
An example of calling the API using POSTMAN
 (1) (1) (1) (1) (1) (1) (1) (1) (1) (1) (1) (1) (1) (1) (1) (1) (1) (1) (1) (1) (1) (1) (1) (1) (1) (1) (1) (1) (1) (1).png)
You can specify the location where the api keys are stored by specifying APIKEY_PATH env variables. Read more environment-variables.md
description: Learn how to connect your aimicromind instance to a database
Databases
Setup
aimicromind supports 4 database types:
- SQLite
- MySQL
- PostgreSQL
- MariaDB
SQLite (Default)
SQLite will be the default database. These databases can be configured with following env variables:
DATABASE_TYPE=sqlite
DATABASE_PATH=/root/.aimicromind #your preferred location
A database.sqlite file will be created and saved in the path specified by DATABASE_PATH. If not specified, the default store path will be in your home directory -> .aimicromind
Note: If none of the env variables is specified, SQLite will be the fallback database choice.
MySQL
DATABASE_TYPE=mysql
DATABASE_PORT=3306
DATABASE_HOST=localhost
DATABASE_NAME=aimicromind
DATABASE_USER=user
DATABASE_PASSWORD=123
PostgreSQL
DATABASE_TYPE=postgres
DATABASE_PORT=5432
DATABASE_HOST=localhost
DATABASE_NAME=aimicromind
DATABASE_USER=user
DATABASE_PASSWORD=123
PGSSLMODE=require
MariaDB
DATABASE_TYPE="mariadb"
DATABASE_PORT="3306"
DATABASE_HOST="localhost"
DATABASE_NAME="aimicromind"
DATABASE_USER="aimicromind"
DATABASE_PASSWORD="mypassword"
How to use aimicromind databases SQLite and MySQL/MariaDB (coming soon)
Backup
- Shut down AiMicromind application.
- Ensure that the database connection to other applications is turned off.
- Backup your database.
- Test backup database.
SQLite
-
Rename file name.
Windows:
rename "DATABASE_PATH\database.sqlite" "DATABASE_PATH\BACKUP_FILE_NAME.sqlite"Linux:
mv DATABASE_PATH/database.sqlite DATABASE_PATH/BACKUP_FILE_NAME.sqlite -
Backup database.
Windows:
copy DATABASE_PATH\BACKUP_FILE_NAME.sqlite DATABASE_PATH\database.sqliteLinux:
cp DATABASE_PATH/BACKUP_FILE_NAME.sqlite DATABASE_PATH/database.sqlite -
Test backup database by running AiMicromind.
PostgreSQL
-
Backup database.
pg_dump -U USERNAME -h HOST -p PORT -d DATABASE_NAME -f /PATH/TO/BACKUP_FILE_NAME.sql -
Enter database password.
-
Create test database.
psql -U USERNAME -h HOST -p PORT -d TEST_DATABASE_NAME -f /PATH/TO/BACKUP_FILE_NAME.sql -
Test the backup database by running aimicromind with the
.envfile modified to point to the backup database.
MySQL & MariaDB
-
Backup database.
mysqldump -u USERNAME -p DATABASE_NAME > BACKUP_FILE_NAME.sql -
Enter database password.
-
Create test database.
mysql -u USERNAME -p TEST_DATABASE_NAME < BACKUP_FILE_NAME.sql -
Test the backup database by running aimicromind with the
.envfile modified to point to the backup database.
description: Learn how to deploy aimicromind to the cloud
Deployment
aimicromind is designed with a platform-agnostic architecture, ensuring compatibility with a wide range of deployment environments to suit your infrastructure needs.
Local Machine
To deploy aimicromind locally, follow our Get Started guide.
Modern Cloud Providers
Modern cloud platforms prioritize automation and focus on developer workflows, simplifying cloud management and ongoing maintenance.
This reduces the technical expertise needed, but may limit the level of customization you have over the underlying infrastructure.
Established Cloud Providers
Established cloud providers, on the other hand, require a higher level of technical expertise to manage and optimize for your specific needs.
This complexity, however, also grants greater flexibility and control over your cloud environment.
description: Learn how to deploy aimicromind on AWS
AWS
Prerequisite
This requires some basic understanding of how AWS works.
Two options are available to deploy aimicromind on AWS:
Deploy on ECS using CloudFormation
CloudFormation template is available here: https://gist.github.com/MrHertal/549b31a18e350b69c7200ae8d26ed691
It deploys aimicromind on an ECS cluster exposed through ELB.
It was inspired by this reference architecture: https://github.com/aws-samples/ecs-refarch-cloudformation
Feel free to edit this template to adapt things like aimicromind image version, environment variables etc.
Example of command to deploy aimicromind using the AWS CLI:
aws cloudformation create-stack --stack-name aimicromind--template-body file://aimicromind-cloudformation.yml --capabilities CAPABILITY_IAM
After deployment, the URL of your aimicromind application is available in the CloudFormation stack outputs.
Deploy on ECS using Terraform
The Terraform files (variables.tf, main.tf) are available in this GitHub repository: terraform-aimicromind-setup.
This setup deploys aimicromind on an ECS cluster exposed through an Application Load Balancer (ALB). It is based on AWS best practices for ECS deployments.
You can modify the Terraform template to adjust:
- AiMicromind image version
- Environment variables
- Resource configurations (CPU, memory, etc.)
Example Commands for Deployment:
- Initialize Terraform:
terraform init
terraform apply
terraform destroy
Launch EC2 Instance
- In the EC2 dashboard, click Launch Instance
 (1) (1) (1) (1).png)
- Scroll down and Create new key pair if you don't have one
 (1) (1) (1) (1) (1) (1) (1) (1) (1) (1) (1) (1) (1) (1) (1) (1) (1) (1) (1) (1) (1) (1) (1) (1) (1) (1) (1) (1) (1).png)
- Fill in your preferred key pair name. For Windows, we will use
.ppkand PuTTY to connect to the instance. For Mac and Linux, we will use.pemand OpenSSH
 (2) (1).png)
- Click Create key pair and select a location path to save the
.ppkfile - Open the left side bar, and open a new tab from Security Groups. Then Create security group
 (1) (1) (1) (1).png)
- Fill in your preferred security group name and description. Next, add the following to Inbound Rules and Create security group
 (1) (1) (1) (1).png)
- Back to the first tab (EC2 Launch an instance) and scroll down to Network settings. Select the security group you've just created
 (1) (1) (1) (1) (1) (1) (1) (1) (1).png)
- Click Launch instance. Navigate back to EC2 Dashboard, after few mins we should be able to see a new instance up and running 🎉
 (1) (1) (1) (1) (1).png)
How to Connect to your instance (Windows)
- For Windows, we are going to use PuTTY. You can download one from here.
- Open PuTTY and fill in the HostName with your instance's Public IPv4 DNS name
 (1) (1) (1) (1) (1) (1) (1) (1) (1).png)
- From the left hand side bar of PuTTY Configuration, expand SSH and click on Auth. Click Browse and select the
.ppkfile you downloaded earlier.
 (1) (1).png)
- Click Open and Accept the pop up message
 (1) (1) (1) (1).png)
- Then login as
ec2-user
 (1) (1) (1) (1) (1) (1) (1) (1) (1) (1) (1) (1) (1).png)
- Now you are connected to the EC2 instance
How to Connect to your instance (Mac and Linux)
- Open the Terminal application on your Mac/Linux.
- (Optional) Set the permissions of the private key file to restrict access to it:
chmod 400 /path/to/mykey.pem
- Use the
sshcommand to connect to your EC2 instance, specifying the username (ec2-user), Public IPv4 DNS, and the path to the.pemfile.
ssh -i /Users/username/Documents/mykey.pem ec2-user@ec2-123-45-678-910.compute-1.amazonaws.com
- Press Enter, and if everything is configured correctly, you should successfully establish an SSH connection to your EC2 instance
Install Docker
- Apply pending updates using the yum command:
sudo yum update
- Search for Docker package:
sudo yum search docker
- Get version information:
sudo yum info docker
- Install docker, run:
sudo yum install docker
- Add group membership for the default ec2-user so you can run all docker commands without using the sudo command:
sudo usermod -a -G docker ec2-user
id ec2-user
newgrp docker
- Install docker-compose:
sudo yum install docker-compose-plugin
- Enable docker service at AMI boot time:
sudo systemctl enable docker.service
- Start the Docker service:
sudo systemctl start docker.service
Install Git
sudo yum install git -y
Setup
- Clone the repo
git clone https://github.com/operativestech/AiMicroMind_Platform_2025.git
- Cd into docker folder
cd aimicromind&& cd docker
- Create a
.envfile. You can use your favourite editor. I'll usenano
nano .env
 (1) (1) (1) (1).png)
- Specify the env variables:
PORT=3000
DATABASE_PATH=/root/.aimicromind
APIKEY_PATH=/root/.aimicromind
SECRETKEY_PATH=/root/.aimicromind
LOG_PATH=/root/.aimicromind/logs
BLOB_STORAGE_PATH=/root/.aimicromind/storage
- (Optional) You can also specify
AIMICROMIND_USERNAMEandAIMICROMIND_PASSWORDfor app level authorization. See more broken-reference - Then press
Ctrl + Xto Exit, andYto save the file - Run docker compose
docker compose up -d
- Your application is now ready at your Public IPv4 DNS on port 3000:
http://ec2-123-456-789.compute-1.amazonaws.com:3000
- You can bring the app down by:
docker compose stop
- You can pull from latest image by:
docker pull AiMicromind/aimicromind
Alternatively:
docker-compose pull
docker-compose up --build -d
Using NGINX
If you want to get rid of the :3000 on the url and have a custom domain, you can use NGINX to reverse proxy port 80 to 3000 So user will be able to open the app using your domain. Example: http://yourdomain.com.
-
sudo yum install nginx -
nginx -v sudo systemctl start nginxsudo nano /etc/nginx/conf.d/aimicromind .conf- Copy paste the following and change to your domain:
server {
    listen 80;
    listen [::]:80;
    server_name yourdomain.com; #Example: demo.aimicromind      .com
    location / {
        proxy_pass http://localhost:3000;
        proxy_http_version 1.1;
        proxy_set_header Host $host;
        proxy_set_header Upgrade $http_upgrade;
        proxy_set_header Connection 'upgrade';
        proxy_cache_bypass $http_upgrade;
        proxy_set_header X-Real-IP $remote_addr;
        proxy_set_header X-Forwarded-For $proxy_add_x_forwarded_for;
        proxy_set_header X-Forwarded-Proto $scheme;
    }
}
press Ctrl + X to Exit, and Y to save the file
-
sudo systemctl restart nginx - Go to your DNS provider, and add a new A record. Name will be your domain name, and value will be the Public IPv4 address from EC2 instance
 (2).png)
- You should now be able to open the app:
http://yourdomain.com.
Install Certbot to have HTTPS
If you like your app to have https://yourdomain.com. Here is how:
- For installing Certbot and enabling HTTPS on NGINX, we will rely on Python. So, first of all, let's set up a virtual environment:
sudo python3 -m venv /opt/certbot/
sudo /opt/certbot/bin/pip install --upgrade pip
- Afterwards, run this command to install Certbot:
sudo /opt/certbot/bin/pip install certbot certbot-nginx
- Now, execute the following command to ensure that the
certbotcommand can be run:
sudo ln -s /opt/certbot/bin/certbot /usr/bin/certbot
- Finally, run the following command to obtain a certificate and let Certbot automatically modify the NGINX configuration, enabling HTTPS:
sudo certbot --nginx
- After following the certificate generation wizard, we will be able to access our EC2 instance via HTTPS using the address
https://yourdomain.com
Set up automatic renewal
To enable Certbot to automatically renew the certificates, it is sufficient to add a cron job by running the following command:
echo "0 0,12 * * * root /opt/certbot/bin/python -c 'import random; import time; time.sleep(random.random() * 3600)' && sudo certbot renew -q" | sudo tee -a /etc/crontab > /dev/null
Congratulations!
You have successfully setup aimicromind apps on EC2 instance with SSL certificate on your domain🥳
description: Learn how to deploy aimicromind on Azure
Azure
AiMicromind as Azure App Service with Postgres: Using Terraform
Prerequisites
- Azure Account: Ensure you have an Azure account with an active subscription. If you do not have one, sign up at Azure Portal.
- Terraform: Install Terraform CLI on your machine. Download it from Terraform's website.
- Azure CLI: Install Azure CLI. Instructions can be found on the Azure CLI documentation page.
Setting Up Your Environment
- Login to Azure: Open your terminal or command prompt and login to Azure CLI using:
az login --tenant <Your Subscription ID> --use-device-code
Follow the prompts to complete the login process.
- Set Subscription: After logging in, set the Azure subscription using:
az account set --subscription <Your Subscription ID>
- Initialize Terraform:
Create a terraform.tfvars file in your Terraform project directory, if it's not already there, and add the following content:
subscription_name = "subscrpiton_name"
subscription_id = "subscription id"
project_name = "webapp_name"
db_username = "PostgresUserName"
db_password = "strongPostgresPassword"
aimicromind_username = "aimicromindUserName"
aimicromind_password = "strongaimicromindPassword"
aimicromind_secretkey_overwrite = "longandStrongSecretKey"
webapp_ip_rules = [
  {
    name = "AllowedIP"
    ip_address = "X.X.X.X/32"
    headers = null
    virtual_network_subnet_id = null
    subnet_id = null
    service_tag = null
    priority = 300
    action = "Allow"
  }
]
postgres_ip_rules = {
  "ValbyOfficeIP" = "X.X.X.X"
  // Add more key-value pairs as needed
}
source_image = "aimicromind/aimicromind:latest"
tagged_image = "flow:v1"
Replace the placeholders with actual values for your setup.
The file tree structure is as follows:
flow
├── database.tf
├── main.tf
├── network.tf
├── output.tf
├── providers.tf
├── terraform.tfvars
├── terraform.tfvars.example
├── variables.tf
├── webapp.tf
├── .gitignore // ignore your .tfvars and .lock.hcf, .terraform
Each .tf file in the Terraform configuration likely contains a different aspect of the infrastructure as code:
`database.tf` would define the configuration for the Postgres database.
// database.tf

// Database instance
resource "azurerm_postgresql_flexible_server" "postgres" {
  name                         = "postgresql-${var.project_name}"
  location                     = azurerm_resource_group.rg.location
  resource_group_name          = azurerm_resource_group.rg.name
  sku_name                     = "GP_Standard_D2s_v3"
  storage_mb                   = 32768
  version                      = "11"
  delegated_subnet_id          = azurerm_subnet.dbsubnet.id
  private_dns_zone_id          = azurerm_private_dns_zone.postgres.id
  backup_retention_days        = 7
  geo_redundant_backup_enabled = false
  auto_grow_enabled            = false
  administrator_login          = var.db_username
  administrator_password       = var.db_password
  zone                         = "2"

  lifecycle {
    prevent_destroy = false
  }
}

// Firewall
resource "azurerm_postgresql_flexible_server_firewall_rule" "pg_firewall" {
  for_each         = var.postgres_ip_rules
  name             = each.key
  server_id        = azurerm_postgresql_flexible_server.postgres.id
  start_ip_address = each.value
  end_ip_address   = each.value
}

// Database
resource "azurerm_postgresql_flexible_server_database" "production" {
  name      = "production"
  server_id = azurerm_postgresql_flexible_server.postgres.id
  charset   = "UTF8"
  collation = "en_US.utf8"

  # prevent the possibility of accidental data loss
  lifecycle {
    prevent_destroy = false
  }
}

// Transport off
resource "azurerm_postgresql_flexible_server_configuration" "postgres_config" {
  name      = "require_secure_transport"
  server_id = azurerm_postgresql_flexible_server.postgres.id
  value     = "off"
}
`main.tf` could be the main configuration file that may include the Azure provider configuration and defines the Azure resource group.
// main.tf
resource "random_string" "resource_code" {
  length  = 5
  special = false
  upper   = false
}

// resource group
resource "azurerm_resource_group" "rg" {
  location = var.resource_group_location
  name     = "rg-${var.project_name}"
}

// Storage Account
resource "azurerm_storage_account" "sa" {
  name                     = "${var.subscription_name}${random_string.resource_code.result}"
  resource_group_name      = azurerm_resource_group.rg.name
  location                 = azurerm_resource_group.rg.location
  account_tier             = "Standard"
  account_replication_type = "LRS"

  blob_properties {
    versioning_enabled = true
  }

}

// File share
resource "azurerm_storage_share" "aimicromind   -share" {
  name                 = "aimicromind   "
  storage_account_name = azurerm_storage_account.sa.name
  quota                = 50
}
`network.tf` would include networking resources such as virtual networks, subnets, and network security groups.
// network.tf

// Vnet
resource "azurerm_virtual_network" "vnet" {
  name                = "vn-${var.project_name}"
  location            = azurerm_resource_group.rg.location
  resource_group_name = azurerm_resource_group.rg.name
  address_space       = ["10.3.0.0/16"]
}

resource "azurerm_subnet" "dbsubnet" {
  name                                      = "db-subnet-${var.project_name}"
  resource_group_name                       = azurerm_resource_group.rg.name
  virtual_network_name                      = azurerm_virtual_network.vnet.name
  address_prefixes                          = ["10.3.1.0/24"]
  private_endpoint_network_policies_enabled = true
  delegation {
    name = "delegation"
    service_delegation {
      name = "Microsoft.DBforPostgreSQL/flexibleServers"
    }
  }
  lifecycle {
    ignore_changes = [
      service_endpoints,
      delegation
    ]
  }
}

resource "azurerm_subnet" "webappsubnet" {

  name                 = "web-app-subnet-${var.project_name}"
  resource_group_name  = azurerm_resource_group.rg.name
  virtual_network_name = azurerm_virtual_network.vnet.name
  address_prefixes     = ["10.3.8.0/24"]

  delegation {
    name = "delegation"
    service_delegation {
      name = "Microsoft.Web/serverFarms"
    }
  }
  lifecycle {
    ignore_changes = [
      delegation
    ]
  }
}

resource "azurerm_private_dns_zone" "postgres" {
  name                = "private.postgres.database.azure.com"
  resource_group_name = azurerm_resource_group.rg.name
}

resource "azurerm_private_dns_zone_virtual_network_link" "postgres" {
  name                  = "private-postgres-vnet-link"
  resource_group_name   = azurerm_resource_group.rg.name
  private_dns_zone_name = azurerm_private_dns_zone.postgres.name
  virtual_network_id    = azurerm_virtual_network.vnet.id
}
`providers.tf` would define the Terraform providers, such as Azure.
// providers.tf
terraform {
  required_version = ">=0.12"

  required_providers {
    azurerm = {
      source  = "hashicorp/azurerm"
      version = "=3.87.0"
    }
    random = {
      source  = "hashicorp/random"
      version = "~>3.0"
    }
  }
}

provider "azurerm" {
  subscription_id = var.subscription_id
  features {}
}
`variables.tf` would declare variables used across all `.tf` files.
// variables.tf
variable "resource_group_location" {
  default     = "westeurope"
  description = "Location of the resource group."
}

variable "container_rg_name" {
  default     = "acrllm"
  description = "Name of container regrestry."
}

variable "subscription_id" {
  type        = string
  sensitive   = true
  description = "Service Subscription ID"
}

variable "subscription_name" {
  type        = string
  description = "Service Subscription Name"
}


variable "project_name" {
  type        = string
  description = "Project Name"
}

variable "db_username" {
  type        = string
  description = "DB User Name"
}

variable "db_password" {
  type        = string
  sensitive   = true
  description = "DB Password"
}

variable "aimicromind   _username" {
  type        = string
  description = "aimicromindUser Name"
}

variable "aimicromind   _password" {
  type        = string
  sensitive   = true
  description = "aimicromindUser Password"
}

variable "aimicromind   _secretkey_overwrite" {
  type        = string
  sensitive   = true
  description = "aimicromindsecret key"
}

variable "webapp_ip_rules" {
  type = list(object({
    name                      = string
    ip_address                = string
    headers                   = string
    virtual_network_subnet_id = string
    subnet_id                 = string
    service_tag               = string
    priority                  = number
    action                    = string
  }))
}

variable "postgres_ip_rules" {
  description = "A map of IP addresses and their corresponding names for firewall rules"
  type        = map(string)
  default     = {}
}

variable "aimicromind   _image" {
  type        = string
  description = "aimicromindimage from Docker Hub"
}

variable "tagged_image" {
  type        = string
  description = "Tag for aimicromindimage version"
}
`webapp.tf` Azure App Services that includes a service plan and linux web app
// webapp.tf
#Create the Linux App Service Plan
resource "azurerm_service_plan" "webappsp" {
  name                = "asp${var.project_name}"
  resource_group_name = azurerm_resource_group.rg.name
  location            = azurerm_resource_group.rg.location
  os_type             = "Linux"
  sku_name            = "P3v3"
}

resource "azurerm_linux_web_app" "webapp" {
  name                = var.project_name
  resource_group_name = azurerm_resource_group.rg.name
  location            = azurerm_resource_group.rg.location
  service_plan_id     = azurerm_service_plan.webappsp.id

  app_settings = {
    DOCKER_ENABLE_CI                    = true
    WEBSITES_CONTAINER_START_TIME_LIMIT = 1800
    WEBSITES_ENABLE_APP_SERVICE_STORAGE = false
    APIKEY_PATH                         = "/root"
    DATABASE_TYPE                       = "postgres"
    DATABASE_HOST                       = azurerm_postgresql_flexible_server.postgres.fqdn
    DATABASE_NAME                       = azurerm_postgresql_flexible_server_database.production.name
    DATABASE_USER                       = azurerm_postgresql_flexible_server.postgres.administrator_login
    DATABASE_PASSWORD                   = azurerm_postgresql_flexible_server.postgres.administrator_password
    DATABASE_PORT                       = 5432
    AIMICROMIND_USERNAME                    = var.aimicromind_username
  AIMICROMIND_PASSWORD                    = var.aimicromind_password
  AIMICROMIND_SECRETKEY_OVERWRITE         = var.aimicromind_secretkey_overwrite
    PORT                                = 3000
    SECRETKEY_PATH                      = "/root"
    DOCKER_IMAGE_TAG                    = var.tagged_image
  }

  storage_account {
    name         = "${var.project_name}_mount"
    access_key   = azurerm_storage_account.sa.primary_access_key
    account_name = azurerm_storage_account.sa.name
    share_name   = azurerm_storage_share.aimicromind-share.name
    type         = "AzureFiles"
    mount_path   = "/root"
  }


  https_only = true

  site_config {
    always_on              = true
    vnet_route_all_enabled = true
    dynamic "ip_restriction" {
      for_each = var.webapp_ip_rules
      content {
        name       = ip_restriction.value.name
        ip_address = ip_restriction.value.ip_address
      }
    }
    application_stack {
      docker_image_name        = var.aimicromind_image
      docker_registry_url      = "https://${azurerm_container_registry.acr.login_server}"
      docker_registry_username = azurerm_container_registry.acr.admin_username
      docker_registry_password = azurerm_container_registry.acr.admin_password
    }
  }

  logs {
    http_logs {
      file_system {
        retention_in_days = 7
        retention_in_mb   = 35
      }

    }
  }

  identity {
    type = "SystemAssigned"
  }

  lifecycle {
    create_before_destroy = false

    ignore_changes = [
      virtual_network_subnet_id
    ]
  }

}

resource "azurerm_app_service_virtual_network_swift_connection" "webappvnetintegrationconnection" {
  app_service_id = azurerm_linux_web_app.webapp.id
  subnet_id      = azurerm_subnet.webappsubnet.id

  depends_on = [azurerm_linux_web_app.webapp, azurerm_subnet.webappsubnet]
}
Note: The .terraform directory is created by Terraform when initializing a project (terraform init) and it contains the plugins and binary files needed for Terraform to run. The .terraform.lock.hcl file is used to record the exact provider versions that are being used to ensure consistent installs across different machines.
Navigate to your Terraform project directory and run:
terraform init
This will initialize Terraform and download the required providers.
Configuring Terraform Variables
Deploying with Terraform
-
Plan the Deployment: Run the Terraform plan command to see what resources will be created:
terraform plan -
Apply the Deployment: If you are satisfied with the plan, apply the changes:
terraform applyConfirm the action when prompted, and Terraform will begin creating the resources.
-
Verify the Deployment: Once Terraform has completed, it will output any defined outputs such as IP addresses or domain names. Verify that the resources are correctly deployed in your Azure Portal.
Azure Continer Instance: Using Azure Portal UI or Azure CLI
Prerequisites
- (Optional) Install Azure CLI if you'd like to follow the cli based commands
Create a Container Instance without Persistent Storage
Without persistent storage your data is kept in memory. This means that on a container restart, all the data that you stored will disappear.
In Portal
- Search for Container Instances in Marketplace and click Create:

Container Instances entry in Azure's Marketplace
- Select or create a Resource group, Container name, Region, Image source
Other registry, Image type, Imageaimicromind/aimicromind, OS type and Size. Then click "Next: Networking" to configure aimicromindports:
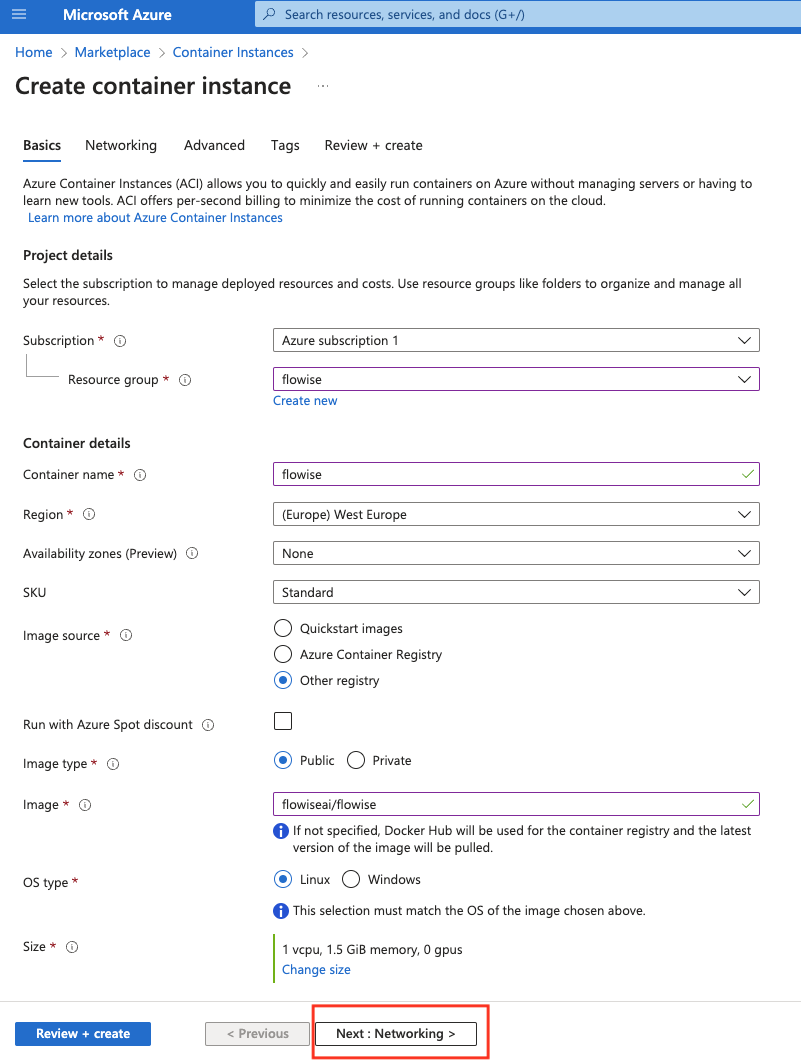
First page in the Container Instance create wizard
- Add a new port
3000 (TCP)next to the default80 (TCP). Then Select "Next: Advanced":

Second page in the Container Instance create wizard. It asks for netowrking type and ports.
- Set Restart policy to
On failure. Next, add 2 Environment variablesAIMICROMIND_USERNAMEandAIMICROMIND_PASSWORD. Add Command override["/bin/sh", "-c", "aimicromindstart"]. Finally click "Review + create":
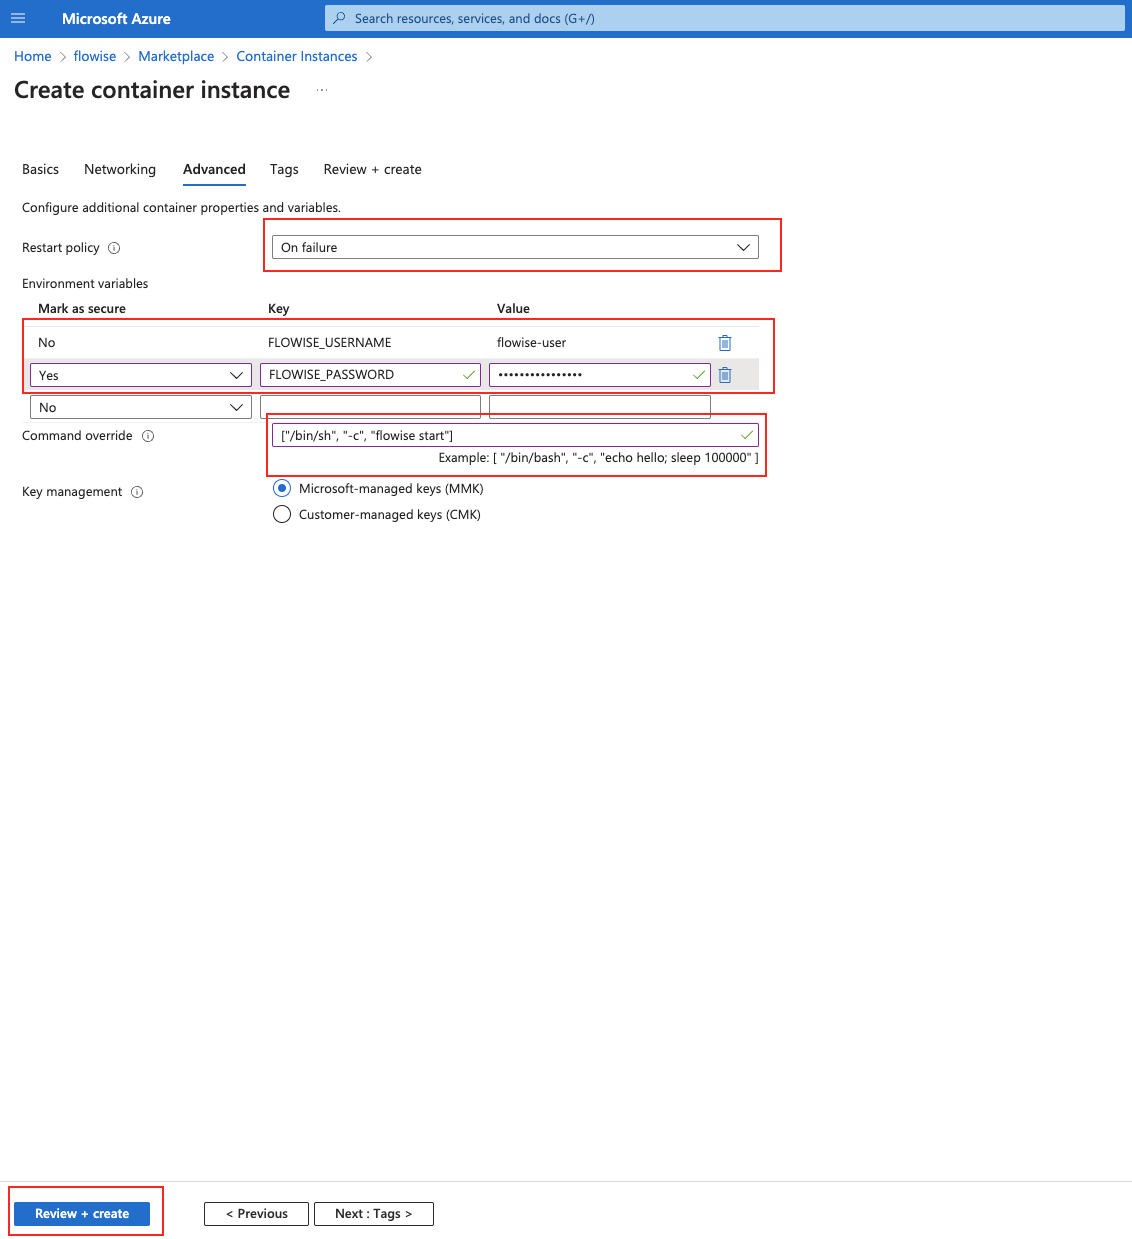
Third page in the Container Instance create wizard. It asks for restart policy, environment variables and command that runs on container start.
- Review final settings and click "Create":

Final review and create page for a Container Instance.
- Once creation is completed, click on "Go to resource"
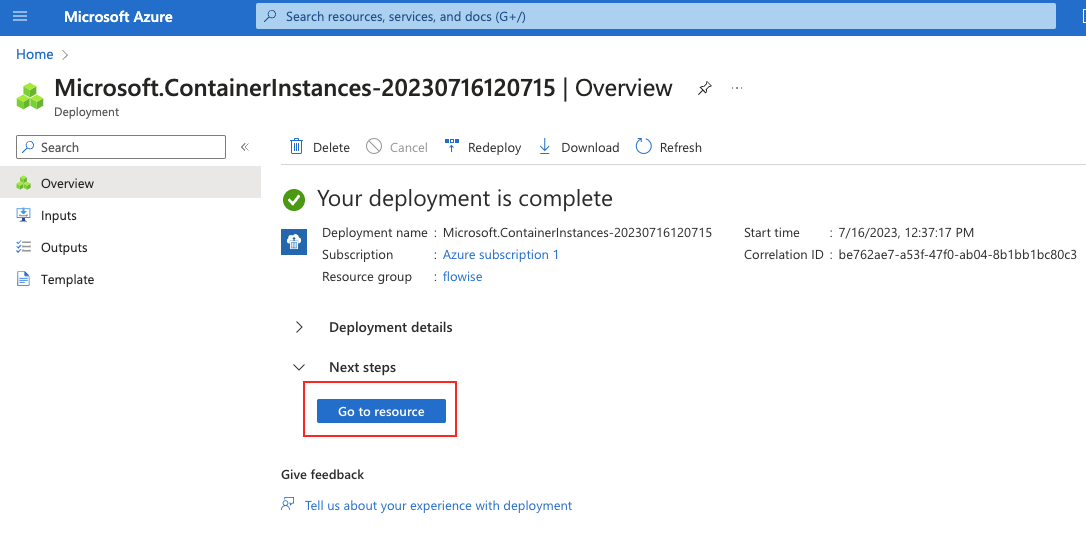
Resource creation result page in Azure.
- Visit your aimicromind instance by copying IP address and adding :3000 as a port:
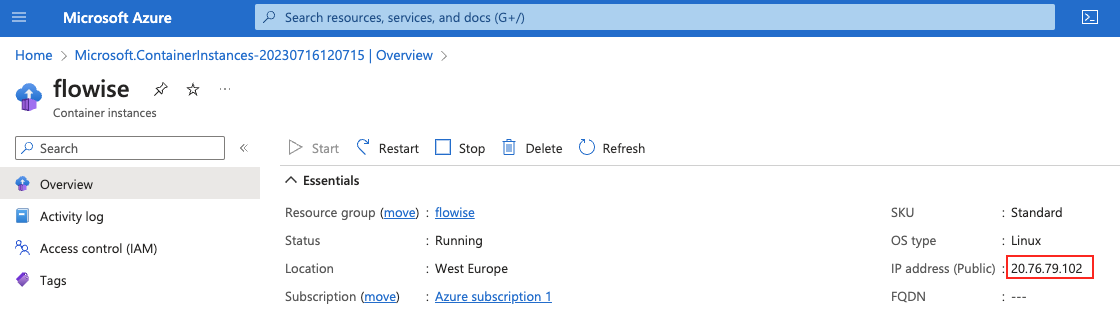
Container Instance overview page
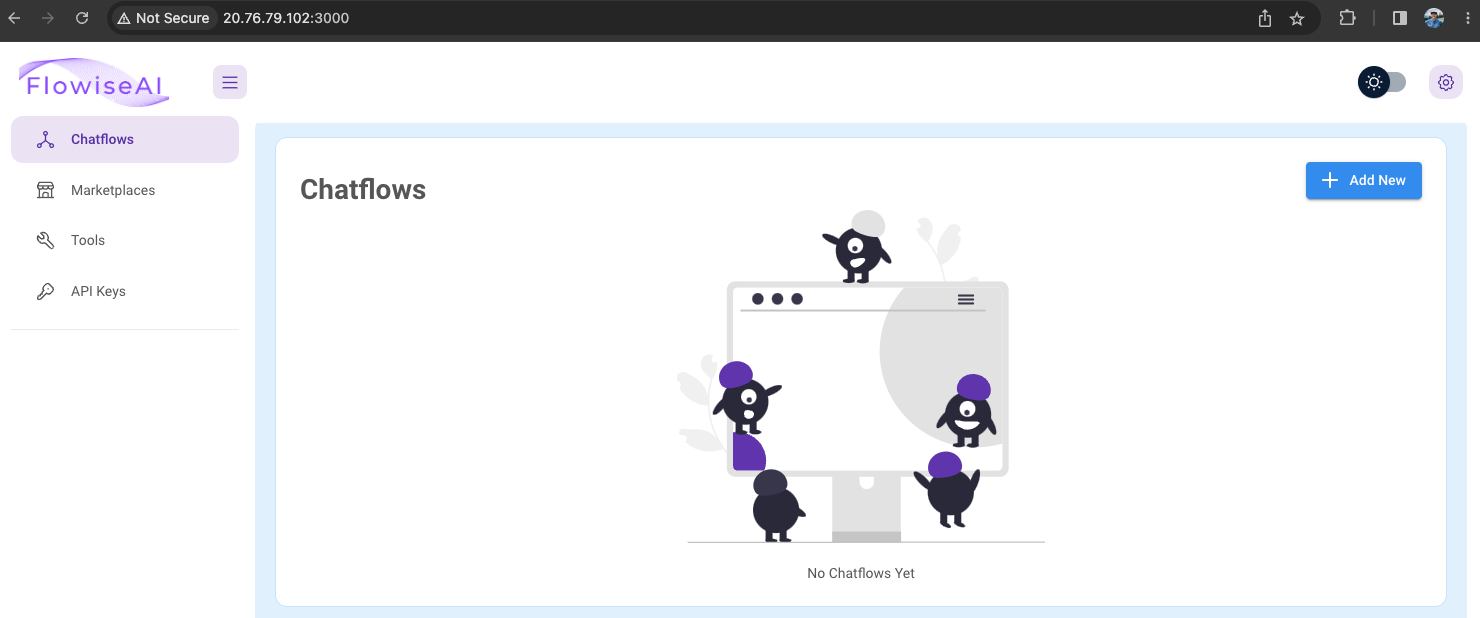
aimicromindapplication deployed as Container Instance
Create using Azure CLI
- Create a resource group (if you don't already have one)
az group create --name aimicromind -rg --location "West US"
- Create a Container Instance
az container create -g aimicromind   -rg \
	--name aimicromind\
	--image aimicromind   /aimicromind\
	--command-line "/bin/sh -c 'aimicromindstart'" \
	--environment-variables AIMICROMIND_USERNAME=aimicromind-user AIMICROMIND_PASSWORD=aimicromind-password \
	--ip-address public \
	--ports 80 3000 \
	--restart-policy OnFailure
- Visit the IP address (including port :3000) printed from the output of the above command.
Create a Container Instance with Persistent Storage
The creation of a Container Instance with persistent storage is only possible using CLI:
- Create a resource group (if you don't already have one)
az group create --name aimicromind -rg --location "West US"
- Create the Storage Account resource (or use existing one) inside above resource group. You can check how to do it here.
- Inside Azure Storage create new File share. You can check how to do it here.
- Create a Container Instance
az container create -g aimicromind   -rg \
	--name aimicromind\
	--image aimicromind   /aimicromind\
	--command-line "/bin/sh -c 'aimicromindstart'" \
	--environment-variables AIMICROMIND_USERNAME=aimicromind-user AIMICROMIND_PASSWORD=aimicromind-password DATABASE_PATH=/opt/aimicromind/.aimicromindAPIKEY_PATH=/opt/aimicromind/.aimicromindSECRETKEY_PATH=/opt/aimicromind/.aimicromindLOG_PATH=/opt/aimicromind/.aimicromind/logs BLOB_STORAGE_PATH=/opt/aimicromind/.aimicromind/storage \
	--ip-address public \
	--ports 80 3000 \
	--restart-policy OnFailure \
	--azure-file-volume-share-name here goes the name of your File share \
	--azure-file-volume-account-name here goes the name of your Storage Account \
	--azure-file-volume-account-key here goes the access key to your Storage Account \
	--azure-file-volume-mount-path /opt/aimicromind   /.aimicromind
- Visit the IP address (including port :3000) printed from the output of the above command.
- From now on your data will be stored in an SQLite database which you can find in your File share.
Video (coming soon):
Watch video tutorial on deploying to Azure Container Instance.
description: Learn how to deploy aimicromind on Digital Ocean
Digital Ocean
Create Droplet
In this section, we are going to create a Droplet. For more information, refer to official guide.
- First, Click Droplets from the dropdown
 (2).png)
- Select Data Region and a Basic $6/mo Droplet type
 (1) (1) (1) (1).png)
- Select Authentication Method. In this example, we are going to use Password
 (2).png)
- After a while you should be able to see your droplet created successfully
 (2) (1).png)
How to Connect to your Droplet
For Windows follow this guide.
For Mac/Linux, follow this guide.
Install Docker
-
curl -fsSL https://get.docker.com -o get-docker.sh -
sudo sh get-docker.sh - Install docker-compose:
sudo curl -L "https://github.com/docker/compose/releases/download/1.29.2/docker-compose-$(uname -s)-$(uname -m)" -o /usr/local/bin/docker-compose
- Set permission:
sudo chmod +x /usr/local/bin/docker-compose
Setup
- Clone the repo
git clone https://github.com/operativestech/AiMicroMind_Platform_2025.git
- Cd into docker folder
cd aimicromind&& cd docker
- Create a
.envfile. You can use your favourite editor. I'll usenano
nano .env
 (2).png)
- Specify the env variables:
PORT=3000
DATABASE_PATH=/root/.aimicromind
APIKEY_PATH=/root/.aimicromind
SECRETKEY_PATH=/root/.aimicromind
LOG_PATH=/root/.aimicromind/logs
BLOB_STORAGE_PATH=/root/.aimicromind/storage
- (Optional) You can also specify
AIMICROMIND_USERNAMEandAIMICROMIND_PASSWORDfor app level authorization. See more broken-reference - Then press
Ctrl + Xto Exit, andYto save the file - Run docker compose
docker compose up -d
- You can then view the app: "Your Public IPv4 DNS":3000. Example:
176.63.19.226:3000 - You can bring the app down by:
docker compose stop
- You can pull from latest image by:
docker pull aimicromind/aimicromind
Adding Reverse Proxy & SSL
A reverse proxy is the recommended method to expose an application server to the internet. It will let us connect to our droplet using a URL alone instead of the server IP and port number. This provides security benefits in isolating the application server from direct internet access, the ability to centralize firewall protection, a minimized attack plane for common threats such as denial of service attacks, and most importantly for our purposes, the ability to terminate SSL/TLS encryption in a single place.
A lack of SSL on your Droplet will cause the embeddable widget and API endpoints to be inaccessible in modern browsers. This is because browsers have begun to deprecate HTTP in favor of HTTPS, and block HTTP requests from pages loaded over HTTPS.
Step 1 — Installing Nginx
- Nginx is available for installation with apt through the default repositories. Update your repository index, then install Nginx:
sudo apt update
sudo apt install nginx
Press Y to confirm the installation. If you are asked to restart services, press ENTER to accept the defaults.
- You need to allow access to Nginx through your firewall. Having set up your server according to the initial server prerequisites, add the following rule with ufw:
sudo ufw allow 'Nginx HTTP'
- Now you can verify that Nginx is running:
systemctl status nginx
Output:
● nginx.service - A high performance web server and a reverse proxy server
     Loaded: loaded (/lib/systemd/system/nginx.service; enabled; vendor preset: enabled)
     Active: active (running) since Mon 2022-08-29 06:52:46 UTC; 39min ago
       Docs: man:nginx(8)
   Main PID: 9919 (nginx)
      Tasks: 2 (limit: 2327)
     Memory: 2.9M
        CPU: 50ms
     CGroup: /system.slice/nginx.service
             ├─9919 "nginx: master process /usr/sbin/nginx -g daemon on; master_process on;"
             └─9920 "nginx: worker process
Next you will add a custom server block with your domain and app server proxy.
Step 2 — Configuring your Server Block + DNS Record
It is recommended practice to create a custom configuration file for your new server block additions, instead of editing the default configuration directly.
- Create and open a new Nginx configuration file using nano or your preferred text editor:
sudo nano /etc/nginx/sites-available/your_domain
- Insert the following into your new file, making sure to replace
your_domainwith your own domain name:
server {
    listen 80;
    listen [::]:80;
    server_name your_domain; #Example: demo.aimicromind.com
    location / {
        proxy_pass http://localhost:3000;
        proxy_http_version 1.1;
        proxy_set_header Host $host;
        proxy_set_header Upgrade $http_upgrade;
        proxy_set_header Connection 'upgrade';
        proxy_cache_bypass $http_upgrade;
    }
}
- Save and exit, with
nanoyou can do this by hittingCTRL+OthenCTRL+X. - Next, enable this configuration file by creating a link from it to the sites-enabled directory that Nginx reads at startup, making sure again to replace
your_domainwith your own domain name::
sudo ln -s /etc/nginx/sites-available/your_domain /etc/nginx/sites-enabled/
- You can now test your configuration file for syntax errors:
sudo nginx -t
- With no problems reported, restart Nginx to apply your changes:
sudo systemctl restart nginx
- Go to your DNS provider, and add a new A record. Name will be your domain name, and value will be the Public IPv4 address from your droplet
Nginx is now configured as a reverse proxy for your application server. You should now be able to open the app: http://yourdomain.com.
Step 3 — Installing Certbot for HTTPS (SSL)
If you'd like to add a secure https connection to your Droplet like https://yourdomain.com, you'll need to do the following:
- For installing Certbot and enabling HTTPS on NGINX, we will rely on Python. So, first of all, let's set up a virtual environment:
apt install python3.10-venv
sudo python3 -m venv /opt/certbot/
sudo /opt/certbot/bin/pip install --upgrade pip
- Afterwards, run this command to install Certbot:
sudo /opt/certbot/bin/pip install certbot certbot-nginx
- Now, execute the following command to ensure that the
certbotcommand can be run:
sudo ln -s /opt/certbot/bin/certbot /usr/bin/certbot
- Finally, run the following command to obtain a certificate and let Certbot automatically modify the NGINX configuration, enabling HTTPS:
sudo certbot --nginx
- After following the certificate generation wizard, we will be able to access our Droplet via HTTPS using the address https://yourdomain.com
Set up automatic renewal
To enable Certbot to automatically renew the certificates, it is sufficient to add a cron job by running the following command:
echo "0 0,12 * * * root /opt/certbot/bin/python -c 'import random; import time; time.sleep(random.random() * 3600)' && sudo certbot renew -q" | sudo tee -a /etc/crontab > /dev/null
Congratulations!
You have successfully setup aimicromind on your Droplet, with SSL certificate on your domain 🥳
Steps to update aimicromind on Digital Ocean
- Navigate to the directory you installed aimicromind in
cd AiMicromind/docker
- Stop and remove docker image
Note: This will not delete your flows as the database is stored in a separate folder
sudo docker compose stop
sudo docker compose rm
- Pull the latest aimicromind Image
You can check the latest version release here
docker pull aimicromind/aimicromind
- Start the docker
docker compose up -d
description: Learn how to deploy aimicromind on GCP
GCP
Prerequisites
- Notedown your Google Cloud [ProjectId]
- Install Git
- Install the Google Cloud CLI
- Install Docker Desktop
Setup Kubernetes Cluster
- Create a Kubernetes Cluster if you don't have one.
Click `Clusters` to create one.
- Name the Cluster, choose the right resource location, use
Autopilotmode and keep all other default configs. - Once the Cluster is created, Click the 'Connect' menu from the actions menu
- Copy the command and paste into your terminal and hit enter to connect your cluster.
- Run the below command and select correct context name, which looks like
gke_[ProjectId]_[DataCenter]_[ClusterName]
kubectl config get-contexts
- Set the current context
kubectl config use-context gke_[ProjectId]_[DataCenter]_[ClusterName]
Build and Push the Docker image
Run the following commands to build and push the Docker image to GCP Container Registry.
- Clone the AiMicromind
git clone https://github.com/operativestech/AiMicroMind_Platform_2025.git
- Build the AiMicromind
cd AiMicromind
pnpm install
pnpm build
- Update the
Dockerfilefile a little.
Specify the platform of nodejs
FROM --platform=linux/amd64 node:18-alpineAdd python3, make and g++ to install
RUN apk add --no-cache python3 make g++
- Build as Docker image, make sure the Docker desktop app is running
docker build -t gcr.io/[ProjectId]/aimicromind:dev .
- Push the Docker image to GCP container registry.
docker push gcr.io/[ProjectId]/aimicromind:dev
Deployment to GCP
- Create a
yamlsroot folder in the project. - Add the
deployment.yamlfile into that folder.
# deployment.yaml
apiVersion: apps/v1
kind: Deployment
metadata:
  name: aimicromind
  labels:
    app: aimicromind
spec:
  selector:
    matchLabels:
      app: aimicromind
  replicas: 1
  template:
    metadata:
      labels:
        app: aimicromind
    spec:
      containers:
      - name: aimicromind
        image: gcr.io/[ProjectID]/aimicromind:dev
        imagePullPolicy: Always
        resources:
          requests:
            cpu: "1"
            memory: "1Gi"
- Add the
service.yamlfile into that folder.
# service.yaml
apiVersion: "v1"
kind: "Service"
metadata:
  name: "aimicromind-service"
  namespace: "default"
  labels:
    app: "aimicromind"
spec:
  ports:
  - protocol: "TCP"
    port: 80
    targetPort: 3000
  selector:
    app: "aimicromind"
  type: "LoadBalancer"
It will be look like below.
- Deploy the yaml files by running following commands.
kubectl apply -f yamls/deployment.yaml
kubectl apply -f yamls/service.yaml
- Go to
Workloadsin the GCP, you can see your pod is running.
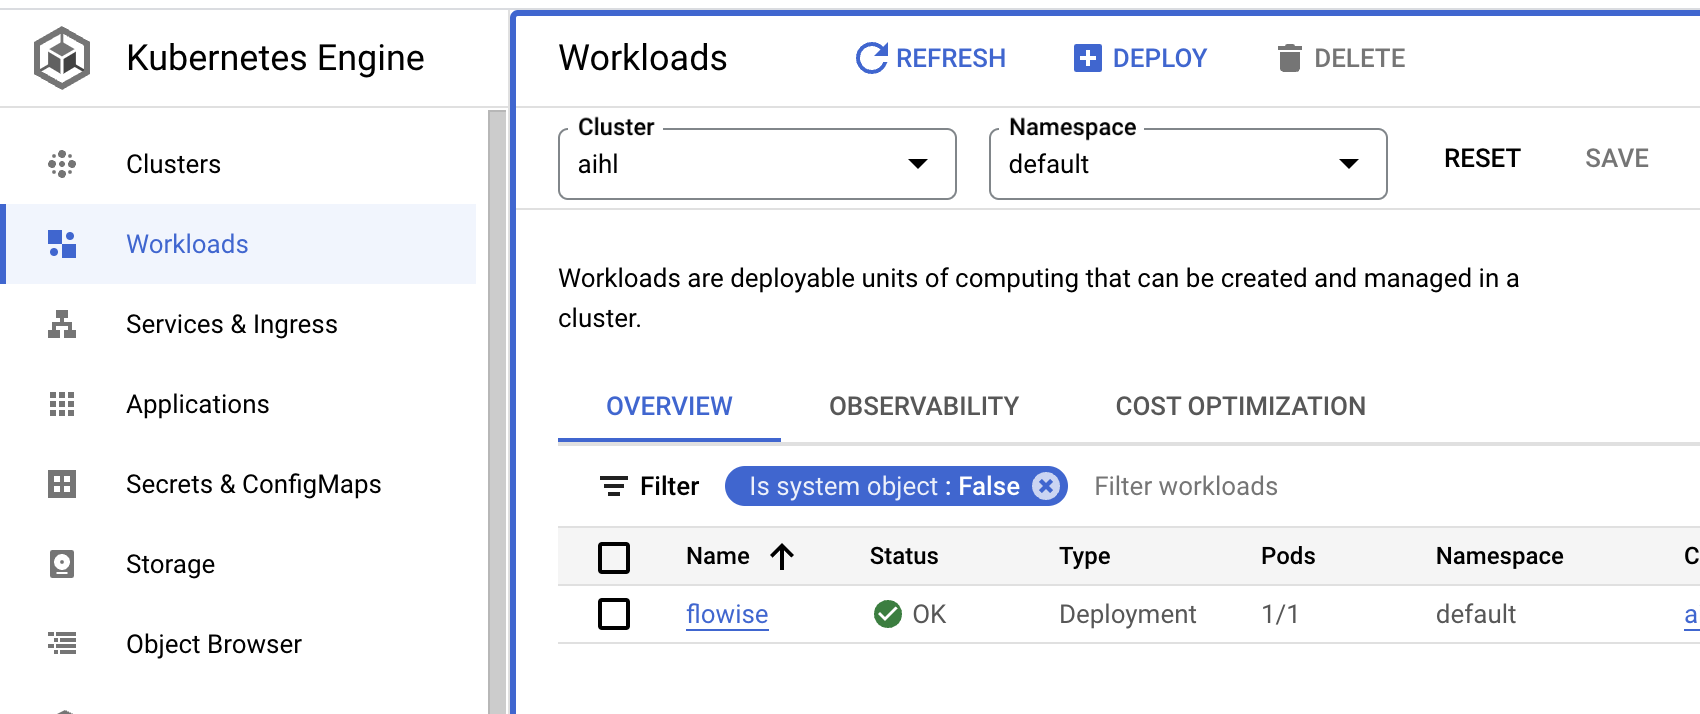
- Go to
Services & Ingress, you can click theEndpointwhere the aimicromind is hosted.
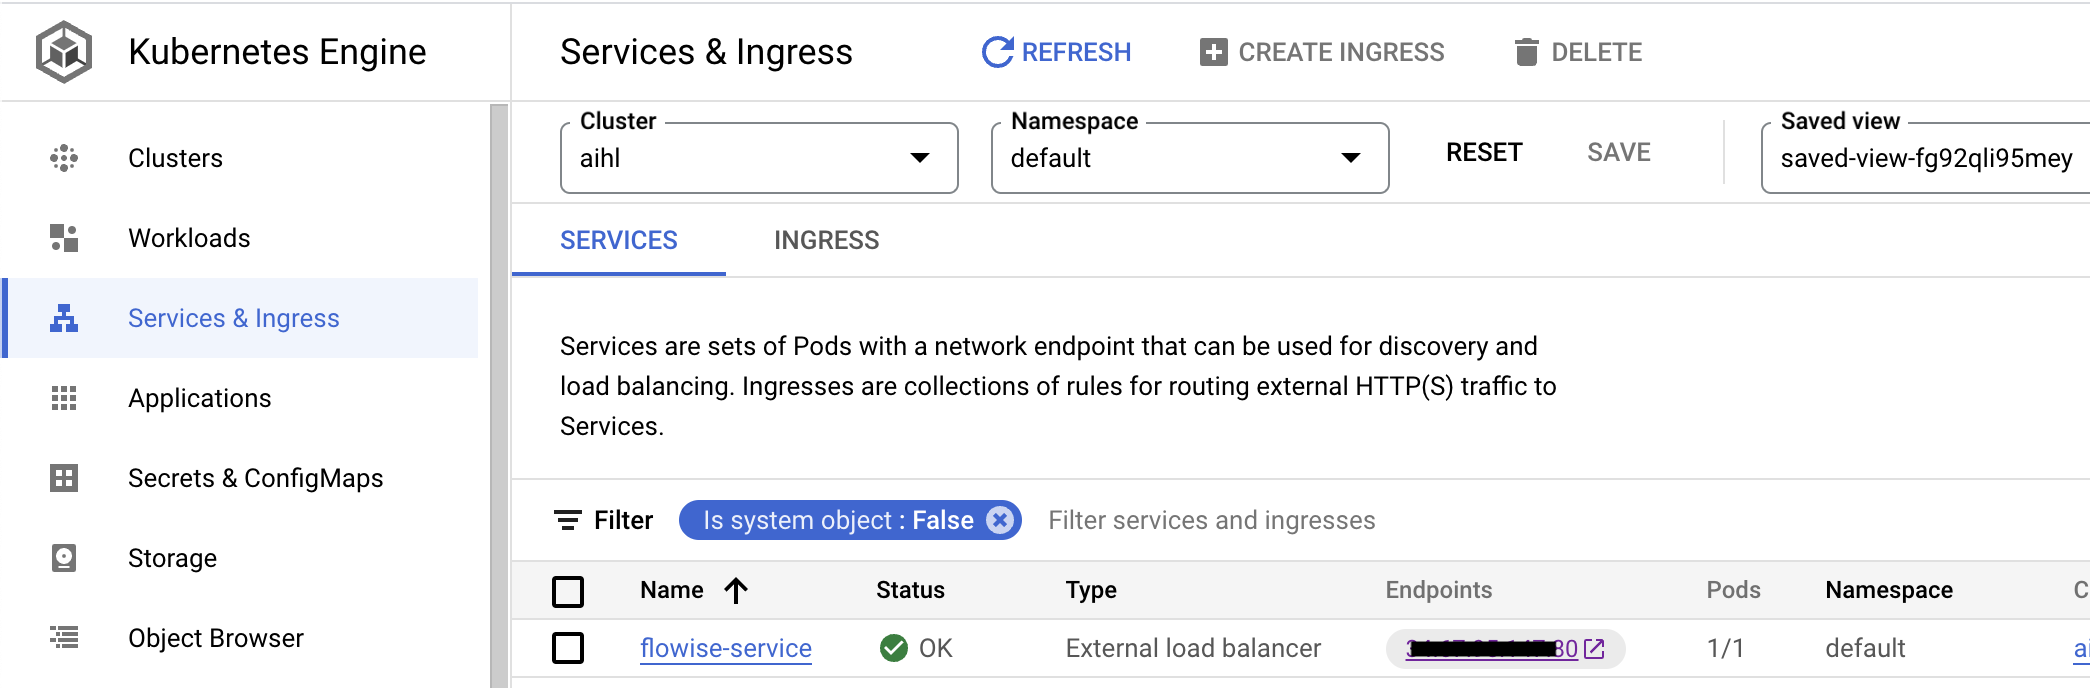
Congratulations!
You have successfully hosted the aimicromind apps on GCP 🥳
Timeout
By default, there is a 30 seconds timeout assigned to the proxy by GCP. This caused issue when the response is taking longer than 30 seconds threshold to return. In order to fix this issue, make the following changes to YAML files:
Note: To set the timeout to be 10 minutes (for example) -- we specify 600 seconds below.
- Create a
backendconfig.yamlfile with the following content:
apiVersion: cloud.google.com/v1
kind: BackendConfig
metadata:
  name: aimicromind-backendconfig
  namespace: your-namespace
spec:
  timeoutSec: 600
- Issue:
kubectl apply -f backendconfig.yaml - Update your
service.yamlfile with the following reference to theBackendConfig:
apiVersion: v1
kind: Service
metadata:
  annotations:
    cloud.google.com/backend-config: '{"default": "aimicromind-backendconfig"}'
  name: aimicromind-service
  namespace: your-namespace
...
- Issue:
kubectl apply -f service.yaml
description: Learn how to deploy aimicromind on Hugging Face
Hugging Face
Create a new space
- Sign in to Hugging Face
- Start creating a new Space with your preferred name.
- Select Docker as Space SDK and choose Blank as the Docker template.
- Select CPU basic ∙ 2 vCPU ∙ 16GB ∙ FREE as Space hardware.
- Click Create Space.
Set the environment variables
- Go to Settings of your new space and find the Variables and Secrets section
- Click on New variable and add the name as
PORTwith value7860 - Click on Save
- (Optional) Click on New secret
- (Optional) Fill in with your environment variables, such as database credentials, file paths, etc. You can check for valid fields in the
.env.examplehere
Create a Dockerfile
- At the files tab, click on button + Add file and click on Create a new file (or Upload files if you prefer to)
- Create a file called Dockerfile and paste the following:
FROM node:18-alpine
USER root

# Arguments that can be passed at build time
ARG AIMICROMIND_PATH=/usr/local/lib/node_modules/aimicromind
ARG BASE_PATH=/root/.aimicromind
ARG DATABASE_PATH=$BASE_PATH
ARG APIKEY_PATH=$BASE_PATH
ARG SECRETKEY_PATH=$BASE_PATH
ARG LOG_PATH=$BASE_PATH/logs
ARG BLOB_STORAGE_PATH=$BASE_PATH/storage

# Install dependencies
RUN apk add --no-cache git python3 py3-pip make g++ build-base cairo-dev pango-dev chromium

ENV PUPPETEER_SKIP_DOWNLOAD=true
ENV PUPPETEER_EXECUTABLE_PATH=/usr/bin/chromium-browser

# Install aimicromindglobally
RUN npm install -g aimicromind

# Configure aimicromind directories using the ARG
RUN mkdir -p $LOG_PATH $AIMICROMIND_PATH/uploads && chmod -R 777 $LOG_PATH $AIMICROMIND_PATH

WORKDIR /data

CMD ["npx", "aimicromind", "start"]
- Click on Commit file to
mainand it will start to build your app.
Done 🎉
When the build finishes you can click on the App tab to see your app running.
description: Learn how to deploy aimicromind on Railway
Railway
- Click the following prebuilt template
- Click Deploy Now
 (1) (2) (1).png)
- Change to your preferred repository name and click Deploy
 (1) (2) (1).png)
- If succeeds, you should be able to see a deployed URL
 (2).png)
- To add authorization, navigate to Variables tab and add:
- AIMICROMIND_USERNAME
- AIMICROMIND_PASSWORD
 (2) (1) (1).png)
- There are list of env variables you can configure. Refer to environment-variables.md
That's it! You now have a deployed aimicromind on Railway 🎉🎉
Persistent Volume
The default filesystem for services running on Railway is ephemeral. aimicromind data isn’t persisted across deploys and restarts. To solve this issue, we can use Railway Volume.
To ease the steps, we have a Railway template with volume mounted: https://railway.app/template/nEGbjR
Just click Deploy and fill in the Env Variables like below:
- DATABASE_PATH -
/opt/railway/.aimicromind - APIKEY_PATH -
/opt/railway/.aimicromind - LOG_PATH -
/opt/railway/.aimicromind/logs - SECRETKEY_PATH -
/opt/railway/.aimicromind - BLOB_STORAGE_PATH -
/opt/railway/.aimicromind/storage
 (1) (1) (1) (1) (1) (1) (1) (1) (1) (1) (1) (1) (1) (1) (1) (1) (1) (1) (1) (1) (1) (1) (1) (1) (1) (1) (1).png)
Now try creating a flow and save it in AiMicromind. Then try restarting service or redeploy, you should still be able to see the flow you have saved previously.
description: Learn how to deploy aimicromind on Render
Render
- Fork aimicromind Official Repository
- Visit your github profile to assure you have successfully made a fork
- Sign in to Render
- Click New +

- Select Web Service
- Connect Your GitHub Account
- Select your forked aimicromind repo and click Connect
- Fill in your preferred Name and Region.
- Select
Dockeras your Runtime
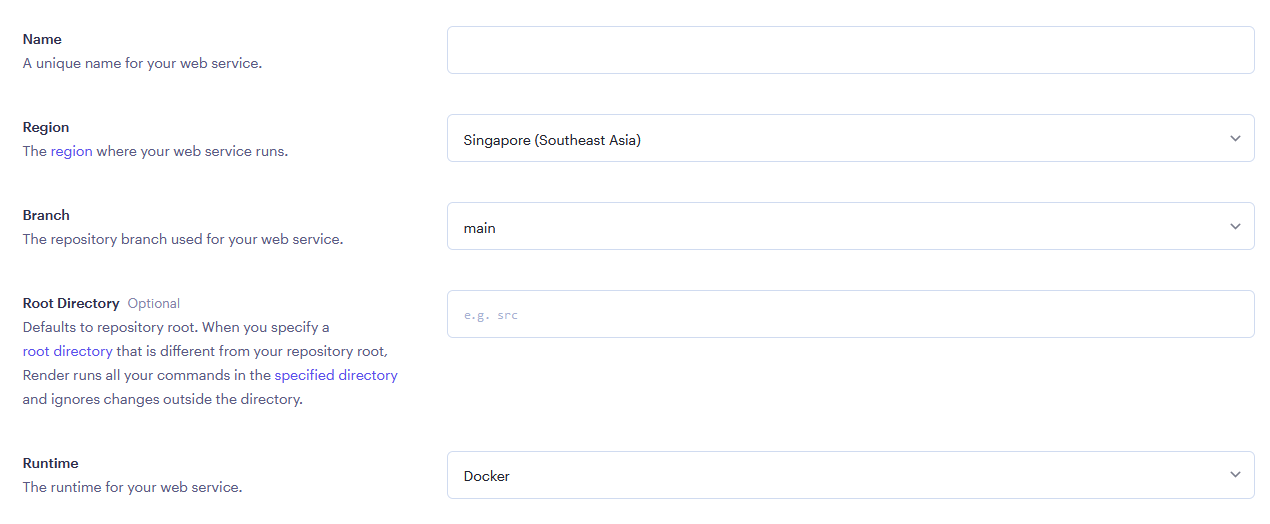
- Select an Instance
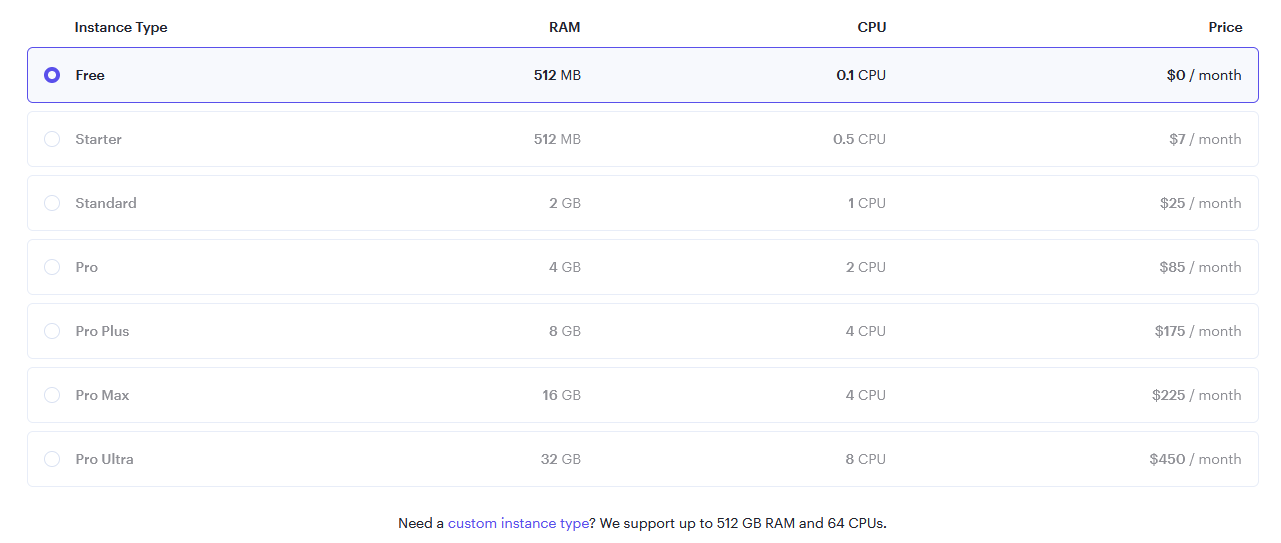
- (Optional) Add app level authorization, click Advanced and add
Environment Variable
- AIMICROMIND_USERNAME
- AIMICROMIND_PASSWORD
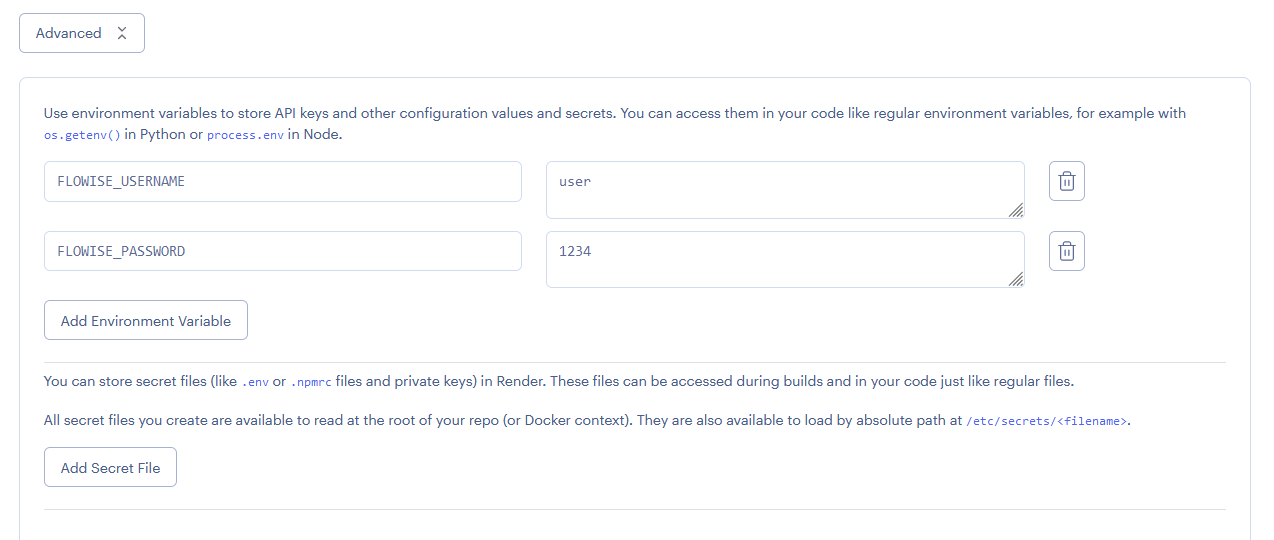
Add NODE_VERSION with value 18.18.1 as the node version to run the instance.
There are list of env variables you can configure. Refer to environment-variables.md
- Click Create Web Service


Persistent Disk
The default filesystem for services running on Render is ephemeral. aimicromind data isn’t persisted across deploys and restarts. To solve this issue, we can use Render Disk.
- On the left hand side bar, click Disks
- Name your disk, and specify the Mount Path to
/opt/render/.aimicromind
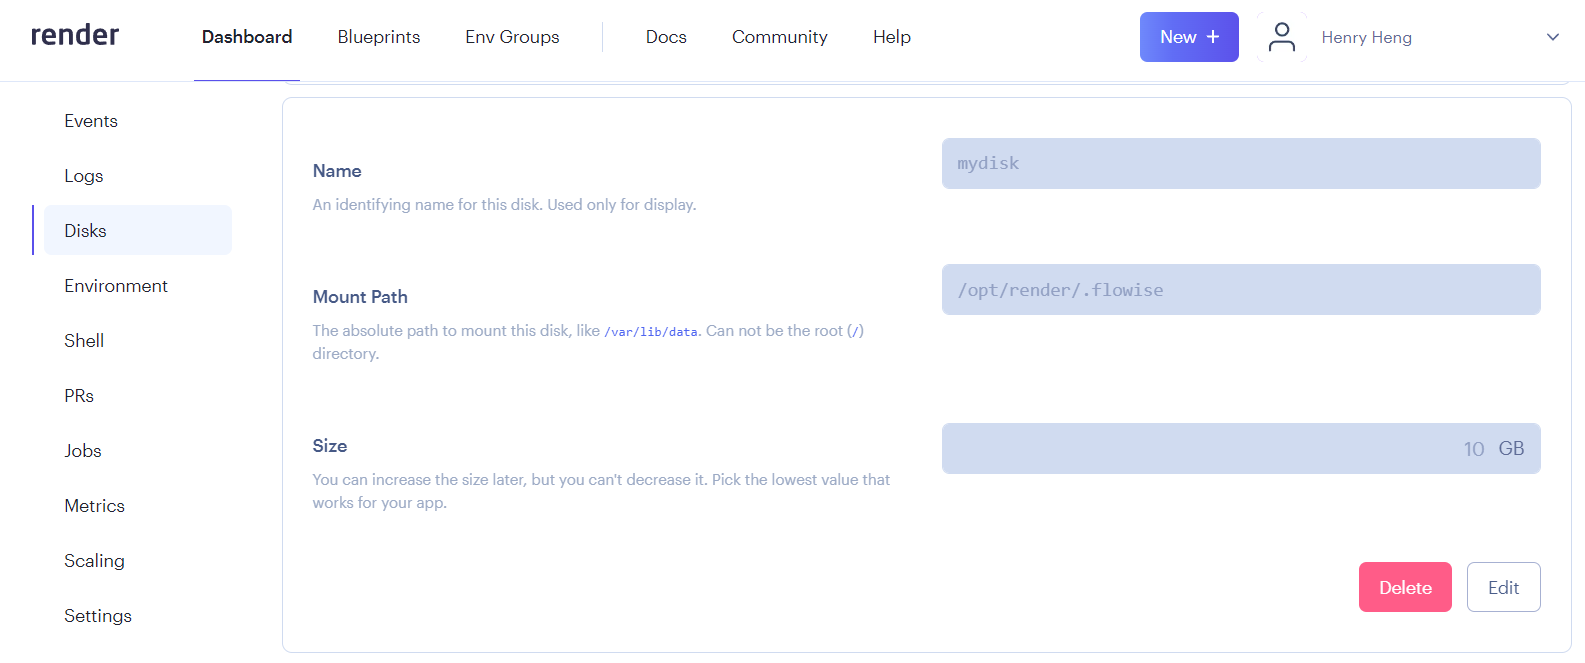
- Click the Environment section, and add these new environment variables:
- DATABASE_PATH -
/opt/render/.aimicromind - APIKEY_PATH -
/opt/render/.aimicromind - LOG_PATH -
/opt/render/.aimicromind/logs - SECRETKEY_PATH -
/opt/render/.aimicromind - BLOB_STORAGE_PATH -
/opt/render/.aimicromind/storage
 (5).png)
- Click Manual Deploy then select Clear build cache & deploy
- Now try creating a flow and save it in AiMicromind. Then try restarting service or redeploy, you should still be able to see the flow you have saved previously.
Watch how to deploy to Render (coming soon)
description: Learn how to deploy aimicromind on Replit
Replit
- Sign in to Replit
- Create a new Repl. Select Node.js as Template and fill in your preferred Title.
 (1) (2) (1).png)
- After a new Repl is created, on the left hand side bar, click Secret:
 (4) (1).png)
- Create 3 Secrets to skip Chromium download for Puppeteer and Playwright libraries.
| Secrets | Value |
|---|---|
| PLAYWRIGHT_SKIP_BROWSER_DOWNLOAD | 1 |
| PUPPETEER_SKIP_DOWNLOAD | true |
| PUPPETEER_SKIP_CHROMIUM_DOWNLOAD | true |
 (3).png)
- You can now switch to Shell tab
 (2) (1).png)
- Type in
npm install -g aimicromindinto the Shell terminal window. If you are having error about incompatible node version, use the following commandyarn global add aimicromind--ignore-engines
 (1) (1) (1) (1) (1) (1) (1) (1) (1) (1) (1) (1) (1) (1) (1) (1) (1) (1) (1).png)
- Then followed by
npx aimicromind start
 (1) (2).png)
- You should now be able to see aimicromind on Replit!
 (3).png)
- If you would like to turn on app level authorization, change the command to:
npx aimicromind start --AIMICROMIND_USERNAME=user --AIMICROMIND_PASSWORD=1234
- You will now see a login page. Simply login with the username and password you've set.
 (2) (1).png)
description: Learn how to deploy aimicromind on Sealos
Sealos
- Click the following prebuilt template or the button below.

- Add authorization
- AIMICROMIND_USERNAME
- AIMICROMIND_PASSWORD

- Click "Deploy Application" on the template page to start deployment.
- Once deployment concludes, click "Details" to navigate to the application's details.
- Wait for the application's status to switch to running. Subsequently, click on the external link to open the application's Web interface directly through the external domain.
Persistent Volume
Click "Update" top-right on the app details page, then click "Advanced" -> "Add volume", Fill in the value of "mount path": /root/.aimicromind.

To wrap up, click the "Deploy" button.
Now try creating a flow and save it in AiMicromind. Then try restarting service or redeploy, you should still be able to see the flow you have saved previously.
description: Learn how to deploy aimicromind on Zeabur
Zeabur
{% hint style="warning" %} Please note that the following template made by Zeabur is outdated (from 2024-01-24). {% endhint %}
- Click the following prebuilt template or the button below.

- Click Deploy
- Select your favorite region and continue
- You will be redirected to Zeabur's dashboard and you will see the deployment process
- To add authorization, navigate to Variables tab and add:
- AIMICROMIND_USERNAME
- AIMICROMIND_PASSWORD
- There are list of env variables you can configure. Refer to environment-variables.md
That's it! You now have a deployed aimicromind on Zeabur 🎉🎉
Persistent Volume
Zeabur will automatically create a persistent volume for you so you don't have to worry about it.
description: Learn how to configure environment variables for AiMicromind
Environment Variables
aimicromind support different environment variables to configure your instance. You can specify the following variables in the .env file inside packages/server folder. Refer to .env.example file.
| Variable | Description | Type | Default |
|---|---|---|---|
| PORT | The HTTP port aimicromind runs on | Number | 3000 |
| AIMICROMIND_USERNAME | Username to login | String | |
| AIMICROMIND_PASSWORD | Password to login | String | |
| AIMICROMIND_FILE_SIZE_LIMIT | Maximum file size when uploading | String | 50mb |
| NUMBER_OF_PROXIES | Rate Limit Proxy | Number | |
| CORS_ORIGINS | The allowed origins for all cross-origin HTTP calls | String | |
| IFRAME_ORIGINS | The allowed origins for iframe src embedding | String | |
| SHOW_COMMUNITY_NODES | Display nodes that are created by community | Boolean: true or false | |
| DISABLED_NODES | Comma separated list of node names to disable | String |
For Database
| Variable | Description | Type | Default |
|---|---|---|---|
| DATABASE_TYPE | Type of database to store the aimicromind data | Enum String: sqlite, mysql, postgres | sqlite |
| DATABASE_PATH | Location where database is saved (When DATABASE_TYPE is sqlite) | String | your-home-dir/.aimicromind |
| DATABASE_HOST | Host URL or IP address (When DATABASE_TYPE is not sqlite) | String | |
| DATABASE_PORT | Database port (When DATABASE_TYPE is not sqlite) | String | |
| DATABASE_USER | Database username (When DATABASE_TYPE is not sqlite) | String | |
| DATABASE_PASSWORD | Database password (When DATABASE_TYPE is not sqlite) | String | |
| DATABASE_NAME | Database name (When DATABASE_TYPE is not sqlite) | String | |
| DATABASE_SSL | Database SSL is required (When DATABASE_TYPE is not sqlite) | Boolean: true or false | false |
For Storage
aimicromind store the following files under a local path folder by default.
- Files uploaded on Document Loaders/Document Store
- Image/Audio uploads from chat
- Images/Files from Assistant
- Files from Vector Upsert API
User can specify STORAGE_TYPE to use AWS S3, Google Cloud Storage or local path
| Variable | Description | Type | Default |
|---|---|---|---|
| STORAGE_TYPE | Type of storage for uploaded files. default is local | Enum String: s3, gcs, local | local |
| BLOB_STORAGE_PATH | Local folder path where uploaded files are stored when STORAGE_TYPE is local | String | your-home-dir/.aimicromind/storage |
| S3_STORAGE_BUCKET_NAME | Bucket name to hold the uploaded files when STORAGE_TYPE is s3 | String | |
| S3_STORAGE_ACCESS_KEY_ID | AWS Access Key | String | |
| S3_STORAGE_SECRET_ACCESS_KEY | AWS Secret Key | String | |
| S3_STORAGE_REGION | Region for S3 bucket | String | |
| S3_ENDPOINT_URL | Custom S3 endpoint (optional) | String | |
| S3_FORCE_PATH_STYLE | Force S3 path style (optional) | Boolean | false |
| GOOGLE_CLOUD_STORAGE_CREDENTIAL | Google Cloud Service Account Key | String | |
| GOOGLE_CLOUD_STORAGE_PROJ_ID | Google Cloud Project ID | String | |
| GOOGLE_CLOUD_STORAGE_BUCKET_NAME | Google Cloud Storage Bucket Name | String | |
| GOOGLE_CLOUD_UNIFORM_BUCKET_ACCESS | Type of Access | Boolean | true |
For Debugging and Logs
| Variable | Description | Type | |
|---|---|---|---|
| DEBUG | Print logs from components | Boolean | |
| LOG_PATH | Location where log files are stored | String | AiMicromind/packages/server/logs |
| LOG_LEVEL | Different levels of logs | Enum String: error, info, verbose, debug | info |
DEBUG: if set to true, will print logs to terminal/console:
 (3).png)
LOG_LEVEL: Different log levels for loggers to be saved. Can be error, info, verbose, or debug. By default it is set to info, only logger.info will be saved to the log files. If you want to have complete details, set to debug.
 (4).png)
server-requests.log.jsonl - logs every request sent to AiMicromind
 (1) (1) (1) (1) (1) (1) (1) (1) (1) (1) (1) (1) (1) (1) (1).png)
server.log - logs general actions on AiMicromind
 (4).png)
server-error.log - logs error with stack trace
Logs Streaming S3
When STORAGE_TYPE env variable is set to s3 , logs will be automatically streamed and stored to S3. New log file will be created hourly, enabling easier debugging.
Logs Streaming GCS
When STORAGE_TYPE env variable is set to gcs , logs will be automatically streamed to Google Cloud Logging.
For Credentials
AiMicromind store your third party API keys as encrypted credentials using an encryption key.
By default, a random encryption key will be generated when starting up the application and stored under a file path. This encryption key is then retrieved everytime to decrypt the credentials used within a chatflow. For example, your OpenAI API key, Pinecone API key, etc.
You can configure to use AWS Secret Manager to store the encryption key instead.
| Variable | Description | Type | Default |
|---|---|---|---|
| SECRETKEY_STORAGE_TYPE | How to store the encryption key | Enum String: local, aws | local |
| SECRETKEY_PATH | Local file path where encryption key is saved | String | AiMicromind/packages/server |
| AIMICROMIND_SECRETKEY_OVERWRITE | Encryption key to be used instead of the existing key | String | |
| SECRETKEY_AWS_ACCESS_KEY | String | ||
| SECRETKEY_AWS_SECRET_KEY | String | ||
| SECRETKEY_AWS_REGION | String |
For some reasons, sometimes encryption key might be re-generated or the stored path was changed, this will cause errors like - Credentials could not be decrypted.
To avoid this, you can set your own encryption key as AIMICROMIND_SECRETKEY_OVERWRITE, so that the same encryption key will be used everytime. There is no restriction on the format, you can set it as any text that you want, or the same as your AIMICROMIND_PASSWORD.
 (1) (1) (1) (1) (1) (1) (1) (1) (1) (1) (1) (1) (1) (1) (1) (1) (1) (1) (1) (1) (1) (1) (1) (1).png)
{% hint style="info" %} Credential API Key returned from the UI is not the same length as your original Api Key that you have set. This is a fake prefix string that prevents network spoofing, that's why we are not returning the Api Key back to UI. However, the correct Api Key will be retrieved and used during your interaction with the chatflow. {% endhint %}
For Models
In some cases, you might want to use custom model on the existing Chat Model and LLM nodes, or restrict access to only certain models.
By default, aimicromindpulls the model list from here. However user can create their own models.json file and specify the file path:
| Variable | Description | Type | Default |
|---|---|---|---|
| MODEL_LIST_CONFIG_JSON | Link to load list of models from your models.json config file | String | https://github.com/operativestech/AiMicroMind_Platform_2025/main/packages/components/models.json |
For API Keys
Users can create multiple API keys within aimicromind in order to authenticate with the APIs. By default, keys get stored as a JSON file to your local file path. User can change the behavior by using the below env variable.
| Variable | Description | Type | Default |
|---|---|---|---|
| APIKEY_STORAGE_TYPE | Method to store API keys | Enum string: json, db | json |
| APIKEY_PATH | Location where the API keys are stored when APIKEY_STORAGE_TYPE is unspecified or json | String | AiMicromind/packages/server |
Using db as storage type will store the API keys to database instead of a local JSON file.
.png)
aimicromind API Keys
For Built-In and External Dependencies
There are certain nodes/features within aimicromind that allow user to run Javascript code. For security reasons, by default it only allow certain dependencies. It's possible to lift that restriction for built-in and external modules by setting the following environment variables:
| Variable | Description | |
|---|---|---|
| TOOL_FUNCTION_BUILTIN_DEP | NodeJS built-in modules to be used for Tool Function | String |
| TOOL_FUNCTION_EXTERNAL_DEP | External modules to be used for Tool Function | String |
{% code title=".env" %}
# Allows usage of all builtin modules
TOOL_FUNCTION_BUILTIN_DEP=*

# Allows usage of only fs
TOOL_FUNCTION_BUILTIN_DEP=fs

# Allows usage of only crypto and fs
TOOL_FUNCTION_BUILTIN_DEP=crypto,fs

# Allow usage of external npm modules.
TOOL_FUNCTION_EXTERNAL_DEP=axios,moment
{% endcode %}
Examples of how to set environment variables
NPM
You can set all these variables when running aimicromind using npx. For example:
npx aimicromind start --PORT=3000 --DEBUG=true
Docker
docker run -d -p 5678:5678 aimicromind\
 -e DATABASE_TYPE=postgresdb \
 -e DATABASE_PORT=<POSTGRES_PORT> \
 -e DATABASE_HOST=<POSTGRES_HOST> \
 -e DATABASE_NAME=<POSTGRES_DATABASE_NAME> \
 -e DATABASE_USER=<POSTGRES_USER> \
 -e DATABASE_PASSWORD=<POSTGRES_PASSWORD> \
Docker Compose
You can set all these variables in the .env file inside docker folder. Refer to .env.example file.
description: Learn how to managing API requests in AiMicromind
Rate Limit
When you share your chatflow to public with no API authorization through API or embedded chat, anybody can access the flow. To prevent spamming, you can set the rate limit on your chatflow.
 (1) (1) (1) (1) (1) (1) (1) (1) (1) (1) (1) (1) (1) (1) (1) (1) (1) (1) (1) (1) (1) (1) (1).png)
- Message Limit per Duration: How many messages can be received in a specific duration. Ex: 20
- Duration in Seconds: The specified duration. Ex: 60
- Limit Message: What message to return when the limit is exceeded. Ex: Quota Exceeded
Using the example above, that means only 20 messages are allowed to be received in 60 seconds. The rate limitation is tracked by IP-address. If you have deployed aimicromind on cloud service, you'll have to set NUMBER_OF_PROXIES env variable.
Rate Limit Setup
When you are hosting aimicromind on cloud such as AWS, GCP, Azure, etc, most likely there you are behind a proxy/load balancer. Therefore, the rate limit might not be able to work. More info can be found here.
To fix the issue:
- Set Environment Variable: Create an environment variable named
NUMBER_OF_PROXIESand set its value to0in your hosting environment. - Restart your hosted aimicromind instance: This enables aimicromind to apply changes of environment variables.
- Check IP Address: To verify the IP address, access the following URL:
{{hosted_url}}/api/v1/ip. You can do this either by entering the URL into your web browser or by making an API request. - Compare IP Address After making the request, compare the IP address returned to your current IP address. You can find your current IP address by visiting either of these websites:
- Incorrect IP Address: If the returned IP address does not match your current IP address, increase
NUMBER_OF_PROXIESby 1 and restart your aimicromind instance. Repeat this process until the IP address matches your own.
Running aimicromind behind company proxy
If you're running aimicromind in an environment that requires a proxy, such as within an organizational network, you can configure aimicromindto route all its backend requests through a proxy of your choice. This feature is powered by the global-agent package.
https://github.com/gajus/global-agent
Configuration
There are 2 environment variables you will need to run aimicromind behind a company proxy:
| Variable | Purpose | Required |
|---|---|---|
GLOBAL_AGENT_HTTP_PROXY | Where to proxy all server HTTP requests through | Yes |
GLOBAL_AGENT_HTTPS_PROXY | Where to proxy all server HTTPS requests through | No |
GLOBAL_AGENT_NO_PROXY | A pattern of URLs that should be excluded from proxying. Eg. *.foo.com,baz.com | No |
Outbound Allow-list
For enterprise plan, you must allow several outbound connections for license checking. Please contact support@aimicromind.com for more information.
SSO
{% hint style="info" %} SSO is only available for Enterprise plan {% endhint %}
AiMicromind supports OIDC that allows users to use single sign-on (SSO) to access application. Currently only the Organization Admin can configure the SSO configurations.
Microsoft
- In the Azure portal, search for Microsoft Entra ID:
.png)
- From the left hand bar, click App Registrations, then New Registration:
.png)
- Enter an app name, and select Single Tenant:
.png)
- After an app is created, note down the Application (client) ID and Directory (tenant) ID:
.png)
- On the left side bar, click Certificates & secrets -> New client secret -> Add:
.png)
- After the secret has been created, copy the Value, not the Secret ID:
.png)
- On the left side bar, click Authentication -> Add a platform -> Web:
.png)
- Fill in the redirect URIs. This will need to be changed depending on how you are hosting it:
http[s]://[your-aimicromind-instance.com]/api/v1/azure/callback:
.png)
- You should be able to see the new Redirect URI created:
.png)
- Back to aimicromind app, login as Organization Admin. Navigate to SSO Config from left side bar. Fill in the Azure Tenant ID and Client ID from Step 4, and Client Secret from Step 6. Click Test Configuration to see if the connection can be established successfully:
.png)
- Lastly, enable and save it:
.png)
- Before users can sign in using SSO, they have to be invited first. Refer to Inviting users for SSO sign in for step by step guide. Invited users must also be part of the Directory Users in Azure.
 (1).png)
To enable Sign In With Google on your website, you first need to set up your Google API client ID. To do so, complete the following steps:
- Open the Credentials page of the Google APIs console.
- Click Create credentials > OAuth client ID
.png)
3. Select Web Application:
.png)
4. Fill in the redirect URIs. This will need to be changed depending on how you are hosting it: http[s]://[your-aimicromind-instance.com]/api/v1/google/callback:
.png)
5. After creating, grab the client ID and secret:
.png)
6. Back to aimicromind app, add the Client ID and secret. Test the connection and Save it.
Auth0
- Register an account on Auth0, then create a new Application
.png)
- Select Regular Web Application:
.png)
- Configure the fields such as Name, Description. Take notes of the Domain, Client ID, and Client Secret.
.png)
4. Fill in the Application URIs. This will need to be changed depending on how you are hosting it: http[s]://[your-aimicromind-instance.com]/api/v1/auth0/callback:
.png)
- In the API’s tab, ensure that Auth0 Management API is enabled with the following permissions
- read:users
- read:client_grants
.png)
6. Back to AiMicromind App, fill in the Domain, Client ID and Secret. Test and Save the configuration.
.png)
Inviting users for SSO sign in
In order for new user to be able to login using SSO, we have to invite new users into aimicromind application. This is essential to keep a record of the role/workspace of the invited user. Refer to Invite Users section for env variables configuration.
Organization Admin can choose the login type for invited user:
.png)
- SSO: invited user can only login using SSO
- Email/Password: invited user can only login via email/password
Invited user will be receiving invitation link to login:
.png)
Clicking the button will bring the invited user directly to aimicromind SSO login screen:
.png)
Or navigate to aimicromind app and Sign in with SSO:
.png)
Running aimicromind using Queue
By default, aimicromind runs in a NodeJS main thread. However, with large number of predictions, this does not scale well. Therefore there are 2 modes you can configure: main (default) and queue.
Queue Mode
With the following environment variables, you can run aimicromind in queue mode.
| Variable | Description | Type | Default |
|---|---|---|---|
| MODE | Mode to run AiMicromind | Enum String: main, queue | main |
| WORKER_CONCURRENCY | How many jobs are allowed to be processed in parallel for a worker. If you have 1 worker, that means how many concurrent prediction tasks it can handle. More info | Number | 10000 |
| QUEUE_NAME | The name of the message queue | String | aimicromind-queue |
| QUEUE_REDIS_EVENT_STREAM_MAX_LEN | Event stream is auto-trimmed so that its size does not grow too much. More info | Number | 10000 |
| REDIS_HOST | Redis host | String | localhost |
| REDIS_PORT | Redis port | Number | 6379 |
| REDIS_USERNAME | Redis username (optional) | String | |
| REDIS_PASSWORD | Redis password (optional) | String | |
| REDIS_TLS | Redis TLS connection (optional) More info | Boolean | false |
| REDIS_CERT | Redis self-signed certificate | String | |
| REDIS_KEY | Redis self-signed certificate key file | String | |
| REDIS_CA | Redis self-signed certificate CA file | String |
In queue mode, the main server will be responsible for processing requests, sending jobs to message queue. Main server will not execute the job. One or multiple workers receive jobs from the queue, execute them and send the results back.
This allows for dynamic scaling: you can add workers to handle increased workloads or remove them during lighter periods.
Here's how it works:
- The main server receive prediction or other requests from the web, adding them as jobs to the queue.
- These job queues are essential lists of tasks waiting to be processed. Workers, which are essentially separate processes or threads, pick up these jobs and execute them.
- Once the job is completed, the worker:
- Write the results in the database.
- Send an event to indicate the completion of the job.
- Main server receive the event, and send the result back to UI.
- Redis pub/sub is also used for streaming data back to UI.
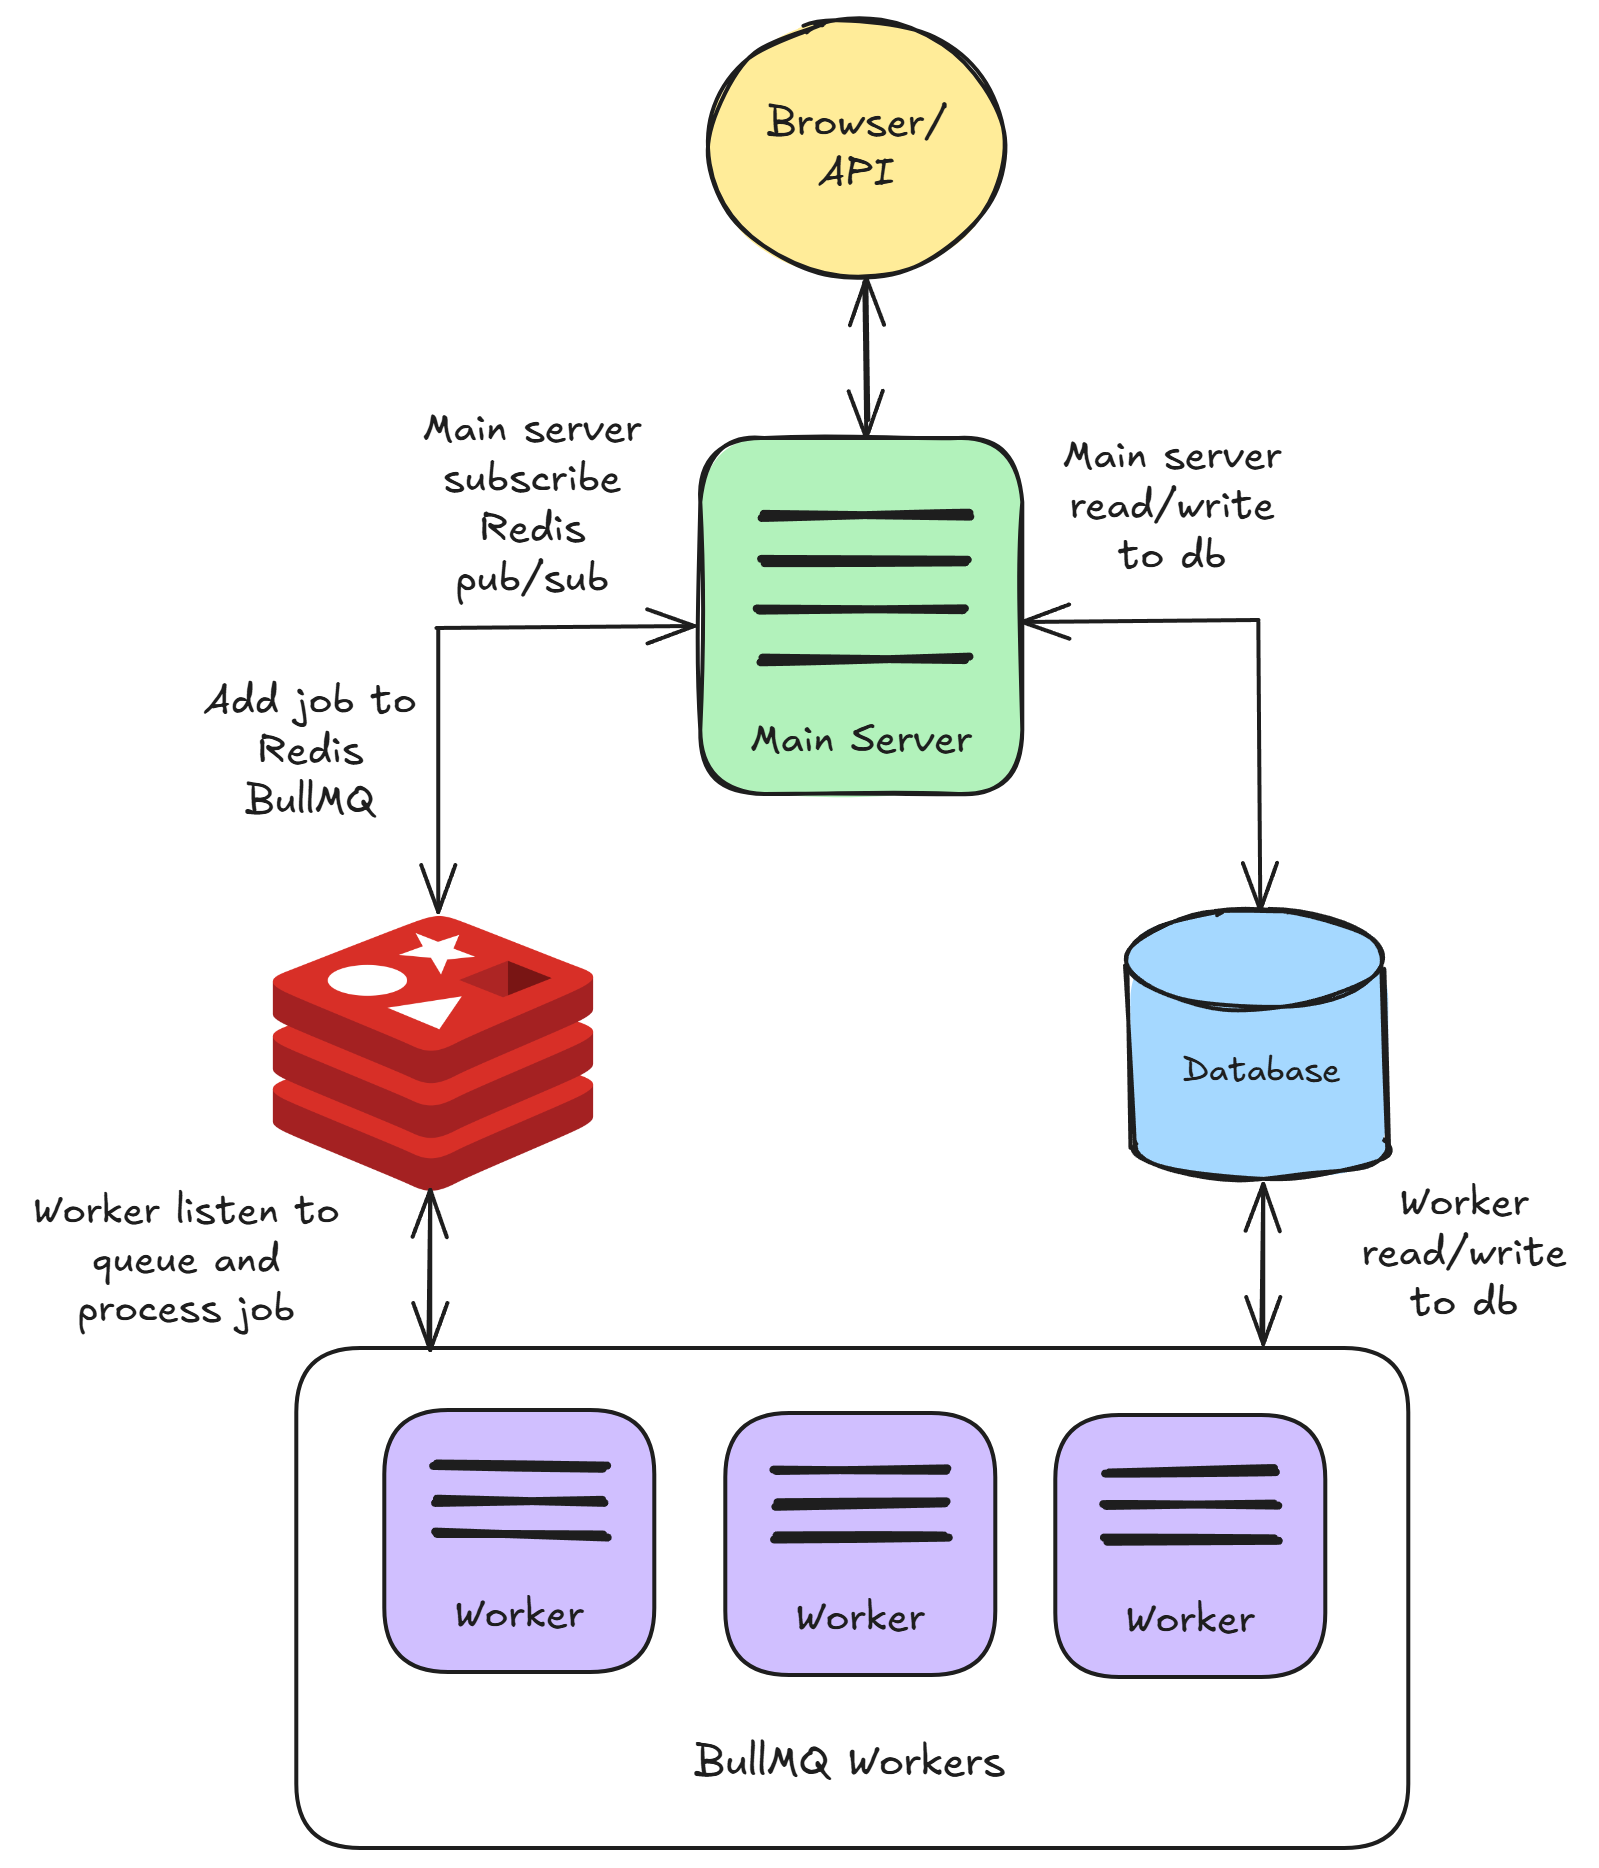
Start Redis
Before starting main server and workers, Redis need to be running first. You can run Redis on a separate machine, but make sure that it's accessible by the server and worker instances.
For example, you can get Redis running on your Docker following this guide.
Configure Main Server
This is the same as you were to run aimicromind by default, with the exceptions of configuring the environment variables mentioned above.
Configure Worker
Same as main server, environment variables above must be configured. We recommend just using the same .env file for both main and worker instances. The only difference is how to run the workers.
{% hint style="warning" %} Main server and worker need to share the same secret key. Refer to #for-credentials. For production, we recommend using Postgres as database for perfomance. {% endhint %}
Running aimicromind locally using NPM
npx aimicromind worker # remember to pass in the env vars!
Docker Compose
You can either use the docker-compose.yml provided here or reuse the same docker-compose.yml you were using for main server, but change the entrypoint from aimicromindstartto aimicromindworker:
version: '3.1'

services:
    aimicromind:
        image: aimicromind/aimicromind
        restart: always
        environment:
            - PORT=${PORT}
            ....
            - MODE=${MODE}
            - WORKER_CONCURRENCY=${WORKER_CONCURRENCY}
            ....
        ports:
            - '${PORT}:${PORT}'
        volumes:
            - ~/.aimicromind:/root/.aimicromind
        entrypoint: /bin/sh -c "sleep 3; aimicromind worker"
Git Clone
Open 1st terminal to run main server
pnpm start
Other terminals to run worker
pnpm start-worker
AWS Terraform
Coming soon
Queue Dashboard
You can view all the jobs, their status, result, data by navigating to <your-aimicromind-url.com>/admin/queues
.png)
Running in Production
Mode
When running in production, we highly recommend using Queue mode with the following settings:
- At least 2 main servers with load balancing, each starting from 2 CPU 4GB RAM
- At least 2 workers, each starting from 1 CPU 2GB RAM
You can configure auto scaling depending on the traffic and volume.
Database
By default, AiMicromind will use SQLite as the database. However when running at scale, its recommended to use PostgresQL.
Storage
Currently aimicromind only supports AWS S3 with plan to support more blob storage providers. This will allow files and logs to be stored on S3, instead of local file path. Refer #for-storage
Encryption
AiMicromind uses an encryption key to encrypt/decrypt credentials you use such as OpenAI API keys. AWS Secret Manager is recommended to be used in production for better security control and key rotation. Refer #for-credentials
API Key Storage
Users can create multiple API keys within aimicromind in order to authenticate with the APIs. By default, keys get stored as a JSON file to your local file path. However when you have multiple instances, each instance will create a new JSON file, causing confusion. You can change the behaviour to store into database instead. Refer #for-aimicromind-api-keys
Rate Limit
When deployed to cloud/on-prem, most likely the instances are behind a proxy/load balancer. The IP address of the request might be the IP of the load balancer/reverse proxy, making the rate limiter effectively a global one and blocking all requests once the limit is reached or undefined. Setting the correct NUMBER_OF_PROXIES can resolve the issue. Refer #rate-limit-setup
Load Testing
Artillery can be used to load testing your deployed aimicromind application. Example script can be found here.
description: Learn about all available integrations / nodes in AiMicromind
Integrations
In AiMicromind, nodes are referred to as integrations. Similar to LEGO, you can build a customized LLM ochestration flow, a chatbot, an agent with all the integrations available in AiMicromind.
LangChain
- Agents
- Cache
- Chains
- Chat Models
- Document Loaders
- Embeddings
- LLMs
- Memory
- Moderation
- Output Parsers
- Prompts
- Record Managers
- Retrievers
- Text Splitters
- Tools
- Vector Stores
LlamaIndex
Utilities
External Integrations
description: Learn how aimicromind integrates with the LangChain framework
LangChain
LangChain is a framework for developing applications powered by language models. It simplifies the process of creating generative AI application, connecting data sources, vectors, memories with LLMs.
AiMicromind complements LangChain by offering a visual interface. Here, nodes are organized into distinct sections, making it easier to build workflows.
LangChain Sections:
- Agents
- Cache
- Chains
- Chat Models
- Document Loaders
- Embeddings
- LLMs
- Memory
- Moderation
- Output Parsers
- Prompts
- Record Managers
- Retrievers
- Text Splitters
- Tools
- Vector Stores
description: LangChain Agent Nodes
Agents
By themselves, language models can't take actions - they just output text.
Agents are systems that use an LLM as a reasoning engine to determine which actions to take and what the inputs to those actions should be. The results of those actions can then be fed back into the agent and it determine whether more actions are needed, or whether it is okay to finish.
Agent Nodes:
- Airtable Agent
- AutoGPT
- BabyAGI
- CSV Agent
- Conversational Agent
- Conversational Retrieval Agent
- MistralAI Tool Agent
- OpenAI Assistant
- OpenAI Function Agent
- OpenAI Tool Agent
- ReAct Agent Chat
- ReAct Agent LLM
- Tool Agent
- XML Agent
description: Agent used to to answer queries on Airtable table.
Airtable Agent
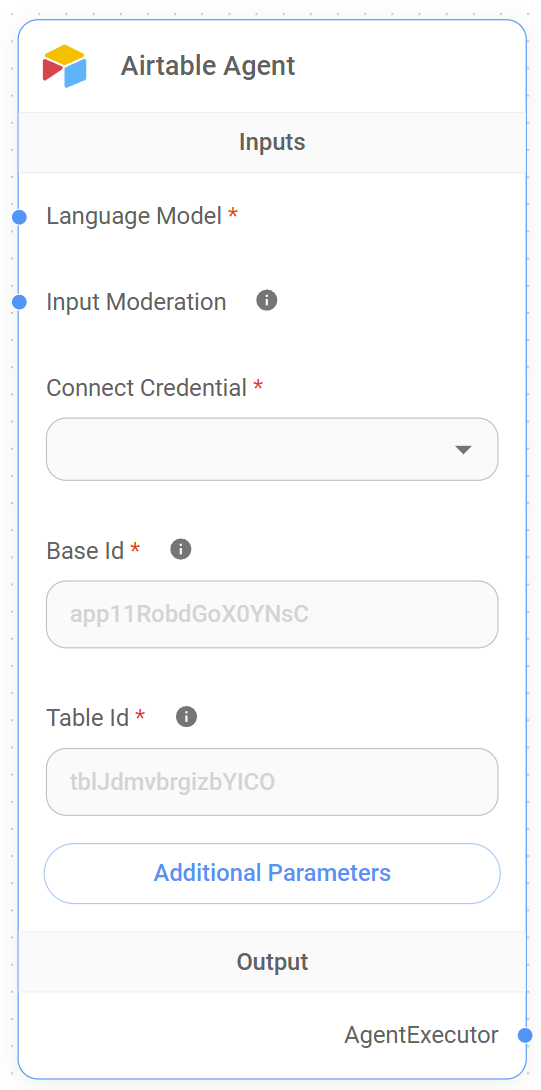
Airtable Agent Node
Airtable Agent Functionality
The Airtable Agent is a specialized node designed to answer queries about data stored in Airtable tables. It combines the power of language models with the ability to interact with Airtable data, allowing users to ask questions and receive insights about their Airtable content.
For example, the Airtable Agent can be used to answer questions like:
- "How many tasks are still incomplete in my project tracker table?"
- "What are the contact details of the clients listed in the CRM?"
- "Give me a summary of all records added in the past week."
This functionality helps users answer queries on Airtable tables, get insights from their Airtable bases without needing to navigate through the Airtable interface, making it easier to manage and analyze their data in a seamless, interactive way.
Inputs
The Airtable Agent requires the following inputs to function effectively:
Required Parameters
- Language Model: The language model to be used for processing queries. This input is required and helps determine the quality and accuracy of responses provided by the agent.
- Base ID: The ID of the Airtable base to connect to. This is a required field and can be found in the Airtable API documentation or the base settings. If your table URL looks like
https://airtable.com/app11RobdGoX0YNsC/tblJdmvbrgizbYlCO/viw9UrP77idOCE4ee,app11RobdGoX0YNsCis the Base ID. It is used to specify which Airtable base contains the data to be queried. - Table ID: The ID of the specific table within the Airtable base. This is also a required field and helps the agent target the correct table for data retrieval. In the example URL
https://airtable.com/app11RobdGoX0YNsC/tblJdmvbrgizbYlCO/viw9UrP77idOCE4ee,tblJdmvbrgizbYlCOis the Table ID. - Connect Credential: Required input to connect to Airtable. Users must select the appropriate credential that has permissions to access their Airtable data.
Optional Parameters
- Input Moderation: Optional input that enables content moderation. This helps ensure that queries are appropriate and do not contain offensive or harmful content.
- Additional Parameters: Optional parameters that can be used to customize the behavior of the agent. These parameters can be configured based on specific use cases.
- Return All: This option allows users to return all records from the specified table. If enabled, all records will be retrieved, otherwise, only a limited number will be returned.
- Limit: Specifies the maximum number of records to be returned if Return All is not enabled. The default value is
100.
Ouput
A detailed answer to the query, based on analysis of the Airtable data.
How It Works
- The agent first retrieves data from the specified Airtable base and table using the provided credentials.
- The data is converted to a Pandas DataFrame using Pyodide (a Python runtime for the browser).
- A language model interprets the user’s query and generates Python code to analyze the data.
- The generated Python code is executed using Pyodide to perform the analysis.
- The results of the analysis are then passed back to the language model to generate a human-readable response.
- The final answer is returned to the user.
Note: This section is a work in progress. We appreciate any help you can provide in completing this section. Please check our Contribution Guide to get started.
description: Autonomous agent with chain of thoughts for self-guided task completion.
AutoGPT
 (2).png)
AutoGPT Node
AutoGPT Agent Functionality
AutoGPT is an autonomous agent node designed for self-guided task completion. It uses a chain of thoughts approach to break down and solve complex tasks without constant human intervention.
The AutoGPT node implements an autonomous agent capable of breaking down complex tasks into smaller steps and executing them sequentially. It uses a language model, a set of tools, and a vector store for memory to guide its decision-making process.
The AutoGPT node implements an autonomous agent capable of breaking down complex tasks into smaller steps and executing them sequentially. It uses a language model, a set of tools, and a vector store for memory to guide its decision-making process.
Inputs
Required Parameters
- Allowed Tools: External capabilities the agent can use to complete tasks, such as web search, document reading, web scraping, file writing, API access, etc.
- Chat Model: language model that is specifically trained and optimized for multi-turn, conversational interactions (e.g., GPT-4 vs Claude 3).
- Vector Store Retriever: Vector-based memory that allows the agent to remember past steps and avoid repetition. Useful for tasks that require reflection or long-term context.
Optional Parameters
- Input Moderation: Optional input that enables content moderation. This helps ensure that queries are appropriate and do not contain offensive or harmful content.
- AutoGPT Name: The name given to the AutoGPT agent.
- AutoGPT Role: The role assigned to the AutoGPT agent.
- Maxium Loop: parameter controls how many iterations (or thought-action-observation cycles) the AutoGPT agent can run before automatically stopping.
How It Works
-
The AutoGPT agent is initialized with the provided tools, language model, and vector store retriever.
-
The agent receives a task or goal as input.
-
It then enters a loop, where in each iteration it:
- Determines the next action to take
- Executes the action using the available tools
- Updates its memory with the results
- Decides whether to continue or finish the task
-
The agent continues this process until it completes the task, reaches the maximum number of iterations, or encounters an error.
-
Finally, it returns a detailed output including its thought process and results.
{% hint style="info" %} This section is a work in progress. We appreciate any help you can provide in completing this section. Please check our Contribution Guide to get started. {% endhint %}
description: >- Task Driven Autonomous Agent which creates new task and reprioritizes task list based on objective
BabyAGI
 (1) (1) (1).png)
BabyAGI Node
BabyAGI Agent Functionality
The BabyAGI node in the AI MicroMind platform represents an autonomous task manager designed to take a single high-level objective and break it down into a sequence of subtasks it can create, prioritize, and execute on its own, continuously refining its task list as it progresses.
Inputs
The BabyAGI Agent requires the following inputs to function effectively:
Required Parameters
- Chat Model: language model that is specifically trained and optimized for multi-turn, conversational interactions (e.g., GPT-4 vs Claude 3).
- Vector Store: A vector store or vector database refers to a type of database system that specializes in storing and retrieving high-dimensional numerical vectors.
- Task Loop: refers to the core autonomous cycle that the agent follows to accomplish a high-level objective
Optional Parameters
- Input Moderation: Optional input that enables content moderation. This helps ensure that queries are appropriate and do not contain offensive or harmful content.
{% hint style="info" %} This section is a work in progress. We appreciate any help you can provide in completing this section. Please check our Contribution Guide to get started. {% endhint %}
description: Agent used to answer queries on CSV data.
CSV Agent
 (1) (1).png)
CSV Agent Node
CSV Agent Functionality
This agent is designed to answer natural language queries based on CSV data. It works by loading the CSV file into a pandas DataFrame and leveraging a language model to analyze and respond to user queries.
For example, the CSV Agent can be used to answer questions like:
- "How many rows are in the CSV?"
- "What is the average value of column ‘age’?"
- "Show me a summary of entries where 'column X' > 100"
Inputs
The CSV Agent requires the following inputs to function effectively:
Required Parameters
-
(LLM) Language Model: The language model to be used for processing queries. This input is required and helps determine the quality and accuracy of responses provided by the agent.
-
CSV File: Required input. This field is used to upload the CSV file that the agent will analyze. The uploaded file should contain the data you want the agent to process and query using natural language instructions.
Optional Parameters
- Input Moderation: Optional input that enables content moderation. This helps ensure that queries are appropriate and do not contain offensive or harmful content.
How It Works
- The agent first loads the CSV file using either the default or custom Pandas read_csv function.
- It converts the CSV data into a Pandas DataFrame using Pyodide (a Python runtime for the browser).
- A language model interprets the user’s query and generates Python code to analyze the data.
- The generated Python code is executed using Pyodide to perform the analysis.
- The results of the analysis are then passed back to the language model to generate a human-readable response.
- The final answer is returned to the user.
The CSV Agent node provides a powerful interface for interacting with CSV data using natural language, making it easier for users to gain insights from their CSV files without needing to write complex queries or scripts. It’s particularly useful for data analysts, business users, or anyone who needs to quickly extract information from CSV data without diving into the technicalities of data manipulation.
{% hint style="info" %} This section is a work in progress. We appreciate any help you can provide in completing this section. Please check our Contribution Guide to get started. {% endhint %}
description: Conversational agent for a chat model. It will utilize chat specific prompts.
Conversational Agent
 (1) (1) (1) (1) (1).png)
Conversational Agent Node
The Conversational Agent is an advanced AI agent designed for dynamic, multi-turn conversations. It leverages a chat model, memory, and a set of tools to engage in contextual dialogue and perform tasks based on user input.
Description
The Conversational Agent node creates an AI assistant capable of maintaining context over multiple interactions, using tools to gather information or perform actions, and providing coherent responses. It’s particularly suited for chat-based applications where context retention and task execution are important.
Inputs
The Conversational Agent requires the following inputs to function effectively:
Required Parameters
- Allowed Tools: List the tools this agent is permitted to use.
- Chat Model: language model that is specifically trained and optimized for multi-turn, conversational interactions (e.g., GPT-4 vs Claude 3).
- Memory: the memory input provides the agent with long-term context across multiple user interactions. It helps the agent remember previous messages, questions, and responses, allowing it to hold a coherent and natural multi-turn conversation.
Optional Parameters
- Input Moderation: Optional input that enables content moderation. This helps ensure that queries are appropriate and do not contain offensive or harmful content.
How It Works
- The agent is initialized with the provided tools, chat model, memory, and optional parameters.
- It receives a user input, which is first checked by any specified moderation tools.
- The agent then:
- Retrieves relevant context from its memory
- Analyzes the input and context to determine the next action
- Uses tools if necessary to gather information or perform tasks
- Generates a response using the chat model
- The response and any used tools or source documents are returned.
- The conversation history is updated in the memory for future context.
Special Features
- Vision Support: If the chat model supports vision capabilities, the agent can process and respond to image inputs.
- Streaming: The agent supports streaming responses, allowing for real-time interaction.
- Tool Integration: Can use a variety of tools to enhance its capabilities and perform actions.
- Memory Management: Maintains conversation history for contextual understanding.
- Moderation: Can implement input moderation to ensure safe interactions.
Notes
- The agent uses a sophisticated prompt structure to maintain consistent behavior.
- It can handle multi-modal inputs if the underlying chat model supports it (e.g., text and images).
- The system message can be customized to tailor the agent’s personality and capabilities.
- The max iterations parameter can be used to control the depth of the agent’s problem-solving attempts.
The Conversational Agent node provides a powerful, flexible foundation for building interactive AI systems. Its ability to maintain context, use tools, and engage in multi-turn dialogues makes it suitable for a wide range of applications where natural, intelligent conversation is required. The integration of memory, tools, and optional features like vision support and moderation makes it a comprehensive solution for complex conversational AI tasks.
{% hint style="info" %} This section is a work in progress. We appreciate any help you can provide in completing this section. Please check our Contribution Guide to get started. {% endhint %}
description: Deprecating Node.
Conversational Retrieval Agent

description: Deprecating Node.
MistralAI Tool Agent
description: An agent that uses OpenAI Assistant API to pick the tool and args to call.
OpenAI Assistant
 (1) (1) (1) (1) (1) (1) (1) (1) (1) (1) (1) (1) (1) (1) (1) (1).png)
OpenAI Assistant
{% hint style="info" %} This section is a work in progress. We appreciate any help you can provide in completing this section. Please check our Contribution Guide to get started. {% endhint %}
Threads
Threads is only used when an OpenAI Assistant is being used. It is a conversation session between an Assistant and a user. Threads store messages and automatically handle truncation to fit content into a model’s context.
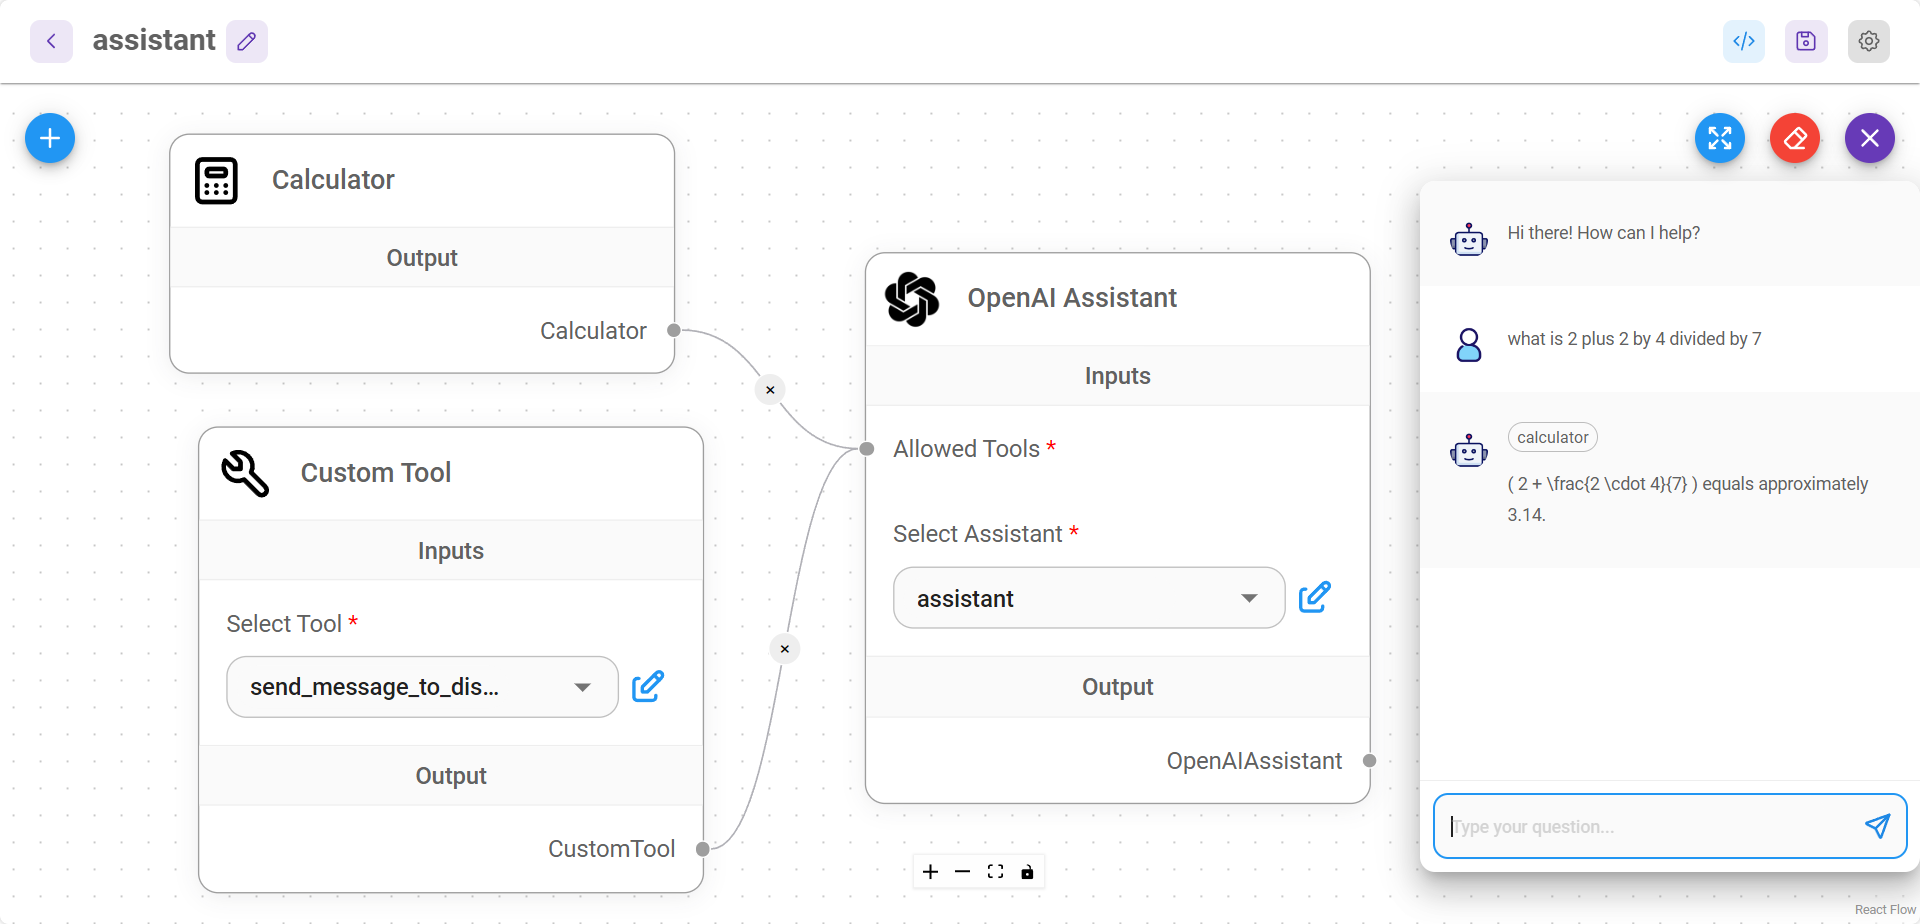
Separate conversations for multiple users
UI & Embedded Chat
By default, UI and Embedded Chat will automatically separate threads for multiple users conversations. This is done by generating a unique chatId for each new interaction. That logic is handled under the hood by AiMicromind.
Prediction API
POST /api/v1/prediction/{your-chatflowid}, specify the chatId . Same thread will be used for the same chatId.
{
    "question": "hello!",
    "chatId": "user1"
}
Message API
- GET
/api/v1/chatmessage/{your-chatflowid} - DELETE
/api/v1/chatmessage/{your-chatflowid}
You can also filter via chatId - /api/v1/chatmessage/{your-chatflowid}?chatId={your-chatid}
All conversations can be visualized and managed from UI as well:
.png)
description: Deprecating Node.
OpenAI Function Agent
description: Deprecating Node.
OpenAI Tool Agent
ReAct Agent Chat
Agent that uses the ReAct (Reasoning and Acting) logic to decide what action to take, optimized to be used with Chat Models.
.png)
 (1) (1) (1) (1) (1) (1) (1) (1).png)
ReAct Agent Chat Node
ReAct Agent Chat Functionality
The ReAct Agent (Chat) in FlowiseAI is an autonomous agent designed to interact through conversation while using external tools (like APIs or knowledge bases) to answer complex questions. "ReAct" stands for Reasoning and Acting — this agent combines step-by-step reasoning with the ability to take actions (like calling tools) to gather the information needed to respond accurately.
React Agent Chat extends ReactAgentLLM with conversational capabilities. It maintains chat history, tracks context, and enables multi-turn dialogue with the same ReAct logic underneath.
Inputs
The ReAct Agent Chat requires the following inputs to function effectively:
Required Parameters
- Allowed Tools: External capabilities the agent can use to complete tasks, such as web search, document reading, web scraping, file writing, API access, etc.
- Chat Model: language model that is specifically trained and optimized for multi-turn, conversational interactions (e.g., GPT-4 vs Claude 3).
- Memory: the memory input provides the agent with long-term context across multiple user interactions. It helps the agent remember previous messages, questions, and responses, allowing it to hold a coherent and natural multi-turn conversation.
Optional Parameters
- Input Moderation: Optional input that enables content moderation. This helps ensure that queries are appropriate and do not contain offensive or harmful content.
Special Features
-
ReAct Framework: Implements the Reason + Act loop for sophisticated problem-solving.
-
Chat Model Optimization: Specifically designed to work well with chat models for natural conversations.
-
Tool Integration: Can use a variety of tools to enhance its capabilities and perform actions.
-
Memory Management: Maintains conversation history for contextual understanding.
-
Moderation: Can implement input moderation to ensure safe interactions.
-
Vision Support: If the chat model supports vision capabilities, the agent can process and respond to image inputs.
-
Streaming: Supports streaming responses for real-time interaction.
{% hint style="info" %} This section is a work in progress. We appreciate any help you can provide in completing this section. Please check our Contribution Guide to get started. {% endhint %}
ReAct Agent LLM
Agent that uses the ReAct (Reasoning and Acting) logic to decide what action to take, optimized to be used with Non Chat Models.
.png)
 (1) (1) (1) (1) (1) (1) (1) (1).png)
ReAct Agent LLM Node
ReAct Agent LLM Functionality
This agent implements the ReAct (Reason + Act) framework, which allows it to alternate between reasoning about a problem and taking actions to solve it. It’s designed to work seamlessly with chat models, making it particularly effective for interactive, multi-turn conversations that involve complex problem-solving.
The ReactAgentLLM is the core agent that implements the ReAct paradigm, allowing LLMs to reason through problems and invoke tools/functions step-by-step based on intermediate observations.
Inputs
The ReAct Agent LLM requires the following inputs to function effectively:
Required Parameters
- Allowed Tools: External capabilities the agent can use to complete tasks, such as web search, document reading, web scraping, file writing, API access, etc.
- Chat Model: language model that is specifically trained and optimized for multi-turn, conversational interactions (e.g., GPT-4 vs Claude 3).
- Memory: the memory input provides the agent with long-term context across multiple user interactions. It helps the agent remember previous messages, questions, and responses, allowing it to hold a coherent and natural multi-turn conversation.
Optional Parameters
- Input Moderation: Optional input that enables content moderation. This helps ensure that queries are appropriate and do not contain offensive or harmful content.
{% hint style="info" %} This section is a work in progress. We appreciate any help you can provide in completing this section. Please check our Contribution Guide to get started. {% endhint %}
description: Agent that uses Function Calling to pick the tools and args to call.
Tool Agent
 (1) (1) (1) (1) (1) (1) (1) (1).png)
Tool Agent Node
Tool Agent Functionality
The Tool Agent node in AIMicroMind plays a central role in enabling LangChain-style agentic behavior, allowing an LLM to reason and decide when and how to call tools (functions) dynamically during a conversation or task.
Inputs
The Tool Agent requires the following inputs to function effectively:
Required Parameters
- Tools: External capabilities the agent can use to complete tasks, such as web search, document reading, web scraping, file writing, API access, etc.
- Memory: the memory input provides the agent with long-term context across multiple user interactions. It helps the agent remember previous messages, questions, and responses, allowing it to hold a coherent and natural multi-turn conversation.
- Tool Calling Chat Model: Only compatible with models that are capable of function calling: ChatOpenAI, ChatMistral, ChatAnthropic, ChatGoogleGenerativeAI, ChatVertexAI, GroqChat
Optional Parameters
- Input Moderation: Optional input that enables content moderation. This helps ensure that queries are appropriate and do not contain offensive or harmful content.
Special Features
-
Function Calling: Utilizes advanced chat models’ function calling for precise tool selection and execution.
-
Memory Management: Maintains conversation history for contextual understanding.
-
Tool Integration: Can use a variety of tools to enhance its capabilities and perform actions.
-
Moderation: Can implement input moderation to ensure safe interactions.
-
Vision Support: If the chat model supports vision capabilities, the agent can process and respond to image inputs.
-
Streaming: Supports streaming responses for real-time interaction.
-
Customizable Prompts: Allows for custom chat prompt templates to tailor the agent’s behavior.
Notes
-
The agent uses a sophisticated prompt structure to maintain consistent behavior.
-
It can handle multi-modal inputs if the underlying chat model supports it (e.g., text and images).
-
The system message can be customized to tailor the agent’s personality and capabilities.
-
The max iterations parameter can be used to control the depth of the agent’s problem-solving attempts.
-
This agent is particularly useful for scenarios where maintaining conversation context, using specific tools, and leveraging function calling capabilities are important.
The Tool Agent node provides a powerful solution for building AI systems that can engage in informed, context-aware conversations while having the ability to use tools as needed. Its combination of conversational abilities, tool usage, and function calling makes it suitable for a wide range of applications requiring both knowledge access and task execution within a conversational framework.
{% hint style="info" %} This section is a work in progress. We appreciate any help you can provide in completing this section. Please check our Contribution Guide to get started. {% endhint %}
description: >- Agent that is designed for LLMs that are good for reasoning/writing XML (e.g: Anthropic Claude).
XML Agent
 (1) (1) (1) (1) (1) (1) (1) (1).png)
XML Agent Node
XML Agent Functionality
The XML Agent is a specialized LangChain-based agent in AI designed to interpret and execute instructions formatted as XML tags. This structure allows for clean, parseable tool invocation using a standardized markup format.
Inputs
The XML Agent requires the following inputs to function effectively:
Required Parameters
- Tools: External capabilities the agent can use to complete tasks, such as web search, document reading, web scraping, file writing, API access, etc.
- Memory: the memory input provides the agent with long-term context across multiple user interactions. It helps the agent remember previous messages, questions, and responses, allowing it to hold a coherent and natural multi-turn conversation.
- Chat Model: language model that is specifically trained and optimized for multi-turn, conversational interactions (e.g., GPT-4 vs Claude 3).
Optional Parameters
- Input Moderation: Optional input that enables content moderation. This helps ensure that queries are appropriate and do not contain offensive or harmful content.
{% hint style="info" %} This section is a work in progress. We appreciate any help you can provide in completing this section. Please check our Contribution Guide to get started. {% endhint %}
description: LangChain Cache Nodes
Cache
Caching can save you money by reducing the number of API calls you make to the LLM provider, if you're often requesting the same completion multiple times. It can speed up your application by reducing the number of API calls you make to the LLM provider.
Cache Nodes:
- InMemory Cache
- InMemory Embedding Cache
- Momento Cache
- Redis Cache
- Redis Embeddings Cache
- Upstash Redis Cache
description: Caches LLM response in local memory, will be cleared when app is restarted.
InMemory Cache
 (1) (1) (1) (1) (1) (1) (1) (1) (1) (1) (1) (1) (1) (1).png)
InMemory Cache Node
The InMemory Cache node provides a simple and efficient way to cache LLM (Large Language Model) responses in memory, offering improved performance for repeated queries within a single session.
Description
This node implements an in-memory caching mechanism for LLM responses. It stores responses in memory, allowing for quick retrieval of previously computed results. This can significantly reduce response times and API calls for repeated or similar queries within the same session.
Parameters
This node does not have any configurable parameters. It automatically initializes and manages the in-memory cache.
Inputs
The node doesn’t require direct input from the user. It integrates into the LLM query flow automatically.
Output
The node doesn’t produce a direct output visible to the user. Instead, it returns cached responses when available, improving overall system performance.
How It Works
- When a query is made to an LLM:
- The cache checks if an identical query has been processed before.
- If found, it returns the cached response immediately.
- If not found, the query is processed by the LLM, and the response is stored in the cache before being returned.
-
The cache uses a combination of the prompt and LLM key to create unique cache keys.
-
The cache is maintained in memory for the duration of the application’s runtime.
Use Cases
- Improving response times for frequently asked questions
- Reducing API costs by minimizing redundant LLM calls
- Enhancing user experience in chatbots or AI assistants with quicker responses
- Optimizing performance in scenarios with repetitive queries or similar user inputs
Special Features
- Efficient Caching: Uses a hash-based approach for fast lookup and storage.
- Session-Based: Cache is maintained for the duration of the application session.
- Automatic Integration: Works seamlessly within the LLM query flow without additional configuration.
- Memory Efficient: Stores only unique query-response pairs.
Notes
- The cache is cleared when the application restarts, ensuring fresh responses for new sessions.
- This caching mechanism is particularly useful for scenarios where the same or similar queries are likely to occur within a single session.
- While improving performance, it’s important to consider that cached responses may not reflect real-time changes or updates to the underlying LLM.
- The effectiveness of the cache depends on the nature of the queries and the likelihood of repetition within a session.
The InMemory Cache node provides a simple yet powerful way to optimize LLM-based applications. By reducing redundant API calls and improving response times, it can significantly enhance both the performance and cost-effectiveness of AI-driven systems. This node is particularly valuable in applications where quick response times are crucial and where similar queries are likely to occur multiple times within the same session.
{% hint style="info" %} This section is a work in progress. We appreciate any help you can provide in completing this section. Please check our Contribution Guide to get started. {% endhint %}
description: Cache generated Embeddings in memory to avoid needing to recompute them.
InMemory Embedding Cache
 (1) (1) (1) (1) (1) (1) (1) (1) (1) (1) (1) (1) (1) (1) (1).png)
InMemory Embedding Cache Node
The InMemory Embedding Cache node provides an efficient way to cache generated embeddings in memory, reducing the need to recompute them for repeated queries within a single session.
Description
This node implements an in-memory caching mechanism for embeddings. It stores computed embeddings in memory, allowing for quick retrieval of previously generated results. This can significantly reduce computation time and API calls for repeated or similar embedding requests within the same session.
Inputs
The node doesn’t require direct input from the user. It integrates into the embedding generation flow automatically.
- Embedding: The embedding model to be used for generating embeddings.
Output
- The node returns a
Text CacheBackedEmbeddingsobject, which wraps the original embedding model with caching functionality.
How It Works
- When an embedding request is made:
- The cache checks if an identical request has been processed before.
- If found, it returns the cached embedding immediately.
- If not found, the embedding is generated using the provided embedding model, stored in the cache, and then returned.
-
The cache uses a combination of the input text and namespace (if provided) to create unique cache keys.
-
The cache is maintained in memory for the duration of the application’s runtime.
-
The caching mechanism is implemented using the
text CacheBackedEmbeddingsclass from LangChain, which provides a robust framework for caching embeddings.
Notes
- The cache is cleared when the application restarts, ensuring fresh embeddings for new sessions.
- This caching mechanism is particularly useful for scenarios where the same or similar texts are likely to be embedded multiple times within a single session.
- While improving performance, it’s important to consider memory usage, especially for large numbers of unique embeddings.
- The effectiveness of the cache depends on the nature of the embedding requests and the likelihood of repetition within a session.
The InMemory Embedding Cache node provides a powerful way to optimize embedding-based applications. By reducing redundant computation and improving response times, it can significantly enhance both the performance and cost-effectiveness of systems that rely heavily on embeddings. This node is particularly valuable in applications where quick embedding generation is crucial and where similar texts are likely to be processed multiple times within the same session.
{% hint style="info" %} This section is a work in progress. We appreciate any help you can provide in completing this section. Please check our Contribution Guide to get started. {% endhint %}
description: Cache LLM response using Momento, a distributed, serverless cache.
Momento Cache
The Momento Cache node provides integration with Momento, a distributed, serverless cache service. It allows for efficient caching of LLM (Large Language Model) responses across multiple sessions and instances.
 (1) (1) (1) (1) (1) (1) (1) (1) (1) (1) (1) (1) (1) (1) (1).png)
Momento Cache Node
Description
This node implements a caching mechanism using Momento’s serverless cache service. It stores LLM responses in a distributed cache, allowing for quick retrieval of previously computed results across different sessions and application instances. This can significantly reduce response times and API calls for repeated queries.
Parameters
- Credential
- Type: credential
- Credential Names: momentoCacheApi
- Description: The API credentials required to authenticate with the Momento cache service.
Inputs
The node doesn’t require direct input from the user. It integrates into the embedding generation flow automatically.
Output
- The node returns a
Text LangchainMomentoCacheobject, which can be used as a cache backend for LangChain operations.
How It Works
- The node initializes a connection to the Momento cache service using the provided credentials.
- When a query is made to an LLM:
- The cache checks if an identical query has been processed before.
- If found, it returns the cached response immediately.
- If not found, the query is processed by the LLM, and the response is stored in the Momento cache before being returned.
- The cache uses a combination of the prompt and LLM key to create unique cache keys.
- The cached data is stored in Momento’s distributed cache, making it accessible across multiple sessions and instances.
Use Cases
- Improving response times for frequently asked questions across multiple application instances
- Reducing API costs by minimizing redundant LLM calls in distributed systems
- Enhancing user experience in scalable chatbots or AI assistants with quicker responses
- Optimizing performance in scenarios with repetitive queries across different user sessions
Special Features
- Distributed Caching: Utilizes Momento’s serverless cache for cross-instance caching.
- Scalability: Easily scales with application growth without managing cache infrastructure.
- Persistence: Cache persists beyond individual application sessions.
- Automatic Integration: Works seamlessly within the LLM query flow.
- Configurable TTL: Supports setting Time-To-Live for cached items.
Notes
- Requires a Momento account and API credentials to function.
- The cache persists across application restarts, ensuring continuity of cached responses.
- This caching mechanism is particularly useful for scenarios where the same or similar queries are likely to occur across different sessions or application instances.
- While improving performance, it’s important to consider that cached responses may not reflect real-time changes or updates to the underlying LLM.
- The effectiveness of the cache depends on the nature of the queries and the likelihood of repetition across different users or sessions.
The Momento Cache node provides a powerful solution for optimizing LLM-based applications in distributed or serverless environments. By leveraging Momento’s serverless cache, it offers efficient caching capabilities that can significantly enhance both the performance and cost-effectiveness of AI-driven systems at scale. This node is particularly valuable in applications where quick response times are crucial across multiple instances or where similar queries are likely to occur from different users or sessions.
{% hint style="info" %} This section is a work in progress. We appreciate any help you can provide in completing this section. Please check our Contribution Guide to get started. {% endhint %}
description: >- Cache LLM response in Redis, useful for sharing cache across multiple processes or servers.
Redis Cache
The Redis Cache node provides integration with Redis, a popular in-memory data structure store, for caching LLM (Large Language Model) responses. It offers efficient caching capabilities across multiple sessions and instances.
 (1) (1) (1) (1) (1) (1) (1) (1) (1).png)
Redis Cache Node
Parameters
- Credential
- Type: credential
- Credential Names: momentoCacheApi
- Description: The API credentials required to authenticate with the Momento cache service.
Inputs
The node doesn’t require direct input from the user. It integrates into the embedding generation flow automatically.
Output
- The node returns a
Text LangchainRedisCacheobject, which can be used as a cache backend for LangChain operations.
How It Works
- The node initializes a connection to the Redis server using the provided credentials.
- When a query is made to an LLM:
- The cache checks if an identical query has been processed before.
- If found, it returns the cached response immediately.
- If not found, the query is processed by the LLM, and the response is stored in the Redis cache before being returned.
- The cache uses a combination of the prompt and LLM key to create unique cache keys.
- If a TTL is specified, cached items will expire after the set duration.
Use Cases
- Improving response times for frequently asked questions across multiple application instances
- Reducing API costs by minimizing redundant LLM calls in distributed systems
- Enhancing user experience in scalable chatbots or AI assistants with quicker responses
- Optimizing performance in scenarios with repetitive queries across different user sessions
- Sharing cache across multiple processes or servers
Special Features
- Distributed Caching: Utilizes Redis for cross-instance caching.
- Persistence: Cache can persist beyond individual application sessions.
- Configurable TTL: Supports setting Time-To-Live for cached items.
- Flexible Connection: Supports both direct Redis configuration and URL-based connection.
- SSL Support: Offers secure connections to Redis servers.
Notes
- Requires access to a Redis server, either self-hosted or cloud-based.
- The cache persists across application restarts, ensuring continuity of cached responses.
- This caching mechanism is particularly useful for scenarios where the same or similar queries are likely to occur across different sessions or application instances.
- While improving performance, it’s important to consider that cached responses may not reflect real-time changes or updates to the underlying LLM.
- The effectiveness of the cache depends on the nature of the queries and the likelihood of repetition across different users or sessions.
- The node supports both standalone Redis setups and clustered environments.
The Redis Cache node provides a robust solution for optimizing LLM-based applications in distributed environments. By leveraging Redis’s fast in-memory data store, it offers efficient caching capabilities that can significantly enhance both the performance and cost-effectiveness of AI-driven systems at scale. This node is particularly valuable in applications where quick response times are crucial across multiple instances or where similar queries are likely to occur from different users or sessions, and where sharing cache across multiple processes or servers is beneficial.
{% hint style="info" %} This section is a work in progress. We appreciate any help you can provide in completing this section. Please check our Contribution Guide to get started. {% endhint %}
description: >- Cache LLM response in Redis, useful for sharing cache across multiple processes or servers.
Redis Embeddings Cache
The Redis Embeddings Cache node provides a mechanism to cache generated embeddings using Redis, a high-performance in-memory data store. This node is designed to improve efficiency and reduce computational costs when working with embedding models.
Redis Embeddings Cache Node
Parameters
-
Embeddings (Required)
- Type: Embeddings
- Description: The embedding model to be used for generating embeddings.
-
Credential
- Type: credential
- Credential Names: momentoCacheApi
- Description: The API credentials required to authenticate with the Momento cache service.
Inputs
- The node doesn’t require direct input from the user. It integrates into the embedding generation flow automatically.
Output
- The node returns a
Text CacheBackedEmbeddingsobject, which wraps the original embedding model with Redis-based caching functionality.
How It Works
- The node initializes a connection to the Redis server using the provided credentials.
- When a query is made to an LLM:
- The cache checks if an identical query has been processed before.
- If found, it returns the cached response immediately.
- If not found, the query is processed by the LLM, and the response is stored in the Redis cache before being returned.
- The cache uses a combination of the prompt and LLM key to create unique cache keys.
- If a TTL is specified, cached items will expire after the set duration.
Use Cases
- Improving response times for applications that frequently generate embeddings
- Reducing API costs by minimizing redundant embedding generation calls
- Enhancing performance in scenarios with repetitive text inputs or similar queries
- Optimizing vector search operations by caching frequently used embeddings
- Sharing cached embeddings across multiple processes or servers
Special Features
- Distributed Caching: Utilizes Redis for cross-instance caching of embeddings.
- Configurable TTL: Supports setting Time-To-Live for cached embeddings.
- Namespace Support: Allows for organization of multiple caches within the same Redis instance.
- Flexible Connection: Supports both direct Redis configuration and URL-based connection.
- SSL Support: Offers secure connections to Redis servers.
- LangChain Integration: Built on top of LangChain’s CacheBackedEmbeddings for reliability and consistency.
Notes
- Requires access to a Redis server, either self-hosted or cloud-based.
- The cache persists across application restarts, ensuring continuity of cached embeddings.
- This caching mechanism is particularly useful for scenarios where the same or similar texts are likely to be embedded multiple times across different sessions or application instances.
- While improving performance, it’s important to consider Redis memory usage, especially for large numbers of unique embeddings.
- The effectiveness of the cache depends on the nature of the embedding requests and the likelihood of repetition across different users or sessions.
- Supports both standalone Redis setups and clustered environments.
The Redis Embeddings Cache node provides a powerful solution for optimizing embedding-based applications in distributed environments. By leveraging Redis’s fast in-memory data store, it offers efficient caching capabilities that can significantly enhance both the performance and cost-effectiveness of systems that rely heavily on embeddings. This node is particularly valuable in applications where quick embedding generation is crucial across multiple instances or where similar texts are likely to be processed multiple times from different users or sessions.
{% hint style="info" %} This section is a work in progress. We appreciate any help you can provide in completing this section. Please check our Contribution Guide to get started. {% endhint %}
description: Cache LLM response in Upstash Redis, serverless data for Redis and Kafka.
Upstash Redis Cache
The Upstash Redis Cache node provides integration with Upstash Redis, a serverless Redis service, for caching LLM (Large Language Model) responses. It offers efficient, scalable caching capabilities suitable for serverless and edge computing environments.
 (1) (1) (1) (1) (1) (1) (1) (1) (1).png)
Upstash Redis Cache Node
Parameters
- Credential
- Type: credential
- Credential Names: upstashRedisApi
- Description: The credentials required to connect to the Upstash Redis service.
Input
- The node doesn’t require direct input from the user. It integrates into the LLM query flow automatically.
Output
- The node initializes and returns an Upstash Redis Cache instance that can be used as a caching backend for LLM operations.
How It Works
- The node establishes a connection to the Upstash Redis service using the provided credentials.
- When a query is made to an LLM:
- The cache checks if an identical query has been processed before.
- If found, it returns the cached response immediately.
- If not found, the query is processed by the LLM, and the response is stored in the Upstash Redis cache before being returned.
- The cache uses a combination of the prompt and LLM key to create unique cache keys.
- Cached data is stored in Upstash’s serverless Redis, making it accessible across multiple serverless function invocations or edge locations.
Use Cases
- Improving response times for LLM queries in serverless architectures
- Reducing API costs by minimizing redundant LLM calls in edge computing scenarios
- Enhancing user experience in globally distributed applications with quicker responses
- Optimizing performance in scenarios with repetitive queries across different serverless function invocations
- Implementing efficient caching for LLM-based chatbots or AI assistants deployed on edge networks
Special Features
- Serverless Caching: Utilizes Upstash’s serverless Redis for scalable, managed caching.
- Global Distribution: Supports caching across multiple regions for low-latency access.
- Automatic Scaling: Scales automatically with application demand without managing infrastructure.
- Persistence: Cache persists beyond individual function invocations or application restarts.
- Compatibility: Works seamlessly with serverless platforms and edge computing environments.
Notes
- Requires an Upstash account and API credentials to function.
- Ideal for serverless and edge computing scenarios where traditional Redis setups might be challenging.
- The cache persists across function invocations, ensuring continuity of cached responses in serverless environments.
- This caching mechanism is particularly useful for scenarios where the same or similar queries are likely to occur across different regions or function invocations.
- While improving performance, it’s important to consider that cached responses may not reflect real-time changes or updates to the underlying LLM.
- The effectiveness of the cache depends on the nature of the queries and the likelihood of repetition across different users or sessions.
The Upstash Redis Cache node provides a powerful solution for optimizing LLM-based applications in serverless and edge computing environments. By leveraging Upstash’s serverless Redis service, it offers efficient caching capabilities that can significantly enhance both the performance and cost-effectiveness of AI-driven systems at global scale. This node is particularly valuable in applications where quick response times are crucial across multiple regions or where similar queries are likely to occur from different serverless function invocations or edge locations.
{% hint style="info" %} This section is a work in progress. We appreciate any help you can provide in completing this section. Please check our Contribution Guide to get started. {% endhint %}
description: LangChain Chain Nodes
Chains
In the context of chatbots and large language models, "chains" typically refer to sequences of text or conversation turns. These chains are used to store and manage the conversation history and context for the chatbot or language model. Chains help the model understand the ongoing conversation and provide coherent and contextually relevant responses.
Here's how chains work:
- Conversation History: When a user interacts with a chatbot or language model, the conversation is often represented as a series of text messages or conversation turns. Each message from the user and the model is stored in chronological order to maintain the context of the conversation.
- Input and Output: Each chain consists of both user input and model output. The user's input is usually referred to as the "input chain," while the model's responses are stored in the "output chain." This allows the model to refer back to previous messages in the conversation.
- Contextual Understanding: By preserving the entire conversation history in these chains, the model can understand the context and refer to earlier messages to provide coherent and contextually relevant responses. This is crucial for maintaining a natural and meaningful conversation with users.
- Maximum Length: Chains have a maximum length to manage memory usage and computational resources. When a chain becomes too long, older messages may be removed or truncated to make room for new messages. This can potentially lead to loss of context if important conversation details are removed.
- Continuation of Conversation: In a real-time chatbot or language model interaction, the input chain is continually updated with the user's new messages, and the output chain is updated with the model's responses. This allows the model to keep track of the ongoing conversation and respond appropriately.
Chains are a fundamental concept in building and maintaining chatbot and language model conversations. They ensure that the model has access to the context it needs to generate meaningful and context-aware responses, making the interaction more engaging and useful for users.
Chain Nodes:
- GET API Chain
- OpenAPI Chain
- POST API Chain
- Conversation Chain
- Conversational Retrieval QA Chain
- LLM Chain
- Multi Prompt Chain
- Multi Retrieval QA Chain
- Retrieval QA Chain
- Sql Database Chain
- Vectara QA Chain
- VectorDB QA Chain
description: Chain to run queries against GET API.
GET API Chain
 (1).png)
GET API Chain Node
The GET API Chain node is designed to run queries against GET APIs. It constructs API URLs based on given documentation and user questions, then processes the API responses to answer queries.
Parameters
-
Language Model (Required)
- Type: BaseLanguageModel
- Description: The language model used to generate API URLs and process responses.
-
API Documentation (Required)
- Type: string
- Description: Description of how the API works. Should include details about endpoints, parameters, and response formats.
- Rows: 4
-
Headers (Optional)
- Type: json
- Description: Headers to be included in the API request.
- Additional Params: true
-
URL Prompt (Optional)
- Type: string
- Description: Prompt used to tell LLMs how to construct the URL.
- Default: A predefined prompt template for URL construction.
- Rows: 4
- Additional Params: true
-
Answer Prompt (Optional)
- Type: string
- Description: Prompt used to tell LLMs how to process the API response.
- Default: A predefined prompt template for answer generation.
- Rows: 4
- Additional Params: true
Input
A string containing the user’s question or query about the API.
Output
A string containing the answer to the user’s question, based on the API response.
How It Works
- The chain receives a user question about the API.
- It uses the language model and the URL prompt to generate an appropriate API URL based on the API documentation and the question.
- The chain makes a GET request to the constructed URL, including any specified headers.
- Upon receiving the API response, it uses the language model and the answer prompt to generate a human-readable answer to the original question.
- The final answer is returned as output.
Use Cases
- Querying external APIs to answer user questions
- Automating API interactions in chatbots or virtual assistants
- Simplifying complex API documentation for end-users
- Creating natural language interfaces for data retrieval from APIs
- Integrating multiple API sources to answer complex queries
Special Features
- Dynamic URL Generation: Constructs API URLs based on natural language questions.
- Flexible API Documentation: Can work with various APIs by providing appropriate documentation.
- Customizable Prompts: Allows fine-tuning of URL construction and answer generation processes.
- Header Support: Enables authentication and other custom headers for API requests.
- Language Model Integration: Leverages advanced language models for intelligent API interaction.
Notes
- The quality of results depends significantly on the completeness and accuracy of the provided API documentation.
- Custom URL and answer prompts can be used to optimize the chain for specific APIs or use cases.
- The chain is designed for GET requests only and may not be suitable for APIs requiring other HTTP methods.
- Proper error handling should be implemented when using this chain in production environments.
- The effectiveness of the chain can vary depending on the complexity of the API and the nature of the user queries.
The GET API Chain node provides a powerful tool for creating natural language interfaces to GET APIs. By combining API documentation, language models, and customizable prompts, it enables developers to build sophisticated systems that can interact with external APIs based on user queries. This node is particularly valuable in scenarios where you want to provide a user-friendly interface to complex API systems or integrate API-based data retrieval into conversational AI applications.
{% hint style="info" %} This section is a work in progress. We appreciate any help you can provide in completing this section. Please check our Contribution Guide to get started. {% endhint %}
description: Chain that automatically select and call APIs based only on an OpenAPI spec.
OpenAPI Chain
 (1).png)
OpenAPI Chain Node
The OpenAI Chain node enables seamless integration with OpenAI's language models, allowing you to generate, process, and analyze text using advanced AI within your workflows. This node is designed for flexible, intelligent interactions with OpenAI's API, supporting a wide range of natural language tasks.
Parameters
- Chat Model (Required)
- Type: BaseChatModel
- Description: The chat model used for interpreting queries and generating responses.
- YAML Link (Optional)
- Type: string
- Description: URL link to the OpenAPI specification in YAML format.
- Placeholder: https://api.speak.com/openapi.yaml
- Note: If YAML link is provided, uploaded YAML File will be ignored.
- YAML File (Optional)
- Type: file
- File Type: .yaml
- Description: Uploaded OpenAPI specification file in YAML format.
- Note: Ignored if YAML link is provided.
- Headers (Optional)
- Type: json
- Description: Additional headers to be included in API requests.
- Additional Params: true
- Input Moderation (Optional)
- Type: Moderation[]
- Description: Moderation tools to detect and prevent harmful input.
- Additional Params: true
How It Works
- The chain loads the OpenAPI specification from either the provided YAML link or uploaded file.
- It receives a user query or instruction.
- The chat model interprets the query to determine which API endpoint and method to use.
- The chain constructs the appropriate API request, including any necessary parameters or headers.
- It executes the API call and receives the response.
- The chat model then interprets the API response and generates a human-readable answer to the original query.
- The final response is returned, potentially including both the raw API data and the interpreted answer.
Notes
- The effectiveness of the chain depends on the quality and completeness of the OpenAPI specification.
- It’s important to ensure that the provided chat model is capable of understanding and working with API concepts.
- The chain supports both YAML and JSON formats for OpenAPI specifications, but YAML is preferred.
- When using file upload, ensure that the YAML file is properly formatted and complete.
- The chain can handle complex API structures, including nested objects and arrays in requests and responses.
- For optimal performance, it’s recommended to use a chat model that has been fine-tuned or trained on API-related tasks.
The OpenAPI Chain node provides a powerful solution for creating intelligent, natural language interfaces to API systems defined by OpenAPI specifications. By leveraging advanced language models and standardized API descriptions, it enables developers to quickly build sophisticated applications that can interact with complex APIs based on simple user queries. This node is particularly valuable in scenarios where you want to provide easy access to API functionality without requiring users to understand the technical details of API operation.
{% hint style="info" %} This section is a work in progress. We appreciate any help you can provide in completing this section. Please check our Contribution Guide to get started. {% endhint %}
description: Chain to run queries against POST API.
POST API Chain
.png)
POST API Chain Node
The POST API Chain node is designed to interact with APIs that require POST requests. It enables users to send data to external APIs by constructing request bodies and URLs based on provided documentation and user input, then processes the API responses to generate answers.
Parameters
-
Language Model (Required)
- Type: BaseLanguageModel
- Description: The language model used to generate API URLs, request bodies, and process responses.
-
API Documentation (Required)
- Type: string
- Description: Description of how the API works. Should include details about endpoints, parameters, request/response formats, and body schema.
- Rows: 4
-
Headers (Optional)
- Type: json
- Description: Headers to be included in the API request (e.g., authentication, content-type).
- Additional Params: true
-
URL Prompt (Optional)
- Type: string
- Description: Prompt used to tell LLMs how to construct the URL.
- Default: A predefined prompt template for URL construction.
- Rows: 4
- Additional Params: true
-
Answer Prompt (Optional)
- Type: string
- Description: Prompt used to tell LLMs how to process the API response.
- Default: A predefined prompt template for answer generation.
- Rows: 4
- Additional Params: true
How It Works
- The chain receives a user question about the API.
- It uses the language model and the URL prompt to generate an appropriate API URL based on the API documentation and the question.
- The chain uses the body prompt to generate the required request body (payload) for the POST request.
- It makes a POST request to the constructed URL, including any specified headers and the generated request body.
- Upon receiving the API response, it uses the language model and the answer prompt to generate a human-readable answer to the original question.
- The final answer is returned as output.
Use Cases
- Creating or updating resources via external APIs
- Automating data submission tasks in chatbots or virtual assistants
- Simplifying complex API documentation for end-users
- Enabling natural language interfaces for data creation or modification
- Integrating multiple API sources to automate workflows requiring POST requests
it empowers developers to build systems that can interact with external APIs for data creation, updates, or other POST operations based on user instructions.
{% hint style="info" %} This section is a work in progress. We appreciate any help you can provide in completing this section. Please check our Contribution Guide to get started. {% endhint %}
description: Chat models specific conversational chain with memory.
Conversation Chain
.png)
Conversation Chain Node
The Conversation Chain is a specialized chain designed for maintaining coherent, context-aware conversations using chat-based language models. It integrates memory components to retain conversation history, allowing for more natural and contextually relevant interactions.
Parameters
-
Chat Model (Required)
- Type: BaseChatModel
- Description: The chat-based language model used for generating responses.
-
Memory (Required)
- Type: BaseMemory
- Description: The memory component used to store and retrieve conversation history.
-
Chat Prompt Template (Optional)
- Type: ChatPromptTemplate
- Description: Custom prompt template for the conversation. Must include variable in the human message.
- Additional Params: true
-
Input Moderation (Optional)
- Type: Moderation[]
- Description: Moderation tools to detect and prevent harmful input.
- Additional Params: true
-
System Message (Optional)
- Type: string
- Description: Custom system message to set the behavior of the AI assistant.
- Default: A predefined system message template.
- Rows: 4
- Additional Params: true
How It Works
- The chain receives a user input.
- If input moderation is enabled, it checks the input for potential harmful content.
- It retrieves the conversation history from the memory component.
- The chat prompt template (or default if not provided) is populated with the conversation history and current input.
- The populated prompt is sent to the chat model for processing.
- The model generates a response based on the prompt and conversation context.
- The response is returned as output.
- The conversation history in the memory component is updated with the new interaction.
Use Cases
- Building conversational AI assistants or chatbots
- Creating interactive storytelling or role-playing experiences
- Developing personalized tutoring or coaching systems
- Implementing customer support chatbots with context retention
- Designing conversational interfaces for complex applications
Notes
- The quality and coherence of conversations heavily depend on the capabilities of the chosen chat model.
- Custom chat prompt templates can significantly influence the conversation style and flow.
- The system message can be used to set specific personality traits or knowledge domains for the AI.
- For multi-turn conversations, ensure that the memory component is properly configured to retain necessary context.
- The chain supports both text-only and multi-modal (text + image) inputs, depending on the chat model’s capabilities.
- Proper error handling should be implemented, especially for potential API failures or moderation issues.
- The effectiveness of the chain can vary based on the complexity of the conversation and the specific use case.
The Conversation Chain node provides a powerful foundation for building sophisticated, context-aware conversational AI systems. By combining advanced chat models with flexible memory components and customizable prompts, it enables the creation of natural, engaging, and persistent conversational experiences. This node is particularly valuable in scenarios where maintaining conversation context, personality consistency, and interactive responsiveness are crucial, such as in virtual assistants, interactive storytelling, or personalized customer engagement systems.
{% hint style="info" %} This section is a work in progress. We appreciate any help you can provide in completing this section. Please check our Contribution Guide to get started. {% endhint %}
Conversational Retrieval QA Chain
A chain for performing question-answering tasks with a retrieval component.
 (1) (1) (1) (1) (1) (1) (1) (1) (1).png)
Definitions
A retrieval-based question-answering chain, which integrates with a retrieval component and allows you to configure input parameters and perform question-answering tasks.
Retrieval-Based Chatbots: Retrieval-based chatbots are chatbots that generate responses by selecting pre-defined responses from a database or a set of possible responses. They "retrieve" the most appropriate response based on the input from the user.
QA (Question Answering): QA systems are designed to answer questions posed in natural language. They typically involve understanding the question and searching for or generating an appropriate answer.
Inputs
Parameters
| Name | Description |
|---|---|
| Return Source Documents | To return citations/sources that were used to build up the response |
| System Message | An instruction for LLM on how to answer query |
| Chain Option | Method on how to summarize, answer questions, and extract information from documents. Read more |
Outputs
| Name | Description |
|---|---|
| ConversationalRetrievalQAChain | Final node to return response |
description: Chain to run queries against LLMs.
LLM Chain
.png)
LLM Chain Node
The LLM Chain is a versatile component designed to run queries against Large Language Models (LLMs). It provides a flexible interface for prompt engineering, allowing users to construct complex prompts and process LLM responses efficiently.
Parameters
-
Language Model (Required)
- Type: BaseLanguageModel
- Description: The language model to be used for generating responses.
-
Prompt (Required)
- Type: BasePromptTemplate
- Description: The prompt template to be used for constructing queries to the LLM.
-
Output Parser (Optional)
- Type: BaseLLMOutputParser
- Description: Parser to process and structure the output from the LLM.
-
Input Moderation (Optional)
- Type: Moderation[]
- Description: Moderation tools to detect and prevent harmful input.
- List: true
-
Chain Name (Optional)
- Type: string
- Description: A name for the chain, useful for identification in complex workflows.
- Placeholder: “Name Your Chain”
How It Works
- The chain receives input, which is used to populate the prompt template.
- If input moderation is enabled, it checks the input for potential harmful content.
- The populated prompt is sent to the language model for processing.
- The LLM generates a response based on the prompt.
- If an output parser is specified, it processes the LLM’s response.
- The final output (either the processed response or the chain object) is returned.
Use Cases
- Generating creative content based on specific prompts
- Answering questions or providing explanations on various topics
- Translating or paraphrasing text
- Analyzing and summarizing documents
- Generating code or technical documentation
- Creating conversational AI components
Notes
- The effectiveness of the chain heavily depends on the quality of the prompt template and the capabilities of the chosen language model.
- Custom prompt templates can significantly influence the behavior and output of the chain.
- When using the chain in production, implement proper error handling, especially for potential API failures or moderation issues.
- Consider the token limits of the chosen LLM when designing prompts and processing outputs.
- The chain supports both text-only and multi-modal (text + image) inputs, depending on the language model’s capabilities.
- Output parsing can be crucial for integrating LLM responses into structured workflows or databases.
The LLM Chain node serves as a fundamental building block for creating AI-powered applications leveraging large language models. Its flexibility in prompt engineering and output processing makes it suitable for a wide range of natural language processing tasks. This node is particularly valuable in scenarios requiring complex language understanding, generation, or transformation, such as in content creation tools, advanced chatbots, or data analysis systems that need to interpret and generate human-like text.
{% hint style="info" %} This section is a work in progress. We appreciate any help you can provide in completing this section. Please check our Contribution Guide to get started. {% endhint %}
description: >- Chain automatically picks an appropriate prompt from multiple prompt templates.
Multi Prompt Chain
.png)
Multi Prompt Chain Node
The Multi Prompt Chain is an advanced chain that automatically selects and uses the most appropriate prompt from multiple predefined prompts based on the input query. It’s designed to handle a wide range of queries by dynamically choosing the best-suited prompt for each specific input.
Parameters
-
Language Model (Required)
- Type: BaseLanguageModel
- Description: The language model to be used for generating responses and selecting prompts.
-
Prompt Retriever (Required)
- Type: PromptRetriever[]
- Description: An array of prompt retrievers, each containing a prompt template, name, and description.
- List: true
-
Input Moderation (Optional)
- Type: Moderation[]
- Description: Moderation tools to detect and prevent harmful input.
- List: true
How It Works
- The chain receives a user input.
- If input moderation is enabled, it checks the input for potential harmful content.
- The language model analyzes the input to determine which prompt from the provided set is most appropriate.
- The selected prompt is then used to format the input for the language model.
- The language model generates a response based on the formatted prompt and input.
- The final response is returned as output.
Use Cases
- Creating versatile chatbots that can handle a wide range of topics
- Building AI assistants capable of adapting to different types of user queries
- Implementing dynamic Q&A systems that can switch between different knowledge domains
- Developing content generation tools that can adapt to various writing styles or formats
- Creating flexible customer support systems that can handle diverse inquiries
Special Features
- Dynamic Prompt Selection: Automatically chooses the most appropriate prompt for each input.
- Multiple Domain Support: Can handle queries across various topics or domains using specialized prompts.
- Flexible Configuration: Allows for easy addition or modification of prompt templates.
- Input Moderation: Optional safeguards against inappropriate or harmful inputs.
- Scalability: Can be expanded to cover new topics or query types by adding new prompt templates.
- Improved Accuracy: By using specialized prompts, it can provide more accurate and relevant responses.
Notes
- The effectiveness of the chain depends on the quality and diversity of the provided prompt templates.
- Careful design of prompt descriptions is crucial for accurate prompt selection.
- The chain may require more computation time compared to single-prompt chains due to the selection process.
- It’s important to ensure that the language model is capable of accurately selecting between prompts.
- For best results, prompt templates should be distinct and cover a wide range of potential query types.
- Regular analysis of chain performance can help identify areas where new prompts might be needed.
- The chain supports streaming responses for real-time interaction in compatible environments.
The Multi Prompt Chain node provides a sophisticated solution for creating highly adaptable AI systems that can handle a diverse range of inputs. By dynamically selecting the most appropriate prompt for each query, it combines the specificity of specialized prompts with the flexibility of a general-purpose system. This node is particularly valuable in scenarios where the input queries can vary widely in topic, style, or intent, such as in multi-purpose virtual assistants, comprehensive customer support systems, or versatile content generation tools. Its ability to adapt to different types of inputs makes it a powerful component for building more intelligent and responsive AI applications.
{% hint style="info" %} This section is a work in progress. We appreciate any help you can provide in completing this section. Please check our Contribution Guide to get started. {% endhint %}
description: >- QA Chain that automatically picks an appropriate vector store from multiple retrievers.
Multi Retrieval QA Chain
.png)
Multi Retrieval QA Chain Node
The Multi Retrieval QA Chain is an advanced question-answering system that automatically selects and utilizes the most appropriate vector store retriever from multiple options based on the input query. It’s designed to provide accurate answers by dynamically choosing the best-suited knowledge base for each specific question.
Parameters
-
Language Model (Required)
- Type: BaseLanguageModel
- Description: The language model used for generating responses and selecting retrievers.
-
Vector Store Retriever (Required)
- Type: VectorStoreRetriever
- Description: An array of vector store retrievers, each containing a vector store, name, and description.
- List: true
-
Return Source Documents (Optional)
- Type: boolean
- Description: Whether to return the source documents used to generate the answer.
-
Input Moderation (Optional)
- Type: Moderation[]
- Description: Moderation tools to detect and prevent harmful input.
- List: true
Input
A string containing the user’s question or query.
Output
- If Return Source Documents is false:
- A string containing the answer to the user’s question.
- If Return Source Documents is true:
- An object containing:
- text: The answer to the user’s question.
- sourceDocuments: An array of documents used to generate the answer.
How It Works
- The chain receives a user question.
- If input moderation is enabled, it checks the input for potential harmful content.
- The language model analyzes the question to determine which vector store retriever is most appropriate.
- The selected retriever fetches relevant documents from its associated vector store.
- The language model generates an answer based on the retrieved documents and the original question.
- The answer (and optionally source documents) is returned as output.
Special Features
- Dynamic Retriever Selection: Automatically chooses the most appropriate vector store retriever for each query.
- Multiple Knowledge Base Support: Can handle questions across various topics or domains using specialized retrievers.
- Flexible Configuration: Allows for easy addition or modification of vector store retrievers.
- Input Moderation: Optional safeguards against inappropriate or harmful inputs.
- Source Attribution: Option to return source documents for transparency and verification.
- Improved Accuracy: By using specialized retrievers, it can provide more accurate and relevant answers.
Notes
- The effectiveness of the chain depends on the quality and diversity of the provided vector store retrievers.
- Careful design of retriever descriptions is crucial for accurate selection.
- The chain may require more computation time compared to single-retriever chains due to the selection process.
- It’s important to ensure that the language model is capable of accurately selecting between retrievers.
- For best results, vector store retrievers should cover distinct knowledge domains or document types.
- Regular analysis of chain performance can help identify areas where new retrievers might be needed.
- The chain supports streaming responses for real-time interaction in compatible environments.
The Multi Retrieval QA Chain node provides a sophisticated solution for creating highly adaptable question-answering systems that can handle diverse queries across multiple knowledge domains. By dynamically selecting the most appropriate vector store retriever for each question, it combines the specificity of specialized knowledge bases with the flexibility of a general-purpose system.
This node is particularly valuable in scenarios where the input questions can vary widely in topic or require access to different types of information, such as in comprehensive customer support systems, multi-domain research tools, or versatile AI assistants. Its ability to adapt to different types of queries makes it a powerful component for building more intelligent and responsive information retrieval systems.
{% hint style="info" %} This section is a work in progress. We appreciate any help you can provide in completing this section. Please check our Contribution Guide to get started. {% endhint %}
description: QA chain to answer a question based on the retrieved documents.
Retrieval QA Chain
.png)
Retrieval QA Chain Node
The Retrieval QA Chain is a powerful question-answering system that combines document retrieval with language model processing to provide accurate answers based on a given knowledge base.
Parameters
- Language Model (Required)
- Type: BaseLanguageModel
- Description: The language model used for generating answers.
- Vector Store Retriever (Required)
- Type: BaseRetriever
- Description: The retriever used to fetch relevant documents from a vector store.
- Input Moderation (Optional)
- Type: Moderation[]
- Description: Moderation tools to detect and prevent harmful input.
- List: true
How It Works
- The chain receives a user question.
- If input moderation is enabled, it checks the input for potential harmful content.
- The vector store retriever fetches relevant documents based on the question.
- The language model generates an answer based on the processed documents and the original question.
- The answer (and optionally source documents) is returned as output.
Use Cases
- Building question-answering systems based on specific knowledge bases
- Creating AI assistants with access to large document repositories
- Implementing intelligent search functionality for databases or document collections
- Developing automated customer support systems with access to product documentation
- Creating educational tools that can answer questions based on course materials
Notes
- The quality of answers depends on both the underlying language model and the relevance of retrieved documents.
- The choice of Chain Option can significantly impact performance and accuracy for different types of queries.
- Custom system messages can be used to guide the AI’s behavior and response style.
- The chain supports streaming responses for real-time interaction in compatible environments.
- Proper error handling and input validation should be implemented for production use.
- The effectiveness of the chain can vary depending on the quality and organization of the knowledge base.
The Retrieval QA Chain node provides a robust solution for building AI-powered question-answering systems with access to large document repositories. By combining efficient document retrieval with advanced language model processing, it enables the creation of intelligent systems that can provide accurate, context-aware answers to user queries. This node is particularly valuable in scenarios where answers need to be derived from a specific body of knowledge, such as in specialized customer support, educational platforms, or domain-specific research tools.
{% hint style="info" %} This section is a work in progress. We appreciate any help you can provide in completing this section. Please check our Contribution Guide to get started. {% endhint %}
description: Answer questions over a SQL database.
Sql Database Chain
.png)
Sql Database Chain Node
The SQL Database node enables seamless integration with relational databases using SQL, allowing you to query, retrieve, and manipulate structured data within your workflows. This node is designed for flexible, intelligent interactions with SQL databases, supporting a wide range of data-driven tasks.
Parameters
- Language Model (Required)
- Type: BaseLanguageModel
- Description: The language model used for generating answers.
- Vector Store Retriever (Required)
- Type: BaseRetriever
- Description: The vector store used for storing and retrieving document embeddings.
- Input Moderation (Optional)
- Type: Moderation[]
- Description: Moderation tools to detect and prevent harmful input.
- List: true
{% hint style="info" %} This section is a work in progress. We appreciate any help you can provide in completing this section. Please check our Contribution Guide to get started. {% endhint %}
Vectara QA Chain
A chain for performing question-answering tasks with Vectara.
Definitions
A retrieval-based question-answering chain, which integrates with a Vectara retrieval component and allows you to configure input parameters and perform question-answering tasks.
Inputs
Parameters
| Name | Description |
|---|---|
| Summarizer Prompt Name | model to be used in generating the summary |
| Response Language | desired language for the response |
| Max Summarized Results | number of top results to use in summarization (defaults to 7) |
Outputs
| Name | Description |
|---|---|
| VectaraQAChain | Final node to return response |
How It Works
- The chain receives a user question.
- If input moderation is enabled, it checks the input for potential harmful content.
- The Vectara store retrieves relevant documents based on the question.
- The retrieved documents are processed and ranked.
- The specified summarizer prompt is used to generate a concise answer from the top-ranked documents.
- The answer is formatted with reordered citations.
- The final answer and source documents are returned as output.
The Vectara QA Chain node provides a sophisticated solution for building AI-powered question-answering systems that leverage Vectara’s advanced search and summarization capabilities. It excels in scenarios requiring accurate information retrieval and concise summarization from large document collections.
This node is particularly valuable for enterprises needing to extract insights from vast knowledge bases, researchers seeking efficient ways to summarize findings, or developers building multilingual information retrieval systems.
description: QA chain for vector databases.
VectorDB QA Chain
.png)
VectorDB QA Chain Node
The VectorDB QA Chain is a question-answering system that combines vector database retrieval with language model processing to provide accurate answers based on a given knowledge base stored in a vector database.
Parameters
- Language Model (Required)
- Type: BaseLanguageModel
- Description: The language model used for generating answers.
- Vector Store Retriever (Required)
- Type: BaseRetriever
- Description: The vector store used for storing and retrieving document embeddings.
- Input Moderation (Optional)
- Type: Moderation[]
- Description: Moderation tools to detect and prevent harmful input.
- List: true
How It Works
- The chain receives a user question.
- If input moderation is enabled, it checks the input for potential harmful content.
- The vector store retrieves relevant documents based on the similarity between the question and stored document embeddings.
- The retrieved documents are combined with the original question to form a prompt for the language model.
- The language model generates an answer based on the prompt and retrieved context.
- The final answer is returned as output.
The VectorDB QA Chain node provides a powerful solution for building AI-powered question-answering systems that can efficiently process and retrieve information from large document collections. By leveraging vector databases for fast similarity search and combining it with advanced language model processing, it enables the creation of intelligent systems that can provide accurate, context-aware answers to user queries.
This node is particularly valuable in scenarios where quick information retrieval from vast knowledge bases is crucial, such as in enterprise search systems, technical support platforms, or educational resources.
{% hint style="info" %} This section is a work in progress. We appreciate any help you can provide in completing this section. Please check our Contribution Guide to get started. {% endhint %}
description: LangChain Chat Model Nodes
Chat Models
Chat models take a list of messages as input and return a model-generated message as output. These models such as gpt-3.5-turbo or gpt4 are powerful and cheaper than its predecessor Completions models such as text-davincii-003.
Chat Model Nodes:
- AWS ChatBedrock
- Azure ChatOpenAI
- NIBittensorChat
- ChatAnthropic
- ChatCohere
- Chat Fireworks
- ChatGoogleGenerativeAI
- ChatGooglePaLM
- Google VertexAI
- ChatHuggingFace
- ChatLocalAI
- ChatMistralAI
- ChatOllama
- ChatOllama Funtion
- ChatOpenAI
- ChatOpenAI Custom
- ChatTogetherAI
- GroqChat
description: Wrapper around AWS Bedrock large language models that use the Chat endpoint.
AWS ChatBedrock
 (1) (1) (1) (1).png)
AWS ChatBedrock
{% hint style="info" %} This section is a work in progress. We appreciate any help you can provide in completing this section. Please check our Contribution Guide to get started. {% endhint %}
Azure ChatOpenAI
Prerequisite
- Log in or sign up to Azure
- Create your Azure OpenAI and wait for approval approximately 10 business days
- Your API key will be available at Azure OpenAI > click name_azure_openai > click Click here to manage keys

Setup
Azure ChatOpenAI
- Click Go to Azure OpenaAI Studio

- Click Deployments
- Click Create new deployment

- Select as shown below and click Create
- Successfully created Azure ChatOpenAI
- Deployment name:
gpt-35-turbo - Instance name:
top right conner

Flowise
- Chat Models > drag Azure ChatOpenAI node
- Connect Credential > click Create New
- Copy & Paste each details (API Key, Instance & Deployment name, API Version) into Azure ChatOpenAI credential

- Voila 🎉, you have created Azure ChatOpenAI node in AiMicromind
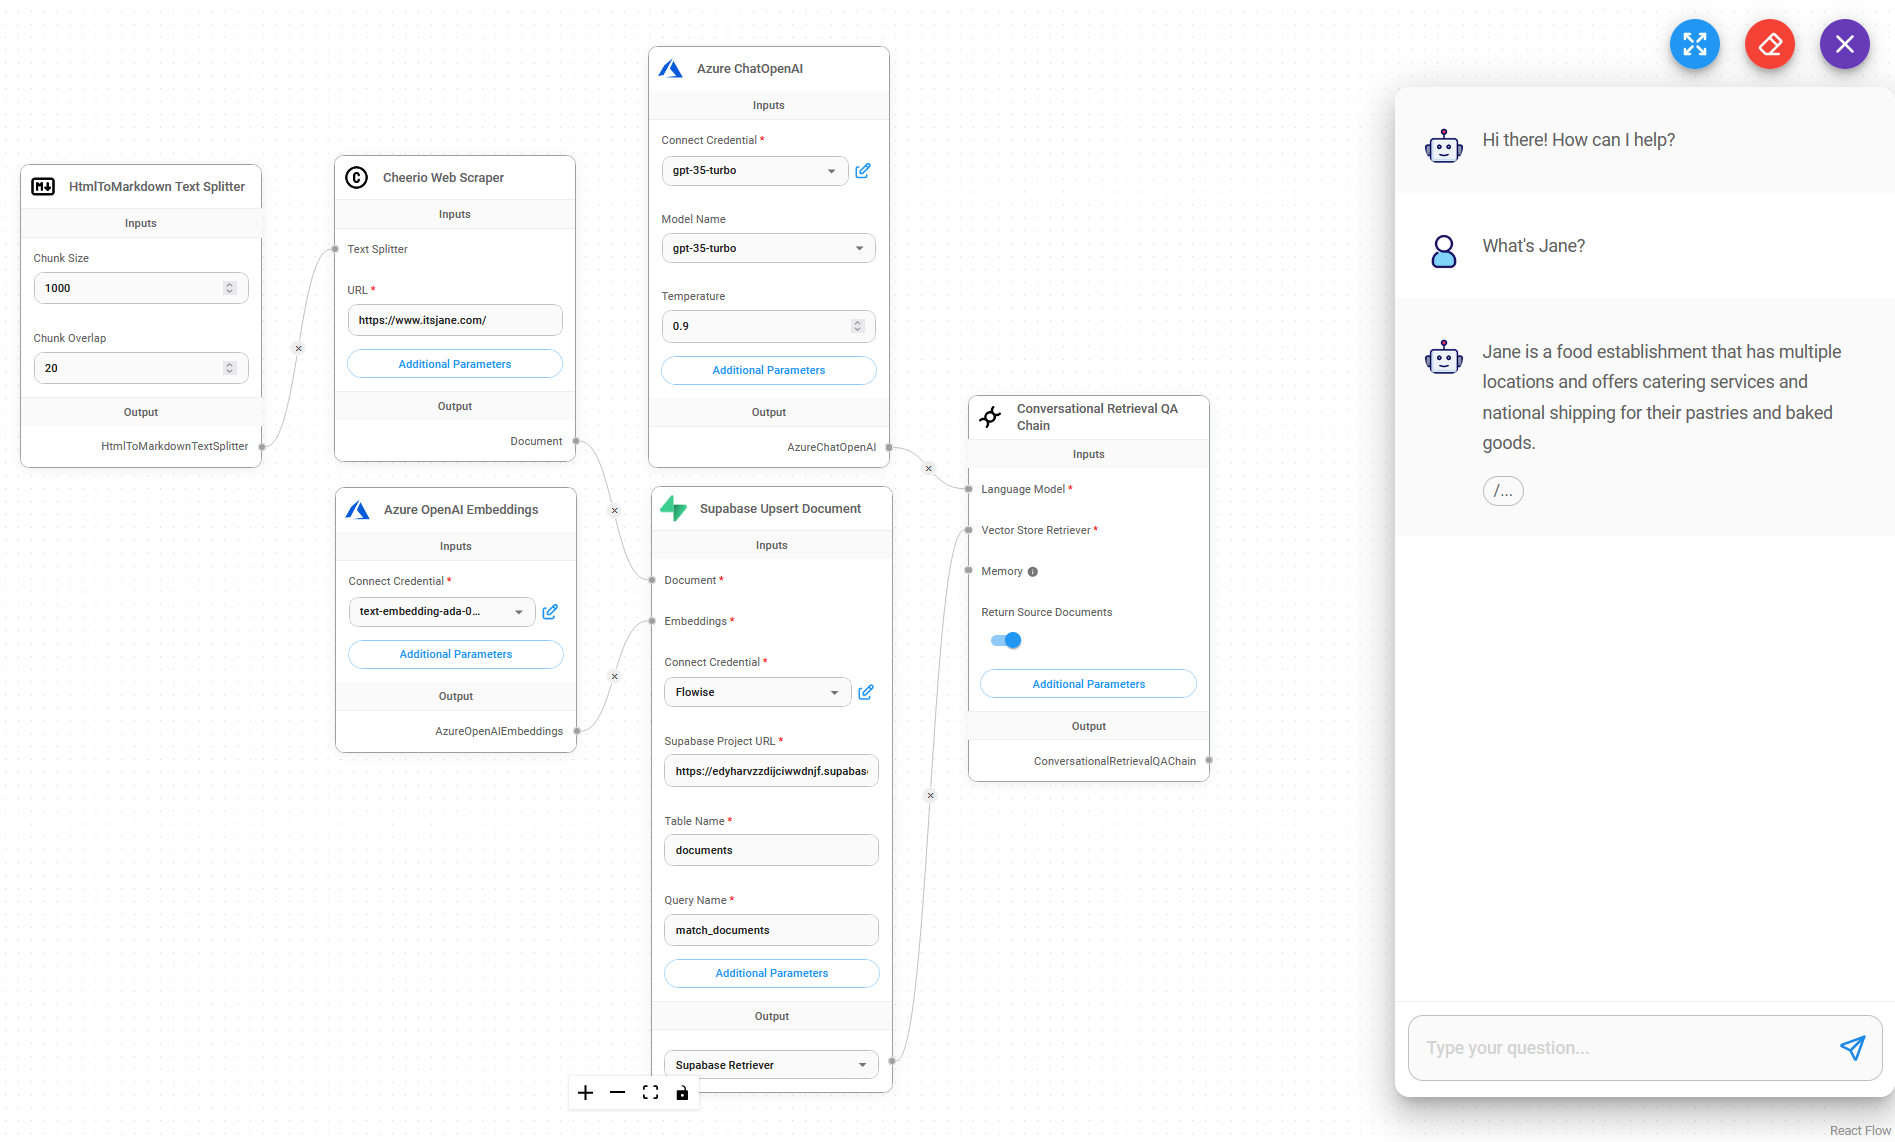
Resources
NVIDIA NIM
Local
Important Note on Running NIM with AiMicromind
If an existing NIM instance is already running (e.g., via NVIDIA’s ChatRTX), starting another instance through aimicromindwithout checking for an existing endpoint may cause conflicts. This issue occurs when multiple podman run commands are executed on the same NIM, leading to failures.
For support, refer to:
- NVIDIA Developer Forums – For technical issues and questions.
- NVIDIA Developer Discord – For community engagement and announcements.
Prerequisite
- Setup NVIDIA NIM locally with WSL2.
AiMicromind
- Chat Models > Drag the Chat NVIDIA NIM node > Click Setup NIM Locally.
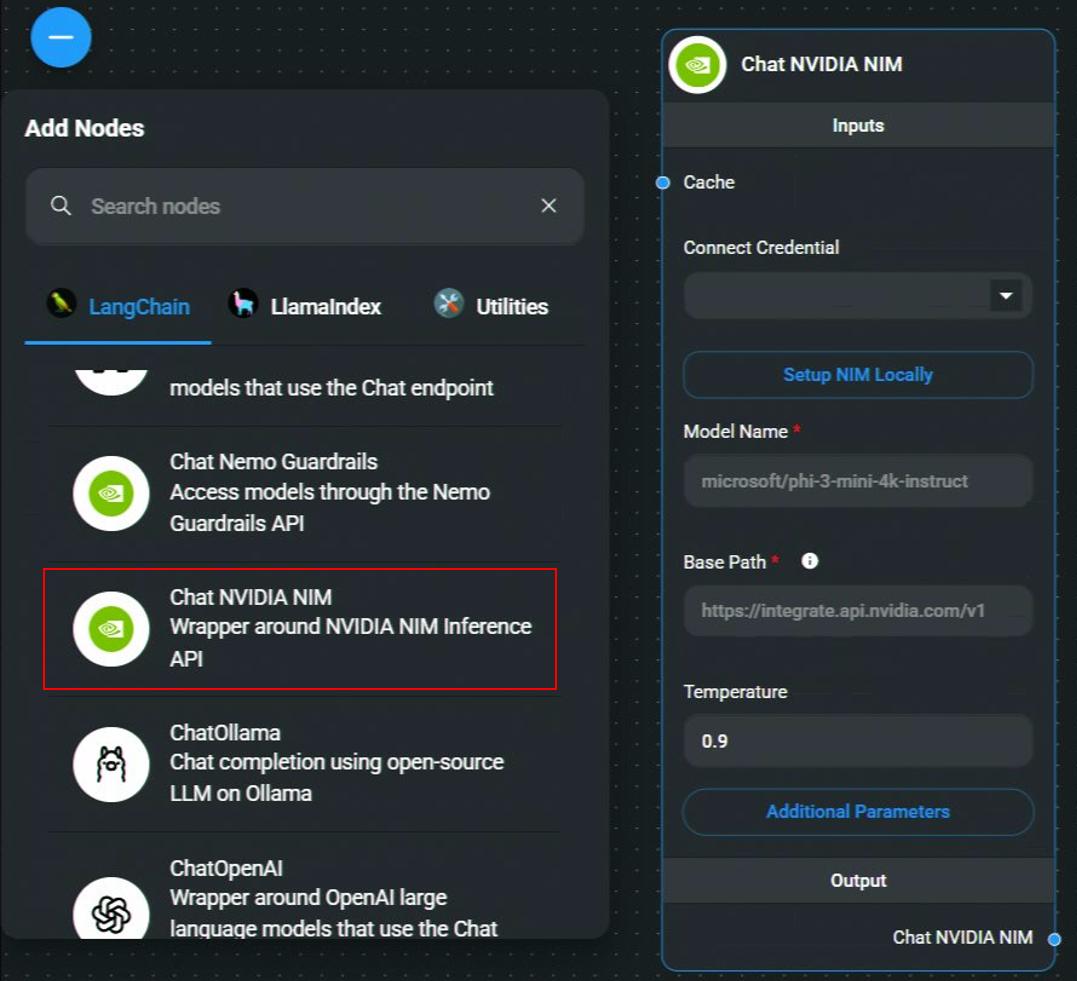
- If NIM is already installed, click Next. Otherwise, click Download to start the installer.
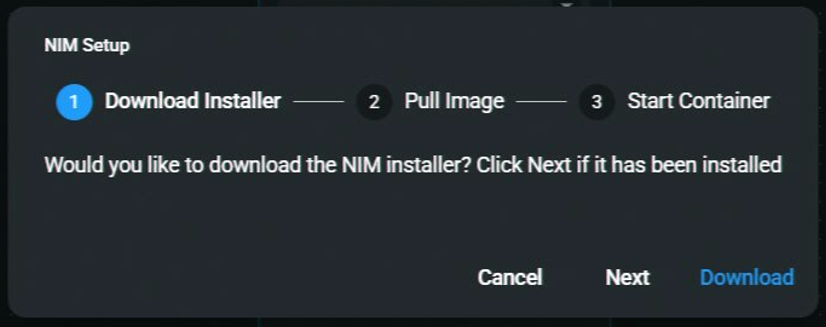
- Select a model image to download.
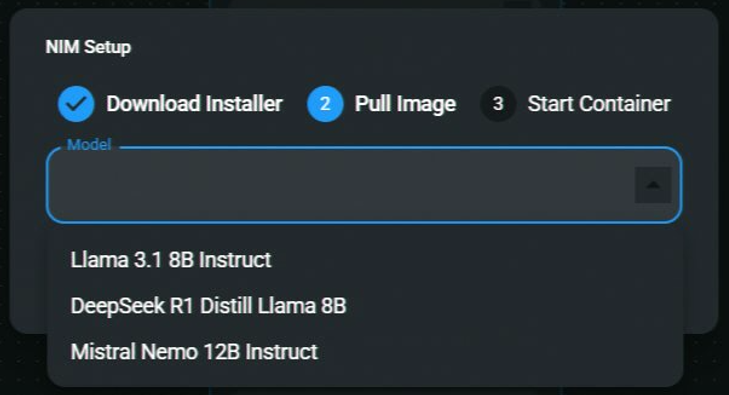
- Once selected, click Next to proceed with the download.
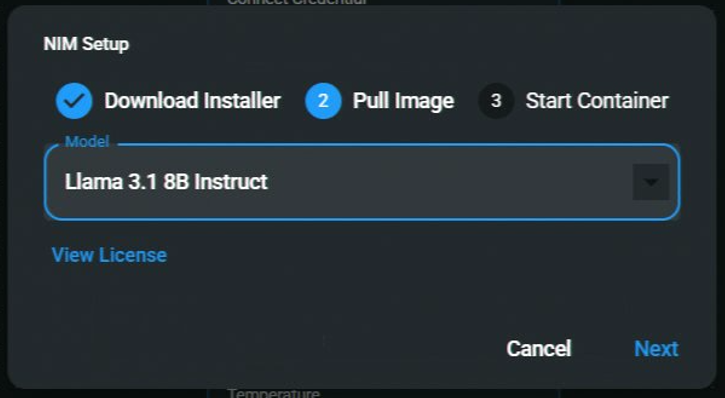
- Downloading Image – Duration depends on internet speed.
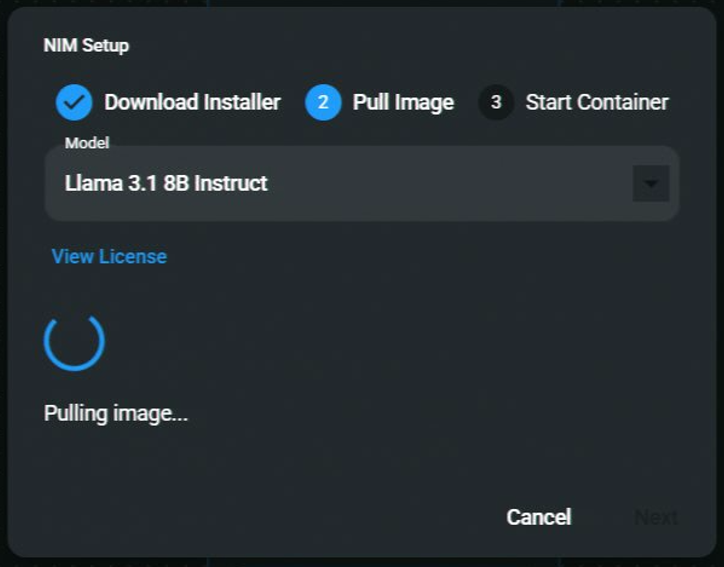
- Learn more about Relax Memory Constraints.
The Host Port is the port for the container to map to the local machine.
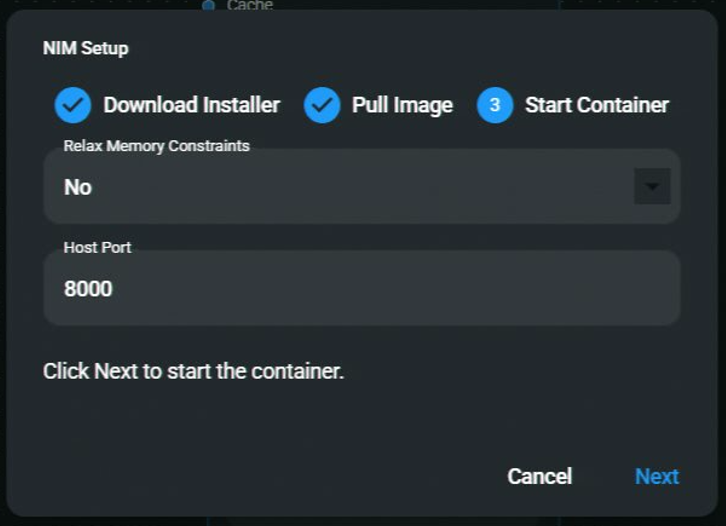
- Starting the container...
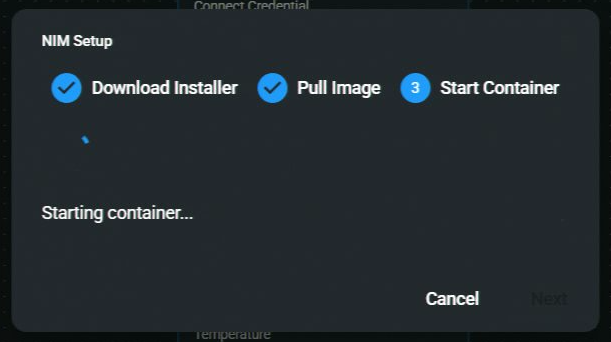
Note: If you already have a container running with the selected model, aimicromind will ask you if you want to reuse the running container. You can choose to reuse the running container or start a new one with a different port.
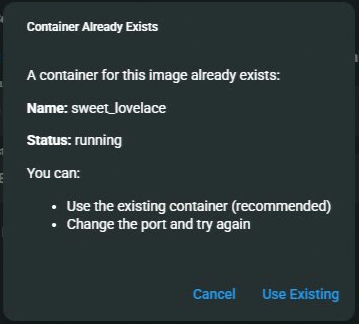
-
Save the chatflow
-
🎉 Voila! Your Chat NVIDIA NIM node is now ready to use in AiMicromind!
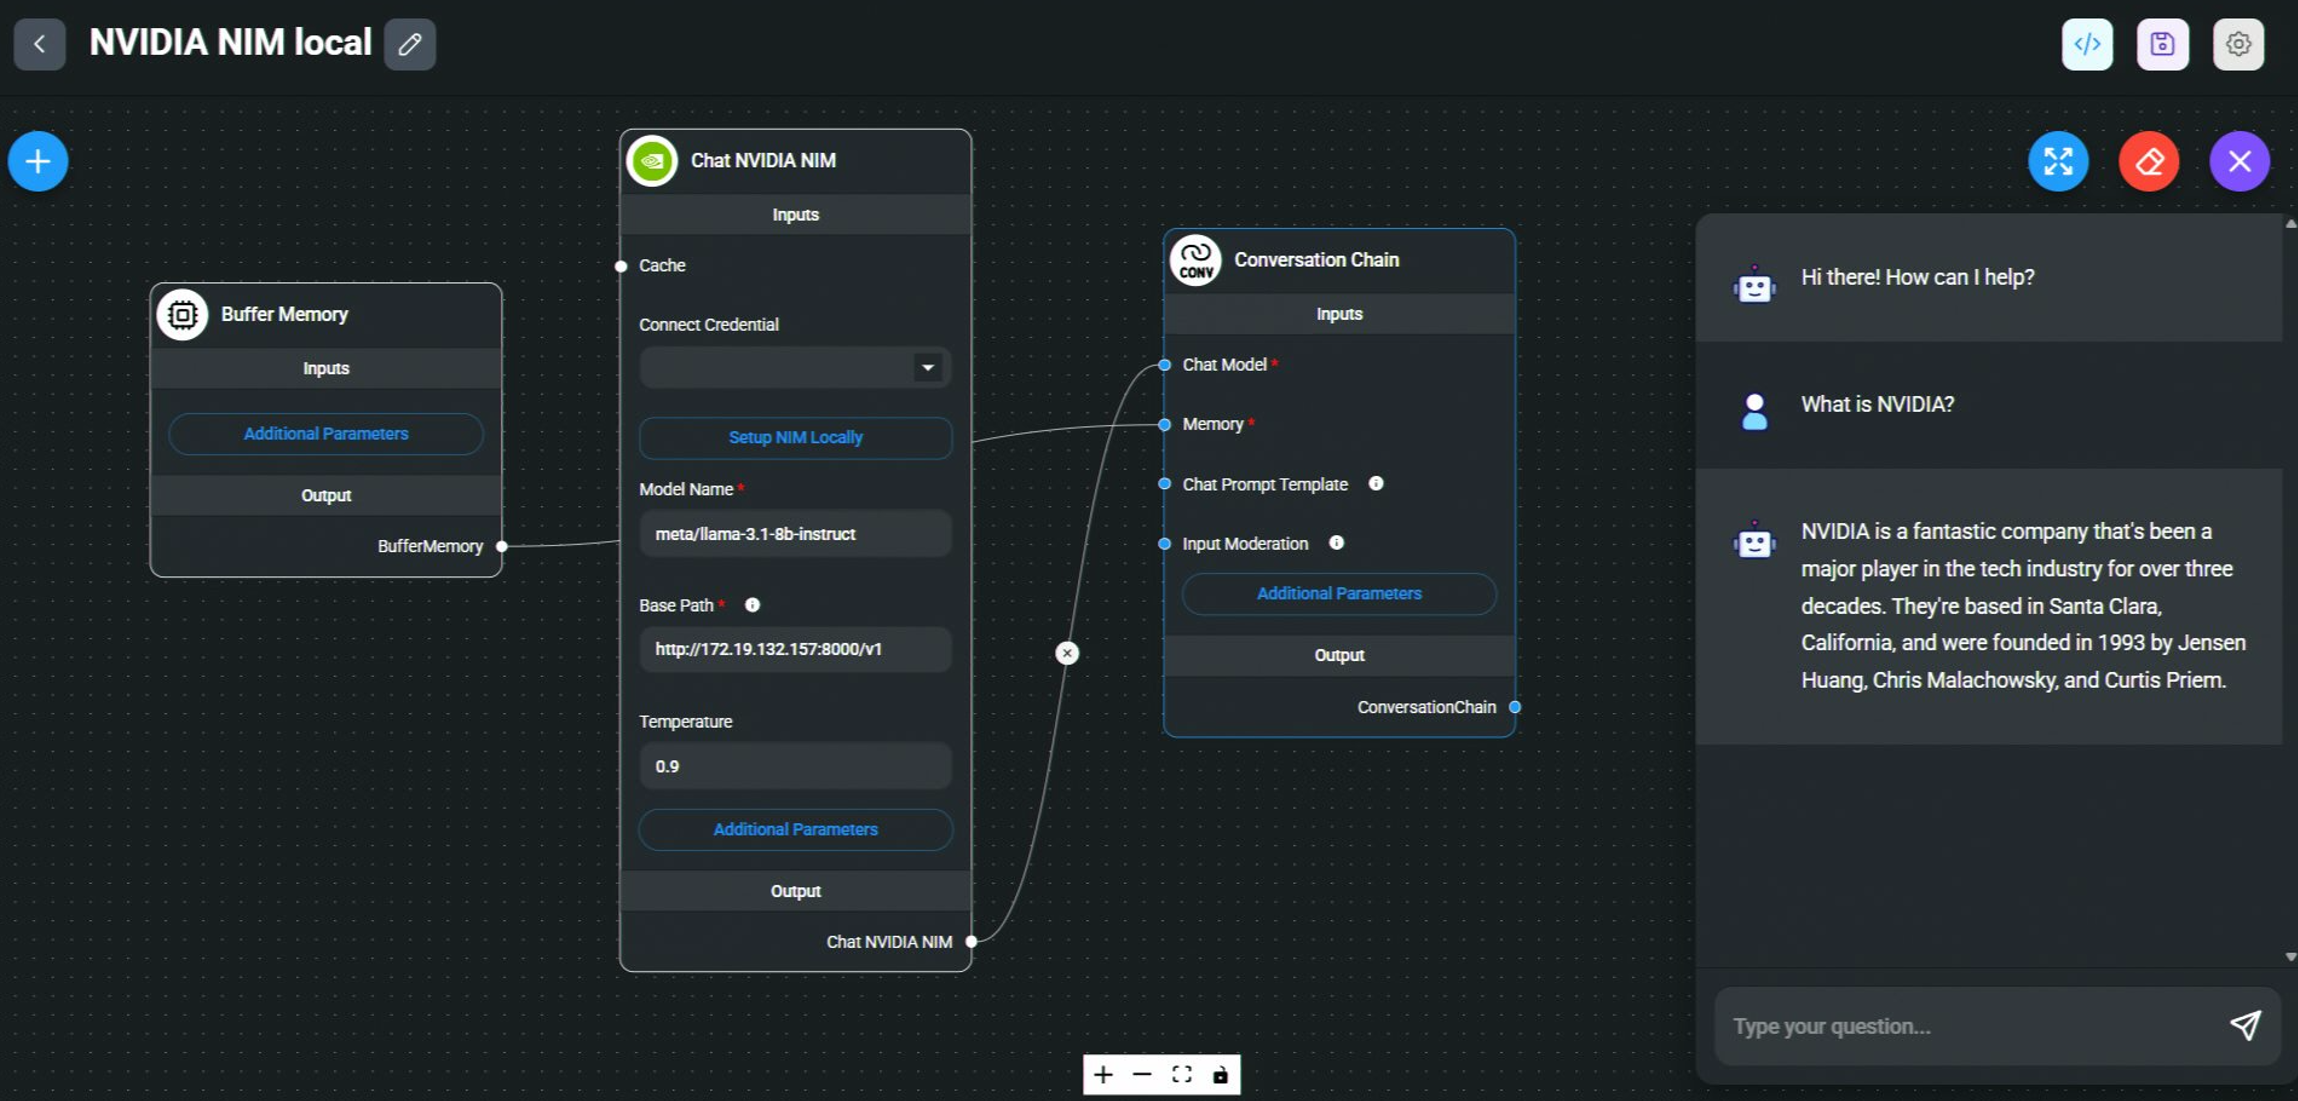
Cloud
Prerequisite
- Log in or sign up to NVIDIA.
- From the top navigation bar, click NIM:
.png)
- Search for the model you would like to use. To download it locally, we will be using Docker:
.png)
- Follow the instructions from the Docker setup. You must first get an API Key to pull the Docker image:
.png)
AiMicromind
- Chat Models > drag Chat NVIDIA NIM node
.png)
- If you are using NVIDIA hosted endpoint, you must have your API key. Connect Credential > click Create New. However if you are using local setup, this is optional.
.png)
- Put in the model name and voila 🎉, your Chat NVIDIA NIM node is now ready to be used in AiMicromind!
.png)
Resources
description: Wrapper around ChatAnthropic large language models that use the Chat endpoint.
ChatAnthropic
.png)
ChatAnthropic Node
{% hint style="info" %} This section is a work in progress. We appreciate any help you can provide in completing this section. Please check our Contribution Guide to get started. {% endhint %}
description: Wrapper around Cohere Chat Endpoints.
ChatCohere
.png)
ChatCohere Node
{% hint style="info" %} This section is a work in progress. We appreciate any help you can provide in completing this section. Please check our Contribution Guide to get started. {% endhint %}
description: Wrapper around Fireworks Chat Endpoints.
Chat Fireworks
Chat Fireworks Node
{% hint style="info" %} This section is a work in progress. We appreciate any help you can provide in completing this section. Please check our Contribution Guide to get started. {% endhint %}
ChatGoogleGenerativeAI
Prerequisite
Setup
- Chat Models > drag ChatGoogleGenerativeAI node
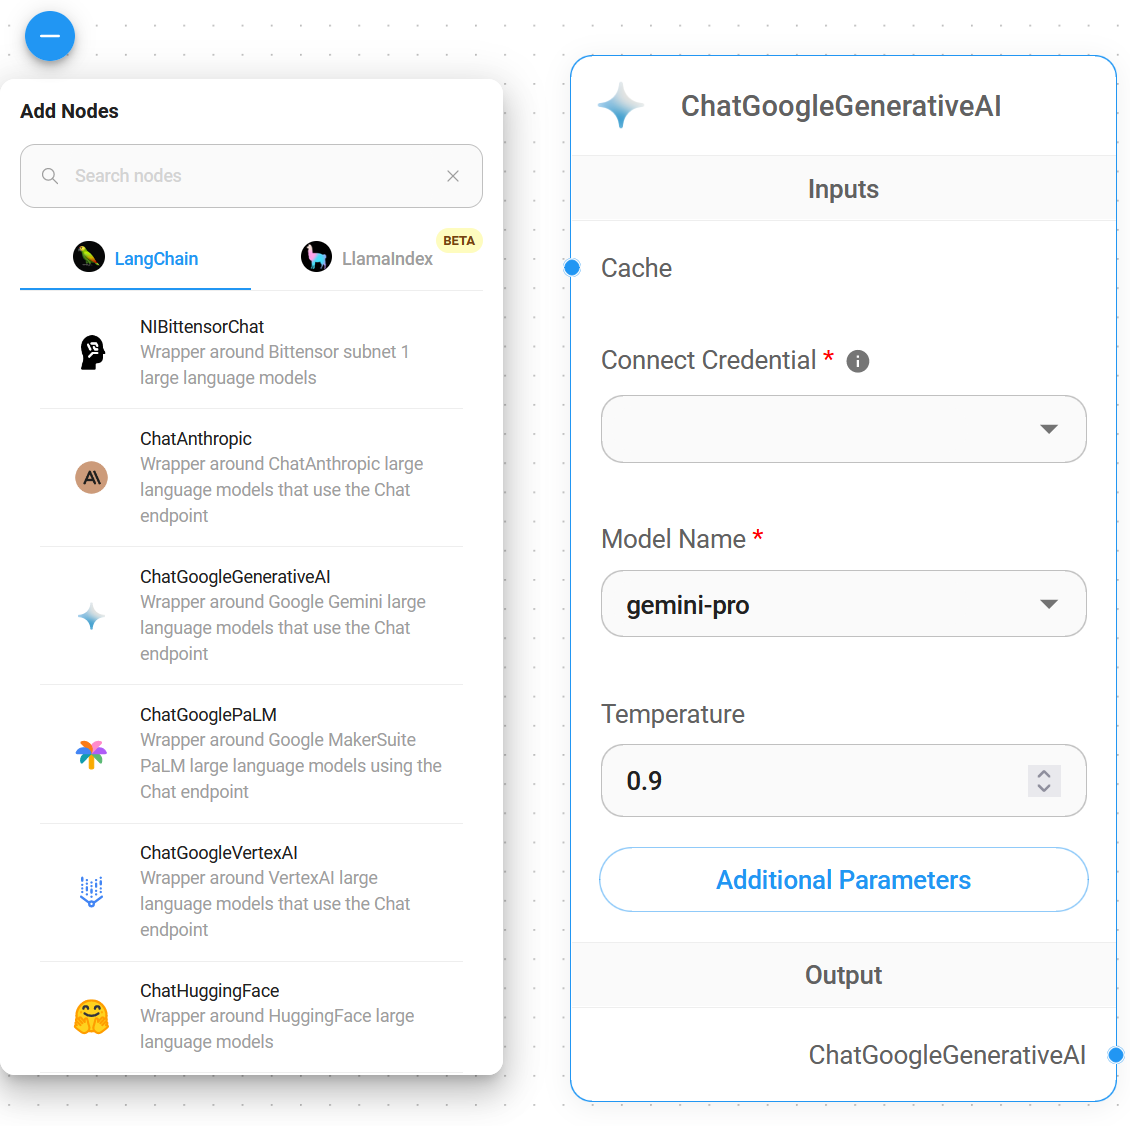
- Connect Credential > click Create New
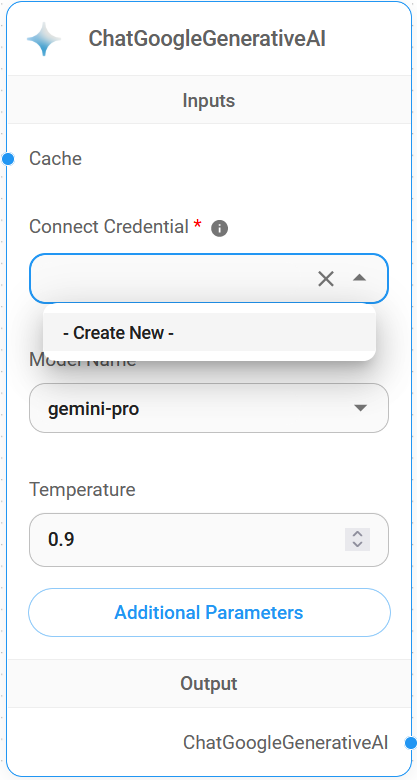
- Fill in the Google AI credential
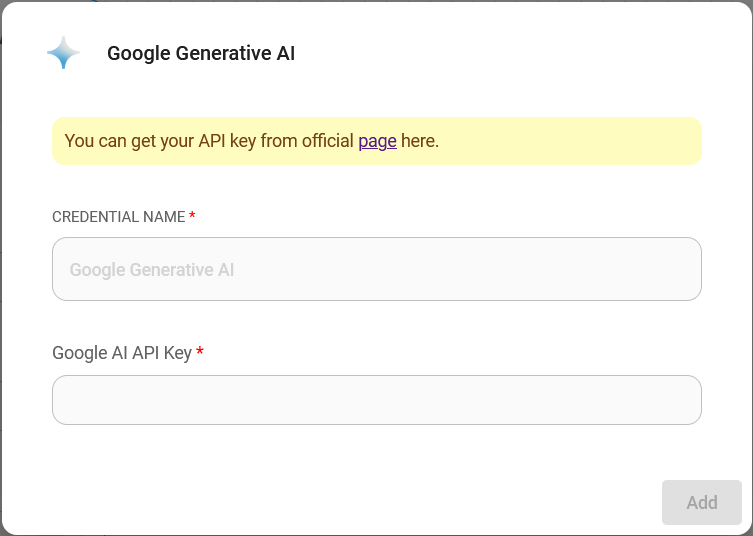
- Voila 🎉, you can now use ChatGoogleGenerativeAI node in AiMicromind

Safety Attributes Configuration
- Click Additonal Parameters
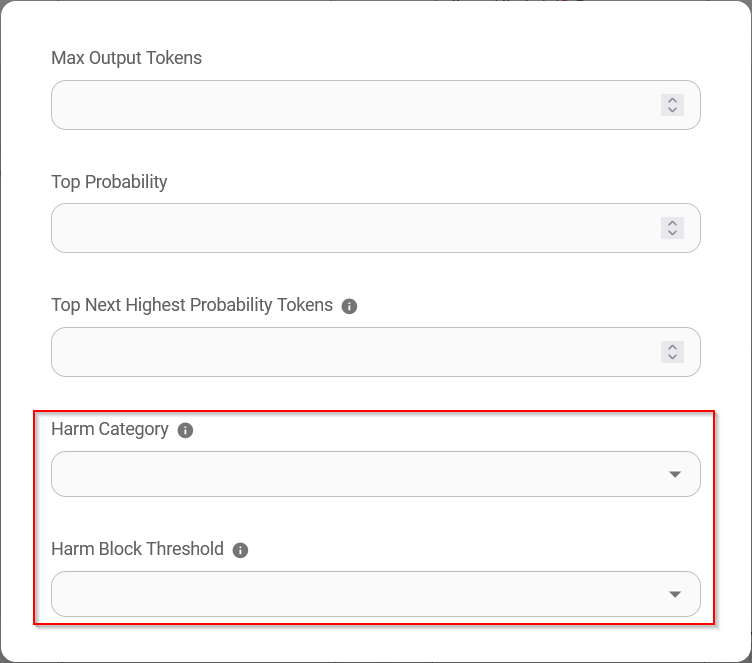
-
When configuring Safety Attributes, the amount of selection in Harm Category & Harm Block Threshold should be the same amount. If not it will throw an error
Harm Category & Harm Block Threshold are not the same length -
The combination of Safety Attributes below will result in
Dangerousis set toLow and AboveandHarassmentis set toMedium and Above
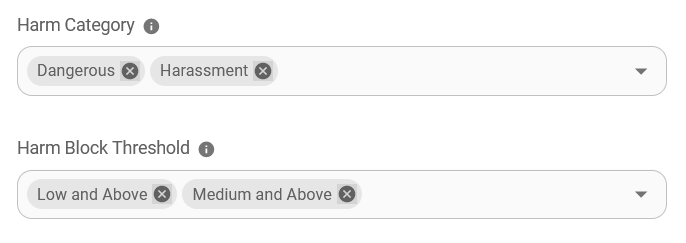
Resources
Google VertexAI
Prerequisites
- Start your GCP
- Install the Google Cloud CLI
Setup
Enable vertex AI API
- Go to Vertex AI on GCP and click "ENABLE ALL RECOMMENDED API"
Create credential file (Optional)
There are 2 ways to create credential file
No. 1 : Use GCP CLI
- Open terminal and run the following command
gcloud auth application-default login
- Login to your GCP account
- Check your credential file. You can find your credential file in
~/.config/gcloud/application_default_credentials.json
No. 2 : Use GCP console
- Go to GCP console and click "CREATE CREDENTIALS"
- Create service account
- Fill in the form of Service account details and click "CREATE AND CONTINUE"
- Select proper role (for example Vertex AI User) and click "DONE"
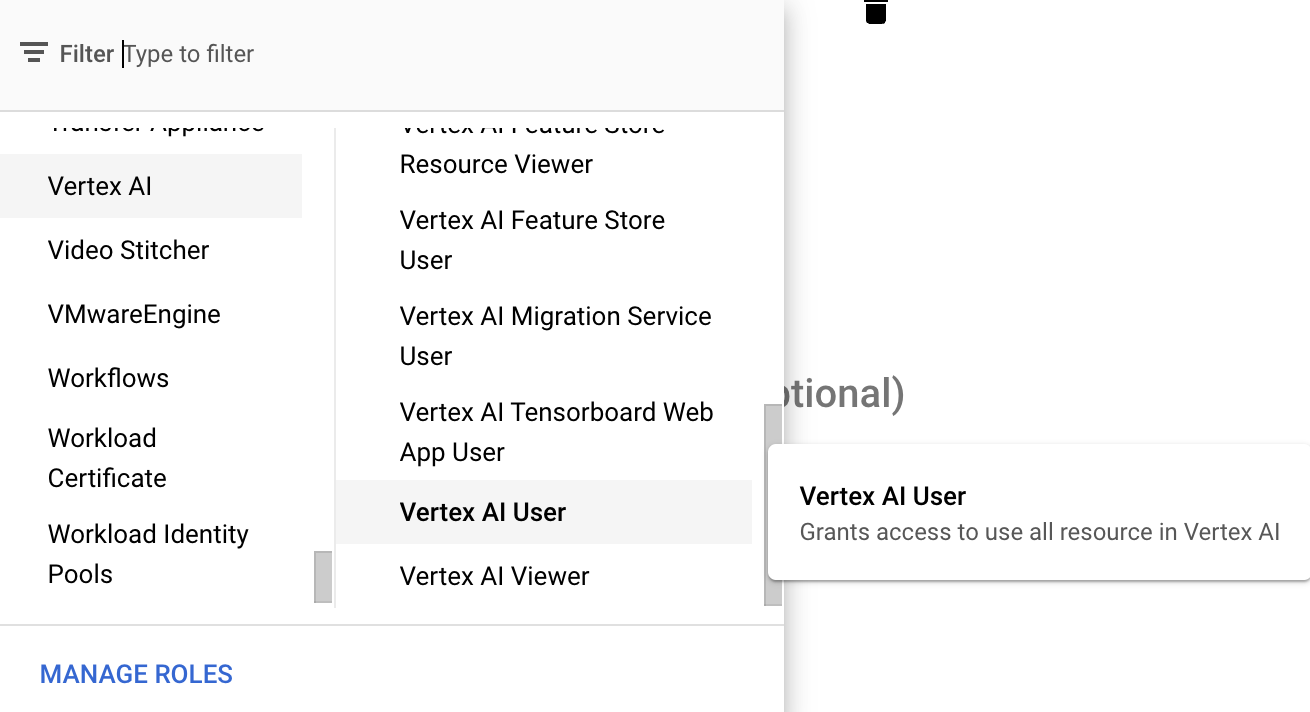
- Click service account that you created and click "ADD KEY" -> "Create new key"
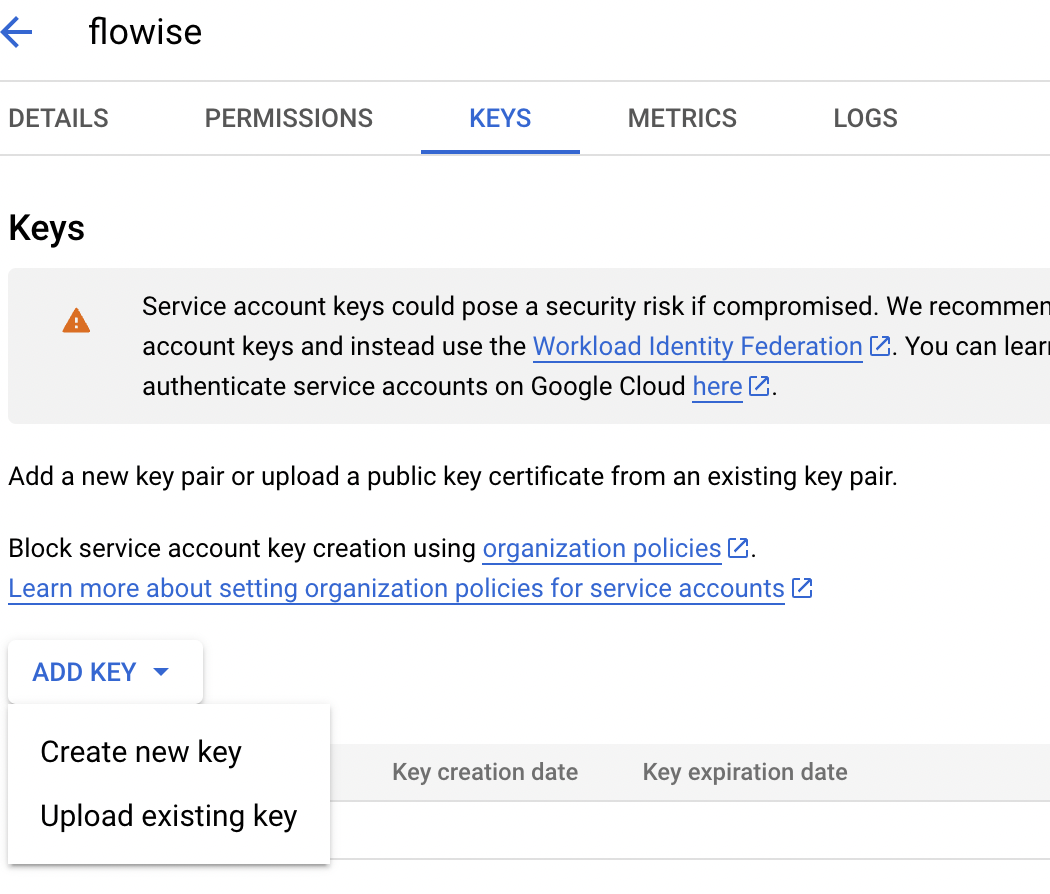
- Select JSON and click "CREATE" then you can download your credential file
AiMicromind
 (1) (1) (1) (1) (1) (1) (1) (1) (1) (1) (1) (1) (1).png)
Without credential file
If you are using a GCP service like Cloud Run, or if you have installed default credentials on your local machine, you do not need to set this credential.
With credential file
- Go to Credential page on aimicromind and click "Add credential"
- Click Google Vertex Auth
- Register your credential file. There are 2 ways to register your credential file.
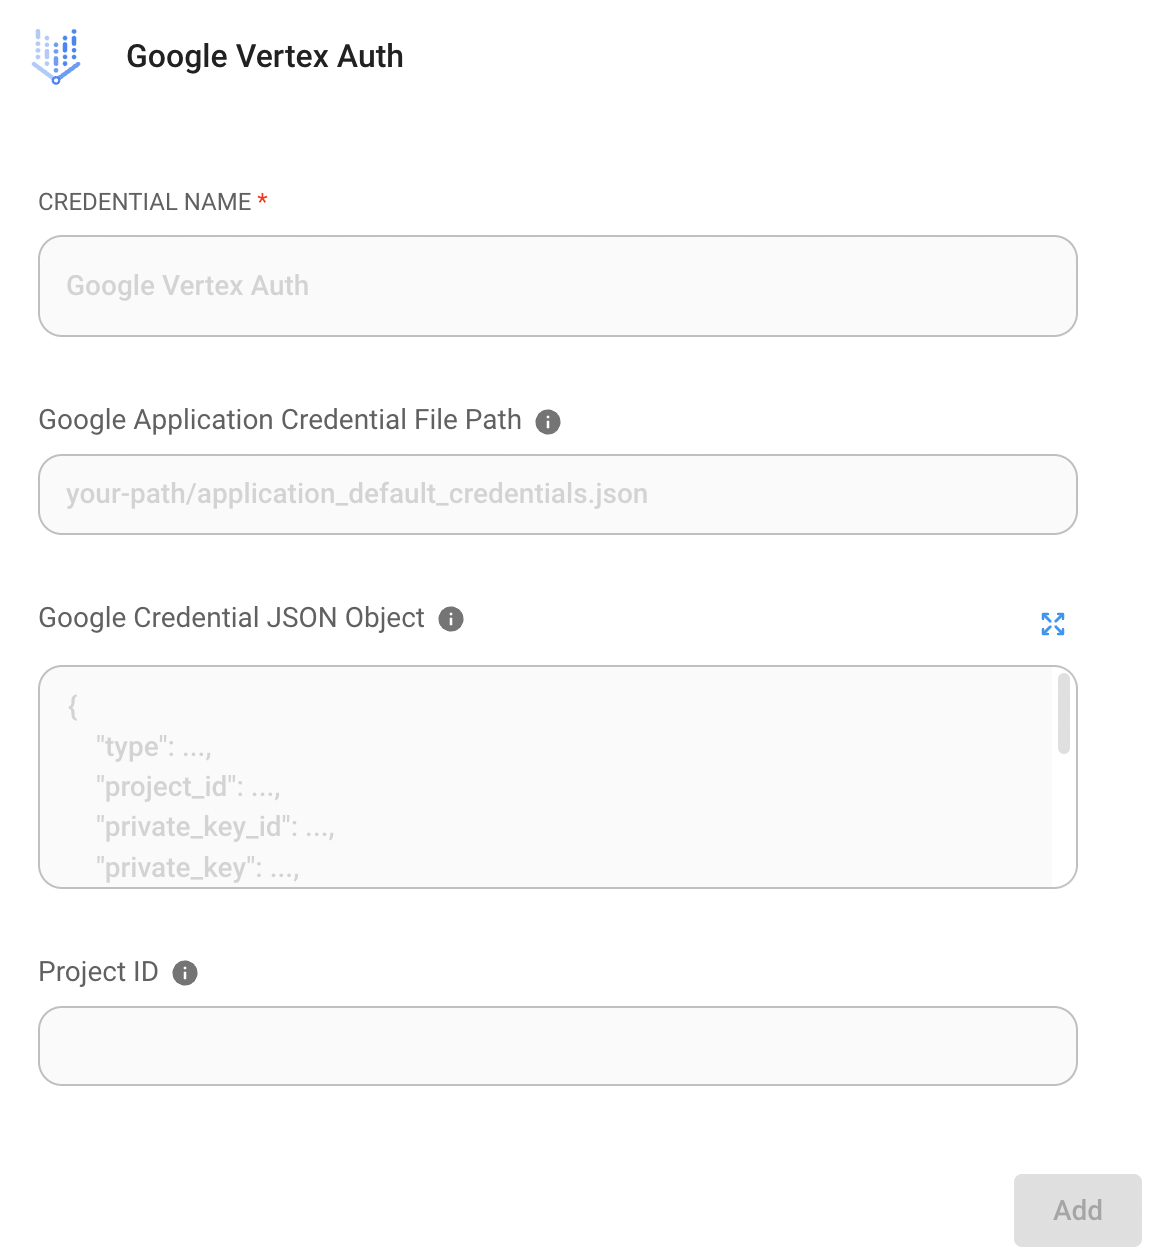
- Option 1 : Enter path of your credential file
- If you have credential file on your machine, you can enter the path of your credential file into
Google Application Credential File Path
- If you have credential file on your machine, you can enter the path of your credential file into
- Option 2 : Paste text of your credential file
- Or you can copy all text in the credential file and paste it into
Google Credential JSON Object
- Or you can copy all text in the credential file and paste it into
- Finally, click "Add" button.
- **🎉**You can now use ChatGoogleVertexAI with the credential in aimicromind now!
Resources
- LangChain JS GoogleVertexAI
- Google Service accounts overview
- Try Google Vertex AI Palm 2 with Flowise: Without Coding to Leverage Intuition
description: Wrapper around HuggingFace large language models.
ChatHuggingFace
.png)
ChatHuggingFace Node
{% hint style="info" %} This section is a work in progress. We appreciate any help you can provide in completing this section. Please check our Contribution Guide to get started. {% endhint %}
ChatLocalAI
LocalAI Setup
LocalAI is a drop-in replacement REST API that’s compatible with OpenAI API specifications for local inferencing. It allows you to run LLMs (and not only) locally or on-prem with consumer grade hardware, supporting multiple model families that are compatible with the ggml format.
To use ChatLocalAI within AiMicromind, follow the steps below:
-
git clone https://github.com/go-skynet/LocalAI cd LocalAI-
# copy your models to models/
cp your-model.bin models/
For example:
Download one of the models from gpt4all.io
# Download gpt4all-j to models/
wget https://gpt4all.io/models/ggml-gpt4all-j.bin -O models/ggml-gpt4all-j
In the /models folder, you should be able to see the downloaded model in there:
 (1).png)
Refer here for list of supported models.
-
docker compose up -d --pull always - Now API is accessible at localhost:8080
# Test API
curl http://localhost:8080/v1/models
# {"object":"list","data":[{"id":"ggml-gpt4all-j.bin","object":"model"}]}
AiMicromind Setup
Drag and drop a new ChatLocalAI component to canvas:
.png)
Fill in the fields:
- Base Path: The base url from LocalAI such as http://localhost:8080/v1
- Model Name: The model you want to use. Note that it must be inside
/modelsfolder of LocalAI directory. For instance:ggml-gpt4all-j.bin
{% hint style="info" %} If you are running both aimicromind and LocalAI on Docker, you might need to change the base path to http://host.docker.internal:8080/v1. For Linux based systems the default docker gateway should be used since host.docker.internal is not available: http://172.17.0.1:8080/v1 {% endhint %}
That's it! For more information, refer to LocalAI docs.
Watch how you can use LocalAI on AiMicromind (coming soon)
ChatMistralAI
Prerequisite
- Register a Mistral AI account
- Create an API key
Setup
- Chat Models > drag ChatMistralAI node
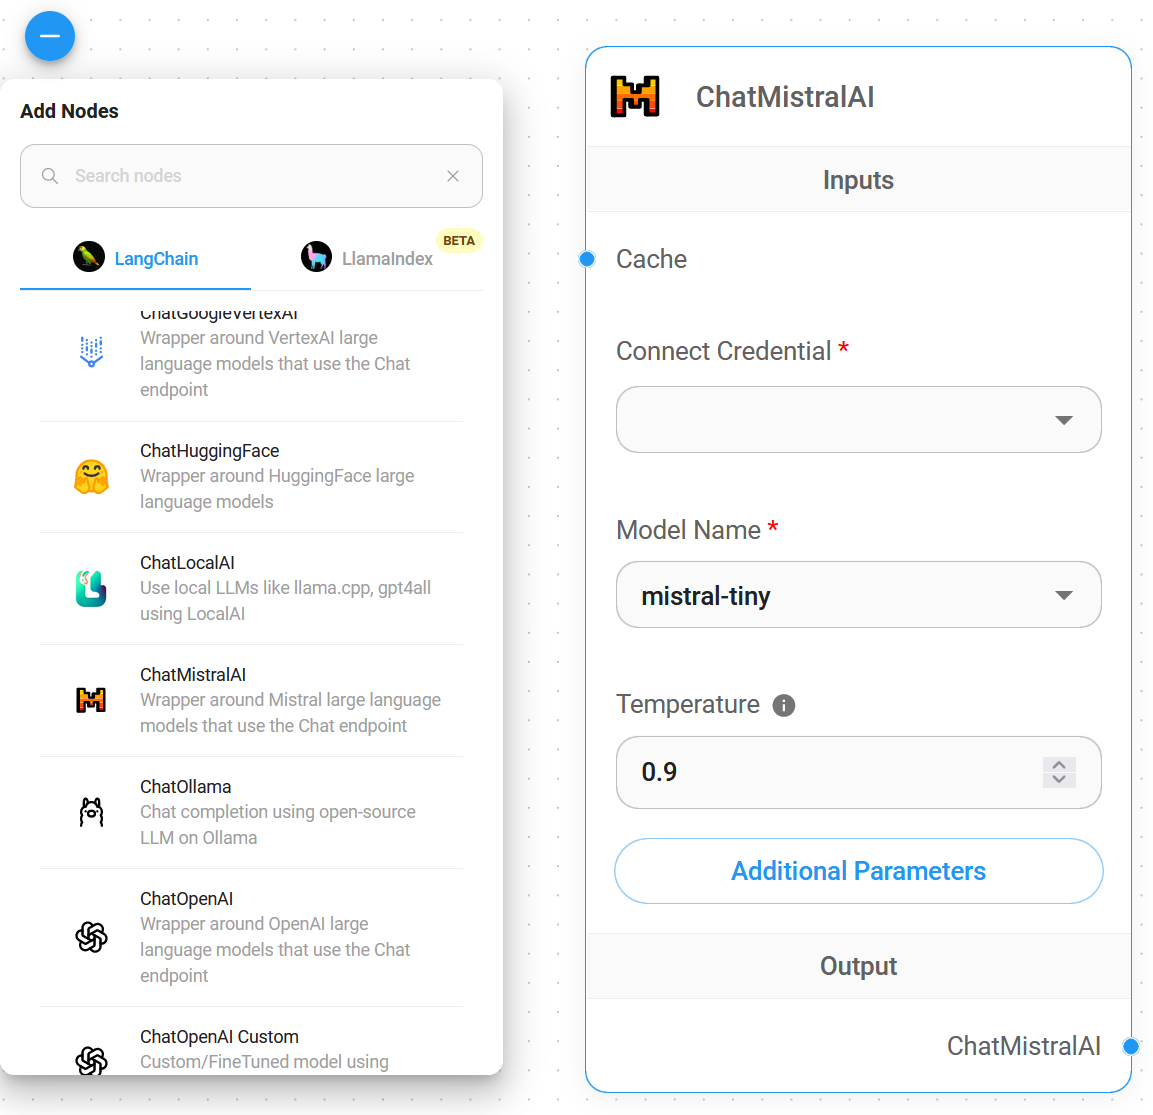
- Connect Credential > click Create New
- Fill in the Mistral AI credential
- Voila 🎉, you can now use ChatMistralAI node in AiMicromind
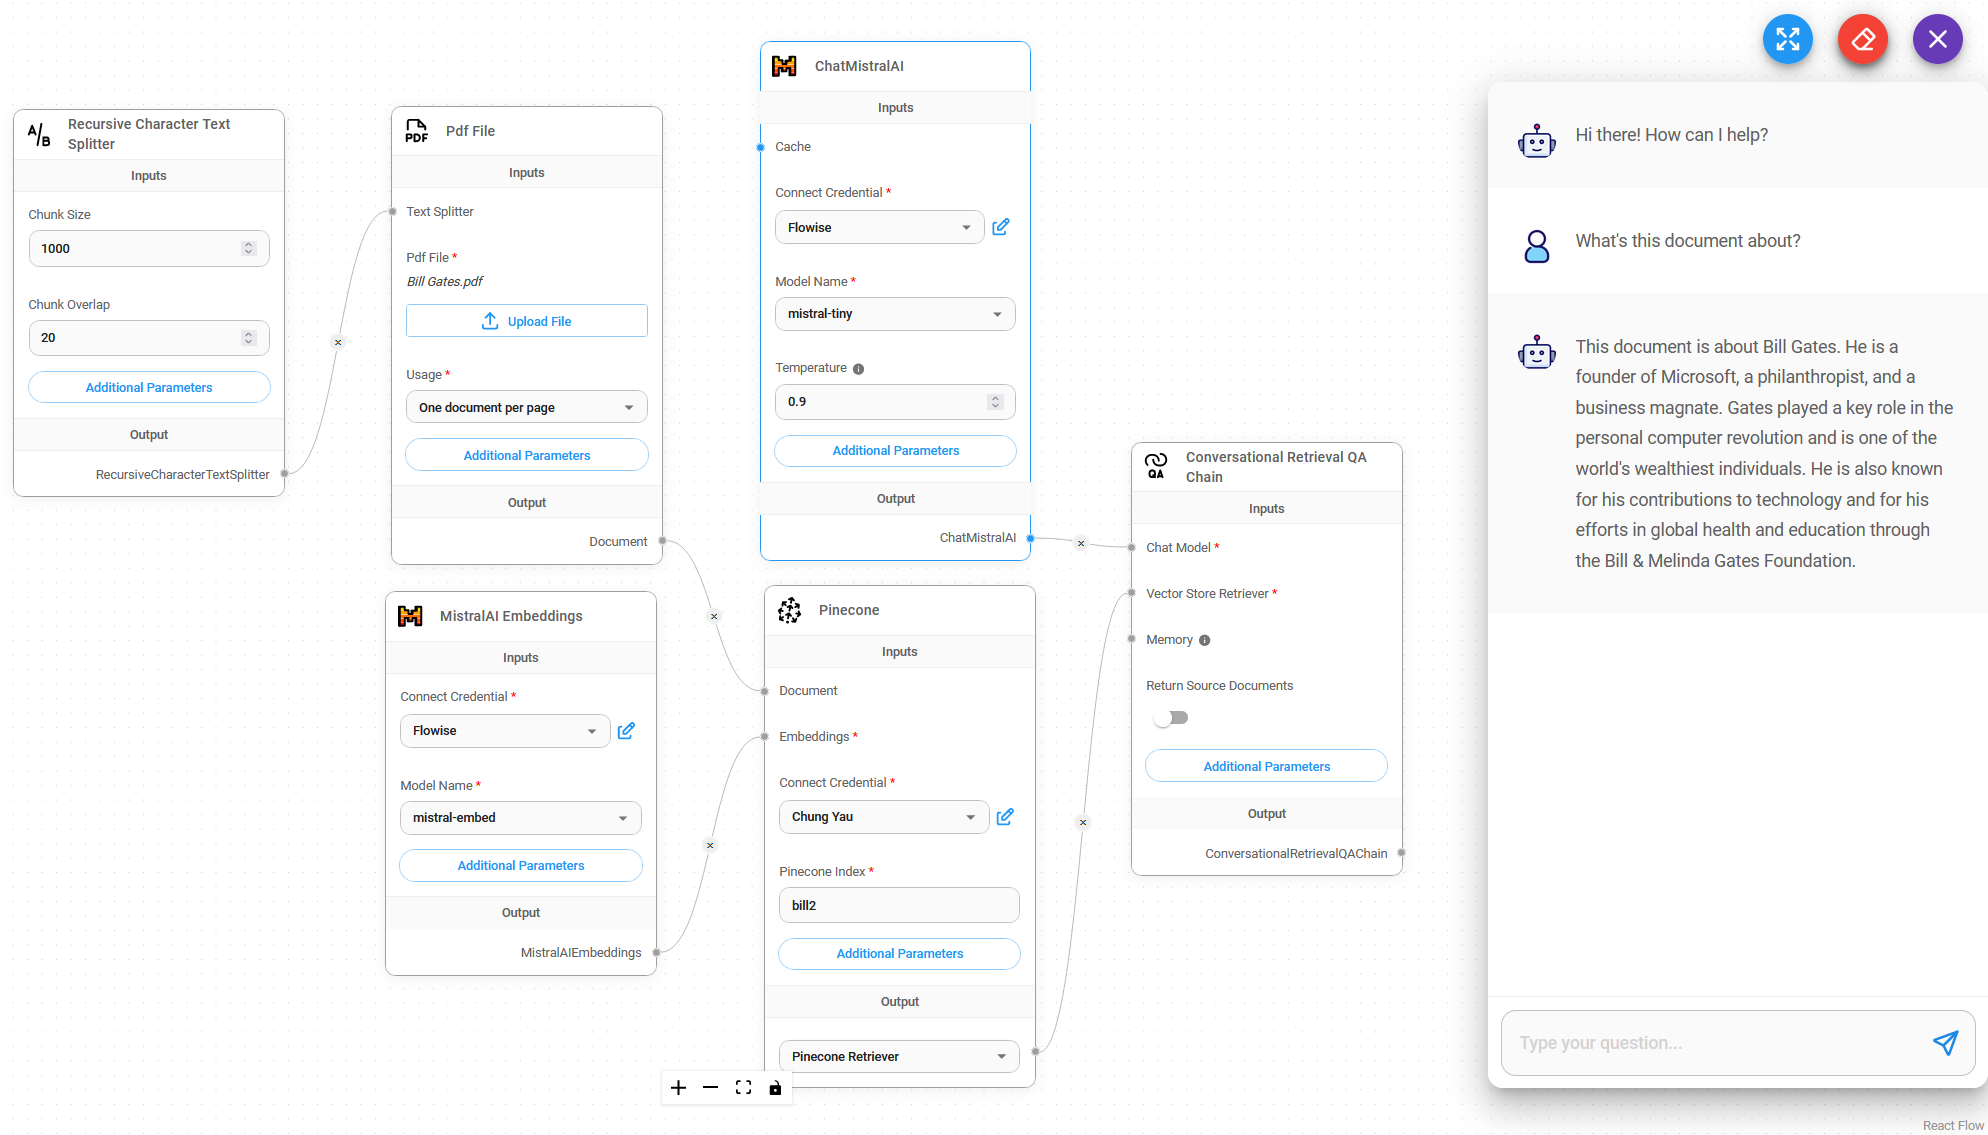
Resources
IBM Watsonx
Prerequisite
- Register an account on IBM Watsonx
- Create a new project:
.png)
.png)
- After project has been created, back to the main dashboard, and click Explore foundation models:
.png)
- Choose the model you would like to use and open in Prompt Lab:
.png)
- From the top right corner, click on View Code:
.png)
- Take note on the
model_idandversionparameter. In this case, it isibm/granite-3-8b-instruct,and the version is2023-05-29. - Click the navigation bar from the left side, and click Developer access
.png)
- Take note on the
watsonx.ai URL,Project IDand create a new API key from IBM Cloud Console. - By now, you should have the following information:
- Watsonx.ai URL
- Project ID
- API Key
- Model's version
- Model's ID
Setup
- Chat Models > drag ChatIBMWatsonx node
.png)
- Fill in the Model with the Model ID earlier. Create New Credential and fill in all the details.
.png)
- Voila 🎉, you can now use ChatIBMWatsonx node in AiMicromind!
.png)
ChatOllama
Prerequisite
-
For example, you can use the following command to spin up a Docker instance with llama3
docker run -d -v ollama:/root/.ollama -p 11434:11434 --name ollama ollama/ollama
docker exec -it ollama ollama run llama3
Setup
- Chat Models > drag ChatOllama node
.png)
- Fill in the model that is running on Ollama. For example:
llama2. You can also use additional parameters:
.png)
- Voila 🎉, you can now use ChatOllama node in AiMicromind
.png)
Additional
If you are running both aimicromind and Ollama on docker. You'll have to change the Base URL for ChatOllama.
For Windows and MacOS Operating Systems specify http://host.docker.internal:8000. For Linux based systems the default docker gateway should be used since host.docker.internal is not available: http://172.17.0.1:8000
.png)
Resources
ChatOpenAI
Prerequisite
Setup
- Chat Models > drag ChatOpenAI node
 (1) (1) (1) (1) (1) (1) (1).png)
- Connect Credential > click Create New
.png)
- Fill in the ChatOpenAI credential
 (1) (1) (1) (1) (1) (1) (1) (1) (1) (1) (1) (1) (1) (1) (1) (1) (1).png)
- Voila 🎉, you can now use ChatOpenAI node in AiMicromind
 (1) (1) (1) (1) (1) (1) (1) (1) (1) (1) (1) (1) (1).png)
Custom base URL and headers
AiMicromind supports using custom base URL and headers for Chat OpenAI. Users can easily use integrations like OpenRouter, TogetherAI and others that support OpenAI API compatibility.
TogetherAI
- Refer to official docs from TogetherAI
- Create a new credential with TogetherAI API key
- Click Additional Parameters on ChatOpenAI node.
- Change the Base Path:
 (1) (1) (1) (1) (1) (1) (1) (1) (1) (1) (1).png)
Open Router
- Refer to official docs from OpenRouter
- Create a new credential with OpenRouter API key
- Click Additional Parameters on ChatOpenAI node
- Change the Base Path and Base Options:
 (1) (1) (1) (1) (1) (1) (1) (1) (1) (1) (1).png)
Custom Model
For models that are not supported on ChatOpenAI node, you can use ChatOpenAI Custom for that. This allow users to fill in model name such as mistralai/Mixtral-8x7B-Instruct-v0.1
.png)
Image Upload
You can also allow images to be uploaded and analyzed by LLM. Under the hood, aimicromind will use OpenAI Vison model to process the image. Only works with LLMChain, Conversation Chain, ReAct Agent, and Conversational Agent.
 (1) (1) (1) (1) (1) (1) (2).png)
From the chat interface, you will now see a new image upload button:
.png)
.png)
description: Wrapper around TogetherAI large language models
ChatTogetherAI
.png)
ChatTogetherAI Node
{% hint style="info" %} This section is a work in progress. We appreciate any help you can provide in completing this section. Please check our Contribution Guide to get started. {% endhint %}
description: Wrapper around Groq API with LPU Inference Engine.
GroqChat
.png)
GroqChat Node
{% hint style="info" %} This section is a work in progress. We appreciate any help you can provide in completing this section. Please check our Contribution Guide to get started. {% endhint %}
description: LangChain Document Loader Nodes
Document Loaders
Document loaders allow you to load documents from different sources like PDF, TXT, CSV, Notion, Confluence etc. They are often used together with Vector Stores to be upserted as embeddings, which can then retrieved upon query.
Watch an intro on Document Loaders (coming soon)
Document Loader Nodes:
- API Loader
- Airtable
- Apify Website Content Crawler
- Cheerio Web Scraper
- Confluence
- Csv File
- Custom Document Loader
- Document Store
- Docx File
- Figma
- FireCrawl
- Folder with Files
- GitBook
- Github
- Json File
- Json Lines File
- Notion Database
- Notion Folder
- Notion Page
- PDF Files
- Plain Text
- Playwright Web Scraper
- Puppeteer Web Scraper
- S3 File Loader
- SearchApi For Web Search
- Spider
- SerpApi For Web Search
- Spider - web search & crawler
- Text File
- Unstructured File Loader
- Unstructured Folder Loader
- VectorStore To Document
description: Load data from an API.
API Loader
 (1) (1) (1) (1) (1) (1).png)
API Loader Node
API Loader Node
The API Document Loader provides functionality to load and process data from external APIs using HTTP requests. This module enables seamless integration with RESTful APIs and web services.
This module provides a versatile API document loader that can:
- Make HTTP GET and POST requests
- Handle custom headers and request bodies
- Process API responses into documents
- Support JSON data structures
- Customize metadata extraction
- Process responses with text splitters
Inputs
Required Parameters
- URL: The API endpoint to fetch data from.
- Method: HTTP method to use (GET or POST)
Optional Parameters
- Headers: JSON object containing HTTP headers
- Body: JSON object for POST request body
- Text Splitter: A text splitter to process the extracted content
- Additional Metadata: JSON object with additional metadata
- Omit Metadata Keys: Comma-separated list of metadata keys to omit
Outputs
- Document: Array of document objects containing metadata and pageContent
- Text: Concatenated string from pageContent of documents
Features
- HTTP method support (GET/POST)
- Custom header configuration
- Request body customization
- Response processing
- Error handling
- Metadata customization
- Text splitting capabilities
Example Usage
GET Request
{
    "method": "GET",
    "url": "https://api.example.com/data",
    "headers": {
        "Authorization": "Bearer token123",
        "Accept": "application/json"
    }
}
POST Request
{
    "method": "POST",
    "url": "https://api.example.com/data",
    "headers": {
        "Content-Type": "application/json",
        "Authorization": "Bearer token123"
    },
    "body": {
        "query": "example",
        "limit": 10
    }
}
Notes
- Supports JSON request/response formats
- Handles HTTP error responses
- Automatically processes response data into documents
- Can be combined with text splitters for content processing
- Supports custom metadata addition and omission
- Error responses are properly handled and reported
{% hint style="info" %} This section is a work in progress. We appreciate any help you can provide in completing this section. Please check our Contribution Guide to get started. {% endhint %}
description: Load data from Airtable table.
Airtable
.png)
Airtable Node
Airtable is a cloud collaboration service that combines the functionality of a spreadsheet with a database. This module provides comprehensive functionality to load and process data from Airtable tables.
This module provides a sophisticated Airtable document loader that can:
- Load data from specific Airtable bases, tables, and views
- Filter and select specific fields
- Handle pagination and large datasets
- Support custom filtering with formulas
- Process data with text splitters
- Customize metadata extraction
Inputs
Required Parameters
- Base Id: The Airtable base identifier (e.g.,
app11RobdGoX0YNsC) - Table Id: The specific table identifier (e.g.,
tblJdmvbrgizbYICO) - Connect Credential: Airtable API credentials
Optional Parameters
- View Id: Specific view identifier (e.g.,
viw9UrP77Id0CE4ee) - Text Splitter: A text splitter to process the extracted content
- Include Only Fields: Comma-separated list of field names or IDs to include
- Return All: Whether to return all results (default:
true) - Limit: Number of results to return when Return All is false (default:
100) - Filter By Formula: Airtable formula to filter records
- Additional Metadata: JSON object with additional metadata
- Omit Metadata Keys: Comma-separated list of metadata keys to omit
Outputs
- Document: Array of document objects containing metadata and
pageContent - Text: Concatenated string from
pageContentof documents
Features
- API-based data retrieval
- Field selection and filtering
- Pagination support
- Formula-based filtering
- Customizable metadata handling
- Text splitting capabilities
- Error handling for invalid inputs
Notes
- Requires valid Airtable API credentials
- Base ID and Table ID are mandatory
- Field names containing commas should use field IDs instead
- Filter formulas must follow Airtable formula syntax
- Rate limiting and API quotas apply
- Supports both full and partial data retrieval
URL Structure Example
For a table URL like:
https://airtable.com/app11RobdGoX0YNsC/tblJdmvbrgizbYICO/viw9UrP77Id0CE4ee
- Base ID: app11RobdGoX0YNsC
- Table ID: tblJdmvbrgizbYICO
- View ID: viw9UrP77Id0CE4ee
{% hint style="info" %} This section is a work in progress. We appreciate any help you can provide in completing this section. Please check our Contribution Guide to get started. {% endhint %}
description: Load data from Apify Website Content Crawler.
Apify Website Content Crawler
Apify is a web scraping and data extraction platform that provides an app store with more than a thousand ready-made cloud tools called Actors.
The Website Content Crawler Actor can deeply crawl websites, clean their HTML by removing a cookies modals, footers, or navigation, and then transform the HTML into Markdown. This Markdown can then be stored in a vector database for semantic search or Retrieval-Augmented Generation (RAG).
 (1) (1) (1) (1) (1) (1) (1) (1) (1) (1) (1) (1) (1) (1).png)
Apify Website Content Crawler Node
This module provides a sophisticated web crawler that can:
- Crawl multiple websites from specified start URLs
- Use different crawling engines (Chrome, Firefox, Cheerio, JSDOM)
- Control crawling depth and page limits
- Handle JavaScript-rendered content
- Process extracted content with text splitters
- Customize metadata extraction
Inputs
Required Parameters
- Start URLs: Comma-separated list of URLs where crawling will begin
- Connect Apify API: Apify API credentials
- Crawler Type: Choice of crawling engine:
- Headless web browser (Chrome+Playwright)
- Stealthy web browser (Firefox+Playwright)
- Raw HTTP client (Cheerio)
- Raw HTTP client with JavaScript execution (JSDOM)
Optional Parameters
- Text Splitter: A text splitter to process the extracted content
- Max Crawling Depth: Maximum depth of page links to follow (default: 1)
- Max Crawl Pages: Maximum number of pages to crawl (default: 3)
- Additional Input: JSON object with additional crawler configuration
- Additional Metadata: JSON object with additional metadata
- Omit Metadata Keys: Comma-separated list of metadata keys to omit
Outputs
- Document: Array of document objects containing metadata and pageContent
- Text: Concatenated string from pageContent of documents
Features
- Multiple crawling engine support
- Configurable crawling parameters
- JavaScript rendering support
- Depth and page limit controls
- Metadata customization
- Text splitting capabilities
- Error handling
Crawler Types
Headless Chrome (Playwright)
- Best for modern web applications
- Full JavaScript support
- Higher resource usage
Stealthy Firefox (Playwright)
- Good for sites with bot detection
- Full JavaScript support
- More stealthy operation
Cheerio
- Fast and lightweight
- No JavaScript support
- Lower resource usage
JSDOM (Experimental)
- JavaScript execution support
- Lightweight alternative to browsers
- Experimental features
Notes
- Requires valid Apify API token
- Different crawler types have different capabilities
- Resource usage varies by crawler type
- JavaScript support depends on crawler type
- Rate limiting may apply based on Apify plan
- Additional configuration available through JSON input
Crawl Entire Website
- (Optional) Connect Text Splitter.
- Connect Apify API (create a new credential with your Apify API token).
- Input one or more URLs (separated by commas) where the crawler will start, e.g
https://github.com/operativestech/MicroMind-Doc/. - Select the crawler type. Refer to Website Content Crawler documentation for more information.
- (Optional) Specify additional parameters such as maximum crawling depth and the maximum number of pages to crawl.
Output
Loads website content as a Document.
Resources
Cheerio Web Scraper
Cheerio is lightweight and doesn't require a full browser environment like some other scraping tools. Keep in mind that when scraping websites, you should always review and comply with the website's terms of service and policies to ensure ethical and legal use of the data.
This module provides a sophisticated web scraper that can:
- Load content from single or multiple web pages
- Crawl relative links from websites
- Extract content using CSS selectors
- Handle XML sitemaps
- Process web content with text splitters
Inputs
- URL: The webpage URL to scrape
- Text Splitter (optional): A text splitter to process the extracted content
- Get Relative Links Method (optional): Choose between:
- Web Crawl: Crawl relative links from HTML URL
- Scrape XML Sitemap: Scrape relative links from XML sitemap URL
- Get Relative Links Limit (optional): Limit for number of relative links to process (default: 10, 0 for all links)
- Selector (CSS) (optional): CSS selector to target specific content
- Additional Metadata (optional): JSON object with additional metadata to add to documents
- Omit Metadata Keys (optional): Comma-separated list of metadata keys to omit
Outputs
- Document: Array of document objects containing metadata and pageContent
- Text: Concatenated string from pageContent of documents
Features
- CSS selector-based content extraction
- Web crawling capabilities
- XML sitemap processing
- Configurable link limits
- Error handling for invalid URLs and PDFs
- Metadata customization
- Debug logging support
Notes
- PDF files are not supported and will be skipped
- Invalid URLs will throw an error
- Setting link limit to 0 will retrieve all available links (may take longer)
- Debug mode provides detailed logging of the scraping process
Scrape One URL
- (Optional) Connect Text Splitter.
- Input desired URL to be scraped.
Crawl & Scrape Multiple URLs
Visit Web Crawl guide to allow scaping of multiple pages.
Output
Loads URL content as Document
Resources
description: Load data from a Confluence Document
Confluence
 (1) (1) (1) (1) (1) (1) (1) (1) (1) (1) (1).png)
Confluence Node
Confluence Document Loader
Confluence is Atlassian's enterprise wiki and collaboration platform. This module provides functionality to load and process content from Confluence spaces and pages.
This module provides a sophisticated Confluence document loader that can:
- Load content from specific Confluence spaces
- Support both Cloud and Server/Data Center deployments
- Handle authentication with multiple methods
- Limit the number of pages retrieved
- Process content with text splitters
- Customize metadata extraction
Inputs
Required Parameters
- Base URL: The Confluence instance URL (e.g., https://example.atlassian.net/wiki)
- Space Key: The unique identifier for the Confluence space
- Connect Credential: Choose between:
- Confluence Cloud API credentials (username + access token)
- Confluence Server/DC API credentials (personal access token)
Optional Parameters
- Text Splitter: A text splitter to process the extracted content
- Limit: Maximum number of pages to retrieve (0 for unlimited)
- Additional Metadata: JSON object with additional metadata
- Omit Metadata Keys: Comma-separated list of metadata keys to omit
Outputs
- Document: Array of document objects containing metadata and pageContent
- Text: Concatenated string from pageContent of documents
Features
- Multi-deployment support (Cloud/Server/DC)
- Flexible authentication options
- Page limit controls
- Content processing capabilities
- Metadata customization
- Error handling
- Text splitting support
Authentication Methods
Confluence Cloud
- Requires username and access token
- Access token generated from Atlassian account settings
- Supports API token authentication
Confluence Server/Data Center
- Uses personal access token
- Token generated from Confluence instance
- Supports direct server access
Notes
- Space Key can be found in Confluence space settings
- Different authentication methods for Cloud vs Server
- Rate limiting may apply based on instance
- Content includes page text and metadata
- Supports both full and partial content retrieval
- Error handling for invalid credentials or URLs
Finding Space Key
To find your Confluence Space Key:
- Navigate to the space in Confluence
- Go to Space Settings
- Look for "Space Key" in the overview
- Format example: ~EXAMPLE362906de5d343d49dcdbae5dEXAMPLE
{% hint style="info" %} This section is a work in progress. We appreciate any help you can provide in completing this section. Please check our Contribution Guide to get started. {% endhint %}
description: Load data from CSV files.
Csv File
.png)
Csv File Node
CSV (Comma-Separated Values) is a simple file format used to store tabular data, such as a spreadsheet or database. This module provides functionality to load and process CSV files within your workflow.
This module provides a versatile CSV document loader that can:
- Load single or multiple CSV files
- Support both base64-encoded files and files from storage
- Extract specific columns or entire content
- Process large datasets efficiently
- Handle custom metadata management
Inputs
- CSV File: The CSV file(s) to process (.csv extension required)
- Text Splitter (optional): A text splitter to process the extracted content
- Single Column Extraction (optional): Name of a specific column to extract
- Additional Metadata (optional): JSON object with additional metadata to add to documents
- Omit Metadata Keys (optional): Comma-separated list of metadata keys to omit from the default metadata
Outputs
- Document: Array of document objects containing metadata and pageContent
- Text: Concatenated string from pageContent of all documents
Features
- Multiple file processing support
- Single column extraction capability
- Efficient handling of large datasets
- Customizable metadata handling
- Storage integration support
- Base64 and blob handling capabilities
{% hint style="info" %} This section is a work in progress. We appreciate any help you can provide in completing this section. Please check our Contribution Guide to get started. {% endhint %}
description: Custom function for loading documents.
Custom Document Loader
.png)
Custom Document Loader Node
The Custom Document Loader provides the ability to create custom document loading functionality using JavaScript. This module enables flexible and customized document processing through user-defined functions.
This module provides a flexible document loader that can:
- Execute custom JavaScript functions for document loading
- Handle input variables dynamically
- Support both document and text outputs
- Run in a sandboxed environment
- Access flow context and variables
- Process custom metadata
Inputs
Required Parameters
- Javascript Function: Custom code that returns either:
- Array of document objects (for Document output)
- String (for Text output)
Optional Parameters
- Input Variables: JSON object containing variables accessible in the function with $ prefix
Outputs
- Document: Array of document objects containing metadata and pageContent
- Text: Concatenated string from pageContent of documents
Features
- Sandboxed execution environment
- Variable injection support
- Flow context access
- Custom dependency support
- Error handling
- Timeout protection
- Input validation
Document Structure
When returning documents, each object must have:
{
  pageContent: 'Document Content',
  metadata: {
    title: 'Document Title',
    // ... other metadata
  }
}
Example Usage
Document Output
return [
  {
    pageContent: 'Document Content',
    metadata: {
      title: 'Document Title',
      source: 'Custom Source'
    }
  }
]
Text Output
return "Processed text content"
Available Context
- $input: Input value passed to the function
- $vars: Access to flow variables
- $flow: Flow context object containing:
- chatflowId
- sessionId
- chatId
- input
Notes
- Functions run in a secure sandbox
- 10-second execution timeout
- Built-in dependencies available
- External dependencies configurable
- Input variables must be valid JSON
- Error handling for invalid returns
- Supports async operations
{% hint style="info" %} This section is a work in progress. We appreciate any help you can provide in completing this section. Please check our Contribution Guide to get started. {% endhint %}
description: Load data from pre-configured document stores.
Document Store
 (1) (1) (1) (1) (1) (1) (1).png)
Document Store Node
The Document Store loader enables you to load data from pre-configured document stores in your database. This loader provides a convenient way to access and utilize previously processed and stored documents in your workflows.
Features
- Load documents from synchronized stores
- Automatic metadata handling
- Multiple output formats
- Asynchronous store selection
- Database integration
- Chunk-based document retrieval
- JSON metadata support
How It Works
-
Store Selection:
- Lists all available document stores that are in 'SYNC' status
- Provides store information including name and description
- Allows selection from synchronized stores only
-
Document Retrieval:
- Fetches document chunks from the selected store
- Reconstructs documents with original metadata
- Maintains document structure and relationships
Parameters
Required Parameters
- Select Store: Choose from available synchronized document stores
- Displays store name and description
- Only shows stores in 'SYNC' status
- Dynamically updated based on database content
Outputs
The loader provides two output formats:
Document Output
Returns an array of document objects, each containing:
- pageContent: The actual content of the document chunk
- metadata: Original document metadata in JSON format
Text Output
Returns a concatenated string containing:
- All document chunks' content
- Separated by newlines
- Properly escaped characters
Database Integration
The loader integrates with your database through:
- TypeORM data source connection
- Document store entity management
- Chunk-based storage and retrieval
- Metadata preservation
Document Structure
Each loaded document contains:
{
  pageContent: string,    // The actual content
  metadata: {            // Parsed JSON metadata
    // Original document metadata
    // Store-specific information
    // Custom metadata fields
  }
}
Usage Examples
Basic Store Selection
{
  "selectedStore": "store-id-123"
}
Accessing Document Content
// Document output format
[
  {
    "pageContent": "Document content here...",
    "metadata": {
      "source": "original-file.pdf",
      "page": 1,
      "category": "reports"
    }
  }
]

// Text output format
"Document content here...\nNext document content here...\n"
Best Practices
- Ensure stores are synchronized before access
- Choose appropriate output format for your use case
- Handle metadata appropriately in your workflow
- Consider chunk size when processing large documents
- Monitor database performance with large stores
Notes
- Only synchronized stores are available for selection
- Metadata is automatically parsed from JSON
- Documents are reconstructed from chunks
- Supports both document and text output formats
- Integrates with TypeORM for database access
- Handles escape characters in text output
- Maintains original document structure
{% hint style="info" %} This section is a work in progress. We appreciate any help you can provide in completing this section. Please check our Contribution Guide to get started. {% endhint %}
description: Load data from DOCX files.
Docx File
 (1) (1) (1) (1) (1) (1) (1).png)
Docx File Node
Microsoft Word Document (DOCX) is a widely used document format for creating and editing text documents. This module provides functionality to load and process DOCX files within your workflow.
This module provides a comprehensive DOCX document loader that can:
- Load single or multiple DOCX files
- Support both base64-encoded files and files from storage
- Extract text content with metadata
- Integrate with text splitters for content processing
- Handle custom metadata management
Inputs
- DOCX File: The DOCX file(s) to process (.docx extension required)
- Text Splitter (optional): A text splitter to process the extracted content
- Additional Metadata (optional): JSON object with additional metadata to add to documents
- Omit Metadata Keys (optional): Comma-separated list of metadata keys to omit from the default metadata
Outputs
- Document: Array of document objects containing metadata and pageContent
- Text: Concatenated string from pageContent of all documents
Features
- Multiple file processing support
- Flexible text splitting options
- Customizable metadata handling
- Storage integration support
- Base64 and blob handling capabilities
{% hint style="info" %} This section is a work in progress. We appreciate any help you can provide in completing this section. Please check our Contribution Guide to get started. {% endhint %}
File Loader
 (1) (1) (1) (1) (1) (1) (1) (1).png)
The File Loader is a versatile document loader that supports multiple file formats including TXT, JSON, CSV, DOCX, PDF, Excel, PowerPoint, and more. This module provides a unified interface for loading and processing various file types.
For example, if a .csv file is uploaded, CSV File Loader will be used.
Pros: no need to have separate loaders for each different file types
Cons: less flexibility to configure loader parameters
This module provides a sophisticated file loader that can:
- Load multiple file formats
- Support both base64-encoded files and files from storage
- Handle PDF-specific processing options
- Process JSON and JSONL with pointer extraction
- Support text splitting
- Customize metadata extraction
- Handle file storage integration
Inputs
Required Parameters
- File: The file(s) to process (supports multiple formats)
Optional Parameters
- Text Splitter: A text splitter to process the extracted content
- PDF Usage: Choose between:
- One document per page
- One document per file
- Use Legacy Build: Use legacy build for PDF compatibility issues
- JSONL Pointer Extraction: Pointer name for JSONL files
- Additional Metadata: JSON object with additional metadata
- Omit Metadata Keys: Comma-separated list of metadata keys to omit
Outputs
- Document: Array of document objects containing metadata and pageContent
- Text: Concatenated string from pageContent of documents
Supported File Types
- Text Files (.txt)
- JSON Files (.json)
- JSONL Files (.jsonl)
- CSV Files (.csv)
- PDF Files (.pdf)
- Word Documents (.docx)
- Excel Files (.xlsx, .xls)
- PowerPoint Files (.pptx, .ppt)
- And more...
Features
- Multi-format support
- Storage integration
- PDF processing options
- JSON pointer extraction
- Text splitting support
- Metadata customization
- Error handling
- MIME type detection
File Processing Options
PDF Processing
- Per-page splitting
- Single document mode
- Legacy build support
- OCR compatibility
JSON/JSONL Processing
- Pointer-based extraction
- Structured data handling
- Array processing
- Nested object support
Notes
- Automatically detects file type
- Handles multiple files simultaneously
- Supports file storage integration
- Preserves file metadata
- Handles large files efficiently
- Error handling for invalid files
- Memory-efficient processing
description: Load data from a Figma file.
Figma
 (1) (1) (1) (1) (1) (1) (1).png)
Figma Node
Figma is a collaborative web application for interface design. This module provides functionality to load and process content from Figma files, including text, components, and metadata.
This module provides a sophisticated Figma document loader that can:
- Load content from specific Figma files
- Extract text from selected nodes
- Process content recursively
- Handle authentication with Figma API
- Process content with text splitters
- Customize metadata extraction
Inputs
Required Parameters
- File Key: The unique identifier for the Figma file (from file URL)
- Node IDs: Comma-separated list of node identifiers to extract
- Connect Credential: Figma API credentials (access token)
Optional Parameters
- Recursive: Whether to process nodes recursively
- Text Splitter: A text splitter to process the extracted content
- Additional Metadata: JSON object with additional metadata
- Omit Metadata Keys: Comma-separated list of metadata keys to omit
Outputs
- Document: Array of document objects containing metadata and pageContent
- Text: Concatenated string from pageContent of documents
Features
- API-based content extraction
- Node-level content selection
- Recursive processing
- Text splitting support
- Metadata customization
- Error handling
- Authentication management
File Key Format
The file key can be found in the Figma file URL:
https://www.figma.com/file/:key/:title
Example: In https://www.figma.com/file/12345/Website, the file key is 12345
Node IDs
To get Node IDs:
- Install the Node Inspector plugin in Figma
- Select the desired elements
- Copy the Node IDs from the inspector
- Use comma-separated format: "0, 1, 2"
Notes
- Requires valid Figma access token
- Node IDs must be valid for the file
- Supports recursive content extraction
- Can process multiple nodes at once
- Handles API rate limits and errors
- Preserves node hierarchy in metadata
- Supports custom metadata addition
{% hint style="info" %} This section is a work in progress. We appreciate any help you can provide in completing this section. Please check our Contribution Guide to get started. {% endhint %}
description: Load data from URL using FireCrawl.
FireCrawl
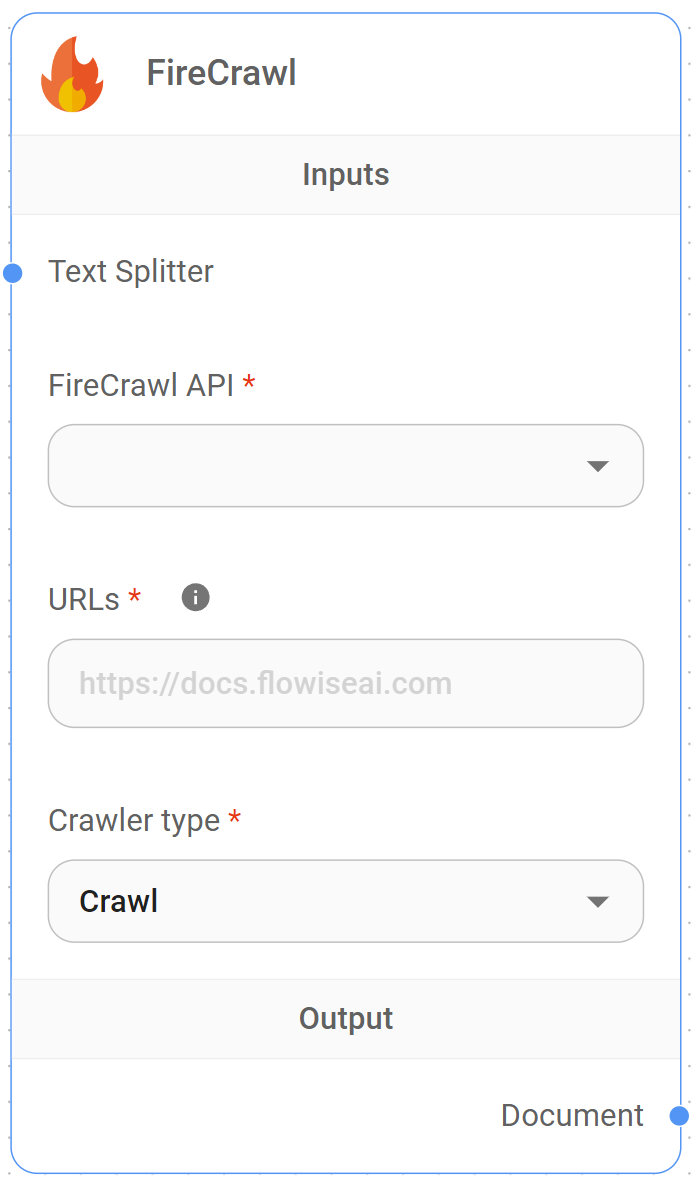
FireCrawl Node
FireCrawl Document Loader
FireCrawl is a powerful web crawling and scraping service that provides advanced capabilities for extracting content from websites. This module enables loading and processing web content through the FireCrawl API.
This module provides a sophisticated web crawler that can:
- Scrape single web pages
- Crawl entire websites
- Extract structured data
- Handle JavaScript-rendered content
- Process content with text splitters
- Customize metadata extraction
- Support multiple operation modes
Inputs
Required Parameters
- URL: The webpage or website URL to process
- Connect Credential: FireCrawl API credentials
- Mode: Choose between:
- Scrape: Single page extraction
- Crawl: Multi-page website crawling
- Extract: Structured data extraction
Optional Parameters
- Text Splitter: A text splitter to process the extracted content
- Scrape Options:
- Include Tags: HTML tags to include
- Exclude Tags: HTML tags to exclude
- Mobile: Use mobile user agent
- Skip TLS Verification: Bypass SSL checks
- Timeout: Request timeout
- Additional Metadata: JSON object with additional metadata
- Omit Metadata Keys: Comma-separated list of metadata keys to omit
Outputs
- Document: Array of document objects containing metadata and pageContent
- Text: Concatenated string from pageContent of documents
Features
- Multiple operation modes
- Advanced scraping options
- Structured data extraction
- JavaScript rendering
- Mobile device emulation
- Custom timeout settings
- Error handling
Operation Modes
Scrape Mode
- Single page processing
- Main content extraction
- Format selection
- Custom tag filtering
Crawl Mode
- Multi-page crawling
- Subdomain handling
- Sitemap processing
- Link extraction
Extract Mode
- Structured data extraction
- Schema-based parsing
- LLM-powered extraction
- Custom extraction prompts
Document Structure
Each document contains:
- pageContent: Extracted content in markdown format
- metadata:
- title: Page title
- description: Meta description
- language: Content language
- sourceURL: Original URL
- Additional custom metadata
Notes
- Requires valid FireCrawl API key
- Supports multiple content formats
- Handles rate limiting
- Job status monitoring
- Error handling and retries
- Customizable request options
- Memory-efficient processing
{% hint style="info" %} This section is a work in progress. We appreciate any help you can provide in completing this section. Please check our Contribution Guide to get started. {% endhint %}
description: Load data from folder with multiple files.
Folder with Files
 (1) (1) (1) (1) (1) (1) (1).png)
Folder with Files Node
The Folder Loader provides functionality to load and process multiple files from a directory. This module supports a wide range of file formats and can recursively process subdirectories.
This module provides a sophisticated folder loader that can:
- Load multiple file types simultaneously
- Process directories recursively
- Handle various document formats
- Support PDF-specific processing
- Process structured data files
- Customize metadata extraction
- Support text splitting
Inputs
Required Parameters
- Folder Path: Path to the directory containing files
- Recursive: Whether to process subdirectories
Optional Parameters
- Text Splitter: A text splitter to process the extracted content
- PDF Usage: Choose between:
- One document per page
- One document per file
- JSONL Pointer Extraction: Pointer name for JSONL files
- Additional Metadata: JSON object with additional metadata
- Omit Metadata Keys: Comma-separated list of metadata keys to omit
Outputs
- Document: Array of document objects containing metadata and pageContent
- Text: Concatenated string from pageContent of documents
Supported File Types
Documents
- PDF (.pdf)
- Word (.doc, .docx)
- Excel (.xls, .xlsx, .xlsm, .xlsb)
- PowerPoint (.ppt, .pptx)
- Text (.txt)
- Markdown (.md, .markdown)
- HTML (.html)
- XML (.xml)
Data Files
- JSON (.json)
- JSONL (.jsonl)
- CSV (.csv)
Programming Languages
- Python (.py, .python)
- JavaScript (.js)
- TypeScript (.ts)
- Java (.java)
- C/C++ (.c, .cpp, .h)
- C# (.cs)
- Ruby (.rb, .ruby)
- Go (.go)
- PHP (.php)
- Swift (.swift)
- Rust (.rs)
- Scala (.scala, .sc)
- Kotlin (.kt)
- Solidity (.sol)
Web Technologies
- CSS (.css)
- SCSS (.scss)
- LESS (.less)
- SQL (.sql)
- Protocol Buffers (.proto)
Features
- Multi-format support
- Recursive directory processing
- PDF processing options
- Structured data handling
- Text splitting support
- Metadata customization
- Error handling
Notes
- Automatically detects file types
- Handles large directories
- Preserves file metadata
- Memory-efficient processing
- Supports custom file extensions
- Error handling for invalid files
- Flexible output formats
{% hint style="info" %} This section is a work in progress. We appreciate any help you can provide in completing this section. Please check our Contribution Guide to get started. {% endhint %}
description: Load data from GitBook.
GitBook
.png)
GitBook Node
GitBook Document Loader
GitBook is a modern documentation platform that helps teams share knowledge. This module provides functionality to load and process content from GitBook documentation sites.
This module provides a sophisticated GitBook document loader that can:
- Load content from specific GitBook pages
- Crawl entire GitBook documentation sites
- Extract structured content
- Process content with text splitters
- Customize metadata extraction
- Handle recursive page loading
Inputs
Required Parameters
- Web Path: The URL to the GitBook page or root path
- Single page: e.g., https://docs.gitbook.com/product-tour/navigation
- Root path: e.g., https://docs.gitbook.com/
Optional Parameters
- Should Load All Paths: Whether to recursively load all pages from the root path
- Text Splitter: A text splitter to process the extracted content
- Additional Metadata: JSON object with additional metadata
- Omit Metadata Keys: Comma-separated list of metadata keys to omit
Outputs
- Document: Array of document objects containing metadata and pageContent
- Text: Concatenated string from pageContent of documents
Features
- Single page loading
- Recursive site crawling
- Content extraction
- Text splitting support
- Metadata customization
- Error handling
- Path management
Loading Modes
Single Page Mode
- Loads content from a specific page
- Extracts page content and metadata
- Preserves page structure
- Faster for single page access
All Paths Mode
- Recursively loads all pages from root
- Maintains site hierarchy
- Extracts all available content
- Preserves navigation structure
Document Structure
Each document contains:
- pageContent: Extracted content from the page
- metadata:
- title: Page title
- url: Original page URL
- Additional custom metadata
Notes
- Supports both single page and full site loading
- Handles GitBook's dynamic content
- Preserves document structure
- Supports custom metadata addition
- Error handling for invalid URLs
- Memory-efficient processing
- Flexible output formats
{% hint style="info" %} This section is a work in progress. We appreciate any help you can provide in completing this section. Please check our Contribution Guide to get started. {% endhint %}
description: Load data from a GitHub repository.
Github
.png)
Github Node
GitHub is a platform for version control and collaboration. This module provides functionality to load and process content from GitHub repositories, supporting both public and private repositories.
This module provides a sophisticated GitHub document loader that can:
- Load content from GitHub repositories
- Support private repository access
- Process repositories recursively
- Handle custom GitHub instances
- Control concurrency and retries
- Customize file filtering
- Process content with text splitters
Inputs
Required Parameters
- Repo Link: The GitHub repository URL (e.g., https://github.com/FlowiseAI/Flowise)
- Branch: The branch to load content from (default: main)
Optional Parameters
- Connect Credential: GitHub API credentials (required for private repos)
- Recursive: Whether to process subdirectories
- Max Concurrency: Maximum number of concurrent file loads
- Github Base URL: Custom GitHub base URL for enterprise instances
- Github Instance API: Custom GitHub API URL for enterprise instances
- Ignore Paths: Array of glob patterns for paths to ignore
- Max Retries: Maximum number of retry attempts
- Text Splitter: A text splitter to process the extracted content
- Additional Metadata: JSON object with additional metadata
- Omit Metadata Keys: Comma-separated list of metadata keys to omit
Outputs
- Document: Array of document objects containing metadata and pageContent
- Text: Concatenated string from pageContent of documents
Features
- Public/private repo support
- Enterprise instance support
- Recursive directory processing
- Concurrency control
- Retry mechanism
- Path filtering
- Text splitting support
- Metadata customization
Authentication Methods
Public Repositories
- No authentication required
- Rate limits apply
- Limited to public content
Private Repositories
- Requires GitHub access token
- Higher rate limits
- Access to private content
- Enterprise support
Document Structure
Each document contains:
- pageContent: File content
- metadata:
- source: File path in repository
- branch: Repository branch
- commit: Commit hash
- Additional custom metadata
Notes
- Supports both public and private repos
- Enterprise GitHub instances supported
- Rate limiting handled automatically
- Exponential backoff for retries
- Path filtering with glob patterns
- Memory-efficient processing
- Error handling for invalid repos
{% hint style="info" %} This section is a work in progress. We appreciate any help you can provide in completing this section. Please check our Contribution Guide to get started. {% endhint %}
description: Load data from JSON files.
Json File
 (1) (1) (1).png)
Json File Node
JSON (JavaScript Object Notation) is a lightweight data-interchange format that is easy for humans to read and write and easy for machines to parse and generate. This module provides advanced functionality to load and process JSON files within your workflow.
This module provides a sophisticated JSON document loader that can:
- Load single or multiple JSON files
- Support both base64-encoded files and files from storage
- Extract specific data using JSON pointers
- Handle dynamic metadata extraction
- Process nested JSON structures
Inputs
- JSON File: The JSON file(s) to process (.json extension required)
- Text Splitter (optional): A text splitter to process the extracted content
- Pointers Extraction (optional): Comma-separated list of JSON pointers to extract specific data
- Additional Metadata (optional): JSON object for dynamic metadata extraction from the document
- Omit Metadata Keys (optional): Comma-separated list of metadata keys to omit from the default metadata
Outputs
- Document: Array of document objects containing metadata and pageContent
- Text: Concatenated string from pageContent of documents
Features
- Multiple file processing support
- JSON pointer-based data extraction
- Dynamic metadata mapping
- Nested JSON structure handling
- Storage integration support
- Base64 and blob handling capabilities
Example Usage
For a JSON document like:
[
    {
        "url": "https://www.google.com",
        "body": "This is body 1"
    },
    {
        "url": "https://www.yahoo.com",
        "body": "This is body 2"
    }
]
You can extract specific fields as metadata using:
{
    "source": "/url"
}
This will add the URL value as metadata with key "source" for each document.
{% hint style="info" %} This section is a work in progress. We appreciate any help you can provide in completing this section. Please check our Contribution Guide to get started. {% endhint %}
description: Load data from JSON Lines files.
Json Lines File
 (1) (1) (1) (1) (1) (1) (1) (1) (1) (1) (1) (1).png)
Json Lines File Node
JSON Lines (JSONL) is a text format where each line is a valid JSON value. This module provides functionality to load and process JSONL files, with support for pointer-based content extraction and dynamic metadata handling.
This module provides a sophisticated JSONL document loader that can:
- Load single or multiple JSONL files
- Extract specific values using JSON pointers
- Handle dynamic metadata extraction
- Process content with text splitters
- Support base64 encoded files
- Handle file storage integration
- Customize metadata extraction
Inputs
Required Parameters
- JSONL File: The JSONL file(s) to process (.jsonl extension)
- Pointer Extraction: JSON pointer to extract content (e.g., "key" for
{"key": "value"})
Optional Parameters
- Text Splitter: A text splitter to process the extracted content
- Additional Metadata: JSON object with additional metadata
- Omit Metadata Keys: Comma-separated list of metadata keys to omit
Outputs
- Document: Array of document objects containing metadata and pageContent
- Text: Concatenated string from pageContent of documents
Features
- JSON pointer extraction
- Dynamic metadata handling
- Text splitting support
- Base64 file support
- File storage integration
- Error handling
- Memory-efficient processing
JSON Pointer Extraction
Basic Example
For JSONL content:
{"key": "value1", "source": "file1.txt"}
{"key": "value2", "source": "file2.txt"}
With pointer "key", extracts: "value1", "value2"
Dynamic Metadata
You can extract values as metadata using JSON pointers:
{
    "source": "/source",
    "custom": "/metadata/field"
}
Document Structure
Each document contains:
- pageContent: Extracted content using pointer
- metadata:
- source: Original file path
- line: Line number in file
- pointer: Used JSON pointer
- Additional dynamic metadata
File Handling
Local Files
- Direct file loading
- Base64 encoded content
- Multiple file support
Storage Integration
- File storage system support
- Organization-based storage
- Chatflow-based storage
Notes
- One document per JSONL line
- Invalid JSON lines are skipped
- Memory-efficient processing
- Error handling for invalid pointers
- Support for nested JSON structures
- Dynamic metadata extraction
- Flexible output formats
{% hint style="info" %} This section is a work in progress. We appreciate any help you can provide in completing this section. Please check our Contribution Guide to get started. {% endhint %}
description: >- Load data from Notion Database (each row is a separate document with all properties as metadata).
Notion Database
 (1) (1) (1) (1) (1) (1) (1) (1) (1) (1) (1) (1) (1).png)
Notion Database Node
Notion is a collaboration platform that combines note-taking, knowledge management, and project management. This module provides three different loaders to process Notion content: Database, Page, and Folder loaders.
Notion Database Loader
Notion Database Node
The Database loader extracts content from Notion databases, treating each row as a separate document.
Features
- Load database rows as documents
- Extract properties as metadata
- Support property headers
- Handle concurrent loading
- Process content with text splitters
- Customize metadata extraction
Required Parameters
- Connect Credential: Notion API credentials
- Database Id: The unique identifier of the Notion database
Common Features
All Notion loaders support:
Optional Parameters
- Text Splitter: A text splitter to process the extracted content
- Additional Metadata: JSON object with additional metadata
- Omit Metadata Keys: Comma-separated list of metadata keys to omit
Outputs
- Document: Array of document objects containing metadata and pageContent
- Text: Concatenated string from pageContent of documents
Authentication
API Authentication (Database & Page Loaders)
- Requires Notion Integration Token
- API rate limiting handled automatically
- Support for workspace-level access
- Secure credential management
Local Access (Folder Loader)
- No authentication required
- Direct file system access
- Process offline content
- Handle exported data
Document Structure
Each document contains:
- pageContent: Extracted text content
- metadata:
- source: Original source (URL or file path)
- title: Page or database title
- properties: Notion properties
- Additional custom metadata
Notes
- API loaders require Notion integration setup
- Folder loader needs exported content
- Rate limiting handled automatically
- Memory-efficient processing
- Error handling for invalid inputs
- Support for large datasets
- Flexible output formats
- Metadata customization
{% hint style="info" %} This section is a work in progress. We appreciate any help you can provide in completing this section. Please check our Contribution Guide to get started. {% endhint %}
description: Load data from the exported and unzipped Notion folder.
Notion Folder
 (1) (1) (1) (1) (1) (1) (1) (1) (1) (1).png)
Notion Folder Node
Notion is a collaboration platform that combines note-taking, knowledge management, and project management. This module provides three different loaders to process Notion content: Database, Page, and Folder loaders.
The Folder loader processes exported and unzipped Notion content from a local folder.
Features
- Process exported Notion content
- Handle multiple pages
- Support local file system
- Extract page content
- Maintain document structure
- Support text splitting
- Customize metadata extraction
Required Parameters
- Notion Folder: Path to the exported and unzipped Notion folder
Common Features
All Notion loaders support:
Optional Parameters
- Text Splitter: A text splitter to process the extracted content
- Additional Metadata: JSON object with additional metadata
- Omit Metadata Keys: Comma-separated list of metadata keys to omit
Outputs
- Document: Array of document objects containing metadata and pageContent
- Text: Concatenated string from pageContent of documents
Authentication
API Authentication (Database & Page Loaders)
- Requires Notion Integration Token
- API rate limiting handled automatically
- Support for workspace-level access
- Secure credential management
Local Access (Folder Loader)
- No authentication required
- Direct file system access
- Process offline content
- Handle exported data
Document Structure
Each document contains:
- pageContent: Extracted text content
- metadata:
- source: Original source (URL or file path)
- title: Page or database title
- properties: Notion properties
- Additional custom metadata
Notes
- API loaders require Notion integration setup
- Folder loader needs exported content
- Rate limiting handled automatically
- Memory-efficient processing
- Error handling for invalid inputs
- Support for large datasets
- Flexible output formats
- Metadata customization
{% hint style="info" %} This section is a work in progress. We appreciate any help you can provide in completing this section. Please check our Contribution Guide to get started. {% endhint %}
description: Load data from Notion Page (including child pages all as separate documents).
Notion Page
 (1) (1) (1) (1) (1) (1) (1) (1).png)
Notion Page Node
Notion is a collaboration platform that combines note-taking, knowledge management, and project management. This module provides three different loaders to process Notion content: Database, Page, and Folder loaders.
Notion Page Loader
 (1) (1) (1) (1) (1) (1) (1) (1) (2).png)
Notion Page Node
The Page loader extracts content from Notion pages, including all child pages as separate documents.
Features
- Load page content as documents
- Process child pages recursively
- Extract page properties
- Handle page hierarchy
- Support text splitting
- Customize metadata extraction
Required Parameters
- Connect Credential: Notion API credentials
- Page Id: The 32-character hex identifier from the page URL
Common Features
All Notion loaders support:
Optional Parameters
- Text Splitter: A text splitter to process the extracted content
- Additional Metadata: JSON object with additional metadata
- Omit Metadata Keys: Comma-separated list of metadata keys to omit
Outputs
- Document: Array of document objects containing metadata and pageContent
- Text: Concatenated string from pageContent of documents
Authentication
API Authentication (Database & Page Loaders)
- Requires Notion Integration Token
- API rate limiting handled automatically
- Support for workspace-level access
- Secure credential management
Local Access (Folder Loader)
- No authentication required
- Direct file system access
- Process offline content
- Handle exported data
Document Structure
Each document contains:
- pageContent: Extracted text content
- metadata:
- source: Original source (URL or file path)
- title: Page or database title
- properties: Notion properties
- Additional custom metadata
Notes
- API loaders require Notion integration setup
- Folder loader needs exported content
- Rate limiting handled automatically
- Memory-efficient processing
- Error handling for invalid inputs
- Support for large datasets
- Flexible output formats
- Metadata customization
{% hint style="info" %} This section is a work in progress. We appreciate any help you can provide in completing this section. Please check our Contribution Guide to get started. {% endhint %}
PDF Files
PDF Document Loader
PDF (Portable Document Format) is a file format developed by Adobe for presenting documents consistently across software platforms. This module provides functionality to load and process PDF files using pdf.js.
This module provides a sophisticated PDF document loader that can:
- Load single or multiple PDF files
- Split documents by page or file
- Support base64 encoded files
- Handle file storage integration
- Process content with text splitters
- Support legacy PDF versions
- Customize metadata extraction
Inputs
Required Parameters
- PDF File: The PDF file(s) to process (.pdf extension)
- Usage: Choose between:
- One document per page
- One document per file
Optional Parameters
- Text Splitter: A text splitter to process the extracted content
- Use Legacy Build: Whether to use legacy PDF.js build
- Additional Metadata: JSON object with additional metadata
- Omit Metadata Keys: Comma-separated list of metadata keys to omit
Outputs
- Document: Array of document objects containing metadata and pageContent
- Text: Concatenated string from pageContent of documents
Features
- Multiple file support
- Page-level splitting
- Legacy version support
- Text extraction
- Metadata handling
- Error handling
- Memory-efficient processing
Processing Modes
Per Page Mode
- Each page becomes a document
- Preserves page numbers
- Individual page metadata
- Granular content access
Per File Mode
- Entire PDF as one document
- Combined content
- Single metadata set
- Memory efficient
Document Structure
Each document contains:
- pageContent: Extracted text content
- metadata:
- source: Original file path
- pdf: PDF-specific metadata
- page: Page number (in per-page mode)
- Additional custom metadata
File Handling
Local Files
- Direct file loading
- Base64 encoded content
- Multiple file support
Storage Integration
- File storage system support
- Organization-based storage
- Chatflow-based storage
Notes
- Uses pdf.js for extraction
- Legacy version support
- Memory-efficient processing
- Error handling for invalid files
- Support for large PDFs
- Flexible output formats
- Metadata customization
- Text encoding handling
description: Load data from plain text.
Plain Text
 (1) (1) (1) (1) (1) (1) (1) (1).png)
Plain Text Node
Plain text is the most basic form of text data, containing no formatting or other embedded information. This module provides functionality to load and process plain text content directly.
This module provides a straightforward text document loader that can:
- Load text content directly
- Process text with splitters
- Add custom metadata
- Handle escape characters
- Support document splitting
- Customize metadata extraction
- Manage text encoding
Inputs
Required Parameters
- Text: The plain text content to process
Optional Parameters
- Text Splitter: A text splitter to process the content
- Additional Metadata: JSON object with additional metadata
- Omit Metadata Keys: Comma-separated list of metadata keys to omit
Outputs
- Document: Array of document objects containing metadata and pageContent
- Text: Concatenated string from pageContent of documents
Features
- Direct text input
- Text splitting support
- Metadata handling
- Error handling
- Memory-efficient processing
- Character encoding handling
- Flexible output formats
Text Processing
Direct Mode
- Single document creation
- Preserves original text
- Basic metadata handling
- Memory efficient
Split Mode
- Multiple document creation
- Custom splitting rules
- Individual chunk metadata
- Granular content access
Document Structure
Each document contains:
- pageContent: Original or split text content
- metadata:
- Custom metadata from input
- Split-specific metadata (when using splitter)
- Additional metadata properties
Content Handling
Text Input
- Direct string input
- Multi-line support
- Unicode support
- Escape character handling
Processing Options
- Text splitting
- Metadata addition
- Character normalization
- Whitespace handling
Notes
- Simple and efficient
- No file handling required
- Memory-efficient processing
- Error handling for invalid inputs
- Support for large texts
- Flexible output formats
- Metadata customization
- Character encoding support
{% hint style="info" %} This section is a work in progress. We appreciate any help you can provide in completing this section. Please check our Contribution Guide to get started. {% endhint %}
Playwright Web Scraper
Playwright is a Node.js library that allows automation of web browsers for web scraping. It was developed by Microsoft and supports multiple browsers, including Chromium. Keep in mind that when scraping websites, you should always review and comply with the website's terms of service and policies to ensure ethical and legal use of the data.
This module provides a sophisticated web scraper that can:
- Load content from single or multiple web pages
- Handle JavaScript-rendered content
- Support various page load strategies
- Wait for specific elements to load
- Crawl relative links from websites
- Process XML sitemaps
Inputs
- URL: The webpage URL to scrape
- Text Splitter (optional): A text splitter to process the extracted content
- Get Relative Links Method (optional): Choose between:
- Web Crawl: Crawl relative links from HTML URL
- Scrape XML Sitemap: Scrape relative links from XML sitemap URL
- Get Relative Links Limit (optional): Limit for number of relative links to process (default: 10, 0 for all links)
- Wait Until (optional): Page load strategy:
- Load: Wait for the load event to fire
- DOM Content Loaded: Wait for the DOMContentLoaded event
- Network Idle: Wait until no network connections for 500ms
- Commit: Wait for initial network response and document loading
- Wait for selector to load (optional): CSS selector to wait for before scraping
- Additional Metadata (optional): JSON object with additional metadata to add to documents
- Omit Metadata Keys (optional): Comma-separated list of metadata keys to omit
Outputs
- Document: Array of document objects containing metadata and pageContent
- Text: Concatenated string from pageContent of documents
Features
- Multi-browser engine support (Chromium, Firefox, WebKit)
- JavaScript execution support
- Configurable page load strategies
- Element wait capabilities
- Web crawling functionality
- XML sitemap processing
- Headless browser operation
- Sandbox configuration
- Error handling for invalid URLs
- Metadata customization
Notes
- Runs in headless mode by default
- Uses no-sandbox mode for compatibility
- Invalid URLs will throw an error
- Setting link limit to 0 will retrieve all available links (may take longer)
- Supports waiting for specific DOM elements before extraction
Scrape One URL
- (Optional) Connect Text Splitter.
- Input desired URL to be scraped.
Crawl & Scrape Multiple URLs
Visit Web Crawl guide to allow scraping of multiple pages.
Output
Loads URL content as Document
Resources
Puppeteer Web Scraper
Puppeteer is a Node.js library, controls Chrome/Chromium through the DevTools Protocol in headless mode. Keep in mind that when scraping websites, you should always review and comply with the website's terms of service and policies to ensure ethical and legal use of the data.
This module provides a sophisticated web scraper that can:
- Load content from single or multiple web pages
- Handle JavaScript-rendered content
- Support various page load strategies
- Wait for specific elements to load
- Crawl relative links from websites
- Process XML sitemaps
Inputs
- URL: The webpage URL to scrape
- Text Splitter (optional): A text splitter to process the extracted content
- Get Relative Links Method (optional): Choose between:
- Web Crawl: Crawl relative links from HTML URL
- Scrape XML Sitemap: Scrape relative links from XML sitemap URL
- Get Relative Links Limit (optional): Limit for number of relative links to process (default: 10, 0 for all links)
- Wait Until (optional): Page load strategy:
- Load: When initial HTML document's DOM is loaded
- DOM Content Loaded: When complete HTML document's DOM is loaded
- Network Idle 0: No network connections for 500ms
- Network Idle 2: No more than 2 network connections for 500ms
- Wait for selector to load (optional): CSS selector to wait for before scraping
- Additional Metadata (optional): JSON object with additional metadata to add to documents
- Omit Metadata Keys (optional): Comma-separated list of metadata keys to omit
Outputs
- Document: Array of document objects containing metadata and pageContent
- Text: Concatenated string from pageContent of documents
Features
- JavaScript execution support
- Configurable page load strategies
- Element wait capabilities
- Web crawling functionality
- XML sitemap processing
- Headless browser operation
- Sandbox configuration
- Error handling for invalid URLs
- Metadata customization
Notes
- Runs in headless mode by default
- Uses no-sandbox mode for compatibility
- Invalid URLs will throw an error
- Setting link limit to 0 will retrieve all available links (may take longer)
- Supports waiting for specific DOM elements before extraction
Scrape One URL
- (Optional) Connect Text Splitter.
- Input desired URL to be scraped.
Crawl & Scrape Multiple URLs
Visit Web Crawl guide to allow scraping of multiple pages.
Output
Loads URL content as Document
Resources
S3 File Loader
S3 File Loader allows you to retrieve a file from s3, and use Unstructured to preprocess into a structured Document object that is ready to be converted into vector embeddings. Unstructured is being used to cater for wide range of different file types. Regardless if your file on s3 is PDF, XML, DOCX, CSV, it can be processed by Unstructured. See here for supported file types.
Amazon S3 (Simple Storage Service) is an object storage service offering industry-leading scalability, data availability, security, and performance. This module provides comprehensive functionality to load and process files stored in S3 buckets.
This module provides a sophisticated S3 document loader that can:
- Load files from S3 buckets using AWS credentials
- Support multiple file formats (PDF, DOCX, CSV, Excel, PowerPoint, text files)
- Process files using built-in loaders or Unstructured.io API
- Handle text and binary files
- Customize metadata extraction
Inputs
Required Parameters
- Bucket: The name of the S3 bucket
- Object Key: The unique identifier of the object in the S3 bucket
- Region: AWS region where the bucket is located (default: us-east-1)
Processing Options
- File Processing Method: Choose between:
- Built In Loaders: Use native file format processors
- Unstructured: Use Unstructured.io API for advanced processing
- Text Splitter (optional): Text splitter for built-in processing
- Additional Metadata (optional): JSON object with additional metadata
- Omit Metadata Keys (optional): Keys to omit from metadata
Unstructured.io Options
- Unstructured API URL: Endpoint for Unstructured.io API
- Unstructured API KEY (optional): API key for authentication
- Strategy: Processing strategy (hi_res, fast, ocr_only, auto)
- Encoding: Text encoding method (default: utf-8)
- Skip Infer Table Types: Document types to skip table extraction
Outputs
- Document: Array of document objects containing metadata and pageContent
- Text: Concatenated string from pageContent of documents
Features
- AWS S3 integration
- Multiple file format support
- Built-in and Unstructured.io processing
- Configurable AWS regions
- Flexible metadata handling
- Binary file processing
- Temporary file management
- MIME type detection
Supported File Types
- PDF documents
- Microsoft Word (DOCX)
- Microsoft Excel
- Microsoft PowerPoint
- CSV files
- Text files
- And more through Unstructured.io
Notes
- Requires AWS credentials (optional if using IAM roles)
- Some file types may require specific processing methods
- Unstructured.io API requires separate setup and credentials
- Temporary files are created and managed automatically
- Error handling for unsupported file types
Unstructured Setup
You can either use the hosted API or running locally via Docker.
- Hosted API
- Docker:
docker run -p 8000:8000 -d --rm --name unstructured-api quay.io/unstructured-io/unstructured-api:latest --port 8000 --host 0.0.0.0
S3 File Loader Setup
1. Drag and drop S3 file loader onto canvas:
.png)
2. AWS Credential: Create a new credential for your AWS account. You'll need the access and secret key. Remember to grant s3 bucket policy to the associated account. You can refer to the policy guide here.
.png)
- Bucket: Login to your AWS console and navigate to S3. Get your bucket name:
.png)
- Key: Click on the object you would like to use, and get the Key name:
.png)
- Unstructured API URL: Depending on how you are using Unstructured, whether its through Hosted API or Docker, change the Unstructured API URL parameter. If you are using Hosted API, you'll need the API key as well.
- You can then start chatting with your file from S3. You don't have to specify the text splitter for chunking down the document because thats handled by Unstructured automatically.
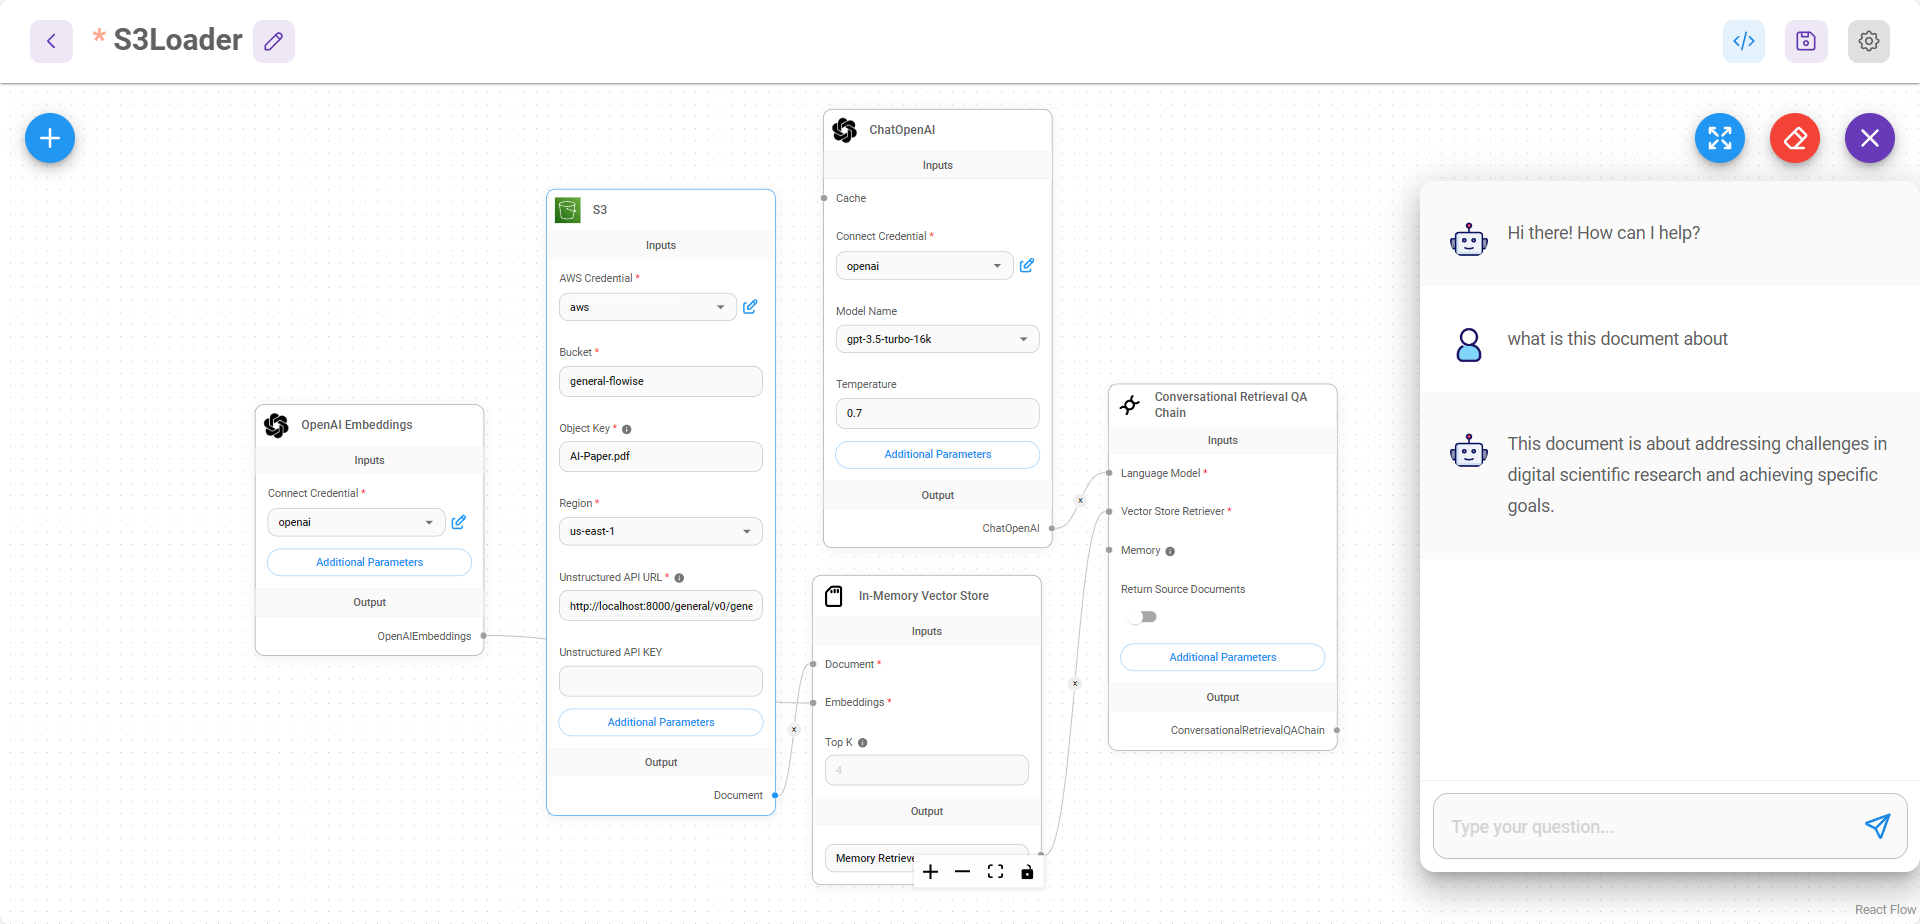
description: Load data from real-time search results.
SearchApi For Web Search
 (1) (1) (1) (1) (1) (1).png)
SearchApi For Web Search
The SearchApi For Web Search loader provides access to real-time search results from multiple search engines using the SearchApi service. This loader enables you to fetch, process, and structure search results as documents that can be used in your workflow.
Features
- Real-time search results from multiple search engines
- Customizable search parameters
- Text splitting capabilities
- Flexible metadata handling
- Multiple output formats
- API key authentication
Inputs
Required Parameters
- Connect Credential: SearchApi API key credential
- At least one of:
- Query: Search query string
- Custom Parameters: JSON object with search parameters
Optional Parameters
- Query: The search query to execute (if not using custom parameters)
- Custom Parameters: JSON object with additional search parameters
- Supports all parameters from SearchApi documentation
- Can override default settings
- Allows engine-specific configurations
- Text Splitter: A text splitter to process the extracted content
- Additional Metadata: JSON object with additional metadata to add to documents
- Omit Metadata Keys: Comma-separated list of metadata keys to exclude
- Format:
key1, key2, key3.nestedKey1 - Use * to remove all default metadata
- Format:
Outputs
- Document: Array of document objects containing:
- metadata: Search result metadata
- pageContent: Search result content
- Text: Concatenated string of all search results' content
Document Structure
Each document contains:
- pageContent: The main content from the search result
- metadata:
- Default search result metadata
- Custom metadata (if specified)
- Filtered metadata (based on omitted keys)
Metadata Handling
Two ways to customize metadata:
-
Additional Metadata
- Add new metadata fields via JSON
- Merged with existing metadata
- Useful for adding custom tracking or categorization
-
Omit Metadata Keys
- Remove unwanted metadata fields
- Comma-separated list of keys to exclude
- Support for nested key removal
- Use * to remove all default metadata
Usage Tips
- Provide specific search queries for better results
- Use custom parameters for advanced search configurations
- Consider using text splitters for large search results
- Manage metadata to keep relevant information
- Handle rate limits through appropriate query spacing
Notes
- Requires SearchApi API key
- Respects API rate limits
- Supports multiple search engines
- Real-time search results
- Memory-efficient processing
- Error handling for API requests
{% hint style="info" %} This section is a work in progress. We appreciate any help you can provide in completing this section. Please check our Contribution Guide to get started. {% endhint %}
description: Load and process data from web search results.
SerpApi For Web Search
.png)
SerpApi For Web Search Node
The SerpApi For Web Search loader enables you to fetch and process web search results using the SerpApi service. This loader transforms search results into structured documents that can be easily integrated into your workflow, making it ideal for applications requiring real-time web search data.
Features
- Real-time web search results
- Text splitting capabilities
- Customizable metadata handling
- Multiple output formats
- API key authentication
- Efficient document processing
Inputs
Required Parameters
- Connect Credential: SerpApi API key credential
- Query: The search query to execute
Optional Parameters
- Text Splitter: A text splitter to process the extracted content
- Additional Metadata: JSON object with additional metadata to add to documents
- Omit Metadata Keys: Comma-separated list of metadata keys to exclude
- Format:
key1, key2, key3.nestedKey1 - Use * to remove all default metadata except custom metadata
- Format:
Outputs
- Document: Array of document objects containing:
- metadata: Search result metadata
- pageContent: Search result content
- Text: Concatenated string of all search results' content
Document Structure
Each document contains:
- pageContent: The main content from the search result
- metadata:
- Default search result metadata
- Custom metadata (if specified)
- Filtered metadata (based on omitted keys)
Metadata Handling
Two ways to customize metadata:
-
Additional Metadata
- Add new metadata fields via JSON
- Merged with existing metadata
- Useful for adding custom tracking or categorization
-
Omit Metadata Keys
- Remove unwanted metadata fields
- Comma-separated list of keys to exclude
- Support for nested key removal
- Use * to remove all default metadata
Usage Tips
- Provide specific search queries for better results
- Use text splitters for large search results
- Customize metadata to match your needs
- Consider rate limits when making multiple queries
- Handle search results appropriately based on size
Notes
- Requires SerpApi API key
- Respects API rate limits
- Real-time search results
- Memory-efficient processing
- Error handling for API requests
- Supports both document and text output formats
Example Usage
// Example search query
query: "artificial intelligence latest developments"

// Example additional metadata
metadata: {
  "source": "serpapi",
  "category": "tech",
  "timestamp": "2024-03-21"
}

// Example metadata keys to omit
omitMetadataKeys: "snippet, position, link"
{% hint style="info" %} This section is a work in progress. We appreciate any help you can provide in completing this section. Please check our Contribution Guide to get started. {% endhint %}
description: Scrape & Crawl the web with Spider - the fastest open source web scraper & crawler.
Spider Web Scraper/Crawler
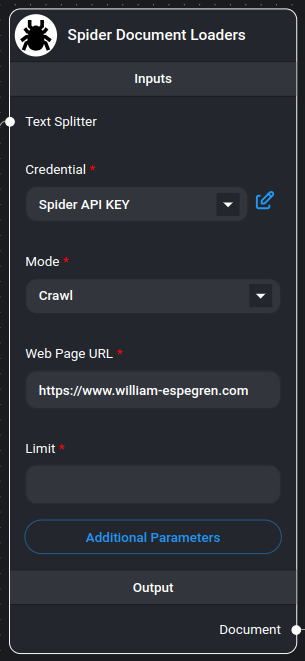
Spider Web Scraper/Crawler Node
Spider is the fastest open source web scraper & crawler that returns LLM-ready data. To get started using this node you need an API key from Spider.cloud.
Get Started
- Go to the Spider.cloud website and sign up for a free account.
- Then go to the API Keys and create a new API key.
- Copy the API key and paste it into the "Credential" field in the Spider node.
Features
- Two operation modes: Scrape and Crawl
- Text splitting capabilities
- Customizable metadata handling
- Flexible parameter configuration
- Multiple output formats
- Markdown-formatted content
- Rate limit handling
Inputs
Required Parameters
- Mode: Choose between:
- Scrape: Extract data from a single page
- Crawl: Extract data from multiple pages within the same domain
- Web Page URL: The target URL to scrape or crawl (e.g., https://spider.cloud)
- Credential: Spider API key
Optional Parameters
- Text Splitter: A text splitter to process the extracted content
- Limit: Maximum number of pages to crawl (default: 25, only applicable in crawl mode)
- Additional Metadata: JSON object with additional metadata to add to documents
- Additional Parameters: JSON object with Spider API parameters
- Example:
{ "anti_bot": true } - Note:
return_formatis always set to "markdown"
- Example:
- Omit Metadata Keys: Comma-separated list of metadata keys to exclude
- Format:
key1, key2, key3.nestedKey1 - Use * to remove all default metadata
- Format:
Outputs
- Document: Array of document objects containing:
- metadata: Page metadata and custom fields
- pageContent: Extracted content in markdown format
- Text: Concatenated string of all extracted content
Document Structure
Each document contains:
- pageContent: The main content from the webpage in markdown format
- metadata:
- source: The URL of the page
- Additional custom metadata (if specified)
- Filtered metadata (based on omitted keys)
Scrape & Crawl
- Choose either "Scrape" or "Crawl" in the mode dropdown.
- Enter the URL you want to scrape or crawl in the "Web Page URL" field.
- If you chose "Crawl", enter the maximum amount of pages you want to crawl in the "Limit" field. If no value or 0 is entered, the crawler will crawl all pages.
Usage Examples
Basic Scraping
{
  "mode": "scrape",
  "url": "https://example.com",
  "limit": 1
}
Advanced Crawling
{
  "mode": "crawl",
  "url": "https://example.com",
  "limit": 25,
  "additional_metadata": {
    "category": "blog",
    "source_type": "web"
  },
  "params": {
    "anti_bot": true,
    "wait_for": ".content-loaded"
  }
}
Example
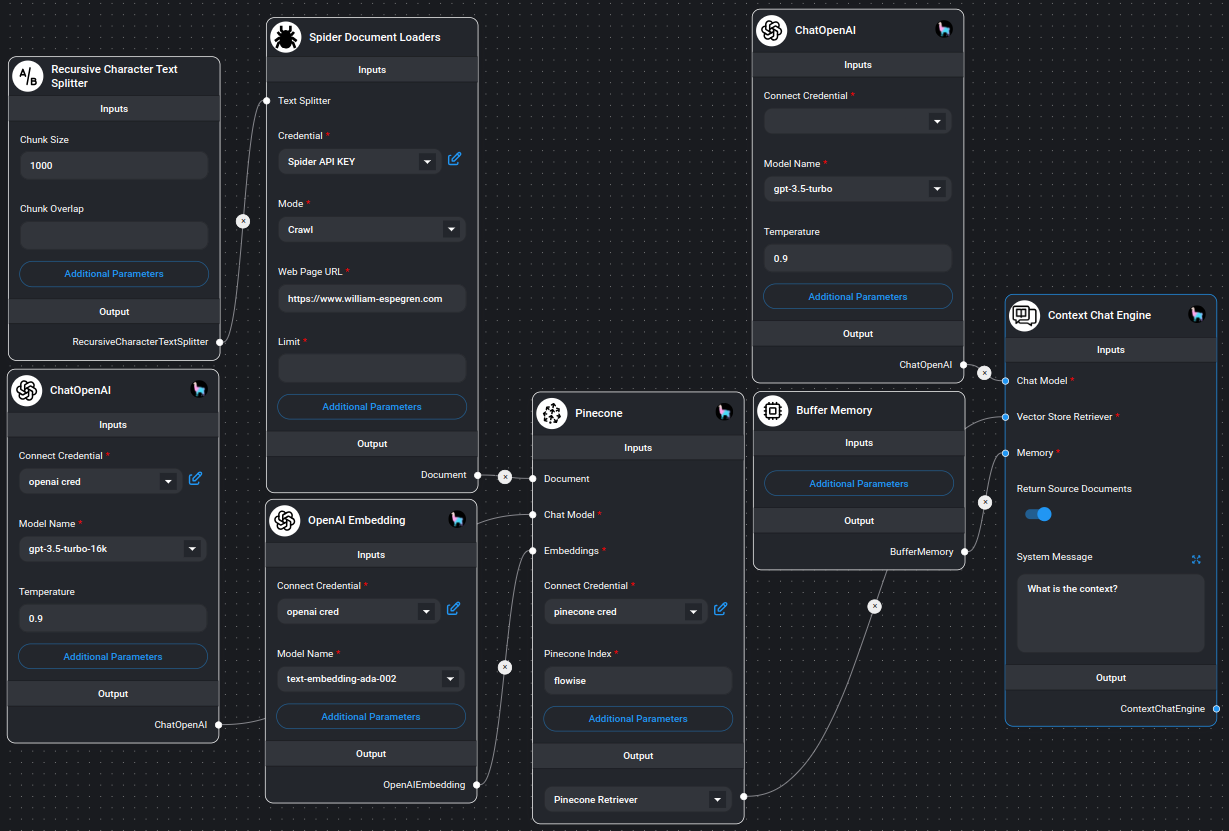
Example on using Spider node
Notes
- The crawler respects the specified limit for crawl operations
- All content is returned in markdown format
- Error handling is built-in for both scraping and crawling operations
- Invalid JSON configurations are handled gracefully
- Memory-efficient processing of large websites
- Supports both single-page and multi-page extraction
- Automatic metadata handling and filtering
description: Load data from text files.
Text File
.png)
Text File Node
The Text File loader enables you to load and process content from various text-based file formats. It supports multiple file types and provides flexible options for text splitting and metadata handling.
Features
- Support for multiple text-based file formats
- Multiple file loading capability
- Text splitting support
- Customizable metadata handling
- Storage integration support
- Base64 file handling
- Multiple output formats
Supported File Types
The loader supports a wide range of text-based file formats:
- Text files (.txt)
- Web files (.html, .aspx, .asp, .css)
- Programming languages:
- C/C++ (.cpp, .c, .h)
- C# (.cs)
- Go (.go)
- Java (.java)
- JavaScript/TypeScript (.js, .ts)
- PHP (.php)
- Python (.py, .python)
- Ruby (.rb, .ruby)
- Rust (.rs)
- Scala (.sc, .scala)
- Solidity (.sol)
- Swift (.swift)
- Visual Basic (.vb)
- Markup/Style:
- CSS/LESS/SCSS (.css, .less, .scss)
- Markdown (.md, .markdown)
- XML (.xml)
- LaTeX (.tex, .ltx)
- Other:
- Protocol Buffers (.proto)
- SQL (.sql)
- RST (.rst)
Inputs
Required Parameters
- Txt File: One or more text files to process
- Accepts files from local upload or storage
- Supports multiple file selection
Optional Parameters
- Text Splitter: A text splitter to process the extracted content
- Additional Metadata: JSON object with additional metadata to add to documents
- Omit Metadata Keys: Comma-separated list of metadata keys to exclude
- Format:
key1, key2, key3.nestedKey1 - Use * to remove all default metadata
- Format:
Outputs
- Document: Array of document objects containing:
- metadata: File metadata and custom fields
- pageContent: Extracted text content
- Text: Concatenated string of all extracted content
Document Structure
Each document contains:
- pageContent: The main content from the text file
- metadata:
- Default file metadata
- Additional custom metadata (if specified)
- Filtered metadata (based on omitted keys)
Usage Examples
Single File Processing
{
  "txtFile": "example.txt",
  "metadata": {
    "source": "local",
    "category": "documentation"
  }
}
Multiple Files Processing
{
  "txtFile": ["doc1.txt", "doc2.md", "code.py"],
  "metadata": {
    "batch": "docs-2024",
    "processor": "text-loader"
  },
  "omitMetadataKeys": "source, timestamp"
}
Storage Integration
The loader supports two file source modes:
- Direct Upload: Files uploaded directly through the interface
- Storage Integration: Files accessed through the storage system
- Format:
FILE-STORAGE::filename.txt - Supports organization and chatflow-specific storage
- Format:
Notes
- Handles both single and multiple file processing
- Supports base64 encoded file content
- Automatically handles different file encodings
- Memory-efficient processing of large files
- Preserves file metadata when needed
- Supports text splitting for large documents
- Handles escape characters in output text
- Integrates with organization-specific storage
Functionality
- The node takes a vector store, an optional query, and an optional minimum score as inputs.
- It performs a similarity search on the vector store using the provided query or input string.
- The search returns documents with their similarity scores.
- Depending on the chosen output type (document or text):
- For ‘document’ output: It filters the documents based on the minimum score (if provided) and returns an array of document objects.
- For ‘text’ output: It filters the documents based on the minimum score (if provided), concatenates the page content of the filtered documents, and returns a single string.
Use Cases
- Retrieving relevant documents from a vector database based on a user query
- Filtering and processing search results from a vector store
- Converting vector store search results into a format suitable for further processing or display
Notes
- The node uses the similaritySearchWithScore method of the vector store, which returns both documents and their similarity scores.
- The minimum score parameter allows for filtering out less relevant documents.
- The node handles escape characters in the output text to ensure proper formatting.
- Console logging is implemented for debugging purposes, showing the raw search results.
Example Usage
This node can be used in workflows where you need to retrieve relevant documents from a vector store based on a query, such as in question-answering systems, document retrieval tasks, or as part of a larger information retrieval pipeline.
{% hint style="info" %} This section is a work in progress. We appreciate any help you can provide in completing this section. Please check our Contribution Guide to get started. {% endhint %}
description: Use Unstructured.io to load data from a file path.
Unstructured File Loader
.png)
Unstructured File Loader Node
The Unstructured File Loader uses Unstructured.io to extract and process content from various file formats. It provides advanced document parsing capabilities with configurable options for OCR, chunking, and metadata extraction.
Features
- Advanced document parsing
- OCR support with multiple language options
- Flexible chunking strategies
- Table structure inference
- Coordinate extraction
- Page break handling
- XML tag processing
- Customizable model selection
- Metadata extraction
Configuration
API Setup
- Default API URL:
https://api.unstructuredapp.io/general/v0/general - Requires API key from Unstructured.io
- Can be configured via environment variables:
UNSTRUCTURED_API_URLUNSTRUCTURED_API_KEY
Processing Strategies
- Strategy: Default is "hi_res"
- Options include various processing strategies for different document types
- Chunking Strategy:
- None (default)
- by_title (chunks text based on titles)
Parameters
Required Parameters
- File: The document to process
- API Key: Unstructured.io API key (if not set via environment)
Optional Parameters
OCR Options
- OCR Languages: Array of languages for OCR processing
- Encoding: Specify document encoding
Processing Options
- Coordinates: Extract element coordinates (true/false)
- PDF Table Structure: Infer table structure in PDFs (true/false)
- XML Tags: Keep XML tags in output (true/false)
- Skip Table Types: Array of table types to skip inference
- Hi-Res Model: Specify the high-resolution model name
- Include Page Breaks: Include page break information (true/false)
Text Chunking Options
- Multi-page Sections: Handle sections across pages (true/false)
- Combine Under N Chars: Combine elements under specified character count
- New After N Chars: Create new element after specified character count
- Max Characters: Maximum characters per element
Output Structure
Document Format
Each processed element becomes a document with:
- pageContent: Extracted text content
- metadata:
- category: Element type
- Additional metadata from the processing
Element Types
The loader can identify various element types:
- Text blocks
- Tables
- Lists
- Headers
- Footers
- Page breaks (if enabled)
- Other structural elements
Usage Examples
Basic Configuration
{
  "apiKey": "your-api-key",
  "strategy": "hi_res",
  "ocrLanguages": ["eng"]
}
Advanced Processing
{
  "apiKey": "your-api-key",
  "strategy": "hi_res",
  "coordinates": true,
  "pdfInferTableStructure": true,
  "chunkingStrategy": "by_title",
  "multiPageSections": true,
  "combineUnderNChars": 100,
  "maxCharacters": 4000
}
Notes
- API calls are made for each file processing request
- Response includes structured elements with text and metadata
- Elements are filtered to ensure valid text content
- Supports buffer-based processing
- Error handling for API responses
- Automatic metadata categorization
- Memory-efficient processing
Best Practices
- Set appropriate chunking parameters for your use case
- Consider OCR language settings for non-English documents
- Enable table structure inference for documents with tables
- Use coordinates when spatial information is important
- Configure character limits based on your downstream processing needs
- Monitor API usage and response times
- Handle potential API errors in your workflow
{% hint style="info" %} This section is a work in progress. We appreciate any help you can provide in completing this section. Please check our Contribution Guide to get started. {% endhint %}
description: >- Use Unstructured.io to load data from a folder. Note: Currently doesn't support .png and .heic until unstructured is updated.
Unstructured Folder Loader
.png)
Unstructured Folder Loader Node
The Unstructured Folder Loader uses Unstructured.io to load and process multiple documents from a folder. It provides advanced document parsing capabilities with extensive configuration options for OCR, chunking, and metadata extraction.
{% hint style="warning" %} Currently doesn't support .png and .heic files until unstructured is updated. {% endhint %}
Features
- Batch processing of multiple documents
- Multiple processing strategies
- OCR support with 15+ languages
- Flexible chunking strategies
- Table structure inference
- XML processing options
- Page break handling
- Coordinate extraction
- Metadata customization
Configuration
API Setup
- Default API URL:
http://localhost:8000/general/v0/general - Can be configured via environment variable:
UNSTRUCTURED_API_URL - Optional API key authentication
Parameters
Required Parameters
- Folder Path: Path to the folder containing documents to process
Optional Parameters
Basic Configuration
- Unstructured API URL: API endpoint (default: http://localhost:8000/general/v0/general)
- Strategy: Processing strategy (default: auto)
- hi_res: High resolution processing
- fast: Quick processing
- ocr_only: OCR-focused processing
- auto: Automatic selection
- Encoding: Document encoding (default: utf-8)
OCR Options
- OCR Languages: Multiple language support including:
- English (eng)
- Spanish (spa)
- Mandarin Chinese (cmn)
- Hindi (hin)
- Arabic (ara)
- Portuguese (por)
- Bengali (ben)
- Russian (rus)
- Japanese (jpn)
- And more...
Processing Options
- Skip Infer Table Types: File types to skip table extraction (default: ["pdf", "jpg", "png"])
- Hi-Res Model Name: Model selection for hi_res strategy (default: detectron2_onnx)
- chipper: Unstructured's in-house VDU model
- detectron2_onnx: Facebook AI's fast object detection
- yolox: Single-stage real-time detector
- yolox_quantized: Optimized YOLOX version
- Coordinates: Extract element coordinates (default: false)
- Include Page Breaks: Include page break elements
- XML Keep Tags: Preserve XML tags
- Multi-Page Sections: Handle multi-page sections
Text Chunking Options
- Chunking Strategy: Text chunking method (default: by_title)
- None: No chunking
- by_title: Chunk by document titles
- Combine Under N Chars: Minimum chunk size
- New After N Chars: Soft maximum chunk size
- Max Characters: Hard maximum chunk size (default: 500)
Metadata Options
- Source ID Key: Key for document source identification (default: source)
- Additional Metadata: Custom metadata as JSON
- Omit Metadata Keys: Keys to exclude from metadata
Supported File Types
- Documents: .doc, .docx, .odt, .ppt, .pptx, .pdf
- Spreadsheets: .xls, .xlsx
- Text: .txt, .text, .md, .rtf
- Web: .html, .htm
- Email: .eml, .msg
- Images: .jpg, .jpeg (Note: .png and .heic currently unsupported)
Output Structure
Document Format
Each processed document includes:
- pageContent: Extracted text content
- metadata:
- source: Document source identifier
- Additional metadata from processing
- Custom metadata (if specified)
Usage Examples
Basic Configuration
{
  "folderPath": "/path/to/documents",
  "strategy": "auto",
  "encoding": "utf-8"
}
Advanced Processing
{
  "folderPath": "/path/to/documents",
  "strategy": "hi_res",
  "hiResModelName": "detectron2_onnx",
  "ocrLanguages": ["eng", "spa", "fra"],
  "chunkingStrategy": "by_title",
  "maxCharacters": 500,
  "coordinates": true,
  "metadata": {
    "source": "company_docs",
    "department": "legal"
  }
}
Best Practices
- Choose appropriate strategy based on document quality and processing needs
- Configure OCR languages based on document content
- Adjust chunking parameters for optimal text segmentation
- Use appropriate hi-res model for your use case
- Consider memory usage when processing large folders
- Monitor API usage and response times
- Handle potential API errors in your workflow
Notes
- Process multiple documents in batch
- Supports various file formats
- Memory-efficient processing
- Automatic metadata handling
- Flexible output formats
- Error handling for API responses
- Configurable processing options
{% hint style="info" %} This section is a work in progress. We appreciate any help you can provide in completing this section. Please check our Contribution Guide to get started. {% endhint %}
description: Search documents with scores from vector store.
VectorStore To Document
.png)
VectorStore To Document Node
The VectorStore To Document node is a component in the Document Loaders category that allows you to search and retrieve documents with scores from a vector store. It converts the retrieved documents into either a document object array or a concatenated text string.
Inputs
Required Parameters
- Vector Store: The vector store to search documents from
Optional Parameters
- Query:
- Query to retrieve documents from the vector database. If not specified, the user question will be used
- Accepts variables
- Minimum Score (%): Minimum score for embedding documents to be included
Outputs
- Document: Array of document objects containing:
- metadata: File metadata and custom fields
- pageContent: Extracted text content
- Text: Concatenated string of all extracted content
{% hint style="info" %} This section is a work in progress. We appreciate any help you can provide in completing this section. Please check our Contribution Guide to get started. {% endhint %}
description: LangChain Embedding Nodes
Embeddings
An embedding is a vector (list) of floating point numbers. The distance between two vectors measures their relatedness. Small distances suggest high relatedness and large distances suggest low relatedness.
Embeddings can be used to create a numerical representation of textual data. This numerical representation is useful because it can be used to find similar documents.
They are commonly used for:
- Search (where results are ranked by relevance to a query string)
- Clustering (where text strings are grouped by similarity)
- Recommendations (where items with related text strings are recommended)
- Anomaly detection (where outliers with little relatedness are identified)
- Diversity measurement (where similarity distributions are analyzed)
- Classification (where text strings are classified by their most similar label)
Embedding Nodes:
- AWS Bedrock Embeddings
- Azure OpenAI Embeddings
- Cohere Embeddings
- Google GenerativeAI Embeddings
- Google PaLM Embeddings
- Google VertexAI Embeddings
- HuggingFace Inference Embeddings
- LocalAI Embeddings
- MistralAI Embeddings
- Ollama Embeddings
- OpenAI Embeddings
- OpenAI Embeddings Custom
- TogetherAI Embedding
- VoyageAI Embeddings
description: AWSBedrock embedding models to generate embeddings for a given text.
AWS Bedrock Embeddings
 (1) (1) (1) (1) (1) (1) (1).png)
AWS Bedrock Embeddings Node
The AWS Bedrock Embeddings node is a component that integrates AWS Bedrock’s embedding models into a larger system, allowing for the generation of embeddings for given text inputs. This node is particularly useful for tasks such as semantic search, text classification, and clustering.
Parameters
Credential (Optional)
- Type: AWS API Credential
Inputs
-
Region
- Type: Async Options (listRegions)
- Default: “us-east-1”
- Description: AWS region for the Bedrock service
-
Model Name
- Type: Async Options (listModels)
- Default: “amazon.titan-embed-text-v1”
- Description: The embedding model to use
-
Custom Model Name
- Type: String
- Optional: Yes
- Description: If provided, overrides the selected Model Name
-
Cohere Input Type
- Type: Options
- Optional: Yes
- Description: Specifies the type of input for Cohere models (v3+)
- Options:
- search_document
- search_query
- classification
- clustering
-
Batch Size
- Type: Number
- Optional: Yes
- Default: 50
- Description: Document batch size for Titan model API calls
-
Max AWS API retries
- Type: Number
- Optional: Yes
- Default: 5
- Description: Maximum number of API call retries for Titan model
- Type: Number
Functionality
-
Model Initialization:
- Sets up the BedrockEmbeddings model with provided parameters
- Configures AWS credentials if provided
-
Embedding Generation:
- For single queries: Uses embedQuery method
- For multiple documents: Uses embedDocuments method
- Handles different processing for Titan and Cohere models
-
Batch Processing:
- Implements a batch processing system for Titan models to manage API rate limits
- Includes retry logic with exponential backoff for handling throttling exceptions
-
Error Handling:
- Provides specific error messages for invalid responses or exceeded retry limits
Use Cases
- Semantic search in vector databases
- Text classification tasks
- Document clustering
- Enhancing natural language processing pipelines
Notes
- The node dynamically loads available models and regions
- It supports both Amazon Titan and Cohere embedding models
- Special handling is implemented for Cohere models, requiring input type specification
- Batch processing and retry logic are implemented to handle API rate limits efficiently
{% hint style="info" %} This section is a work in progress. We appreciate any help you can provide in completing this section. Please check our Contribution Guide to get started. {% endhint %}
Azure OpenAI Embeddings
Prerequisite
- Log in or sign up to Azure
- Create your Azure OpenAI and wait for approval approximately 10 business days
- Your API key will be available at Azure OpenAI > click name_azure_openai > click Click here to manage keys

Setup
Azure OpenAI Embeddings
- Click Go to Azure OpenaAI Studio

- Click Deployments

- Click Create new deployment

- Select as shown below and click Create
- Successfully created Azure OpenAI Embeddings
- Deployment name:
text-embedding-ada-002 - Instance name:
top right conner

AiMicromind
- Embeddings > drag Azure OpenAI Embeddings node
- Connect Credential > click Create New

- Copy & Paste each details (API Key, Instance & Deployment name, API Version) into Azure OpenAI Embeddings credential
- Voila 🎉, you have created Azure OpenAI Embeddings node in AiMicromind

Resources
description: Cohere API to generate embeddings for a given text
Cohere Embeddings
 (1) (1) (1) (1) (1) (1) (1).png)
Cohere Embeddings Node
The Cohere Embeddings node is used to generate embeddings for given text using the Cohere API. Embeddings are vector representations of text that capture semantic meaning, which can be used for various natural language processing tasks such as search, classification, and clustering.
Parameters
Credential (Required)
- Type: cohereApi
- Required Fields: cohereApiKey
Inputs
- Model Name
- Type: asyncOptions
- Default: “embed-english-v2.0”
- Description: The name of the Cohere embedding model to use.
- Note: Available models are loaded dynamically.
- Input Type
- Type: options
- Default: “search_query”
- Options:
- search_document: For encoding documents to store in a vector database for search use-cases.
- search_query: For querying a vector database to find relevant documents.
- classification: For using embeddings as input to a text classifier.
- clustering: For clustering embeddings.
- Description: Specifies the type of input passed to the model. Required for embedding models v3 and higher.
Functionality
- The node first retrieves the necessary credentials (Cohere API key) and input parameters.
- It then initializes a CohereEmbeddings instance with the provided configuration.
- The resulting model can be used to generate embeddings for given text inputs.
Use Cases
- Semantic Search: Generate embeddings for documents and queries to perform semantic search operations.
- Text Classification: Create embeddings as input features for text classification tasks.
- Document Clustering: Generate embeddings to group similar documents together.
- Information Retrieval: Enhance document retrieval systems by using semantic embeddings.
Notes
- The node dynamically loads available embedding models specific to Cohere.
- It supports different input types, allowing for optimization based on the specific use case (search, classification, clustering).
- The Cohere API key is required and should be securely stored and accessed.
{% hint style="info" %} This section is a work in progress. We appreciate any help you can provide in completing this section. Please check our Contribution Guide to get started. {% endhint %}
description: Google Generative API to generate embeddings for a given text.
Google GenerativeAI Embeddings
 (1) (1) (1) (1) (1).png)
Google GenerativeAI Embeddings Node
{% hint style="info" %} This section is a work in progress. We appreciate any help you can provide in completing this section. Please check our Contribution Guide to get started. {% endhint %}
description: Google vertexAI API to generate embeddings for a given text.
Google VertexAI Embeddings
 (1) (1) (1) (1) (1).png)
Google VertexAI Embeddings Node
The GoogleVertexAIEmbedding_Embeddings node is a component that integrates Google Vertex AI’s embedding capabilities into a larger system. It’s designed to generate embeddings for given text using Google’s Vertex AI API.
Parameters
Credential (Optional)
- Type: googleVertexAuth
- Description: Google Vertex AI credential. Not required if using a GCP service like Cloud Run or if default credentials are installed on the local machine.
Inputs
- Model Name:
- Type: Asynchronous options
- Default: “textembedding-gecko@001”
- Load Method: listModels (retrieves available embedding models)
Initialization
The node initializes a GoogleVertexAIEmbeddings instance with the following potential configurations:
- Google Application Credential File Path
- Google Application Credential JSON
- Project ID
- Model Name
Usage
This node is typically used in workflows that require text embeddings, such as:
- Semantic search
- Text classification
- Clustering
- Recommendation systems
Implementation Details
- The node first retrieves credential data and input parameters.
- It then configures authentication options based on the provided credentials.
- A GoogleVertexAIEmbeddings instance is created with the specified model and authentication options.
- The initialized model is returned, ready to generate embeddings for input text.
Error Handling
The node includes error checks for:
- Missing Google Application Credential
- Conflicting credential inputs
Integration
This node is designed to work within a larger system, likely a workflow or pipeline for natural language processing tasks. It can be connected to other nodes that require text embeddings as input.
Notes
- The node uses the @langchain/community library for the GoogleVertexAIEmbeddings implementation.
- It supports dynamic loading of available embedding models.
- The node is flexible in terms of authentication, supporting both file-based and JSON-based credentials.
{% hint style="info" %} This section is a work in progress. We appreciate any help you can provide in completing this section. Please check our Contribution Guide to get started. {% endhint %}
description: HuggingFace Inference API to generate embeddings for a given text.
HuggingFace Inference Embeddings
 (1) (1) (1) (1) (1).png)
HuggingFace Inference Embeddings Node
The HuggingFace Inference Embeddings node is a component used to generate embeddings for given text using the HuggingFace Inference API. This node is part of the Embeddings category and leverages HuggingFace’s powerful language models to create vector representations of text.
Parameters
Credential
- Label: Connect Credential
- Name: credential
- Type: credential
- Credential Names: huggingFaceApi
Inputs
-
Model
- Label: Model
- Name: modelName
- Type: string
- Description: The name of the HuggingFace model to use for embeddings. Leave blank if using a custom inference endpoint.
- Placeholder: sentence-transformers/distilbert-base-nli-mean-tokens
- Optional: Yes
-
Endpoint
- Label: Endpoint
- Name: endpoint
- Type: string
- Description: The URL of your custom inference endpoint, if using one.
- Placeholder: https://xyz.eu-west-1.aws.endpoints.huggingface.cloud/sentence-transformers/all-MiniLM-L6-v2
- Optional: Yes
Initialization
The node initializes by creating an instance of text HuggingFaceInferenceEmbeddings with the following steps:
- Retrieves the HuggingFace API key from the provided credentials.
- Sets up the configuration object with the API key.
- If a model name is provided, it’s added to the configuration.
- If a custom endpoint is provided, it’s added to the configuration.
- Creates and returns a new HuggingFaceInferenceEmbeddings instance with the configured parameters.
Usage
This node is typically used in workflows where text needs to be converted into numerical vector representations. Common use cases include:
- Text similarity comparisons
- Document clustering
- Input preparation for machine learning models
- Semantic search implementations
By leveraging HuggingFace’s pre-trained models or custom-deployed endpoints, users can easily generate high-quality embeddings for a wide range of natural language processing tasks.
{% hint style="info" %} This section is a work in progress. We appreciate any help you can provide in completing this section. Please check our Contribution Guide to get started. {% endhint %}
LocalAI Embeddings
LocalAI Setup
LocalAI is a drop-in replacement REST API that’s compatible with OpenAI API specifications for local inferencing. It allows you to run LLMs (and not only) locally or on-prem with consumer grade hardware, supporting multiple model families that are compatible with the ggml format.
To use LocalAI Embeddings within AiMicromind, follow the steps below:
-
git clone https://github.com/go-skynet/LocalAI cd LocalAI- LocalAI provides an API endpoint to download/install the model. In this example, we are going to use BERT Embeddings model:
 (1).png)
- In the
/modelsfolder, you should be able to see the downloaded model in there:
 (1).png)
- You can now test the embeddings:
curl http://localhost:8080/v1/embeddings -H "Content-Type: application/json" -d '{
    "input": "Test",
    "model": "text-embedding-ada-002"
  }'
- Response should looks like:
.png)
AiMicromind Setup
Drag and drop a new LocalAIEmbeddings component to canvas:
 (1) (2).png)
Fill in the fields:
- Base Path: The base url from LocalAI such as http://localhost:8080/v1
- Model Name: The model you want to use. Note that it must be inside
/modelsfolder of LocalAI directory. For instance:text-embedding-ada-002
That's it! For more information, refer to LocalAI docs.
description: MistralAI API to generate embeddings for a given text.
MistralAI Embeddings
 (1) (1) (1).png)
MistralAI Embeddings Node
The MistralAI Embeddings node is a component that integrates the MistralAI API to generate embeddings for given text. Embeddings are vector representations of text that capture semantic meaning, useful for various natural language processing tasks.
Parameters
Credential
- Label: Connect Credential
- Name: credential
- Type: credential
- Credential Names: mistralAIApi
Inputs
- Model Name (Required)
- Type: asyncOptions
- Default: “mistral-embed”
- Load Method: listModels
- Batch Size (Optional)
- Type: number
- Default: 512
- Step: 1
- Strip New Lines (Optional)
- Type: boolean
- Default: true
- Override Endpoint (Optional)
- Type: string
Functionality
- The node initializes by loading the specified model and setting up the MistralAI Embeddings with the provided parameters.
- It uses the MistralAI API key from the connected credential for authentication.
- The node can handle batch processing of text for embedding generation.
- It offers options to strip new lines from the input text and override the default API endpoint.
Use Cases
- Text similarity comparison
- Semantic search
- Document classification
- Content-based recommendation systems
Input/Output
- Input: Text data to be embedded
- Output: Vector representations (embeddings) of the input text
Additional Notes
- The node dynamically loads available models using the listModels method.
- It supports customization of batch size for processing efficiency.
- The option to strip new lines can be useful for cleaning input text.
- Advanced users can override the default API endpoint if needed.
{% hint style="info" %} This section is a work in progress. We appreciate any help you can provide in completing this section. Please check our Contribution Guide to get started. {% endhint %}
description: Generate embeddings for a given text using open source model on Ollama.
Ollama Embeddings
 (1) (1) (1).png)
Ollama Embeddings Node
The Ollama Embeddings node is used to generate embeddings for given text using open-source models on Ollama. It leverages the code OllamaEmbeddings class from the code @langchain/community/embeddings/ollama package.
Parameters
Inputs
-
Base URL (string)
- Default: “http://localhost:11434”
- The base URL for the Ollama API.
-
Model Name (string)
- Placeholder: “llama2”
- The name of the Ollama model to use for generating embeddings.
-
Number of GPU (number, optional)
- Description: The number of layers to send to the GPU(s). On macOS, it defaults to 1 to enable metal support, 0 to disable.
- Additional parameter
-
Number of Thread (number, optional)
- Description: Sets the number of threads to use during computation. By default, Ollama will detect this for optimal performance. It is recommended to set this value to the number of physical CPU cores your system has.
- Additional parameter
-
Use MMap (boolean, optional)
- Default: true
- Determines whether to use memory mapping for loading the model.
- Additional parameter
Output
The node initializes and returns an instance of the OllamaEmbeddings class, which can be used to generate embeddings for input text.
Usage
This node is particularly useful in workflows that require text embeddings, such as:
- Semantic search
- Text clustering
- Document similarity comparisons
- Feature extraction for machine learning models
By leveraging Ollama’s open-source models, users can generate high-quality embeddings locally or on their own infrastructure, providing more control over the embedding process and reducing dependency on external API services.
Notes
- The node uses the @langchain/community/embeddings/ollama package, which should be installed in the project.
- Make sure the Ollama service is running and accessible at the specified Base URL.
- The additional parameters (Number of GPU, Number of Thread, and Use MMap) allow for fine-tuning the embedding generation process based on available hardware and specific requirements.
{% hint style="info" %}
This section is a work in progress. We appreciate any help you can provide in completing this section. Please check our Contribution Guide to get started. {% endhint %}
description: OpenAI API to generate embeddings for a given text.
OpenAI Embeddings
 (1) (1) (1) (1) (1) (1).png)
OpenAI Embeddings Node
The OpenAI Embeddings node is used to generate embeddings for given text using the OpenAI API. Embeddings are vector representations of text that capture semantic meaning, allowing for efficient comparison and analysis of textual data.
Parameters
Credential (Required)
- Label: Connect Credential
- Name: credential
- Type: credential
- Credential Names: openAIApi
Inputs
-
Model Name
- Type: asyncOptions
- Default:
code “text-embedding-ada-002” - Description: The name of the OpenAI model to use for generating embeddings.
-
Strip New Lines (Optional)
- Type: boolean
- Description: Whether to remove new line characters from the input text.
-
Batch Size (Optional)
- Type: number
- Description: The number of texts to process in a single API call.
-
Timeout (Optional)
- Type: number
- Description: The maximum time (in milliseconds) to wait for the API response.
-
BasePath (Optional)
- Type: string
- Description: The base URL for API requests, useful for using alternative API endpoints.
-
Dimensions (Optional)
- Type: number
- Description: The number of dimensions for the output embedding vectors.
Functionality
- The node first loads the available embedding models using the listModels method.
- During initialization, it processes the input parameters and credential data.
- It then creates an instance of OpenAIEmbeddings with the specified configuration.
- This instance can be used to generate embeddings for given text inputs.
Use Cases
- Text similarity comparison
- Document clustering
- Semantic search
- Input preparation for machine learning models
- Content recommendation systems
Notes
- The node uses the @langchain/openai package for interaction with the OpenAI API.
- It supports various additional parameters for fine-tuning the embedding process.
- The actual embedding generation occurs when the initialized node is used in a workflow.
{% hint style="info" %} This section is a work in progress. We appreciate any help you can provide in completing this section. Please check our Contribution Guide to get started. {% endhint %}
description: OpenAI API to generate embeddings for a given text.
OpenAI Embeddings Custom
 (1) (1) (1) (1) (1) (1) (1) (1) (1) (1) (1).png)
OpenAI Embeddings Custom Node
The OpenAI Embeddings Custom node is a component designed to generate embeddings for given text using the OpenAI API. It’s an extension of the standard OpenAI Embeddings functionality, offering additional customization options.
Parameters
Credential (Required)
- Type: openAIApi
- Required Fields: openAIApiKey
Inputs
-
Strip New Lines (optional)
- Type: boolean
- Description: Removes new line characters from the input text if set to true.
-
Batch Size (optional)
- Type: number
- Description: Sets the number of texts to process in a single API call.
-
Timeout (optional)
- Type: number
- Description: Sets the maximum time (in milliseconds) to wait for an API response.
-
BasePath (optional)
- Type: string
- Description: Specifies a custom base URL for the OpenAI API.
-
Model Name (optional)
- Type: string
- Description: Specifies the OpenAI model to use for generating embeddings.
-
Dimensions (optional)
- Type: number
- Description: Sets the number of dimensions for the output embeddings.
Functionality
The node initializes an OpenAIEmbeddings instance with the provided parameters. It retrieves the OpenAI API key from the user’s credentials and applies any additional parameters specified in the node configuration. The resulting embeddings model can be used in downstream tasks that require text embeddings.
Use Cases
- Text similarity comparison
- Document clustering
- Semantic search
- Feature extraction for machine learning models
- Content-based recommendation systems
Notes
- This custom node allows for more fine-grained control over the embedding process compared to the standard OpenAI Embeddings node.
- Users should be mindful of their API usage, as generating embeddings can consume a significant number of tokens.
- The ‘dimensions’ parameter allows users to specify the size of the embedding vectors, which can be useful for compatibility with specific models or applications.
{% hint style="info" %} This section is a work in progress. We appreciate any help you can provide in completing this section. Please check our Contribution Guide to get started. {% endhint %}
description: TogetherAI Embedding models to generate embeddings for a given text.
TogetherAI Embedding
 (1) (1) (1) (1) (1) (1) (1) (1) (1) (1) (1) (1).png)
TogetherAI Embedding Node
The TogetherAIEmbedding node is used to generate embeddings for given text using TogetherAI’s embedding models. It’s part of the Embeddings category in the system.
Parameters
Credential (Required)
- Label: Connect Credential
- Name: credential
- Type: credential
- Credential Names: togetherAIApi
Inputs
-
Cache (Optional)
- Label: Cache
- Name: cache
- Type: BaseCache
-
Model Name (Required)
- Label: Model Name
- Name: modelName
- Type: string
- Placeholder: sentence-transformers/msmarco-bert-base-dot-v5
- Description: Refers to the specific embedding model to use. Users can find available models on the TogetherAI embedding models page.
Functionality
- The node initializes by retrieving the necessary credentials and input parameters.
- It sets up a TogetherAIEmbeddings object with the provided model name and API key.
- The initialized model can then be used to generate embeddings for text inputs.
Usage
This node is particularly useful in natural language processing pipelines where text needs to be converted into numerical vectors (embeddings). These embeddings can be used for various downstream tasks such as semantic search, text classification, or clustering.
Integration
The TogetherAIEmbedding node is designed to work seamlessly within a larger system, likely a node-based workflow environment for AI and machine learning tasks. It can be connected to other nodes that require text embeddings as input or to nodes that process the resulting embeddings further.
Note
Users need to have valid TogetherAI API credentials to use this node. The API key is securely handled through the credential system of the parent application.
{% hint style="info" %} This section is a work in progress. We appreciate any help you can provide in completing this section. Please check our Contribution Guide to get started. {% endhint %}
description: Voyage AI API to generate embeddings for a given text.
VoyageAI Embeddings
 (1) (1) (1) (1) (1) (1) (1) (1) (1).png)
VoyageAI Embeddings Node
The VoyageAI Embeddings node is a component that integrates the Voyage AI API for generating embeddings from text. It’s part of a larger system for natural language processing and machine learning tasks.
Parameters
Credential (Required)
- Type: voyageAIApi
- Required Parameters:
text apiKey: The API key for accessing the Voyage AI servicetext endpoint: The API endpoint for the Voyage AI service (optional)
Inputs
- Model Name:
- Type: Asynchronous dropdown
- Default: ‘voyage-2’
- Available options are dynamically loaded using the ```text listModels`` method
Initialization
The node initializes a VoyageEmbeddings instance with the following:
- Retrieves the selected model name
- Fetches credential data (API key and optional endpoint)
- Creates a VoyageEmbeddings object with the API key and model name
- Sets a custom API URL if provided in the credentials
Usage
This node is typically used in a pipeline where text needs to be converted into numerical vector representations. These embeddings can then be used for:
- Semantic search
- Text classification
- Clustering similar texts
- Measuring text similarity
- Input for other machine learning models
Integration
The node is designed to work within a larger system, likely a graphical interface for building NLP pipelines. It can be connected to other nodes for data input and further processing of the generated embeddings.
Dependencies
@langchain/community/embeddings/voyage: Provides the VoyageEmbeddings class Various utility functions from the parent project for credential management, model loading, and base class retrieval
Note
This node is part of a modular system and is expected to be used alongside other components for building comprehensive NLP workflows.
{% hint style="info" %} This section is a work in progress. We appreciate any help you can provide in completing this section. Please check our Contribution Guide to get started. {% endhint %}
description: LangChain LLM Nodes
LLMs
A large language model, LLM for short, is a AI system trained on massive amounts of text data. This allows them to communicate and generate human-like text in response to a wide range of prompts and questions. In essence, they can understand and respond to complex language.
LLM Nodes:
- AWS Bedrock
- Azure OpenAI
- NIBittensorLLM
- Cohere
- GooglePaLM
- GoogleVertex AI
- HuggingFace Inference
- Ollama
- OpenAI
- Replicate
description: Wrapper around AWS Bedrock large language models.
AWS Bedrock
 (5).png)
AWS Bedrock Node
{% hint style="info" %} This section is a work in progress. We appreciate any help you can provide in completing this section. Please check our Contribution Guide to get started. {% endhint %}
description: Wrapper around Azure OpenAI large language models.
Azure OpenAI
Azure OpenAI Node
{% hint style="info" %} This section is a work in progress. We appreciate any help you can provide in completing this section. Please check our Contribution Guide to get started. {% endhint %}
description: Wrapper around Cohere large language models.
Cohere
 (1) (1) (1) (1) (1) (1) (1).png)
Cohere Node
{% hint style="info" %} This section is a work in progress. We appreciate any help you can provide in completing this section. Please check our Contribution Guide to get started. {% endhint %}
description: Wrapper around GoogleVertexAI large language models.
GoogleVertex AI
 (1) (1) (1).png)
GoogleVertex AI Node
{% hint style="info" %} This section is a work in progress. We appreciate any help you can provide in completing this section. Please check our Contribution Guide to get started. {% endhint %}
description: Wrapper around HuggingFace large language models.
HuggingFace Inference
 (1) (1) (1).png)
HuggingFace Inference Node
{% hint style="info" %} This section is a work in progress. We appreciate any help you can provide in completing this section. Please check our Contribution Guide to get started. {% endhint %}
description: Wrapper around open source large language models on Ollama.
Ollama
 (1) (1).png)
Ollama Node
{% hint style="info" %} This section is a work in progress. We appreciate any help you can provide in completing this section. Please check our Contribution Guide to get started. {% endhint %}
description: Wrapper around OpenAI large language models.
OpenAI
 (1) (1).png)
OpenAI Node
{% hint style="info" %} This section is a work in progress. We appreciate any help you can provide in completing this section. Please check our Contribution Guide to get started. {% endhint %}
description: Use Replicate to run open source models on cloud.
Replicate
 (1) (1).png)
Replicate Node
{% hint style="info" %} This section is a work in progress. We appreciate any help you can provide in completing this section. Please check our Contribution Guide to get started. {% endhint %}
description: LangChain Memory Nodes
Memory
Memory allow you to chat with AI as if AI has the memory of previous conversations.
Human: hi i am bob
AI: Hello Bob! It's nice to meet you. How can I assist you today?
Human: what's my name?
AI: Your name is Bob, as you mentioned earlier.
Under the hood, these conversations are stored in arrays or databases, and provided as context to LLM. For example:
You are an assistant to a human, powered by a large language model trained by OpenAI.

Whether the human needs help with a specific question or just wants to have a conversation about a particular topic, you are here to assist.

Current conversation:
{history}
Memory Nodes:
- Buffer Memory
- Buffer Window Memory
- Conversation Summary Memory
- Conversation Summary Buffer Memory
- DynamoDB Chat Memory
- Mem0 Memory
- MongoDB Atlas Chat Memory
- Redis-Backed Chat Memory
- Upstash Redis-Backed Chat Memory
- Zep Memory
Separate conversations for multiple users
UI & Embedded Chat
By default, UI and Embedded Chat will automatically separate different users conversations. This is done by generating a unique chatId for each new interaction. That logic is handled under the hood by AiMicromind.
Prediction API
You can separate the conversations for multiple users by specifying a unique sessionId
- For every memory node, you should be able to see a input parameter
Session ID
.png)
 (1) (1) (1) (1) (1).png)
- In the
/api/v1/prediction/{your-chatflowid}POST body request, specify thesessionIdinoverrideConfig
{
    "question": "hello!",
    "overrideConfig": {
        "sessionId": "user1"
    }
}
Message API
- GET
/api/v1/chatmessage/{your-chatflowid} - DELETE
/api/v1/chatmessage/{your-chatflowid}
| Query Param | Type | Value |
|---|---|---|
| sessionId | string | |
| sort | enum | ASC or DESC |
| startDate | string | |
| endDate | string |
All conversations can be visualized and managed from UI as well:
.png)
For OpenAI Assistant, Threads will be used to store conversations.
Buffer Memory
Use aimicromind database table chat_message as the storage mechanism for storing/retrieving conversations.
 (1) (3).png)
Input
| Parameter | Description | Default |
|---|---|---|
| Session Id | An ID to retrieve/store messages. If not specified, a random ID will be used. | |
| Memory Key | A key used to format messages in prompt template | chat_history |
Buffer Window Memory
Use aimicromind database table chat_message as the storage mechanism for storing/retrieving conversations.
Difference being it only fetches the last K interactions. This approach is beneficial for preserving a sliding window of the most recent interactions, ensuring the buffer remains manageable in size.
 (1) (3) (1).png)
Input
| Parameter | Description | Default |
|---|---|---|
| Size | Last K messages to fetch | 4 |
| Session Id | An ID to retrieve/store messages. If not specified, a random ID will be used. | |
| Memory Key | A key used to format messages in prompt template | chat_history |
Conversation Summary Memory
Use aimicromind database table chat_message as the storage mechanism for storing/retrieving conversations.
This memory type creates a brief summary of the conversation over time. This is useful for shortening information from long discussions. It updates and saves a current summary as the conversation goes on. This is especially helpful in longer chats, where saving every past message would take up too much space.
 (1) (1) (1) (2).png)
Input
| Parameter | Description | Default |
|---|---|---|
| Chat Model | LLM used to perform summarization | |
| Session Id | An ID to retrieve/store messages. If not specified, a random ID will be used. | |
| Memory Key | A key used to format messages in prompt template | chat_history |
Conversation Summary Buffer Memory
Use aimicromind database table chat_message as the storage mechanism for storing/retrieving conversations.
This memory keeps a buffer of recent interactions and compiles old ones into a summary, using both in its storage. Instead of flushing old interactions based solely on their number, it now considers the total length of tokens to decide when to clear them out.
 (1) (2).png)
Input
| Parameter | Description | Default |
|---|---|---|
| Chat Model | LLM used to perform summarization | |
| Max Token Limit | Summarize conversations once token limit is reached | 2000 |
| Session Id | An ID to retrieve/store messages. If not specified, a random ID will be used. | |
| Memory Key | A key used to format messages in prompt template | chat_history |
description: Stores the conversation in dynamo db table.
DynamoDB Chat Memory
.png)
DynamoDB Chat Memory Node
The DynamoDB Chat Memory node is a component that stores conversation history in an Amazon DynamoDB table. It extends the functionality of the BufferMemory class to provide persistent storage of chat messages using AWS DynamoDB as the backend.
Parameters
-
Credential
Type: credential Credential Names: dynamodbMemoryApi Description: AWS credentials for DynamoDB access
Inputs
-
Table Name
Type: string Description: The name of the DynamoDB table to store chat
-
Partition Key
Type: string Description: The primary key for the DynamoDB table
-
Region
Type: string Description: The AWS region where the DynamoDB table is located Placeholder: us-east-1
-
Session ID (optional)
Type: string Default: ” (empty string) Description: Unique identifier for the chat session. If not specified, a random ID will be used
-
Memory Key
Type: string Default: ‘chat_history’ Description: Key used to store the chat history in memory
Functionality
The DynamoDB Chat Memory node provides the following key features:
-
Initialization: Sets up the DynamoDB client and creates a BufferMemoryExtended instance with the specified parameters.
-
Message Storage: Stores chat messages (both user inputs and AI responses) in the specified DynamoDB table.
-
Message Retrieval: Fetches stored chat messages from the DynamoDB table.
-
Message Clearing: Allows clearing of all stored messages for a given session.
-
Session Management: Supports multiple chat sessions using unique session IDs.
Usage
This node is particularly useful for applications that require persistent storage of conversation history across sessions or need to scale chat memory storage using AWS DynamoDB. It’s ideal for chatbots, virtual assistants, or any AI application that benefits from maintaining context over time or across multiple interactions.
Implementation Details
- Uses the
text @aws-sdk/client-dynamodbfor interacting with DynamoDB. - Extends the
text BufferMemoryclass from LangChain for compatibility with other LangChain components. - Implements custom methods for adding, retrieving, and clearing messages in DynamoDB.
- Supports credential management for secure AWS authentication.
Note
Ensure that the AWS credentials provided have the necessary permissions to read from and write to the specified DynamoDB table. Also, make sure that the table structure matches the expected format for storing chat messages.
{% hint style="info" %} This section is a work in progress. We appreciate any help you can provide in completing this section. Please check our Contribution Guide to get started. {% endhint %}
description: Stores the conversation in MongoDB Atlas.
MongoDB Atlas Chat Memory
.png)
MongoDB Atlas Chat Memory Node
The MongoDB Atlas Chat Memory node is a component designed to store conversation history in MongoDB Atlas. It extends the functionality of BufferMemory to provide persistent storage of chat messages using MongoDB as the backend.
Parameters
Credential
Label: Connect Credential Name: credential Type: credential Credential Names: mongoDBUrlApi Description: MongoDB Atlas connection credentials Description: MongoDB Atlas connection credentials
Inputs
-
Database
- Label: Database
- Name: databaseName
- Type: string
- Placeholder: “mongodb+srv://username:password@cluster.mongodb.net/DB_NAME”
- Description: MongoDB Atlas database name
-
Collection Name
- Label: Collection Name
- Name: collectionName
- Type: string
- Placeholder: <COLLECTION_NAME>
- Description: Name of the collection to store chat messages
-
Session Id (Optional)
- Label: Session Id
- Name: sessionId
- Type: string
- Default: ” (empty string)
- Description: Unique identifier for the chat session. If not specified, a random id will be used
-
Memory Key (Additional Parameter)
- Label: Memory Key
- Name: memoryKey
- Type: string
- Default: ‘chat_history’
- Description: Key used to store the chat history in memory
Functionality
- Initialization:
- Connects to MongoDB Atlas using the provided credential.
- Creates a MongoDBChatMessageHistory instance.
- Initializes a BufferMemoryExtended instance.
- Message Storage:
- Stores messages as documents in the specified MongoDB collection.
- Each document represents a chat session, identified by a sessionId.
- Message Retrieval:
- Retrieves messages for a specific session from MongoDB.
- Converts stored messages to BaseMessage objects.
- Memory Management:
- Supports adding new messages to the chat history.
- Allows clearing of chat history for a specific session.
- Extended Functionality:
- Implements MemoryMethods interface for advanced memory operations.
- Supports overriding sessionId for flexible message management.
Use Cases
- Long-term storage of conversation history.
- Maintaining separate chat histories for different users or contexts.
- Integrating persistent memory in chatbots or conversational AI systems.
Notes
- This node uses a singleton pattern for MongoDB client management to optimize connections.
- It extends the base BufferMemory class to provide MongoDB-specific functionality.
- The node supports both adding individual messages and bulk message operations.
{% hint style="info" %} This section is a work in progress. We appreciate any help you can provide in completing this section. Please check our Contribution Guide to get started. {% endhint %}
description: Summarizes the conversation and stores the memory in Redis server.
Redis-Backed Chat Memory
.png)
Redis-Backed Chat Memory Node
The Redis-Backed Chat Memory node is a component that provides long-term memory storage for chat conversations using Redis as the backend. It summarizes and stores conversation history, allowing for persistent and scalable chat memory across sessions.
Parameters
Credential
- Type: credential
- Credential Names: redisCacheApi, redisCacheUrlApi
- Description: Redis connection credentials
Inputs
-
Session Id (optional)
- Type: string
- Default: Empty string
- Description: Unique identifier for the chat session. If not specified, a random id will be used
-
Session Timeouts (optional)
- Type: number
- Description: Time-to-live (TTL) for the session in seconds. Omit this parameter to make sessions never expire
-
Memory Key
- Type: string
- Default: “chat_history”
- Description: Key used to store and retrieve the chat history in Redis
-
Window Size (optional)
- Type: number
- Description: Number of recent back-and-forth interactions to use as memory context
Functionality
- Initialization:
- Connects to Redis using provided credentials (either URL or individual connection parameters).
- Sets up a RedisChatMessageHistory instance for managing chat history.
- Creates a BufferMemoryExtended instance for handling memory operations.
- Memory Operations:
- getChatMessages: Retrieves chat messages from Redis, with options for windowing and prepending messages.
- addChatMessages: Adds new messages (both user and AI) to the Redis store.
- clearChatMessages: Deletes all messages for a given session from Redis.
- Session Management:
- Supports session-based storage using session IDs.
- Optional session timeout (TTL) for automatic expiration of old sessions.
Use Cases
- Long-running chatbots that need to maintain context across multiple interactions.
- Multi-user chat systems where each user’s history needs to be stored separately.
- Applications requiring scalable and persistent chat memory storage.
Integration
This node can be used in a AI solution to provide long-term memory capabilities to language models or other AI components that benefit from conversation history.
Notes
- Ensure that a Redis server is properly set up and accessible for this node to function correctly.
- When using in production, consider security implications and ensure proper authentication and encryption for Redis connections.
- The window size parameter can be used to limit the amount of history provided to AI models, which can be useful for managing token limits or focusing on recent context.
{% hint style="info" %} This section is a work in progress. We appreciate any help you can provide in completing this section. Please check our Contribution Guide to get started. {% endhint %}
description: Summarizes the conversation and stores the memory in Upstash Redis server.
Upstash Redis-Backed Chat Memory
.png)
Upstash Redis-Backed Chat Memory Node
The Upstash Redis-Backed Chat Memory node is a component that provides long-term memory storage for chat conversations using Upstash Redis. It summarizes and stores conversation history, allowing for persistent memory across chat sessions.
Parameters
Credential
- Type: credential
- Credential Names: upstashRedisMemoryApi
- Description: Configure password authentication for your Upstash Redis instance
Inputs
- Upstash Redis REST URL
- Type: string
- Description: The base URL for your Upstash Redis instance
- Placeholder:
text https://<your-url>.upstash.io
- Session Id (optional)
- Type: string
- Description: Unique identifier for the chat session. If not specified, a random id will be used
- Session Timeouts (optional)
- Type: number
- Description: Time-to-live for the session in seconds. Omit this parameter to make sessions never expire
- Memory Key
- Type: string
- Default: ‘chat_history’
- Description: Key used to store and retrieve the chat history in Redis
Functionality
- Initialization:
- Creates a Redis client using the provided URL and authentication token.
- Sets up an UpstashRedisChatMessageHistory instance.
- Initializes a BufferMemoryExtended instance with the chat history.
- Memory Operations:
text getChatMessages: Retrieves stored chat messages from Redis.text addChatMessages: Adds new messages to the Redis storage.text clearChatMessages: Clears all messages for a given session.
Usage
This node is particularly useful in scenarios where you need to maintain conversation context over extended periods or across multiple sessions. It leverages Upstash Redis for efficient and scalable storage of chat history.
Integration
The node can be easily integrated into a larger conversational AI system, providing a robust solution for managing chat memory. It’s designed to work seamlessly with other components and can be configured through the Ardor UI.
Note
Ensure that you have proper credentials and access to an Upstash Redis instance before using this node. The Redis connection is managed as a singleton to optimize resource usage across multiple instances of the node.
{% hint style="info" %} This section is a work in progress. We appreciate any help you can provide in completing this section. Please check our Contribution Guide to get started. {% endhint %}
Zep Memory
Zep is long-term memory store for LLM applications. It stores, summarizes, embeds, indexes, and enriches LLM app / chatbot histories, and exposes them via simple, low-latency APIs.
Guide to Deploy Zep to Render
You can easily deploy Zep to cloud services like Render, Flyio. If you prefer to test it locally, you can also spin up a docker container by following their quick guide.
In this example, we are going to deploy to Render.
- Head over to Zep Repo and click Deploy to Render
- This will bring you to Render's Blueprint page and simply click Create New Resources
 (1).png)
- When the deployment is done, you should see 3 applications created on your dashboard
 (2).png)
- Simply click the first one called zep and copy the deployed URL
 (1).png)
Guide to Deploy Zep to Digital Ocean (via Docker)
- Clone the Repo
git clone https://github.com/getzep/zep.git
cd zep
nano .env
- Add IN your OpenAI API Key in.ENV
ZEP_OPENAI_API_KEY=
docker compose up -d --build
- Allow firewall access to port 8000
sudo ufw allow from any to any port 8000 proto tcp
ufw status numbered
If using Digital ocean separate firewall from dashboard, make sure port 8000 is added there too
Use in AiMicromind UI
- Back to aimicromind application, simply create a new canvas or use one of the template from marketplace. In this example, we are going to use Simple Conversational Chain
 (1).png)
- Replace Buffer Memory with Zep Memory. Then replace the Base URL with the Zep URL you have copied above
.png)
- Save the chatflow and test it out to see if conversations are remembered.
.png)
- Now try clearing the chat history, you should see that it is now unable to remember the previous conversations.
 (1) (1) (1) (1) (1) (1) (1) (1) (1) (1) (1).png)
Zep Authentication
Zep allows you to secure your instance using JWT authentication. We'll be using the zepcli command line utility here.
1. Generate a secret and the JWT token
After downloaded the ZepCLI:
On Linux or MacOS
./zepcli -i
On Windows
zepcli.exe -i
You will first get your SECRET Token:
 (1) (1) (1) (1) (1) (1) (1) (1) (1) (1) (1) (1) (1) (1) (1) (1) (1) (1) (1) (1) (1) (1) (1) (1) (1).png)
Then you will get JWT Token:
 (1) (1) (1) (1) (1) (1) (1) (1) (1) (1) (1) (1) (1) (1) (1) (1) (1) (1) (1) (1) (1) (1) (1) (1) (1) (1).png)
2. Configure Auth environment variables
Set the following environment variables in your Zep server environment:
ZEP_AUTH_REQUIRED=true
ZEP_AUTH_SECRET=<the secret you generated above>
3. Configure Credential on aimicromind
Add a new credential for Zep, and put in the JWT Token in the API Key field:
 (1) (1) (1) (1) (1) (1) (1) (1) (1) (1) (1) (1) (1) (1) (1) (1) (1) (1) (1) (1).png)
4. Use the created credential on Zep node
In the Zep node Connect Credential, select the credential you have just created. And that's it!
 (1) (1) (1) (1) (1) (1) (1) (1) (1) (1) (1) (1) (1) (1) (1) (1) (1).png)
description: LangChain Moderation Nodes
Moderation
Moderation nodes are used to check whether the input or output consists of harmful or inappropriate content.
Moderation Nodes:
description: Check whether content complies with OpenAI usage policies.
OpenAI Moderation
 (1) (1) (1) (1) (1) (1) (1) (1).png)
OpenAI Moderation Node
The OpenAI Moderation node leverages OpenAI’s content moderation API to analyze input text for potentially harmful or inappropriate content, ensuring compliance with OpenAI’s usage policies.
Parameters
Credential (Required)
-
Type: credential
-
Credential Names: openAIApi
-
Description: OpenAI API credentials for accessing the moderation service
Inputs
-
Error Message (optional)
-
Type: string
-
Default: “Cannot Process! Input violates OpenAI’s content moderation policies.”
-
Description: Custom error message to display when content violates moderation policies
-
Functionality
The OpenAI Moderation node provides real-time content analysis through the following features:
- Content Analysis
-
Analyzes text for harmful or inappropriate content
-
Uses OpenAI’s advanced moderation models
-
Provides detailed categorization of potential violations
- Policy Enforcement
-
Ensures compliance with OpenAI’s usage policies
-
Prevents processing of prohibited content
-
Maintains consistent content standards
- Integration Features
-
Seamless integration with OpenAI services
-
Real-time moderation checks
-
Customizable error handling
Use Cases
- Content Pre-screening
-
Filter user inputs before processing
-
Prevent policy violations
-
Maintain content quality
- API Compliance
-
Ensure adherence to OpenAI’s policies
-
Prevent API usage violations
-
Manage content restrictions
- Safety Monitoring
-
Detect harmful content
-
Flag inappropriate submissions
-
Protect system integrity
Integration Notes
-
Place the node before OpenAI API calls in your workflow
-
Configure appropriate error handling
-
Monitor moderation results for system optimization
-
Consider implementing retry logic for temporary failures
Best Practices
- Configuration
-
Use clear, informative error messages
-
Set appropriate timeout values
-
Implement proper error handling
- Monitoring
-
Track moderation results
-
Monitor false positives/negatives
-
Adjust settings based on performance
- Maintenance
-
Keep API credentials secure
-
Update error messages as needed
-
Monitor OpenAI policy changes
{% hint style="info" %} This section is a work in progress. We appreciate any help you can provide in completing this section. Please check our Contribution Guide to get started. {% endhint %}
description: >- Check whether input consists of any text from Deny list, and prevent being sent to LLM.
Simple Prompt Moderation
 (1) (1) (1) (1) (1) (1).png)
Simple Prompt Moderation Node
The Simple Prompt Moderation node provides customizable content filtering by checking input text against user-defined denied phrases or instructions, preventing potentially harmful or unwanted content from being processed.
Parameters
Inputs
- Deny List (Required)
-
Type: string
-
Description: List of denied phrases or instructions (one per line)
-
Example:
ignore previous instructions
do not follow the directions
you must ignore all previous instructions
- Chat Model (Optional)
-
Type: BaseChatModel
-
Description: Language model to detect semantic similarities with denied phrases
- Error Message (Optional)
-
Type: string
-
Default: “Cannot Process! Input violates content moderation policies.”
-
Description: Custom error message to display when moderation fails
Functionality
The Simple Prompt Moderation node provides content filtering through the following features:
- Pattern Matching
-
Exact match detection against deny list
-
Case-insensitive comparison
-
Line-by-line analysis
- Semantic Analysis (when Chat Model is provided)
-
Similarity detection using LLM
-
Context-aware filtering
-
Flexible matching capabilities
- Customization Options
-
User-defined deny lists
-
Configurable error messages
-
Optional LLM integration
Use Cases
- Prompt Injection Prevention
-
Block attempts to override system instructions
-
Prevent prompt manipulation
-
Maintain system integrity
- Content Filtering
-
Filter specific keywords or phrases
-
Implement custom content policies
-
Control user input quality
- Safety Enforcement
-
Prevent harmful instructions
-
Block unwanted commands
-
Maintain usage boundaries
Integration Notes
-
Position the node early in your workflow to filter inputs
-
Consider combining with other moderation nodes for layered protection
-
Monitor and update deny lists regularly
-
Test thoroughly with various input patterns
Best Practices
- Deny List Management
-
Keep deny lists up to date
-
Use specific, clear patterns
-
Document denied phrases
-
Regular expression support for complex patterns
- Error Handling
-
Provide clear error messages
-
Log moderation events
-
Implement appropriate fallbacks
- Performance Optimization
-
Balance deny list size with performance
-
Consider caching for frequent patterns
-
Monitor LLM usage when enabled
- Maintenance
-
Regular deny list reviews
-
Update patterns based on new threats
-
Monitor false positive/negative rates
-
Adjust sensitivity as needed
{% hint style="info" %} This section is a work in progress. We appreciate any help you can provide in completing this section. Please check our Contribution Guide to get started. {% endhint %}
description: LangChain Output Parser Nodes
Output Parsers
Output Parser nodes are responsible for taking the output of a model and transforming it to a more suitable format for downstream tasks. Useful when you are using LLMs to generate structured data, or to normalize output from chat models and LLMs.
Output Parser Nodes:
- CSV Output Parser
- Custom List Output Parser
- Structured Output Parser
- Advanced Structured Output Parser
description: Parse the output of an LLM call as a comma-separated list of values.
CSV Output Parser
.png)
CSV Output Parser Node
A specialized parser that converts Language Model outputs into comma-separated lists, enabling easy extraction and processing of list-based responses.
Remember: Output Parser nodes are responsible for taking the output of a model and transforming it to a more suitable format for downstream tasks. Useful when you are using LLMs to generate structured data, or to normalize output from chat models and LLMs.
Parameters
Inputs
-
Autofix (Optional)
-
Type: boolean
-
Description: Enables automatic error correction by making additional model calls when parsing fails
-
Default: false
-
Functionality
-
Parsing Operations
-
List extraction
-
Comma separation
-
Value normalization
-
Format validation
-
-
Error Handling
-
Automatic fixing (optional)
-
Format validation
-
Error reporting
-
Recovery options
-
Use Cases
-
List Processing
-
Item enumeration
-
Data extraction
-
Value separation
-
Batch processing
-
-
Data Transformation
-
Format conversion
-
Structure normalization
-
List standardization
-
Output formatting
-
Integration Notes
-
Integrates with LangChain base classes
-
Supports automatic error correction
-
Handles various list formats
-
Produces standardized arrays
Best Practices
-
Input Formatting
-
Clear list structure
-
Proper comma usage
-
Value consistency
-
Format validation
-
-
Error Management
-
Enable autofix for reliability
-
Handle parsing failures
-
Validate input format
-
Monitor error patterns
-
-
Performance Optimization
-
Efficient list processing
-
Minimal format complexity
-
Optimal autofix usage
-
Clean data handling
-
{% hint style="info" %} This section is a work in progress. We appreciate any help you can provide in completing this section. Please check our Contribution Guide to get started. {% endhint %}
description: Parse the output of an LLM call as a list of values.
Custom List Output Parser
.png)
Custom List Output Parser Node
{% hint style="info" %} This section is a work in progress. We appreciate any help you can provide in completing this section. Please check our Contribution Guide to get started. {% endhint %}
description: Parse the output of an LLM call into a given (JSON) structure.
Structured Output Parser
.png)
Structured Output Parser Node
The Structured Output Parser is a node used to parse the output of a Language Model (LLM) call into a predefined JSON structure. This node is particularly useful when you need to extract structured information from the LLM's response in a consistent format.
It is ideal for scenarios where the output structure is relatively flat and simple.
Key Features
-
Basic Schema Support: Allows users to define expected output fields and their types, usually via JSON schema or example-based schema generation.
-
Simple Validation: Checks if the output matches the expected structure, but with less sophistication than advanced parsers.
-
Ease of Use: Quick to set up for common use cases where outputs are not deeply nested or highly complex.
-
Intended for Final Output: Best used for structuring the last step in a workflow, not for intermediary formatting.
Parameters
Inputs
-
Autofix (Optional)
-
Type: boolean
-
Description: Enables automatic error correction by making additional model calls when parsing fails
-
Default: false
-
-
JSON Structure (Required)
-
Type: datagrid
-
Description: Defines the expected JSON structure for model outputs
-
Schema:
-
Property: JSON property name
-
Type: Data type (string, number, boolean)
-
Description: Property description
-
-
Default:
[ { "property": "answer", "type": "string", "description": "answer to the user's question" }, { "property": "source", "type": "string", "description": "sources used to answer the question, should be websites" } ] -
Input
The node takes the following inputs:
-
Configuration for autofix (boolean)
-
JSON structure definition (datagrid)
Output
The node outputs a StructuredOutputParser instance that can be used to parse LLM responses according to the defined JSON structure.
Flow of the Structured Output Parser Node
-
Schema Definition
-
The user defines the expected output schema, usually as a JSON Schema or using libraries like Zod (TypeScript) or Pydantic (Python).
-
The schema specifies required fields, types, and descriptions for each output property.
-
-
LLM Call
- The language model generates a response, typically as unstructured text or loosely structured JSON.
-
Parsing Step
-
The Structured Output Parser node receives the LLM output.
-
It attempts to parse the output according to the defined schema.
-
If the output matches the schema, it is transformed into a structured object.
-
If not, the parser may raise an error or attempt to fix the output (depending on configuration).
-
-
Output Delivery
- The parsed, structured data is passed on to the next node in the workflow or consumed by downstream systems.
{% hint style="info" %} This section is a work in progress. We appreciate any help you can provide in completing this section. Please check our Contribution Guide to get started. {% endhint %}
description: >- Parse the output of an LLM call into a given structure by providing a Zod schema.
Advanced Structured Output Parser
.png)
Advanced Structured Output Parser Node
The Advanced Structured Output Parser Function is designed to parse the output of a language model (LLM) into a highly controlled, structured format by leveraging advanced schema definitions—commonly using libraries like Zod (for TypeScript) or similar schema validation tools. This parser is particularly useful when you need strong guarantees about the structure, types, and validation of data returned from an LLM, supporting more complex and nested schemas than basic parsers
Key Features
-
Schema-Driven Parsing: Accepts a detailed schema (e.g., Zod schema) that defines the exact structure, data types, and validation rules for the expected output.
-
Advanced Validation: Ensures that the LLM output strictly adheres to the schema, catching errors or inconsistencies early.
-
Complex Structures: Supports nested objects, arrays, enums, and other advanced data types, making it suitable for sophisticated workflows.
-
Error Handling: Can provide detailed feedback if the output does not match the schema, allowing for robust error management.
Parameters
Inputs
-
Autofix (Optional)
-
Type: boolean
-
Description: Enables automatic error correction by making additional model calls when parsing fails
-
Default: false
-
-
Example JSON (Required)
-
Type: string
-
Description: Zod schema definition for output structure validation
-
Default Example:
z.object({ title: z.string(), yearOfRelease: z.number().int(), genres: z.array(z.enum(['Action', 'Comedy', 'Drama', 'Sci-Fi'])).max(2), shortDescription: z.string().max(500) }) ``` -
Comparison between Structured Output Parser & Advanced Structured Output Parser
| Feature | Structured Output Parser | Advanced Structured Output Parser Function |
|---|---|---|
| Schema Complexity | Simple (flat JSON/dictionary) | Complex (nested, enums, advanced validation) |
| Validation | Basic type and field checks | Strong, schema-driven, detailed error reporting |
| Supported Schema Types | JSON Schema, Example-based | Zod schema, Pydantic, advanced schema libs |
| Use Case | Simple, final output formatting | Complex, multi-layered, deeply validated output |
| Error Handling | Limited | Detailed, with feedback on schema mismatches |
| Integration | Quick setup, less flexible | Requires schema definition, more flexible |
{% hint style="info" %} This section is a work in progress. We appreciate any help you can provide in completing this section. Please check our Contribution Guide to get started. {% endhint %}
description: LangChain Prompt Nodes
Prompts
Prompt template nodes help to translate user input and parameters into instructions for a language model. This can be used to guide a model's response, helping it understand the context and generate relevant and coherent language-based output.
Prompt Nodes:
description: Schema to represent a chat prompt.
Chat Prompt Template
 (1) (1).png)
Chat Prompt Template Node
A Chat Prompt Template allows you to define a sequence of chat messages—such as system, human, and AI messages—using templates with placeholders for variables. These templates can be filled in at runtime with user inputs or contextual data, making it easy to generate consistent and context-aware prompts for language models
Parameters
Inputs
-
System Message (Required)
-
Type: string
-
Description: Initial system message that sets the context or role for the AI
-
Example: "You are a helpful assistant that translates {input_language} to {output_language}."
-
-
Human Message (Required)
-
Type: string
-
Description: Human message prompt added at the end of the message sequence
-
Example: "{text}"
-
-
Format Prompt Values (Optional)
-
Type: JSON
-
Description: Variables specification for use in prompts
-
Example:
{ "input_language": "English", "output_language": "Spanish" } -
-
Messages History (Optional)
-
Type: Tabs
-
Default: messageHistoryCode
-
Description: Additional messages after System Message for few-shot examples
-
Tabs:
-
Add Messages (Code)
-
Type: code
-
Description: Custom message history using JavaScript code
-
-
-
Best Practices
-
System Message Design
-
Clear instructions
-
Specific role definition
-
Consistent context
-
Appropriate constraints
-
-
Message History
-
Relevant examples
-
Progressive complexity
-
Clear structure
-
Safe code execution
-
-
Variable Management
-
Clear naming
-
Type consistency
-
Error handling
-
Default values
-
Input/Output
Input
-
The node takes in the defined parameters (system message, human message, prompt values, and optional message history).
-
If message history code is provided, it is executed in a sandboxed environment.
Output
-
The node outputs a ChatPromptTemplate object that includes:
-
A system message
-
Optional message history (if provided and valid)
-
A human message
-
Usage
This node is used to create structured chat prompts for language models. It’s particularly useful for:
-
Setting up consistent system instructions across multiple interactions.
-
Defining a standard format for human inputs.
-
Incorporating few-shot examples or specific conversation context through the message history feature.
-
Allowing for dynamic prompt creation by using variables in the system and human messages.
The Chat Prompt Template Function is a foundational tool for anyone developing advanced conversational AI workflows, enabling structured, maintainable, and highly customizable prompts for chat models
{% hint style="info" %} This section is a work in progress. We appreciate any help you can provide in completing this section. Please check our Contribution Guide to get started. {% endhint %}
description: Prompt template you can build with examples.
Few Shot Prompt Template
 (1) (1) (1) (1) (1) (1) (1) (1) (1) (1).png)
Few Shot Prompt Template Node
The Few-Shot Prompt Template Function is a powerful tool for constructing prompts that guide AI models by providing them with a set of example input-output pairs - known as "few-shot examples." This technique is widely used to improve the accuracy and reliability of language models, especially for tasks requiring structured outputs or specific formats.
What Is Few-Shot Prompting?
-
Few-shot prompting involves supplying the language model with a handful of demonstrations (examples) of the desired task within the prompt itself.
-
These examples teach the model how to respond to new, similar queries by showing the expected pattern or structure
When to Use
-
When you want to guide a language model with clear, structured demonstrations.
-
For tasks where output format consistency is important.
-
In scenarios where zero-shot prompting (no examples) yields unreliable results.
Parameters
Inputs
- Examples (Required)
-
Type: string (JSON)
-
Description: Array of example objects with key-value pairs
-
Example:
[
  { "word": "happy", "antonym": "sad" },
  { "word": "tall", "antonym": "short" }
]```
- Example Prompt (Required)
-
Type: PromptTemplate
-
Description: Template for formatting individual examples
- Prefix (Optional)
-
Type: string
-
Description: Text appearing before the examples
-
Example: “Give the antonym of every input”
- Suffix (Required)
-
Type: string
-
Description: Text after examples, containing input variable
-
Example: “Word:
\nAntonym:”
- Example Separator (Optional)
-
Type: string
-
Default: “\n\n”
-
Description: String used to separate examples
- Template Format (Optional)
-
Type: options
-
Options: [“f-string”, “jinja-2”]
-
Default: “f-string”
-
Description: Format style for template strings
Best Practices
-
Example Design
-
Clear demonstrations
-
Consistent formatting
-
Diverse examples
-
Progressive complexity
-
-
Template Structure
-
Compatible formats
-
Clear separators
-
Proper variables
-
Consistent style
-
-
Performance Optimization
-
Efficient examples
-
Minimal redundancy
-
Clear instructions
-
Optimal spacing
-
{% hint style="info" %} This section is a work in progress. We appreciate any help you can provide in completing this section. Please check our Contribution Guide to get started. {% endhint %}
description: Schema to represent a basic prompt for an LLM.
Prompt Template
 (1) (1) (1) (1) (1) (1) (1) (1) (1) (1) (1).png)
Prompt Template Node
The Prompt Template node enables the creation of structured prompts with dynamic placeholders, allowing for consistent and reusable prompt generation in Language Model interactions.
Parameters
Inputs
- Template (Required)
-
Type: string
-
Rows: 4
-
Placeholder: "What is a good name for a company that makes {product}?"
-
Description: The prompt template with variables in curly braces { }, which will be replaced with actual values
- Format Prompt Values (Optional)
-
Type: json
-
Accept Variable: true
-
List: true
-
Description: JSON object containing values for template variables
-
Example:
  {
    "product": "eco-friendly water bottles"
  }```

## Functionality

1. Template Processing

  - Variable extraction

  - Placeholder validation

  - Format verification

  - Dynamic content insertion

2. Value Management

  - JSON parsing

  - Variable mapping

  - Type validation

  - Error checking


## Use Cases

1. Dynamic Content Generation

- Customized prompts

- Variable content

- Consistent formatting

- Template reuse

2. Standardization

- Format consistency

- Error reduction

- Quality control

- Pattern enforcement

## Integration Notes

- Supports variable injection

- Handles JSON formatting

- Validates template syntax

- Manages error states


## Best Practices

1. Template Design

- Clear variable naming

- Consistent formatting

- Descriptive placeholders

- Proper documentation

2. Value Management

- Valid JSON structure

- Complete variable sets

- Type consistency

- Error handling

3. Performance Optimization

- Efficient templates

- Minimal complexity

- Reusable patterns

- Clear structure

{% hint style="info" %}
This section is a work in progress. We appreciate any help you can provide in completing this section. Please check our [Contribution Guide](../../../contributing/) to get started.
{% endhint %}
description: LangChain Record Manager Nodes
Record Managers
Record Managers keep track of your indexed documents, preventing duplicated vector embeddings in Vector Store.
When document chunks are upserting, each chunk will be hashed using SHA-1 algorithm. These hashes will get stored in Record Manager. If there is an existing hash, the embedding and upserting process will be skipped.
In some cases, you might want to delete existing documents that are derived from the same sources as the new documents being indexed. For that, there are 3 cleanup modes for Record Manager:
{% tabs %} {% tab title="Incremental" %} When you are upserting multiple documents, and you want to prevent deletion of the existing documents that are not part of the current upserting process, use Incremental Cleanup mode.
- Let's have a Record Manager with
IncrementalCleanup andsourceas SourceId Key
 (1) (1) (1) (1) (1) (1) (1) (1) (1) (1).png)
 (1) (1) (1) (1) (1) (1) (1) (1) (1) (1).png)
- And have the following 2 documents:
| Text | Metadata |
|---|---|
| Cat | {source:"cat"} |
| Dog | {source:"dog"} |
 (1) (1) (1) (1).png)
 (1) (1) (1) (1) (1) (1).png)
 (1) (1) (1) (1) (2).png)
 (1) (1) (1) (1) (1) (1) (2).png)
- After an upsert, we will see 2 documents that are upserted:
 (1) (1) (1) (1) (2).png)
- Now, if we delete the Dog document, and update Cat to Cats, we will now see the following:
 (2).png)
- The original Cat document is deleted
- A new document with Cats is added
- Dog document is left untouched
- The remaining vector embeddings in Vector Store are Cats and Dog
 (1) (1).png)
{% tab title="Full" %} When you are upserting multiple documents, Full Cleanup mode will automatically delete any vector embeddings that are not part of the current upserting process.
- Let's have a Record Manager with
FullCleanup. We don't need to have a SourceId Key for Full Cleanup mode.
 (1) (1).png)
- And have the following 2 documents:
| Text | Metadata |
|---|---|
| Cat | {source:"cat"} |
| Dog | {source:"dog"} |
- After an upsert, we will see 2 documents that are upserted:
- Now, if we delete the Dog document, and update Cat to Cats, we will now see the following:
 (1) (1).png)
- The original Cat document is deleted
- A new document with Cats is added
- Dog document is deleted
- The remaining vector embeddings in Vector Store is just Cats
 (1) (1).png)
{% tab title="None" %} No cleanup will be performed {% endtab %} {% endtabs %}
Current available Record Manager nodes are:
- SQLite
- MySQL
- PostgresQL
Resources
description: LangChain Retriever Nodes
Retrievers
Retriever nodes return documents given an unstructured query. It is more general than a vector store. A retriever does not need to be able to store documents, only to return (or retrieve) them.
Retriever Nodes:
- Cohere Rerank Retriever
- Embeddings Filter Retriever
- HyDE Retriever
- LLM Filter Retriever
- Multi Query Retriever
- Prompt Retriever
- Reciprocal Rank Fusion Retriever
- Similarity Score Threshold Retriever
- Vector Store Retriever
- Voyage AI Rerank Retriever
Extract Metadata Retriever
This retriever is designed to automatically extract keywords from query. The extracted JSON output is used as metadata filter for vector store.
For example, when we ask a question: "What is the profit for Apple", LLM will give an output of {source: "apple"}, and this will be passed to vectore store's metadata filter.
.png)
description: Custom Retriever allows user to specify the format of the context to LLM
Custom Retriever
 (1) (1).png)
By default, when context is being retrieved from vector store, they are in the following format:
[
    {
        "pageContent": "This is an example",
        "metadata": {
            "source": "example.pdf"
        }
    },
    {
        "pageContent": "This is example 2",
        "metadata": {
            "source": "example2.txt"
        }
    }
]
pageContent of the array will be joined together as a string, and fed back to LLM for completion.
However, in some cases, you might want to include information from metadata to give more information to LLM, such as source, link, etc. This is where Custom Retriever comes in. We can specify the format to return to LLM.
For instance, using the following format:
{{context}}
Source: {{metadata.source}}
Will results in the combined string as below:
This is an example
Source: example.pdf

This is example 2
Source: example2.txt
This will be sent back to LLM. Since LLM now has the sources of the answers, we can use prompts to instruct LLM to return answers followed by citations.
description: >- Cohere Rerank indexes the documents from most to least semantically relevant to the query.
Cohere Rerank Retriever
.png)
Cohere Rerank Retriever Node
The Cohere Rerank Retriever is a specialized retriever that uses Cohere’s reranking capabilities to improve the relevance of retrieved documents. It works by first retrieving documents from a base vector store retriever, then reranking these documents based on their semantic relevance to the query using Cohere's AI models.
Input Parameters
-
Vector Store Retriever (required)
-
Type: VectorStoreRetriever
-
Description: The base retriever to fetch initial documents from a vector store.
-
-
Model Name (optional)
-
Type: Options
-
Default: “rerank-english-v2.0”
-
Options:
-
rerank-english-v2.0
-
rerank-multilingual-v2.0
-
-
Description: The Cohere model to use for reranking.
-
-
Query (optional)
-
Type: string
-
Description: Specific query to retrieve documents. If not provided, the user's question will be used.
-
-
Top K (optional)
-
Type: number
-
Default: Inherits from base retriever, or 4 if not specified
-
Description: Number of top results to fetch after reranking.
-
-
Max Chunks Per Doc (optional)
-
Type: number
-
Default: 10
-
Description: Maximum number of chunks to produce internally from a document.
-
Outputs
- Cohere Rerank Retriever
-
Type: BaseRetriever
-
Description: The configured Cohere Rerank Retriever object.
- Document
-
Type: Document[]
-
Description: Array of retrieved and reranked document objects, containing metadata and page content.
- Text
-
Type: string
-
Description: Concatenated string of page content from all retrieved and reranked documents.
How It Works
-
The node first initializes a base retriever (usually a vector store retriever).
-
It then creates a CohereRerank compressor using the provided API key, model, and parameters.
-
A ContextualCompressionRetriever is created, combining the base retriever and the Cohere reranker.
-
When queried, it retrieves documents from the base retriever and reranks them using Cohere’s AI.
-
The output can be the retriever itself, the reranked documents, or the concatenated text of the documents.
Use Cases
-
Improving relevance of document retrieval in question-answering systems.
-
Enhancing search results by considering semantic similarity.
-
Creating more accurate document summaries by focusing on the most relevant parts.
Notes
-
This node requires a Cohere API key to function.
-
The effectiveness of the reranking depends on the quality of the initial retrieval and the chosen Cohere model.
-
Consider the trade-off between retrieval speed and accuracy when adjusting the Top K and Max Chunks Per Doc parameters.
{% hint style="info" %} This section is a work in progress. We appreciate any help you can provide in completing this section. Please check our Contribution Guide to get started. {% endhint %}
description: >- A document compressor that uses embeddings to drop documents unrelated to the query.
Embeddings Filter Retriever
.png)
Embeddings Filter Retriever Node
The Embeddings Filter Retriever is a specialized retriever that uses embeddings to filter out documents unrelated to a given query. It’s designed to improve the relevance of retrieved documents by comparing their embeddings to the query embedding.
Description
This node implements a document compressor that uses embeddings to drop documents unrelated to the query. It combines a base retriever (typically a vector store retriever) with an embeddings filter to refine the retrieval process.
Input Parameters
-
Vector Store Retriever (baseRetriever)
-
Type: VectorStoreRetriever
-
Description: The base retriever to use for initial document retrieval.
-
-
Embeddings (embeddings)
-
Type: Embeddings
-
Description: The embeddings model to use for encoding queries and documents.
-
-
Query (query)
-
Type: string
-
Optional: Yes
-
Description: Specific query to retrieve documents. If not provided, the user's question will be used.
-
-
Similarity Threshold (similarityThreshold)
-
Type: number
-
Default: 0.8
-
Optional: Yes
-
Description: Threshold for determining when two documents are similar enough to be considered redundant.
-
-
K (k)
-
Type: number
-
Default: 20
-
Optional: Yes
-
Description: The number of relevant documents to return. Can be set to undefined, in which case similarity_threshold must be specified.
-
Outputs
-
Embeddings Filter Retriever (retriever)
-
Type: EmbeddingsFilterRetriever, BaseRetriever
-
Description: The configured retriever object.
-
-
Document (document)
-
Type: Document, json
-
Description: Array of document objects containing metadata and pageContent.
-
-
Text (text)
-
Type: string, json
-
Description: Concatenated string from pageContent of retrieved documents.
-
Functionality
The Embeddings Filter Retriever works by:
-
Using the base retriever to fetch an initial set of documents.
-
Applying an embeddings filter to refine the results based on similarity to the query.
-
Returning either the retriever object, the filtered documents, or the concatenated text of the documents based on the specified output.
Use Cases
-
Improving relevance in document retrieval tasks.
-
Reducing noise in retrieved documents for more focused language model inputs.
-
Enhancing question-answering systems by providing more relevant context.
Notes
-
Either 'k' or 'similarity_threshold' must be specified for proper functioning.
-
The node uses the ContextualCompressionRetriever and EmbeddingsFilter from the LangChain library.
-
It handles escape characters in the output text when returning concatenated document content.
{% hint style="info" %} This section is a work in progress. We appreciate any help you can provide in completing this section. Please check our Contribution Guide to get started. {% endhint %}
description: Use HyDE retriever to retrieve from a vector store.
HyDE Retriever
.png)
HyDE Retriever Node
The HyDE (Hypothetical Document Embeddings) Retriever is a specialized retrieval component used to fetch relevant documents from a vector store. It leverages a language model to generate hypothetical answers or passages based on the input query, which are then used to retrieve similar documents from the vector store.
Input Parameters
-
Language Model (required)
-
Type: BaseLanguageModel
-
Description: The language model used to generate hypothetical documents.
-
-
Vector Store (required)
-
Type: VectorStore
-
Description: The vector store to retrieve documents from.
-
-
Query (optional)
-
Type: string
-
Description: Specific query to retrieve documents. If not provided, the user's question will be used.
-
-
Select Defined Prompt (required)
-
Type: options
-
Description: Pre-defined prompt templates for different use cases.
-
Options: websearch, scifact, arguana, trec-covid, fiqa, dbpedia-entity, trec-news, mr-tydi
-
Default: websearch
-
-
Custom Prompt (optional)
-
Type: string
-
Description: A custom prompt template that overrides the defined prompt if provided.
-
-
Top K (optional)
-
Type: number
-
Description: Number of top results to fetch.
-
Default: 4
-
Outputs
-
HyDE Retriever
-
Type: HydeRetriever
-
Description: The configured HyDE Retriever object.
-
-
Document
-
Type: Document[]
-
Description: An array of retrieved document objects containing metadata and page content.
-
-
Text
-
Type: string
-
Description: Concatenated string of page content from all retrieved documents.
-
Usage
The HyDE Retriever is particularly useful in scenarios where traditional keyword-based retrieval might fall short. It's effective for:
-
Answering complex questions that require contextual understanding
-
Retrieving documents for topics with limited or ambiguous keywords
-
Improving retrieval performance in domain-specific applications
By generating a hypothetical answer or passage, the HyDE Retriever can capture the semantic intent of the query more effectively, leading to more relevant document retrieval.
Note
The performance of the HyDE Retriever heavily depends on the quality of the language model and the appropriateness of the prompt template for the given task. Experimenting with different prompts and fine-tuning the language model for specific domains can significantly improve retrieval results.
{% hint style="info" %} This section is a work in progress. We appreciate any help you can provide in completing this section. Please check our Contribution Guide to get started. {% endhint %}
description: >- Iterate over the initially returned documents and extract, from each, only the content that is relevant to the query.
LLM Filter Retriever
.png)
LLM Filter Retriever Node
The LLM Filter Retriever is a specialized retriever that enhances the document retrieval process by using a language model to filter and extract relevant content from initially retrieved documents.
Input Parameters
- Vector Store Retriever
-
Name: baseRetriever
-
Type: VectorStoreRetriever
-
Description: The underlying retriever used to fetch initial documents.
- Language Model
-
Name: model
-
Type: BaseLanguageModel
-
Description: The language model used for filtering and extracting relevant content.
- Query (Optional)
-
Name: query
-
Type: string
-
Description: Query to retrieve documents from the retriever. If not specified, the user’s question will be used.
-
Accepts variables: Yes
Outputs
- LLM Filter Retriever
-
Name: retriever
-
Type: LLMFilterRetriever, BaseRetriever
-
Description: The configured LLM Filter Retriever object.
- Document
-
Name: document
-
Type: Document, json
-
Description: Array of document objects containing metadata and pageContent.
- Text
-
Name: text
-
Type: string, json
-
Description: Concatenated string from pageContent of filtered documents.
Functionality
The LLM Filter Retriever uses a ContextualCompressionRetriever with an LLMChainExtractor. It works as follows:
-
The base retriever (e.g., a vector store retriever) fetches initial documents.
-
The language model (LLM) is used to create an LLMChainExtractor, which serves as the base compressor.
-
The ContextualCompressionRetriever combines the base retriever and the LLM-based compressor.
-
When retrieving documents, the compressor filters and extracts only the relevant content from each document based on the query.
This approach helps to reduce noise and improve the relevance of the retrieved information, especially useful in scenarios where documents might contain a mix of relevant and irrelevant content.
Usage
This node is particularly useful in workflows where:
-
The initial document retrieval might return lengthy or partially relevant documents.
-
You need to extract specific, query-relevant information from a larger context.
-
You want to improve the quality and relevance of retrieved information before passing it to subsequent processing steps or presenting it to the user.
Note
Ensure that a suitable language model is connected to this node, as it's crucial for the filtering and extraction process.
{% hint style="info" %} This section is a work in progress. We appreciate any help you can provide in completing this section. Please check our Contribution Guide to get started. {% endhint %}
description: >- Generate multiple queries from different perspectives for a given user input query.
Multi Query Retriever
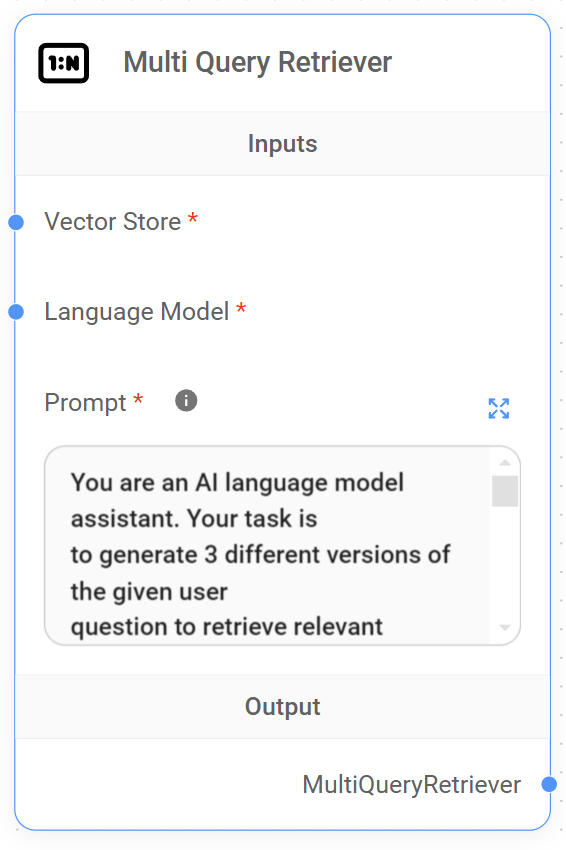
Multi Query Retriever Node
The Multi Query Retriever is a specialized retriever that generates multiple queries from different perspectives for a given user input query. This approach helps overcome some limitations of distance-based similarity search in vector databases.
Input Parameters
-
Vector Store
-
Label: Vector Store
-
Name: vectorStore
-
Type: VectorStore
-
Description: The vector store to be used for document retrieval.
-
-
Language Model
-
Label: Language Model
-
Name: model
-
Type: BaseLanguageModel
-
Description: The language model used to generate alternative questions.
-
-
Prompt
-
Label: Prompt
-
Name: modelPrompt
-
Type: string
-
Description: The prompt template for the language model to generate alternative questions. Use {question} to refer to the original question.
-
Default: A predefined prompt that instructs the AI to generate 3 different versions of the given user question.
-
Functionality
-
The node initializes with the provided vector store, language model, and prompt template.
-
When executed, it takes the user’s input query and uses the language model to generate multiple alternative questions based on the prompt.
-
These alternative questions are then used to query the vector store, potentially retrieving a more diverse and comprehensive set of relevant documents.
Usage
This retriever is particularly useful in scenarios where:
-
The user's initial query might not capture all aspects of their information need.
-
The desired information could be expressed in various ways in the document collection.
-
A broader exploration of the topic is beneficial.
Output
The node returns a MultiQueryRetriever instance, which can be used to retrieve documents based on the original query and its generated alternatives.
{% hint style="info" %} This section is a work in progress. We appreciate any help you can provide in completing this section. Please check our Contribution Guide to get started. {% endhint %}
description: >- Store prompt template with name & description to be later queried by MultiPromptChain.
Prompt Retriever
.png)
Prompt Retriever Node
The Prompt Retriever node is designed to store prompt templates with associated names and descriptions. These stored prompts can later be queried and used by a MultiPromptChain. This node is particularly useful for organizing and managing multiple prompts that can be dynamically selected based on the context or requirements of a conversation or task.
Input Parameters
-
Prompt Name
-
Type: string
-
Description: A unique identifier for the prompt template
-
Example: "physics-qa"
-
-
Prompt Description
-
Type: string
-
Description: A brief explanation of what the prompt does and when it should be used
-
Example: "Good for answering questions about physics"
-
-
Prompt System Message
-
Type: string
-
Description: The actual prompt template or system message that guides the AI's behavior
-
Example: "You are a very smart physics professor. You are great at answering questions about physics in a concise and easy to understand manner. When you don't know the answer to a question you admit that you don't know."
-
Output
The node initializes and returns a PromptRetriever object, which encapsulates the provided prompt information (name, description, and system message).
Usage
This node is typically used as part of a larger system where multiple specialized prompts are needed. By storing prompts with metadata, it allows for:
-
Organized Prompt Management: Keeping track of multiple prompts for different purposes.
-
Dynamic Prompt Selection: Enabling systems to choose the most appropriate prompt based on the current context or user query.
-
Improved Maintainability: Centralizing prompt storage and making it easier to update or modify prompts without changing the underlying code.
Integration
The Prompt Retriever is often used in conjunction with a MultiPromptChain, which can dynamically select and use the most appropriate prompt based on the input or context. This allows for creating more flexible and adaptive AI systems that can handle a wide range of queries or tasks by selecting the most suitable prompt template.
Example Use Case
In a multi-purpose AI assistant, you might have several Prompt Retriever nodes set up:
-
One for physics questions
-
One for literature analysis
-
One for coding help
-
One for general conversation
The system could then use a MultiPromptChain to analyze the user's input and select the most appropriate prompt, allowing the AI to seamlessly switch between different areas of expertise or conversation styles.
{% hint style="info" %} This section is a work in progress. We appreciate any help you can provide in completing this section. Please check our Contribution Guide to get started. {% endhint %}
description: Reciprocal Rank Fusion to re-rank search results by multiple query generation.
Reciprocal Rank Fusion Retriever
.png)
Reciprocal Rank Fusion Retriever Node
The Reciprocal Rank Fusion (RRF) Retriever is a specialized retriever that uses the Reciprocal Rank Fusion algorithm to re-rank search results obtained from multiple query generations. This node enhances the retrieval process by generating synthetic queries and combining their results for improved relevance.
Input Parameters
-
Vector Store Retriever (required)
-
Type: VectorStoreRetriever
-
Description: The base retriever used for initial document retrieval.
-
-
Language Model (required)
-
Type: BaseLanguageModel
-
Description: The language model used for generating synthetic queries.
-
-
Query (optional)
-
Type: string
-
Description: Custom query to retrieve documents. If not specified, the user’s question will be used.
-
-
Query Count (optional)
-
Type: number
-
Default: 4
-
Description: Number of synthetic queries to generate.
-
-
Top K (optional)
-
Type: number
-
Description: Number of top results to fetch. Defaults to the TopK of the Base Retriever.
-
-
Constant (optional)
-
Type: number
-
Default: 60
-
Description: A constant added to the rank, controlling the balance between high-ranked and lower-ranked items.
-
Outputs
- Reciprocal Rank Fusion Retriever
-
Type: RRFRetriever, BaseRetriever
-
Description: The initialized RRF retriever object.
- Document
-
Type: Document, json
-
Description: Array of document objects containing metadata and pageContent.
- Text
-
Type: string, json
-
Description: Concatenated string from pageContent of retrieved documents.
How It Works
-
The node initializes a ReciprocalRankFusion object using the provided language model, base retriever, and configuration parameters.
-
It then wraps this object in a ContextualCompressionRetriever for additional processing.
-
Depending on the selected output, the node can return:
-
The retriever object itself
-
An array of relevant documents
-
A concatenated text of the retrieved documents' content
-
Use Cases
-
Improving search relevance in document retrieval systems
-
Enhancing question-answering systems with more diverse and relevant context
-
Boosting the performance of RAG (Retrieval-Augmented Generation) applications
Notes
-
The node uses escape character handling for text output to ensure proper formatting.
-
The synthetic query generation and re-ranking process happens internally within the ReciprocalRankFusion class.
{% hint style="info" %} This section is a work in progress. We appreciate any help you can provide in completing this section. Please check our Contribution Guide to get started. {% endhint %}
description: Return results based on the minimum similarity percentage.
Similarity Score Threshold Retriever
.png)
Similarity Score Threshold Retriever Node
The Similarity Score Threshold Retriever is a specialized retriever that returns results based on a minimum similarity percentage. It's designed to filter and retrieve documents from a vector store that meet or exceed a specified similarity threshold.
Input Parameters
-
Vector Store (required)
-
Type: VectorStore
-
Description: The vector store to retrieve documents from.
-
-
Query (optional)
-
Type: string
-
Description: The query to retrieve documents. If not specified, the user’s question will be used.
-
Accepts variables: Yes
-
-
Minimum Similarity Score (%) (required)
-
Type: number
-
Default: 80
-
Description: The minimum similarity score (as a percentage) for retrieved documents.
-
-
Max K (optional, additional parameter)
-
Type: number
-
Default: 20
-
Description: The maximum number of results to fetch.
-
-
K Increment (optional, additional parameter)
-
Type: number
-
Default: 2
-
Description: How much to increase K by each time. It’ll fetch N results, then N + kIncrement, then N + kIncrement * 2, etc.
-
Outputs
- Similarity Threshold Retriever
-
Type: SimilarityThresholdRetriever
-
Description: The configured retriever object.
- Document
-
Type: Document[] (array of Document objects)
-
Description: Array of document objects containing metadata and pageContent.
- Text
-
Type: string
-
Description: Concatenated string from pageContent of retrieved documents.
Functionality
The node creates a ScoreThresholdRetriever from the provided vector store and configuration parameters. It can output either the retriever itself, the retrieved documents, or the concatenated text content of the retrieved documents, depending on the selected output.
When retrieving documents or text, it uses either the provided query or the input string to fetch relevant documents. For text output, it concatenates the page content of all retrieved documents and handles escape characters.
Use Cases
-
Retrieving highly relevant documents from a large corpus
-
Filtering out less relevant information in information retrieval tasks
-
Ensuring a minimum quality threshold for retrieved content in question-answering systems
-
Fine-tuning document retrieval for specific similarity requirements in various NLP applications
{% hint style="info" %} This section is a work in progress. We appreciate any help you can provide in completing this section. Please check our Contribution Guide to get started. {% endhint %}
description: Store vector store as retriever to be later queried by MultiRetrievalQAChain.
Vector Store Retriever
.png)
Vector Store Retriever Node
The Vector Store Retriever node is a component used in retrieval-based systems, particularly for storing and querying vector representations of data. It's designed to be used with MultiRetrievalQAChain, making it useful for question-answering tasks that require retrieval from multiple sources.
Input Parameters
-
Vector Store
-
Label: Vector Store
-
Name: vectorStore
-
Type: VectorStore
-
Description: The vector store to be used as the basis for the retriever.
-
-
Retriever Name
-
Label: Retriever Name
-
Name: name
-
Type: string
-
Placeholder: “netflix movies”
-
Description: A unique identifier for the retriever.
-
-
Retriever Description
-
Label: Retriever Description
-
Name: description
-
Type: string
-
Rows: 3
-
Description: A brief explanation of when to use this specific vector store retriever.
-
Placeholder: "Good for answering questions about netflix movies"
-
Output
The node initializes and returns a VectorStoreRetriever object, which encapsulates:
-
The provided vector store
-
The specified name
-
The given description
Usage
This node is typically used in workflows where:
-
You have pre-processed data stored in a vector format.
-
You need to retrieve this data efficiently based on similarity searches.
-
You want to integrate this retrieval mechanism into a larger question-answering or information retrieval system.
Integration
The Vector Store Retriever is designed to work seamlessly with other components in a langchain-based system, particularly with MultiRetrievalQAChain for complex question-answering tasks that require querying multiple data sources.
Implementation Notes
-
The node uses the VectorStore class from ‘@langchain/core/vectorstores’.
-
It implements the INode interface, ensuring compatibility with the broader node-based architecture.
-
The init method is responsible for creating and returning the VectorStoreRetriever object based on the provided inputs.
Best Practices
-
Provide clear and descriptive names for your retrievers to easily identify them in complex workflows.
-
Use the description field to specify the domain or type of questions this retriever is best suited for.
-
Ensure that the vector store provided is properly initialized and contains relevant, high-quality data for optimal retrieval performance.
{% hint style="info" %} This section is a work in progress. We appreciate any help you can provide in completing this section. Please check our Contribution Guide to get started. {% endhint %}
Voyage AI Rerank Retriever
description: LangChain Text Splitter Nodes
Text Splitters
When you want to deal with long pieces of text, it is necessary to split up that text into chunks.
As simple as this sounds, there is a lot of potential complexity here. Ideally, you want to keep the semantically related pieces of text together. What "semantically related" means could depend on the type of text. This notebook showcases several ways to do that.
At a high level, text splitters work as following:
- Split the text up into small, semantically meaningful chunks (often sentences).
- Start combining these small chunks into a larger chunk until you reach a certain size (as measured by some function).
- Once you reach that size, make that chunk its own piece of text and then start creating a new chunk of text with some overlap (to keep context between chunks).
That means there are two different axes along which you can customize your text splitter:
- How the text is split
- How the chunk size is measured
Text Splitter Nodes:
- Character Text Splitter
- Code Text Splitter
- Html-To-Markdown Text Splitter
- Markdown Text Splitter
- Recursive Character Text Splitter
- Token Text Splitter
description: Splits only on one type of character (defaults to "\n\n").
Character Text Splitter
.png)
Character Text Splitter
The Character Text Splitter is a node used for splitting text into smaller chunks based on a specified character separator. It's particularly useful for processing large text documents into manageable pieces for further analysis or processing.
Parameters
-
Chunk Size
-
Label: Chunk Size
-
Name: chunkSize
-
Type: number
-
Description: Number of characters in each chunk
-
Default: 1000
-
Optional: Yes
-
-
Chunk Overlap
-
Label: Chunk Overlap
-
Name: chunkOverlap
-
Type: number
-
Description: Number of characters to overlap between chunks
-
Default: 200
-
Optional: Yes
-
-
Custom Separator
-
Label: Custom Separator
-
Name: separator
-
Type: string
-
Description: Custom separator to determine when to split the text (overrides the default separator)
-
Placeholder: ” ” (space)
-
Optional: Yes
-
Input
The node expects text input that needs to be split into smaller chunks.
Output
The node outputs an instance of CharacterTextSplitter configured with the specified parameters, which can be used to split input text into chunks.
Usage
This node is typically used in text processing pipelines where large documents need to be broken down into smaller pieces. It's particularly useful in scenarios such as:
-
Preparing text for embedding or semantic analysis
-
Breaking down large documents for summarization
-
Splitting text for parallel processing
-
Preparing input for language models with token limits
The ability to customize chunk size, overlap, and separator makes this node versatile for various text processing needs.
{% hint style="info" %} This section is a work in progress. We appreciate any help you can provide in completing this section. Please check our Contribution Guide to get started. {% endhint %}
description: Split documents based on language-specific syntax.
Code Text Splitter
.png)
Code Text Splitter Node
The Code Text Splitter is a specialized text splitter designed to split documents based on language-specific syntax. It utilizes the code RecursiveCharacterTextSplitter from the LangChain library to perform intelligent splitting of code documents.
Parameters
-
Language
-
Type: Options
-
Description: The programming language of the code to be split.
-
-
Chunk Size
-
Type: Number
-
Default: 1000
-
Optional: Yes
-
Description: The number of characters in each chunk. This determines the size of the text segments after splitting.
-
-
Chunk Overlap
-
Type: Number
-
Default: 200
-
Optional: Yes
-
Description: The number of characters to overlap between chunks. This helps maintain context between split segments.
-
Input/Output
Input
The node expects code or text input in the specified language.
Output
The node outputs split text chunks based on the specified parameters and language-specific syntax.
Usage
This node is particularly useful in workflows that involve processing or analyzing code, such as:
-
Code summarization
-
Code analysis tasks
-
Preparing code for language models
-
Splitting large codebases for easier processing
By respecting the syntax of the chosen programming language, it ensures that the splitting process maintains the logical structure of the code as much as possible, which can lead to better results in downstream tasks.
Implementation Details
The node uses the RecursiveCharacterTextSplitter.fromLanguage() method from LangChain, which applies language-specific splitting rules. This method is more intelligent than a simple character-based split, as it attempts to split at appropriate syntactic boundaries for the given language.
{% hint style="info" %} This section is a work in progress. We appreciate any help you can provide in completing this section. Please check our Contribution Guide to get started. {% endhint %}
description: >- Converts Html to Markdown and then split your content into documents based on the Markdown headers.
Html-To-Markdown Text Splitter
.png)
Html-To-Markdown Text Splitter Node
The HtmlToMarkdown Text Splitter is a specialized text splitter that converts HTML content to Markdown and then splits the resulting Markdown text into smaller chunks based on headers. This node is particularly useful for processing HTML documents and preparing them for further natural language processing or analysis tasks.
Parameters
-
Chunk Size
-
Label: Chunk Size
-
Name: chunkSize
-
Type: number
-
Description: Number of characters in each chunk
-
Default: 1000
-
Optional: Yes
-
-
Chunk Overlap
-
Label: Chunk Overlap
-
Name: chunkOverlap
-
Type: number
-
Description: Number of characters to overlap between chunks
-
Default: 200
-
Optional: Yes
-
Input
The node expects HTML text as input.
Output
The node outputs an array of string chunks, where each chunk is a section of the Markdown-converted HTML, split according to the specified chunk size and overlap.
How It Works
-
The node receives HTML text as input.
-
It uses the
code NodeHtmlMarkdown.translate()function to convert the HTML to Markdown. -
The resulting Markdown is then split into chunks using the
code MarkdownTextSplitterclass from thecode langchain/text_splitterpackage. -
The splitting process respects Markdown headers and the specified chunk size and overlap parameters.
Use Cases
-
Processing HTML content from web scraping for natural language processing tasks
-
Preparing HTML documents for text analysis or summarization
-
Converting and chunking HTML-based documentation for improved searchability or processing
Notes
-
This node extends the functionality of the MarkdownTextSplitter class to handle HTML input.
-
The conversion from HTML to Markdown allows for better preservation of document structure compared to plain text splitting.
-
The chunk size and overlap can be adjusted to optimize for specific downstream tasks or models.
{% hint style="info" %} This section is a work in progress. We appreciate any help you can provide in completing this section. Please check our Contribution Guide to get started. {% endhint %}
description: Split your content into documents based on the Markdown headers.
Markdown Text Splitter
.png)
Markdown Text Splitter Node
The Markdown Text Splitter is a specialized text splitting component designed to divide Markdown content into smaller, manageable chunks based on Markdown headers. This node is particularly useful for processing large Markdown documents while maintaining the structural integrity of the content.
Parameters
The Markdown Text Splitter accepts two optional parameters:
-
Chunk Size
-
Label: Chunk Size
-
Name: chunkSize
-
Type: number
-
Description: Number of characters in each chunk
-
Default: 1000
-
Optional: Yes
-
-
Chunk Overlap
-
Label: Chunk Overlap
-
Name: chunkOverlap
-
Type: number
-
Description: Number of characters to overlap between chunks
-
Default: 200
-
Optional: Yes
-
Input/Output
-
Input: The node takes Markdown text as input (implicitly, through the text splitting process).
-
Output: The node outputs an instance of the MarkdownTextSplitter class, which can be used to split Markdown text into chunks.
Usage
The Markdown Text Splitter is initialized with the specified chunk size and overlap. When used, it will:
-
Analyze the structure of the Markdown document.
-
Split the text into chunks, respecting Markdown headers as natural break points.
-
Ensure each chunk is approximately the specified size (chunkSize).
-
Create an overlap between chunks to maintain context (chunkOverlap).
This node is particularly useful in workflows where you need to process large Markdown documents while preserving their structure, such as in document analysis, content summarization, or when preparing text for large language models with input size limitations.
Implementation Details
-
The node uses the
code MarkdownTextSplitterclass from the 'langchain/text_splitter' library. -
It extends the
code INodeinterface, making it compatible with the larger node-based system it's part of. -
The
code initmethod creates and returns an instance ofcode MarkdownTextSplitterwith the specified parameters.
Best Practices
-
Adjust the chunk size based on your specific use case and the requirements of downstream processes.
-
Use a chunk overlap to ensure context is maintained between chunks, especially for tasks that require understanding across section boundaries.
-
Consider the structure of your Markdown documents when setting the chunk size to avoid breaking important sections mid-content.
{% hint style="info" %} This section is a work in progress. We appreciate any help you can provide in completing this section. Please check our Contribution Guide to get started. {% endhint %}
description: >- Split documents recursively by different characters - starting with "\n\n", then "\n", then " ".
Recursive Character Text Splitter
.png)
Recursive Character Text Splitter Node
The RecursiveCharacterTextSplitter node is a text splitting component used for dividing large text documents into smaller chunks. It’s particularly useful for processing long documents that need to be broken down into more manageable pieces for analysis, summarization, or other natural language processing tasks.
Parameters
-
Chunk Size
-
Label: Chunk Size
-
Name: chunkSize
-
Type: number
-
Description: Number of characters in each chunk
-
Default: 1000
-
Optional: Yes
-
-
Chunk Overlap
-
Label: Chunk Overlap
-
Name: chunkOverlap
-
Type: number
-
Description: Number of characters to overlap between chunks
-
Default: 200
-
Optional: Yes
-
-
Custom Separators
-
Label: Custom Separators
-
Name: separators
-
Type: string
-
Description: Array of custom separators to determine when to split the text, will override the default separators
-
Placeholder: ["|", "##", ">", "-"]
-
Optional: Yes
-
Additional: This is an advanced parameter
-
Input
The node takes the following inputs:
-
Text document(s) to be split (handled internally by the system)
-
Configuration parameters as described above
Output
The node outputs a RecursiveCharacterTextSplitter object, which can be used to split text documents into chunks based on the specified parameters.
Usage
This node is typically used in document processing pipelines where large texts need to be broken down into smaller, more manageable pieces. It's particularly useful for:
-
Preparing text for large language models with context limitations
-
Breaking down documents for summarization tasks
-
Splitting text for parallel processing
-
Creating more granular sections for information retrieval or question-answering systems
Implementation Details
-
The node uses the
code RecursiveCharacterTextSplitterclass from the 'langchain/text_splitter' library. -
It supports dynamic configuration of chunk size, overlap, and custom separators.
-
The
code initmethod creates and returns a configuredcode RecursiveCharacterTextSplitterobject based on the input parameters. -
Custom separators, if provided, are parsed from a JSON string to an array.
Error Handling
The node includes error handling for parsing custom separators. If the separators string cannot be parsed as valid JSON, it will throw an error.
{% hint style="info" %} This section is a work in progress. We appreciate any help you can provide in completing this section. Please check our Contribution Guide to get started. {% endhint %}
description: >- Splits a raw text string by first converting the text into BPE tokens, then split these tokens into chunks and convert the tokens within a single chunk back into text.
Token Text Splitter
.png)
Token Text Splitter Node
The Token Text Splitter is a component used for splitting text into smaller chunks based on token count. It utilizes the TikToken library for tokenization, which is commonly used in language models like GPT.
Parameters
Encoding Name
-
Type: Options
-
Default: gpt2
-
Available Options:
-
gpt2
-
r50k_base
-
p50k_base
-
p50k_edit
-
cl100k_base
-
-
Description: Specifies the encoding scheme to use for tokenization. Different models may use different encodings.
Chunk Size
-
Type: Number
-
Default: 1000
-
Optional: Yes
-
Description: The number of characters in each chunk. This determines the maximum size of each text segment after splitting.
Chunk Overlap
-
Type: Number
-
Default: 200
-
Optional: Yes
-
Description: The number of characters to overlap between chunks. This helps maintain context between chunks.
Input/Output
-
Input: Raw text string
-
Output: An array of text chunks
Usage
This node is particularly useful in scenarios where you need to process large amounts of text with language models that have a maximum token limit. By splitting the text into smaller chunks, you can process each chunk separately and then combine the results.
Common use cases include:
-
Preparing text for summarization
-
Breaking down large documents for question-answering systems
-
Preprocessing text for semantic search or embeddings
Implementation Details
The node uses the code TokenTextSplitter class from the LangChain library, which in turn uses the TikToken library for tokenization. The splitting process ensures that the text is split at token boundaries rather than arbitrary character positions, which can be more semantically meaningful for many NLP tasks.
Note
When using this splitter, be aware that the actual number of tokens in each chunk may vary slightly from the specified chunk size, as the splitter converts tokens back to text for the final output. The chunk size parameter is used as a target, but the exact size may differ to maintain token integrity.
{% hint style="info" %} This section is a work in progress. We appreciate any help you can provide in completing this section. Please check our Contribution Guide to get started. {% endhint %}
description: LangChain Tool Nodes
Tools
Tools are functions that agents can use to interact with the world. These tools can be generic utilities (e.g. search), other chains, or even other agents.
Tool Nodes:
- BraveSearch API
- Calculator
- Chain Tool
- Chatflow Tool
- Custom Tool
- Exa Search
- Google Custom Search
- OpenAPI Toolkit
- Python Interpreter
- Read File
- Request Get
- Request Post
- Retriever Tool
- SearchApi
- SearXNG
- Serp API
- Serper
- Web Browser
- Write File
description: >- Wrapper around BraveSearch API - a real-time API to access Brave search results.
BraveSearch API
 (1) (1) (1) (1) (1) (1).png)
BraveSearch API Node
Brave Search is a privacy-focused search engine with its own independent web index, providing high-quality, fresh, and unbiased search results. This node enables AI agents or chatflows built in AIMicromind to access up-to-date information from the web, enhancing their capabilities with real-time data.
Parameters
- The node doesn’t have any specific input parameters. However, it requires a credential to be connected
Input/Output
-
Input: The node doesn’t require any specific inputs at initialization.
-
Output: An instance of the BraveSearch class from the @langchain/community/tools/brave_search package.
Initialization
The node’s init method performs the following steps:
-
Retrieves the credential data associated with the node.
-
Extracts the Brave API key from the credential data.
-
Creates and returns a new instance of the BraveSearch class, initialized with the API key.
Usage
This node is typically used in workflows or applications where search functionality is required. It can be combined with other nodes or tools to create more complex search-based operations or to feed search results into other processes.
Important Notes
-
Requires a valid Brave Search API key for authentication.
-
Supports integration with text splitters for better content handling.
-
Handles API rate limits and errors internally to ensure smooth operation.
-
Preserves the privacy-focused nature of Brave Search.
-
Results include snippets and metadata useful for downstream processing or display.
-
Can be combined with other nodes in AIMicromind to build powerful agents that utilize live web data.
{% hint style="info" %} This section is a work in progress. We appreciate any help you can provide in completing this section. Please check our Contribution Guide to get started. {% endhint %}
description: Perform calculations on response.
Calculator
 (1) (1) (1) (1) (1) (1) (1) (1) (1).png)
Calculator Node
The Calculator node is a tool component that provides mathematical calculation capabilities within a larger system, likely a language model or AI application.
Input/Output
As this is a tool node, it doesn’t have explicit input/output parameters defined in the code. The actual I/O would be handled by the Calculator class it instantiates:
-
Input: Typically a string containing a mathematical expression.
-
Output: The result of the calculation, usually a number.
Usage
This node is used to add calculation capabilities to a larger system. It can be integrated into workflows where numerical computations are needed based on text input or as part of a chain of operations.
{% hint style="info" %} This section is a work in progress. We appreciate any help you can provide in completing this section. Please check our Contribution Guide to get started. {% endhint %}
description: Use a chain as allowed tool for agent.
Chain Tool
 (1) (1) (1) (1) (1) (1) (1) (1) (1) (1).png)
Chain Tool Node
The Chain Tool node is a component that allows the use of a LangChain chain as a tool for an agent. It provides a way to integrate complex chain-based operations into agent workflows.
A chain tool is a special type of step within a chain that allows the AI to access and utilize external resources—such as APIs, databases, calculators, or search engines—dynamically during the reasoning process
Parameters
Input
-
Chain Name
-
Type: string
-
Description: A unique identifier for the chain tool
-
Example: “state-of-union-qa”
-
-
Chain Description
-
Type: string
-
Description: A detailed description of what the chain does and when it should be used
-
Example: “State of the Union QA - useful for when you need to ask questions about the most recent state of the union address.”
-
-
Return Direct
-
Type: boolean
-
Optional: Yes
-
Description: Determines whether the tool should return its result directly or wrap it in a response
-
-
Base Chain
-
Type: BaseChain
-
Description: The LangChain chain to be used as the core functionality of this tool
-
Output
- The node outputs a ChainTool object that can be used in agent configurations.
Functionality
The ChainTool node creates a tool that wraps a LangChain chain, allowing it to be used as part of an agent’s toolkit. This enables the agent to leverage complex chain-based operations when needed.
Key aspects of its functionality include:
-
Naming and describing the tool for clear identification by the agent
-
Integrating a BaseChain object as the core functionality
-
Optional direct return of results, bypassing standard response formatting
{% hint style="info" %} This section is a work in progress. We appreciate any help you can provide in completing this section. Please check our Contribution Guide to get started. {% endhint %}
description: Execute another chatflow and get the response.
Chatflow Tool
.png)
Chatflow Tool
The Chatflow Tool node is a specialized tool that allows the execution of another chat flow within a project. It’s particularly useful for creating modular and reusable components in complex conversational AI systems.
Parameters
Main Parameters
-
Select Chatflow
-
Type: asyncOptions
-
Description: Allows selection of an existing chatflow to be used as a tool.
-
-
Tool Name
-
Type: string
-
Description: Name of the tool, used for identification.
-
-
Tool Description
-
Type: string
-
Description: Detailed description of the tool’s functionality, used by the LLM to determine when to use this tool.
-
-
Return Direct
-
Type: boolean
-
Optional: Yes
-
Description: Determines if the tool’s output should be returned directly.
-
Additional Parameters
-
Override Config
-
Type: json
-
Optional: Yes
-
Description: Allows overriding the configuration passed to the Chatflow.
-
-
Base URL
-
Type: string
-
Optional: Yes
-
Default: URL of the incoming request
-
Description: Base URL useful for executing the Chatflow through an alternative route.
-
-
Start new session per message
-
Type: boolean
-
Optional: Yes
-
Default: false
-
Description: Determines whether to continue the session with the Chatflow tool or start a new one with each interaction.
-
-
Use Question from Chat
-
Type: boolean
-
Optional: Yes
-
Description: If enabled, uses the question from the chat as input to the chatflow, overriding custom input.
-
-
Custom Input
-
Type: string
-
Optional: Yes
-
Description: Custom input to be passed to the chatflow. If empty, the LLM decides the input.
-
Functionality
-
Initializes with selected parameters and credentials.
-
Creates a ChatflowTool instance with the specified configuration.
-
When called, it executes the selected chatflow using the provided input.
-
The tool makes an HTTP POST request to the specified API endpoint.
-
The response from the executed chatflow is returned as a string.
{% hint style="info" %} This section is a work in progress. We appreciate any help you can provide in completing this section. Please check our Contribution Guide to get started. {% endhint %}
Custom Tool
Watch how to use custom tools (coming soon)
Problem
Function usually takes in structured input data. Let's say you want the LLM to be able to call Airtable Create Record API, the body parameters has to be structured in a specific way. For example:
"records": [
  {
    "fields": {
      "Address": "some address",
      "Name": "some name",
      "Visited": true
    }
  }
]
Ideally, we want LLM to return a proper structured data like this:
{
  "Address": "some address",
  "Name": "some name",
  "Visited": true
}
So we can extract the value and parse it into the body needed for API. However, instructing LLM to output the exact pattern is difficult.
With the new OpenAI Function Calling models, it is now possible. gpt-4-0613 and gpt-3.5-turbo-0613 are specifically trained to return structured data. The model will intelligently choose to output a JSON object containing arguments to call those functions.
Tutorial
Goal: Have the agent automatically get the stock price movement, retrieve related stock news, and add a new record to Airtable.
Let's get started🚀
Create Tools
We need 3 tools to achieve the goal:
- Get Stock Price Movement
- Get Stock News
- Add Airtable Record
Get Stock Price Movement
Create a new Tool with the following details (you can change as you want):
- Name: get_stock_movers
- Description: Get the stocks that has biggest price/volume moves, e.g. actives, gainers, losers, etc.
Description is an important piece as ChatGPT is relying on this to decide when to use this tool.
 (3).png)
- JavaScript Function: We are going to use Morning Star
/market/v2/get-moversAPI to get data. First you have to click Subscribe to Test if you haven't already, then copy the code and paste it into JavaScript Function.- Add
const fetch = require('node-fetch');at the top to import the library. You can import any built-in NodeJS modules and external libraries. - Return the
resultat the end.
- Add
 (1).png)
The final code should be:
const fetch = require('node-fetch');
const url = 'https://morning-star.p.rapidapi.com/market/v2/get-movers';
const options = {
	method: 'GET',
	headers: {
		'X-RapidAPI-Key': 'replace with your api key',
		'X-RapidAPI-Host': 'morning-star.p.rapidapi.com'
	}
};

try {
	const response = await fetch(url, options);
	const result = await response.text();
	console.log(result);
	return result;
} catch (error) {
	console.error(error);
	return '';
}
You can now save it.
Get Stock news
Create a new Tool with the following details (you can change as you want):
- Name: get_stock_news
- Description: Get latest news for a stock
- Input Schema:
- Property: performanceId
- Type: string
- Description: id of the stock, which is referred as performanceID in the API
- Required: true
Input Schema tells LLM what to return as a JSON object. In this case, we are expecting a JSON object like below:
{ "performanceId": "SOME TICKER" }
 (2).png)
- JavaScript Function: We are going to use Morning Star
/news/listAPI to get the data. First you have to click Subscribe to Test if you haven't already, then copy the code and paste it into JavaScript Function.- Add
const fetch = require('node-fetch');at the top to import the library. You can import any built-in NodeJS modules and external libraries. - Return the
resultat the end.
- Add
- Next, replace the hard-coded url query parameter performanceId:
0P0000OQN8to the property variable specified in Input Schema:$performanceId - You can use any properties specified in Input Schema as variables in the JavaScript Function by appending a prefix
$at the front of the variable name.
 (1) (1).png)
Final code:
const fetch = require('node-fetch');
const url = 'https://morning-star.p.rapidapi.com/news/list?performanceId=' + $performanceId;
const options = {
	method: 'GET',
	headers: {
		'X-RapidAPI-Key': 'replace with your api key',
		'X-RapidAPI-Host': 'morning-star.p.rapidapi.com'
	}
};

try {
	const response = await fetch(url, options);
	const result = await response.text();
	console.log(result);
	return result;
} catch (error) {
	console.error(error);
	return '';
}
You can now save it.
Add Airtable Record
Create a new Tool with the following details (you can change as you want):
- Name: add_airtable
- Description: Add the stock, news summary & price move to Airtable
- Input Schema:
- Property: stock
- Type: string
- Description: stock ticker
- Required: true
- Property: move
- Type: string
- Description: price move in %
- Required: true
- Property: news_summary
- Type: string
- Description: news summary of the stock
- Required: true
ChatGPT will returns a JSON object like this:
{ "stock": "SOME TICKER", "move": "20%", "news_summary": "Some summary" }
.png)
- JavaScript Function: We are going to use Airtable Create Record API to create a new record to an existing table. You can find the tableId and baseId from here. You'll also need to create a personal access token, find how to do it here.
Final code should looks like below. Note how we pass in $stock, $move and $news_summary as variables:
const fetch = require('node-fetch');
const baseId = 'your-base-id';
const tableId = 'your-table-id';
const token = 'your-token';

const body = {
	"records": [
		{
			"fields": {
				"stock": $stock,
				"move": $move,
				"news_summary": $news_summary,
			}
		}
	]
};

const options = {
	method: 'POST',
	headers: {
		'Authorization': `Bearer ${token}`,
		'Content-Type': 'application/json'
	},
	body: JSON.stringify(body)
};

const url = `https://api.airtable.com/v0/${baseId}/${tableId}`

try {
	const response = await fetch(url, options);
	const text = await response.text();
	return text;
} catch (error) {
	console.error(error);
	return '';
}
You can now save it.
You should see 3 tools created:
 (3) (1).png)
Create Chatflow
You can use the template OpenAI Function Agent from marketplace, and replace the tools with Custom Tool. Select the tool you have created.
Note: OpenAI Function Agent only supports 0613 models currently.
 (1) (1) (1).png)
Save the chatflow and start testing it. For starter, you can try asking:
What is the stock that has the biggest price movement today?
The stock that has the biggest price movement today is Overstock.com (OSTK) with a price move of 17.47%.
You can then follow up with another question to get the news of that particular stock:
What are the latest news about this stock that might cause the price movement?
Here are the latest news about Overstock.com (OSTK) that might have caused the price movement:
- Title: "Overstock's shares soar on successful 21.5 million bid for Bed Bath & Beyond assets" Source: MarketWatch Published Date: June 22, 2023 Summary: Overstock.com's shares experienced a significant increase after successfully winning a bid for Bed Bath & Beyond assets worth 21.5 million.
- Title: "Thinking about trading options or stock in Meta Platforms, Overstock.com, Walmart, Home Depot, or United Parcel Service?" Source: PR Newswire Published Date: June 22, 2023 Summary: This news article discusses the potential trading options and stocks, including Overstock.com, that investors may consider.
Please note that these news articles are for informational purposes only and may not be the sole reason for the price movement. It is always recommended to conduct thorough research and analysis before making any investment decisions.
Lastly, you can ask ChatGPT to add a new record to Airtable:
Can you add a record to Airtable with the stock ticker, price move and news summary?
I have added a record to Airtable with the following details:
Stock Ticker: OSTK Price Move: 17.47% News Summary: Overstock.com's shares experienced a significant increase after successfully winning a bid for Bed Bath & Beyond assets worth $21.5 million.
🎉🎉Voila! That's how you can create your own custom tool and use it with the OpenAI Function Agent!
Additional
Pass Session ID to Function
By default, Function in custom tool has access to the following flow configurations:
$flow.sessionId
$flow.chatId
$flow.chatflowId
$flow.input
Below is an example of sending the sessionId to Discord webhook:
{% tabs %} {% tab title="Javascript" %}
const fetch = require('node-fetch');
const webhookUrl = "https://discord.com/api/webhooks/1124783587267";
const content = $content; // captured from input schema
const sessionId = $flow.sessionId;

const body = {
	"content": `${mycontent} and the sessionid is ${sessionId}`
};

const options = {
	method: 'POST',
	headers: {
		'Content-Type': 'application/json'
	},
	body: JSON.stringify(body)
};

const url = `${webhookUrl}?wait=true`

try {
	const response = await fetch(url, options);
	const text = await response.text();
	return text;
} catch (error) {
	console.error(error);
	return '';
}
{% endtab %} {% endtabs %}
Pass variables to Function
In some cases, you would like to pass variables to custom tool function.
For example, you are creating a chatbot that uses a custom tool. The custom tool is executing a HTTP POST call and API key is needed for successful authenticated request. You can pass it as a variable.
By default, Function in custom tool has access to variables:
$vars.<variable-name>
Example of how to pass variables in aimicromind using API and Embedded:
{% tabs %} {% tab title="Javascript API" %}
async function query(data) {
    const response = await fetch(
        "http://localhost:3000/api/v1/prediction/<chatflow-id>",
        {
            method: "POST",
            headers: {
                "Content-Type": "application/json"
            },
            body: JSON.stringify(data)
        }
    );
    const result = await response.json();
    return result;
}

query({
    "question": "Hey, how are you?",
    "overrideConfig": {
        "vars": {
            "apiKey": "abc"
        }
    }
}).then((response) => {
    console.log(response);
});
{% endtab %}
{% tab title="Embed" %}
<script type="module">
    import Chatbot from 'https://cdn.jsdelivr.net/npm/aimicromind-embed/dist/web.js';
    Chatbot.init({
        chatflowid: 'chatflow-id',
        apiHost: 'http://localhost:3000',
        chatflowConfig: {
          vars: {
            apiKey: 'def'
          }
        }
    });
</script>
{% endtab %} {% endtabs %}
Example of how to receive the variables in custom tool:
{% tabs %} {% tab title="Javascript" %}
const fetch = require('node-fetch');
const webhookUrl = "https://discord.com/api/webhooks/1124783587267";
const content = $content; // captured from input schema
const sessionId = $flow.sessionId;
const apiKey = $vars.apiKey;

const body = {
	"content": `${mycontent} and the sessionid is ${sessionId}`
};

const options = {
	method: 'POST',
	headers: {
		'Content-Type': 'application/json',
		'Authorization': `Bearer ${apiKey}`
	},
	body: JSON.stringify(body)
};

const url = `${webhookUrl}?wait=true`

try {
	const response = await fetch(url, options);
	const text = await response.text();
	return text;
} catch (error) {
	console.error(error);
	return '';
}
{% endtab %} {% endtabs %}
Override Custom Tool
Parameters below can be overriden
| Parameter | Description |
|---|---|
| customToolName | tool name |
| customToolDesc | tool description |
| customToolSchema | tool schema |
| customToolFunc | tool function |
Example of an API call to override custom tool parameters:
{% tabs %} {% tab title="Javascript API" %}
async function query(data) {
    const response = await fetch(
        "http://localhost:3000/api/v1/prediction/<chatflow-id>",
        {
            method: "POST",
            headers: {
                "Content-Type": "application/json"
            },
            body: JSON.stringify(data)
        }
    );
    const result = await response.json();
    return result;
}

query({
    "question": "Hey, how are you?",
    "overrideConfig": {
        "customToolName": "example_tool",
        "customToolSchema": "z.object({title: z.string()})"
    }
}).then((response) => {
    console.log(response);
});
{% endtab %} {% endtabs %}
Import External Dependencies
You can import any built-in NodeJS modules and supported external libraries into Function.
- To import any non-supported libraries, you can easily add the new npm package to
package.jsoninpackages/componentsfolder.
cd aimicromind&& cd packages && cd components
pnpm add <your-library>
cd .. && cd ..
pnpm install
pnpm build
- Then, add the imported libraries to
TOOL_FUNCTION_EXTERNAL_DEPenvironment variable. Refer #builtin-and-external-dependencies for more details. - Start the app
pnpm start
- You can then use the newly added library in the JavaScript Function like so:
const axios = require('axios')
Watch how to add additional dependencies and import libraries (coming soon)
description: Wrapper around Exa Search API - search engine fully designed for use by LLMs.
Exa Search
Exa Search Node
The ExaSearch node is a wrapper around the Exa Search API, designed to be used as a tool within a larger system, likely for AI-powered applications. Exa is a search engine specifically optimized for use by Language Models (LLMs).
Parameters
Required
- Credential: An API key for Exa Search (credential type: exaSearchApi)
Optional
-
Tool Description: A custom description of the tool’s functionality (default provided)
-
Num of Results: Number of search results to return (default: 10, max varies by plan)
-
Search Type: Options include ‘keyword’, ‘neural’, or ‘magic’ (auto-decides between keyword and neural)
-
Use Auto Prompt: Boolean to enable query conversion to Exa format
-
Category: Specifies a data category to focus the search (e.g., company, research paper, news)
-
Include Domains: List of domains to include in the search
-
Exclude Domains: List of domains to exclude from the search
-
Start Crawl Date: ISO 8601 date to set the earliest crawl date for results
-
End Crawl Date: ISO 8601 date to set the latest crawl date for results
-
Start Published Date: ISO 8601 date to set the earliest publication date for results
-
End Published Date: ISO 8601 date to set the latest publication date for results
Input
The input to this node should be an Exa-optimized query string. If ‘Use Auto Prompt’ is enabled, the input can be a natural language query that will be converted to Exa format.
Output
The output is a JSON array containing the search results. Each result typically includes details such as the URL, title, snippet, and other metadata related to the search hit.
{% hint style="info" %} This section is a work in progress. We appreciate any help you can provide in completing this section. Please check our Contribution Guide to get started. {% endhint %}
description: >- Wrapper around Google Custom Search API - a real-time API to access Google search results.
Google Custom Search
 (1) (1) (1) (1) (1) (1) (1).png)
Google Custom Search Node
The Google Custom Search API node is a tool that provides access to Google’s Custom Search Engine (CSE) functionality. It allows users to perform programmatic searches using Google’s search technology, tailored to specific domains or content.
Parameters
The node doesn’t have any direct input parameters. Instead, it relies on credentials for authentication and configuration.
Credentials Required
-
Google API Key: Used for authentication with Google’s API services.
-
Google Custom Search Engine ID: Identifies the specific Custom Search Engine to be used.
Initialization
The node initializes by:
-
Retrieving credential data.
-
Extracting the Google API Key and Custom Search Engine ID from the credentials.
-
Creating and returning a new instance of GoogleCustomSearch with these parameters.
Base Classes
The node inherits from:
-
GoogleCustomSearchAPI
-
Any base classes of the GoogleCustomSearch class from the @langchain/community/tools/google_custom_search package.
Usage
This node is typically used in workflows or applications that require:
-
Targeted web searches within specific domains
-
Integration of Google search capabilities into custom applications
-
Automated information retrieval from the web
Input/Output
-
Input: No direct inputs are required for this node.
-
Output: Returns an initialized GoogleCustomSearch instance, which can be used to perform custom searches.
{% hint style="info" %} This section is a work in progress. We appreciate any help you can provide in completing this section. Please check our Contribution Guide to get started. {% endhint %}
description: Load OpenAPI specification.
OpenAPI Toolkit
 (1) (1) (1) (1) (1).png)
OpenAPI Toolkit Node
The Open API Toolkit node is a component that loads and initializes an Open API specification, creating a set of tools that can be used to interact with the API described by the specification.
Parameters
Inputs
- Language Model
- Description: The language model to be used with the OpenAPI toolkit
- YAML File
File Type: .yaml
- Description: The OpenAPI specification file in YAML format
Credential (Optional)
- Description: Only needed if the YAML OpenAPI Spec requires authentication
Functionality
-
Loads the provided YAML file containing the OpenAPI specification
-
Supports loading from base64-encoded string or file storage
-
Initializes the OpenApiToolkit with the loaded specification and provided language model
-
Handles authentication if credentials are provided
-
Returns a set of tools based on the OpenAPI specification
Usage
This node is used to create a toolkit of tools based on an OpenAPI specification. These tools can be used in various AI applications, such as chatbots or agents, to interact with the API described by the specification.
Output
The node returns an array of tools generated from the OpenAPI specification, which can be used in downstream nodes or processes.
Notes
-
The node supports loading YAML files from both base64-encoded strings and file storage systems
-
Authentication is handled through optional credentials, supporting Bearer token authentication
-
The node is designed to be flexible and can be integrated into various AI workflows that require API interaction based on OpenAPI specifications
{% hint style="info" %} This section is a work in progress. We appreciate any help you can provide in completing this section. Please check our Contribution Guide to get started. {% endhint %}
Code Interpreter by E2B
E2B is an open-source runtime for executing AI-generated code in secure cloud sandboxes. For example, when user asks to generate a bar graph of the data, LLM will output python code needed to plot the graph. This generated code will be sent to E2B, and the output of the execution will contains images of the graph, codes, text and etc. These outputs are sent back to LLM for final processing before getting displayed on the chat.
.png)
description: Read file from disk.
Read File
 (1) (1) (1) (1) (1).png)
Read File Node
The Read File node is a tool component designed to read files from the disk. It’s part of a larger system, likely a workflow or automation platform that deals with file operations.
Parameters
The node accepts one optional input parameter:
-
Base Path
-
Label: Base Path
-
Name: basePath
-
Type: string
-
Optional: true
-
Placeholder: C:\Users\User\Desktop
-
Description: The base directory path from which files will be read. If not provided, the default system path will be used.
-
Functionality
-
The node initializes a
code NodeFileStoreinstance, either with the provided base path or using the default path. -
It creates a
code ReadFileToolinstance, which is the core component for reading files. -
The
code ReadFileTooluses a schema to validate input, expecting acode file_pathstring. -
When called, the tool reads the contents of the specified file using the
code store.readFile()method.
Input/Output
-
Input: A file path (string) representing the file to be read.
-
Output: The contents of the file as a string.
Usage
This node is typically used in scenarios where file contents need to be accessed or processed within a workflow. For example:
-
Reading configuration files
-
Processing text files
-
Accessing data stored in files for further analysis or manipulation
Error Handling
While not explicitly shown in the code, users should be aware that file operations can throw errors (e.g., file not found, permission issues). Proper error handling should be implemented when using this node in a workflow.
Notes
-
The actual file reading operation is performed by the
code NodeFileStoreclass, which is not fully visible in the provided code snippet. -
This tool is designed to work within a larger system, likely integrating with other nodes or tools for complex workflows.
{% hint style="info" %} This section is a work in progress. We appreciate any help you can provide in completing this section. Please check our Contribution Guide to get started. {% endhint %}
description: Execute HTTP GET requests.
Request Get
Request Get Node
The Requests Get Tool is a component designed to execute HTTP GET requests within a larger system, It provides a way to integrate web-based data retrieval into workflows or agent-based systems.
Purpose
This tool allows agents or workflows to make HTTP GET requests to specified URLs, enabling the retrieval of data from web services or APIs. It can be used to fetch information dynamically as part of a larger process or decision-making system.
Input Parameters
-
URL
-
Type: string
-
Optional: Yes
-
Description: The exact URL to which the GET request will be made. If not provided, the agent may attempt to determine it from an AIPlugin (if available).
-
-
Description
-
Type: string
-
Optional: Yes
-
Default: Provided by desc variable (not shown in the given code)
-
Description: Acts as a prompt to guide the agent on when to use this tool. It helps in decision-making processes for tool selection.
-
-
Headers
-
Type: JSON
-
Optional: Yes
-
Description: Additional HTTP headers to be included in the request.
-
Initialization
The text init method prepares the tool for use by:
-
Parsing the input parameters (URL, description, and headers).
-
Creating a
text RequestParametersobject with the provided inputs. -
Instantiating and returning a new
text RequestsGetToolwith the prepared parameters.
Usage in AI Systems
This tool is likely part of a larger AI or automation system where:
-
An agent or workflow manager can dynamically decide when to use this tool based on the provided description.
-
The tool can be used to fetch data from web services as part of a larger task or information gathering process.
-
The flexibility in URL and headers allows for interaction with various APIs and web services.
{% hint style="info" %} This section is a work in progress. We appreciate any help you can provide in completing this section. Please check our Contribution Guide to get started. {% endhint %}
description: Execute HTTP POST requests.
Request Post
Request Post Node
The Requests Post node is a tool for executing HTTP POST requests within a larger system, likely an AI-powered application or workflow.
Input Parameters
- URL
-
Type: string
-
Optional: Yes
-
Description: The exact URL to which the POST request will be made. If not specified, the agent will attempt to determine it from an AIPlugin if provided.
- Body
-
Type: JSON
-
Optional: Yes
-
Description: The JSON body for the POST request. If not specified, the agent will attempt to determine it from an AIPlugin if provided.
- Description
-
Type: string
-
Optional: Yes
-
Default: A predefined description (stored in the desc variable)
-
Description: Acts as a prompt to inform the agent when it should use this tool.
- Headers
-
Type: JSON
-
Optional: Yes
-
Description: HTTP headers to be included with the request.
Initialization
The node’s code init method processes the input data and creates a new RequestsPostTool instance with the following steps:
-
Extracts input parameters (headers, URL, description, and body)
-
Parses JSON inputs for headers and body if they are provided as strings
-
Constructs a RequestParameters object with the processed inputs
-
Returns a new RequestsPostTool instance initialized with the RequestParameters
Usage
This node is designed to be used within a larger system, likely as part of an AI-powered workflow. It provides a flexible way to make HTTP POST requests, either with explicitly provided parameters or by allowing an AI agent to determine the necessary details.
The node can be particularly useful in scenarios such as:
-
Sending data to external APIs
-
Updating remote resources
-
Triggering actions in other systems
-
Integrating with web services that require POST requests
By providing a description, the node can guide an AI agent on when and how to use this tool, making it a versatile component in automated workflows or AI-driven applications.
{% hint style="info" %} This section is a work in progress. We appreciate any help you can provide in completing this section. Please check our Contribution Guide to get started. {% endhint %}
description: Use a retriever as allowed tool for agent.
Retriever Tool
 (1) (1) (1) (1).png)
Retriever Tool Node
{% hint style="info" %} This section is a work in progress. We appreciate any help you can provide in completing this section. Please check our Contribution Guide to get started. {% endhint %}
description: Real-time API for accessing Google Search data.
SearchApi
 (1) (1) (1) (1).png)
SearchApi Node
The SearchAPI Tool is a component that provides real-time access to Google Search data. It integrates the SearchApi from the LangChain community tools into the node-based system.
Usage
This node is used to integrate Google Search capabilities into a larger workflow or system. It allows users to perform real-time searches and retrieve data from Google Search, which can be useful for various applications such as:
-
Information gathering
-
Data enrichment
-
Content research
-
Automated web searching
Input/Output
-
Input: No specific inputs are required for initialization. The necessary API key is obtained from the credentials.
-
Output: An initialized SearchApi instance that can be used to perform Google searches.
Notes
-
This tool requires valid credentials to be set up with a SearchAPI key.
-
It’s part of a larger node-based system, likely for building workflows or pipelines involving various AI and data processing tools.
{% hint style="info" %} This section is a work in progress. We appreciate any help you can provide in completing this section. Please check our Contribution Guide to get started. {% endhint %}
description: Wrapper around SearXNG - a free internet metasearch engine.
SearXNG
SearXNG Node
Setup SearXNG
Follow official documentation for setting up SearXNG locally. In this case, we will be using Docker Compose to set it up.
Navigate to searxng-docker repository and follow the setup instructions.
Make sure that you have server.limiter set to false and json is included in search.formats. These parameters can be defined in searxng/settings.yml :
server:
  limiter: false
general:
  debug: true
search:
  formats:
    - html
    - json
docker-compose up -d to start the container. Open web browser and go to http://localhost:8080/search, you will be able to see SearXNG page.
Using in AiMicromind
Drag and drop SearXNG node onto canvas. Fill in the Base URL as http://localhost:8080. You can also specify other search parameters if needed. LLM will automatically figure out what to use for the search query question.
.png)
description: Wrapper around SerpAPI - a real-time API to access Google search results.
Serp API
 (1) (1).png)
The SerpAPI Tool Node is a wrapper around the SerpAPI service, which provides real-time access to Google search results. This node is part of a larger system for building AI-powered applications, likely within a visual programming or node-based environment.
Parameters
This node doesn't have any additional input parameters beyond the required credential.
Initialization
The text init method is responsible for setting up the SerpAPI tool:
-
It retrieves the credential data associated with the node.
-
Extracts the SerpAPI key from the credential data.
-
Creates and returns a new instance of the SerpAPI class using the extracted API key.
Usage
The SerpAPI Tool Node is used to integrate Google search capabilities into AI workflows. It allows the AI to perform web searches and retrieve up-to-date information from the internet. This can be particularly useful for:
-
Answering questions that require current information
-
Fact-checking or verification tasks
-
Gathering data for research or analysis
-
Enhancing the knowledge base of language models with real-time web data
Note
To use this node, you must have a valid SerpAPI key stored in the system's credential manager under the name 'serpApi'. Ensure that you have an active subscription to SerpAPI and that your usage complies with their terms of service.
{% hint style="info" %} This section is a work in progress. We appreciate any help you can provide in completing this section. Please check our Contribution Guide to get started. {% endhint %}
description: Wrapper around Serper.dev - Google Search API.
Serper
 (1) (1).png)
Serper Node
The Serper node is a wrapper around the Serper.dev Google Search API. It provides a tool for performing Google searches within your application.
Parameters
This node doesn't have any input parameters specific to its functionality. However, it requires a credential to be connected:
Input/Output
-
The node doesn't have any specific inputs defined in the inputs array.
-
The main input it requires is the Serper API key, which is obtained through the connected credential.
-
Output is not explicitly defined in this class, but it will return a new instance of the Serper class from the @langchain/community/tools/serper package.
Functionality
The Serper node initializes a Serper tool that can be used for Google searches. Here’s how it works:
-
When initialized, it retrieves the credential data associated with the node.
-
It extracts the Serper API key from the credential data.
-
It creates and returns a new instance of the Serper class, passing the API key as a parameter.
Usage
This node is typically used as part of a larger workflow where Google search functionality is needed. It can be combined with other nodes to create more complex search and information retrieval systems.
{% hint style="info" %} This section is a work in progress. We appreciate any help you can provide in completing this section. Please check our Contribution Guide to get started. {% endhint %}
description: Wrapper around TavilyAI API - real-time, accurate search results tailored for LLMs and RAG.
TavilyAI
Tavily Node
Setup
-
To add the Tavily API node. click the Add Nodes button, LangChain > Tools > Tavily API
-
Create credentials for Tavily. Refer to the official guide on how to get the Tavily API key.
- You can now connect this node to any node that accepts tool inputs to get real-time search results.
description: Gives agent the ability to visit a website and extract information.
Web Browser
 (1) (1).png)
Web Browser Node
The Web Browser tool is a component that gives an AI agent the ability to visit a website and extract information. It is implemented as a node in a larger system, likely for AI-powered web browsing and information retrieval.
Parameters
The Web Browser tool requires two input parameters:
-
Language Model
-
Label: Language Model
-
Name: model
-
Type: BaseLanguageModel
-
-
Embeddings
-
Label: Embeddings
-
Name: embeddings
-
Type: Embeddings
-
Functionality
The tool initializes a WebBrowser instance from the langchain library, which combines a language model and embeddings to process and understand web content.
Usage
This tool is typically used as part of a larger AI system or agent. It allows the agent to:
-
Visit specified web pages
-
Extract text and other information from those pages
-
Process and understand the content using the provided language model and embeddings
Integration
This tool can be integrated into AI workflows that require web browsing capabilities. It’s particularly useful for:
-
Information gathering tasks
-
Web scraping
-
Real-time data analysis from web sources
Notes
-
The effectiveness of this tool depends on the quality of the provided language model and embeddings.
-
Proper error handling and rate limiting should be implemented when using this tool to respect website policies and prevent overloading servers.
{% hint style="info" %} This section is a work in progress. We appreciate any help you can provide in completing this section. Please check our Contribution Guide to get started. {% endhint %}
description: Write file to disk.
Write File
 (1) (1).png)
Write File Node
The WriteFile node is a tool component that allows writing text content to files on the disk. It’s part of a larger system, likely a node-based workflow or automation tool.
Parameters
The node accepts one optional input parameter:
-
Base Path
-
Label: Base Path
-
Name: basePath
-
Type: string
-
Optional: true
-
Placeholder: C:\Users\User\Desktop
-
Description: The base directory path for file operations. If not provided, a default path will be used.
-
Functionality
This node creates a code WriteFileTool instance, which is a structured tool for writing files. It uses a code NodeFileStore to handle the actual file operations.
Input/Output
-
Input:
-
file_path: A string representing the name or path of the file to be written.
-
text: A string containing the content to be written to the file.
-
-
Output:
- A success message: "File written to successfully."
Usage
The WriteFile node is used when you need to save text content to a file as part of a workflow or process. It can be useful for:
-
Saving generated content
-
Logging information
-
Creating or updating configuration files
-
Exporting data from other nodes or processes
Notes
-
Ensure that the process has the necessary permissions to write to the specified locations.
-
Be cautious when using this tool, as it can overwrite existing files.
-
The actual file path used will be a combination of the optional base path and the provided file_path in the tool's input.
{% hint style="info" %} This section is a work in progress. We appreciate any help you can provide in completing this section. Please check our Contribution Guide to get started. {% endhint %}
description: LangChain Vector Store Nodes
Vector Stores
A vector store or vector database refers to a type of database system that specializes in storing and retrieving high-dimensional numerical vectors. Vector stores are designed to efficiently manage and index these vectors, allowing for fast similarity searches.
Watch an intro on Vector Stores and how you can use that on AiMicromind (coming soon)
Vector Store Nodes:
- AstraDB
- Chroma
- Couchbase
- Elastic
- Faiss
- In-Memory Vector Store
- Milvus
- MongoDB Atlas
- OpenSearch
- Pinecone
- Postgres
- Qdrant
- Redis
- SingleStore
- Supabase
- Upstash Vector
- Vectara
- Weaviate
- Zep Collection - Open Source
- Zep Collection - Cloud
AstraDB
Setup
- Register an account on AstraDB
- Login to portal. Create a Database
 (1) (1) (1) (1) (1) (1) (2) (1).png)
- Choose Serverless (Vector), fill in the Database name, Provider, and Region
 (1) (1) (1) (1) (1) (1) (2) (1) (1).png)
- After database has been setup, grab the API Endpoint, and generate Application Token
- Create a new collection, select the desired dimenstion and similarity metric:
 (1) (1) (1) (1) (2) (1).png)
- Back to aimicromind canvas, drag and drop Astra node. Click Create New from the Credentials dropdown:
 (1) (1) (1) (1) (2).png)
- Specify the API Endpoint and Application Token:
 (1) (1) (1) (1) (2).png)
- You can now upsert data to AstraDB
 (1) (1) (1) (1) (1) (1) (2).png)
- Navigate back to Astra portal, and to your collection, you will be able to see all the data that has been upserted:
 (1) (1) (1) (1) (1) (2).png)
- Start querying!
 (1) (1) (1) (1) (1) (1) (1) (1) (1) (1).png)
Chroma
Prerequisite
- Download & Install Docker and Git
- Clone Chroma's repository with your terminal
git clone https://github.com/chroma-core/chroma.git
- Change directory path to your cloned Chroma
cd chroma
- Run docker compose to build up Chroma image and container
docker compose up -d --build
- If success, you will be able to see the docker images spun up:
 (1) (3).png)
Setup
| Input | Description | Default |
|---|---|---|
| Document | Can be connected with nodes from Document Loader | |
| Embeddings | Can be connected with nodes from Embeddings | |
| Collection Name | Chroma collection name. Refer to here for naming convention | |
| Chroma URL | Specify the URL of your chroma instance | http://localhost:8000 |
 (1) (1) (1) (1) (2).png)
Additional
If you are running both aimicromind and Chroma on Docker, there are additional steps involved.
- Spin up Chroma docker first
docker compose up -d --build
- Open
docker-compose.ymlin AiMicromind
cd aimicromind&& cd docker
- Modify the file to:
version: '3.1'

services:
    aimicromind:
        image: aimicromind/aimicromind
        restart: always
        environment:
            - PORT=${PORT}
            - AIMICROMIND_USERNAME=${AIMICROMIND_USERNAME}
            - AIMICROMIND_PASSWORD=${AIMICROMIND_PASSWORD}
            - DEBUG=${DEBUG}
            - DATABASE_PATH=${DATABASE_PATH}
            - APIKEY_PATH=${APIKEY_PATH}
            - SECRETKEY_PATH=${SECRETKEY_PATH}
            - AIMICROMIND_SECRETKEY_OVERWRITE=${AIMICROMIND_SECRETKEY_OVERWRITE}
            - LOG_PATH=${LOG_PATH}
            - LOG_LEVEL=${LOG_LEVEL}
            - EXECUTION_MODE=${EXECUTION_MODE}
        ports:
            - '${PORT}:${PORT}'
        volumes:
            - ~/.aimicromind:/root/.aimicromind
        networks:
            - aimicromind_net
        command: /bin/sh -c "sleep 3; aimicromind start"
networks:
    aimicromind_net:
        name: chroma_net
        external: true
- Spin up aimicromind docker image
docker compose up -d
- On the Chroma URL, for Windows and MacOS Operating Systems specify http://host.docker.internal:8000. For Linux based systems the default docker gateway should be used since host.docker.internal is not available: http://172.17.0.1:8000
 (5).png)
Resources
description: >- Upsert embedded data and perform vector search upon query using Couchbase, a NoSQL cloud developer data platform for critical, AI-powered applications.
Couchbase
Prerequisite
Requirements
-
Couchbase Cluster (Self Managed or Capella) version 7.6+ with Search Service.
-
Capella Setup: To know more about connecting to your Capella cluster, please follow the instructions.
Specifically, you need to do the following:
- Create the database credentials to access cluster.
- Allow access to the Cluster from the IP on which the application is running.
Self Managed Setup:
- Follow Couchbase Installation Options for installing the latest Couchbase Database Server Instance. Make sure to add the Search Service.
-
Search Index Creation on the Full Text Service in Couchbase.
Importing Search Index
Couchbase Capella
Follow these steps to import a Search Index in Capella:
- Copy the index definition to a new file named
index.json. - Import the file in Capella following the instructions in the documentation.
- Click Create Index to finalize the index creation.
Couchbase Server
Follow these steps for Couchbase Server:
- Navigate to Search → Add Index → Import.
- Copy the provided Index definition into the Import screen.
- Click Create Index to finalize the index creation.
You may also create a vector index using Search UI on both Couchbase Capella and Couchbase Self Managed Server.
Index Definition
Here, we are creating the index vector-index on the documents. The Vector field is set to embedding with 1536 dimensions and the text field set to text. We are also indexing and storing all the fields under metadata in the document as a dynamic mapping to account for varying document structures. The similarity metric is set to dot_product. If there is a change in these parameters, please adapt the index accordingly.
{
  "name": "vector-index",
  "type": "fulltext-index",
  "params": {
    "doc_config": {
      "docid_prefix_delim": "",
      "docid_regexp": "",
      "mode": "scope.collection.type_field",
      "type_field": "type"
    },
    "mapping": {
      "default_analyzer": "standard",
      "default_datetime_parser": "dateTimeOptional",
      "default_field": "_all",
      "default_mapping": {
        "dynamic": true,
        "enabled": false
      },
      "default_type": "_default",
      "docvalues_dynamic": false,
      "index_dynamic": true,
      "store_dynamic": false,
      "type_field": "_type",
      "types": {
        "_default._default": {
          "dynamic": true,
          "enabled": true,
          "properties": {
            "embedding": {
              "enabled": true,
              "dynamic": false,
              "fields": [
                {
                  "dims": 1536,
                  "index": true,
                  "name": "embedding",
                  "similarity": "dot_product",
                  "type": "vector",
                  "vector_index_optimized_for": "recall"
                }
              ]
            },
            "metadata": {
              "dynamic": true,
              "enabled": true
            },
            "text": {
              "enabled": true,
              "dynamic": false,
              "fields": [
                {
                  "index": true,
                  "name": "text",
                  "store": true,
                  "type": "text"
                }
              ]
            }
          }
        }
      }
    },
    "store": {
      "indexType": "scorch",
      "segmentVersion": 16
    }
  },
  "sourceType": "gocbcore",
  "sourceName": "pdf-chat",
  "sourceParams": {},
  "planParams": {
    "maxPartitionsPerPIndex": 64,
    "indexPartitions": 16,
    "numReplicas": 0
  }
}
Setup
- Add a new Couchbase node on canvas and fill in the Bucket Name, Scope Name, Collection Name and Index Name
- Add new credential and fill in the parameters:
- Couchbase Connection String
- Cluster Username
- Cluster Password
- Add additional nodes to canvas and start the upsert process
- Document can be connected with any node under Document Loader category
- Embeddings can be connected with any node under Embeddings category
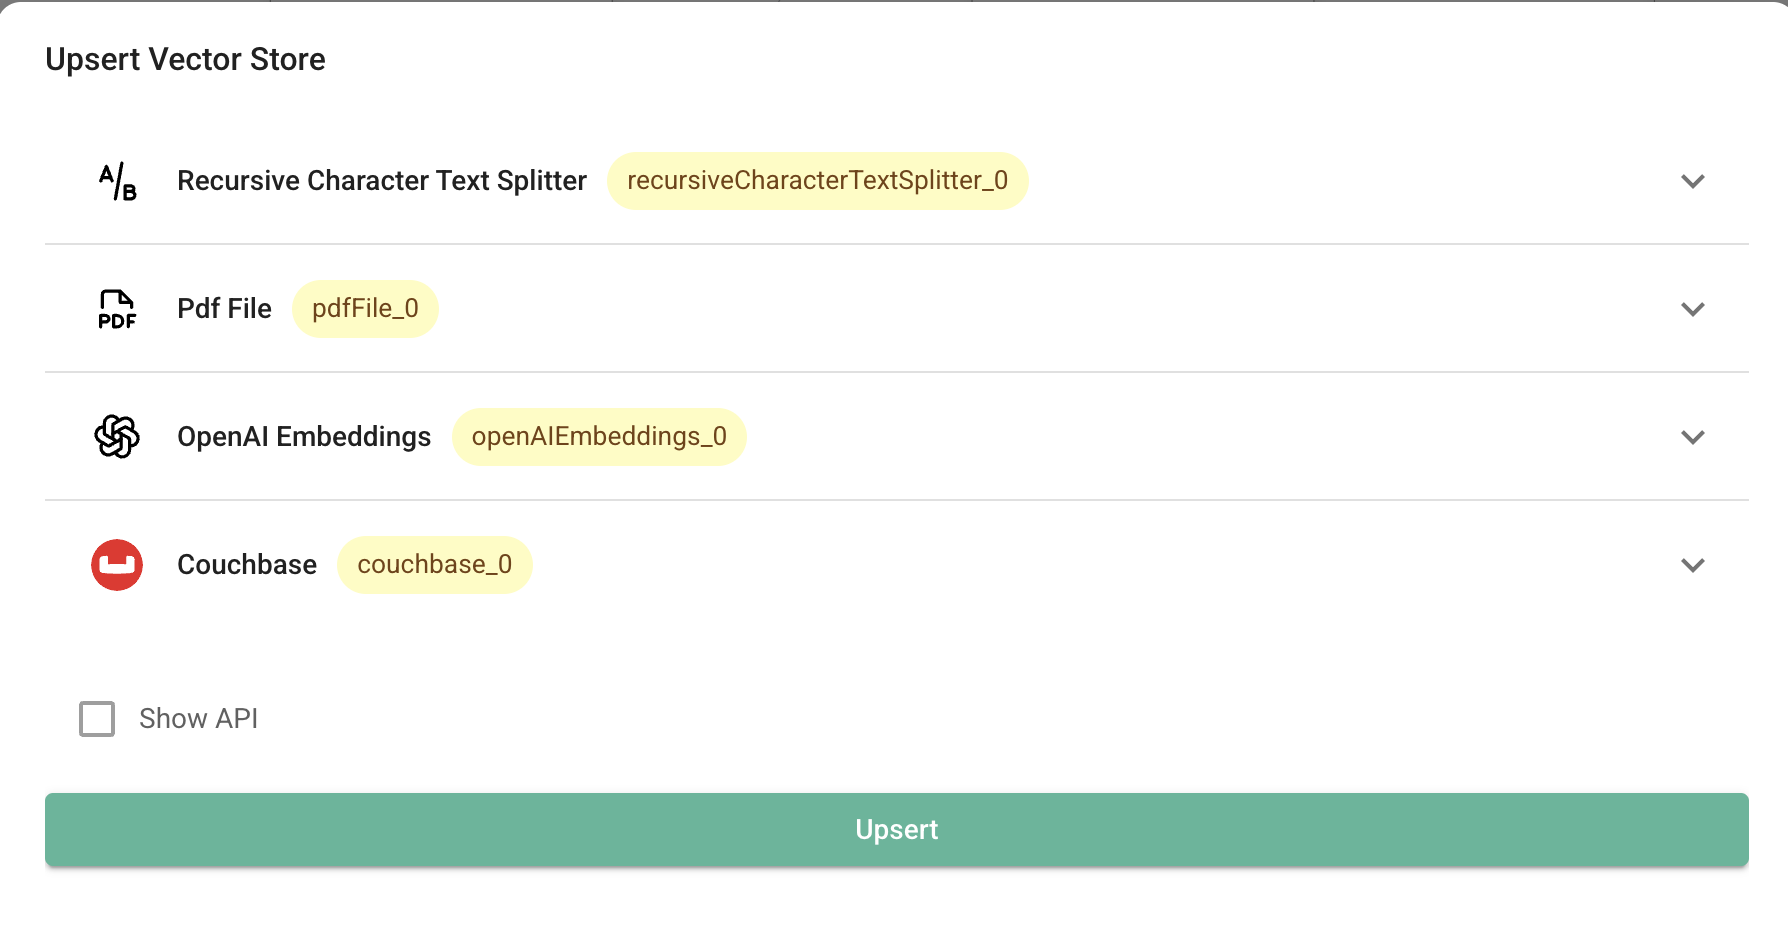
- Verify from the Couchbase UI to see if data has been successfully upserted!
Resources
- LangChain Couchbase vectorstore integrations
- Refer to the Couchbase Documentation to learn about Couchbase.
Elastic
Prerequisite
- You can use the official Docker image to get started, or you can use Elastic Cloud, Elastic's official cloud service. In this guide, we will be using cloud version.
- Register an account or login with existing account on Elastic cloud.
- Click Create deployment. Then, name your deployment, and choose the provider.
- After deployment is finished, you should be able to see the setup guides as shown below. Click the Set up vector search option.
- You should now see the Getting started page for Vector Search.
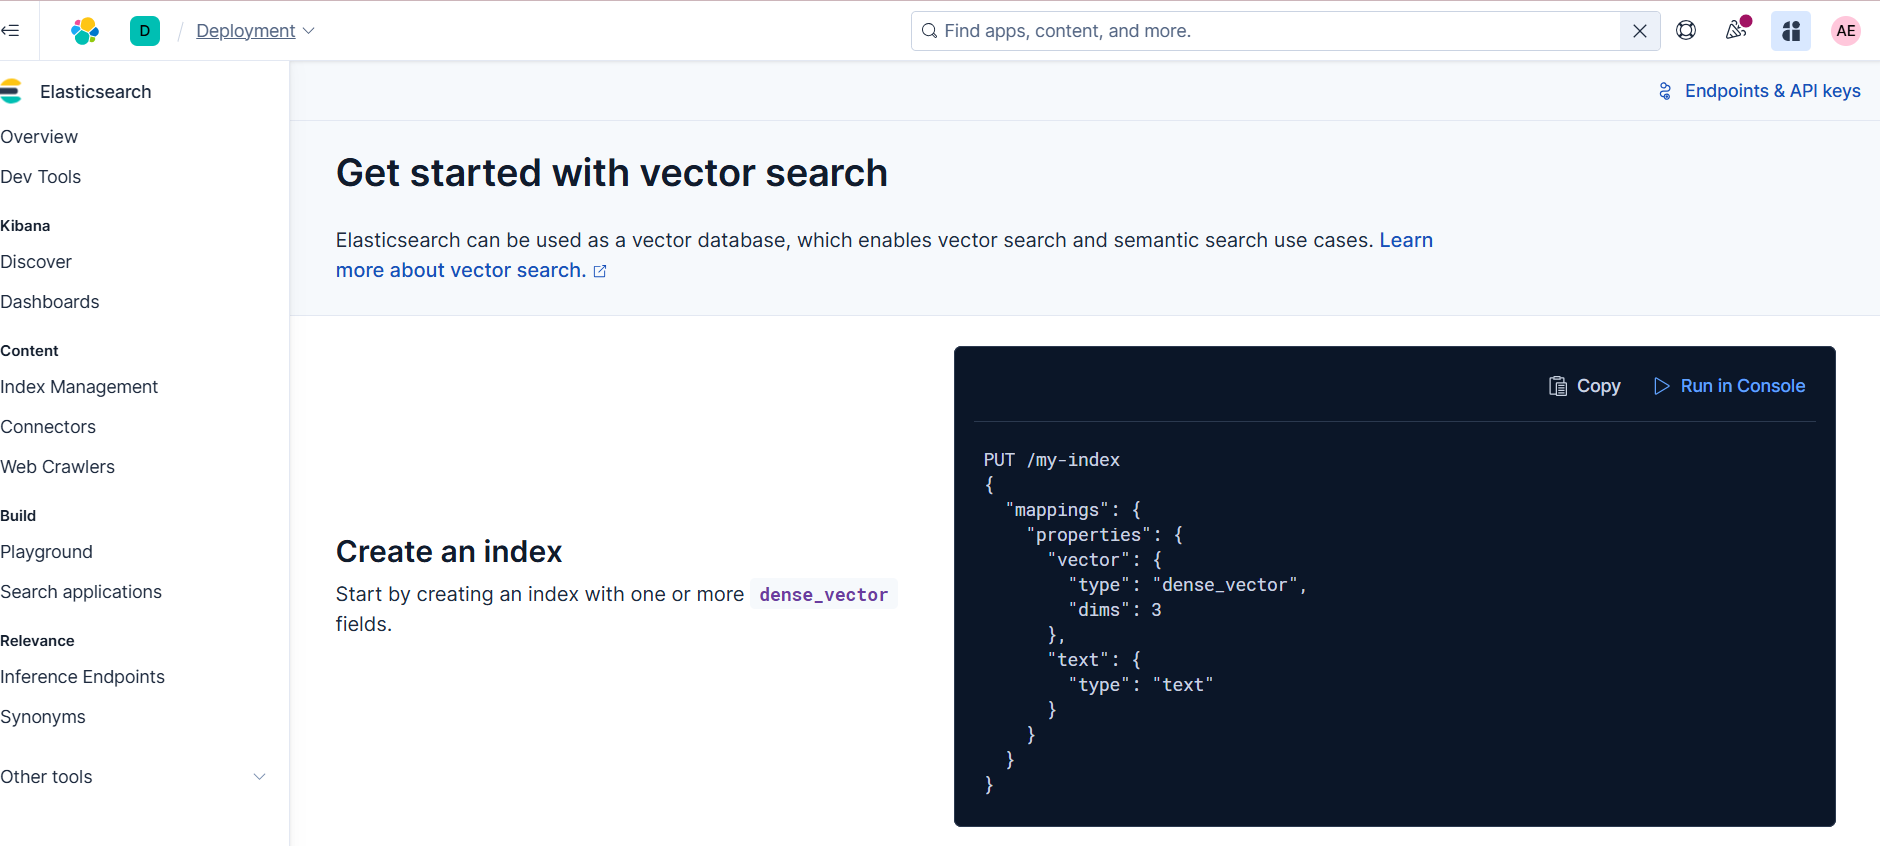
- On the left hand side bar, click Indices. Then, Create a new index.

- Select API ingestion method

- Name your search index name, then Create Index
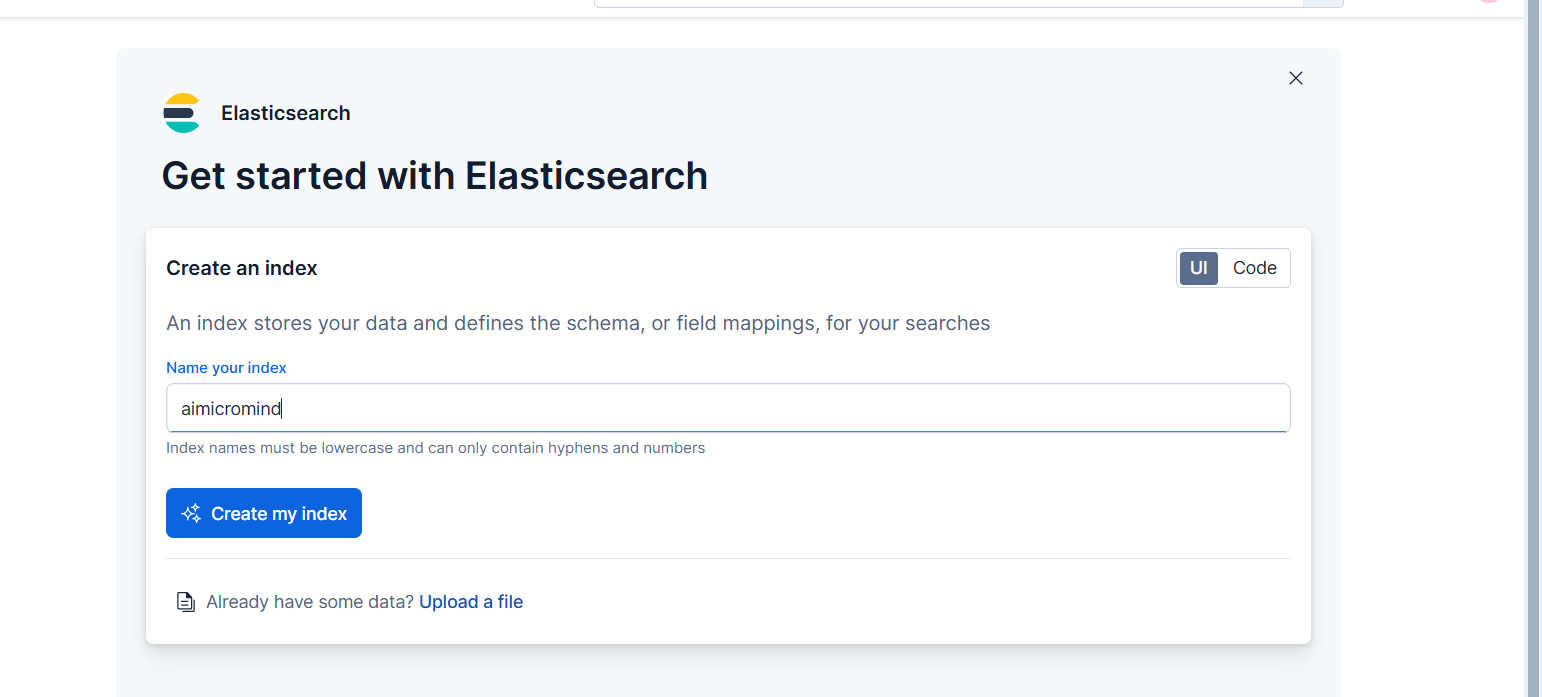
- After the index has been created, generate a new API key, take note of both generated API key and the URL
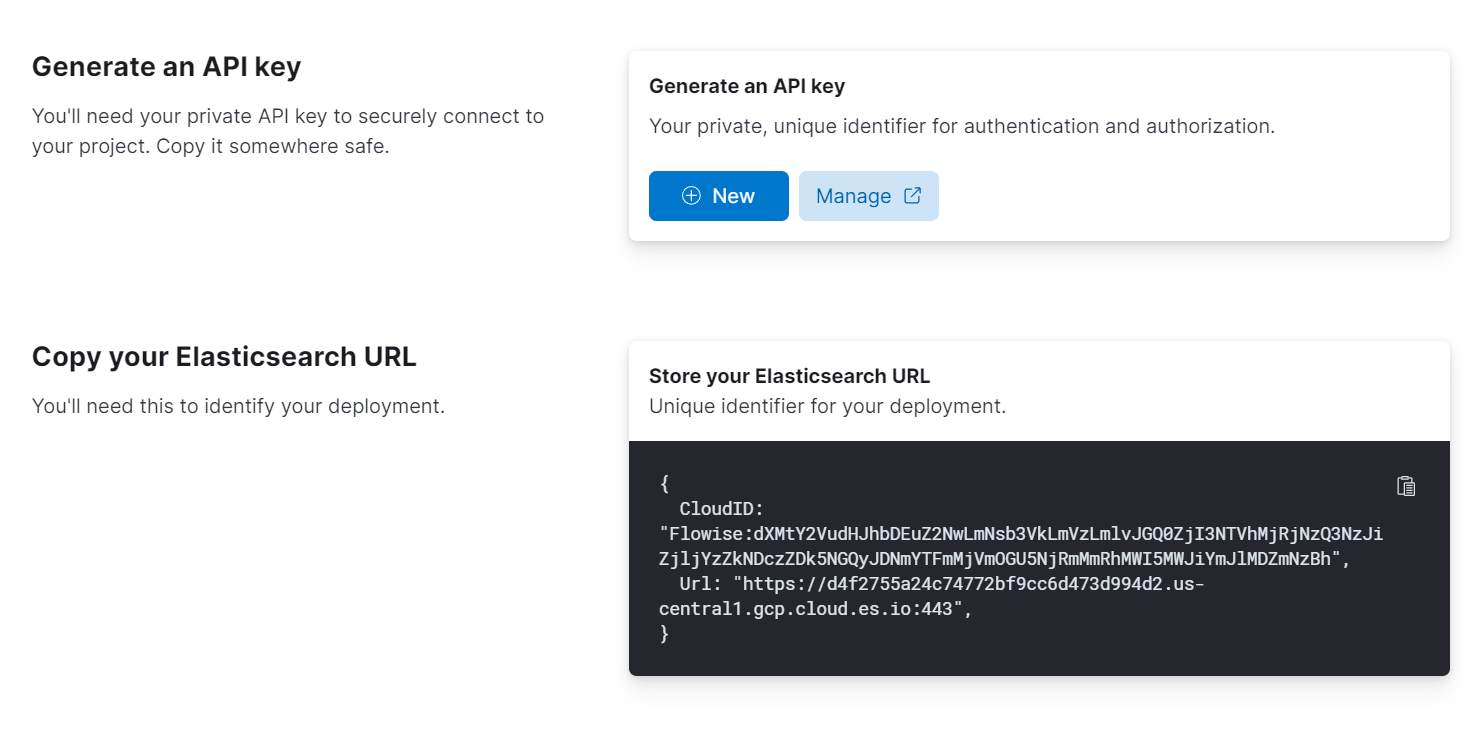
AiMicromind Setup
- Add a new Elasticsearch node on canvas and fill in the Index Name
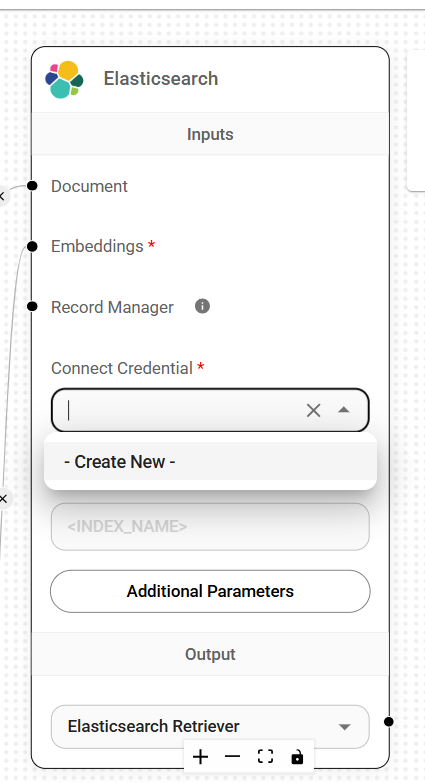
- Add new credential via Elasticsearch API
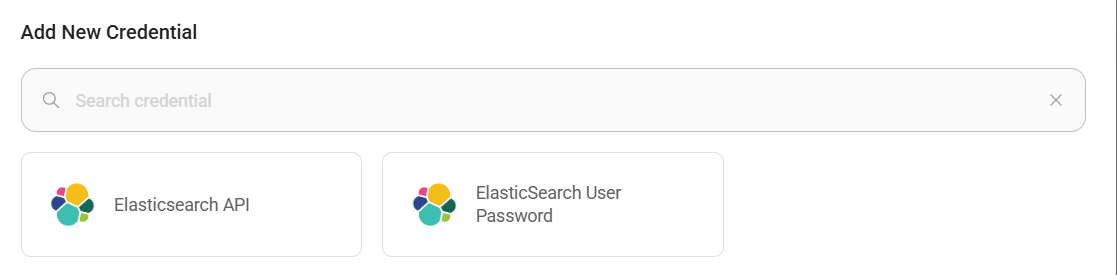
- Take the URL and API Key from Elasticsearch, fill in the fields
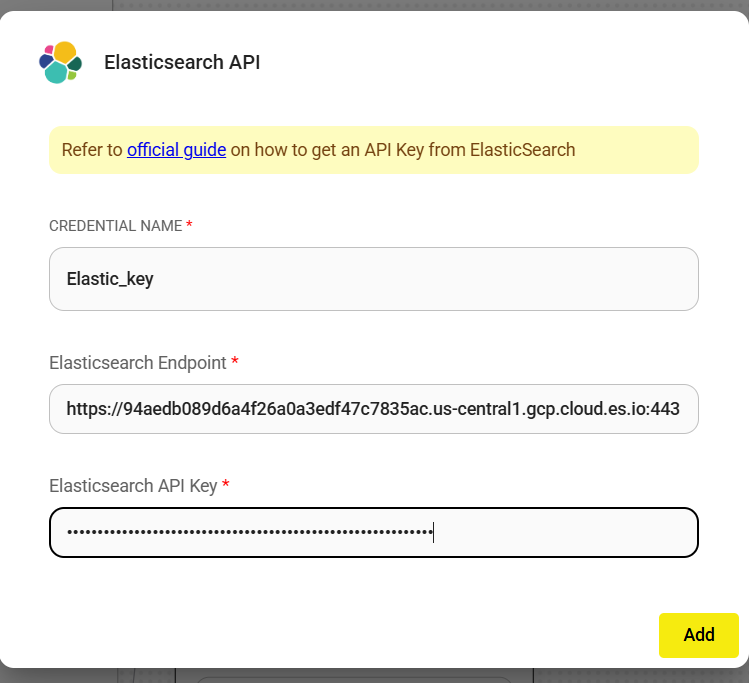
- After credential has been created successfully, you can start upserting the data
 (1) (1).png)
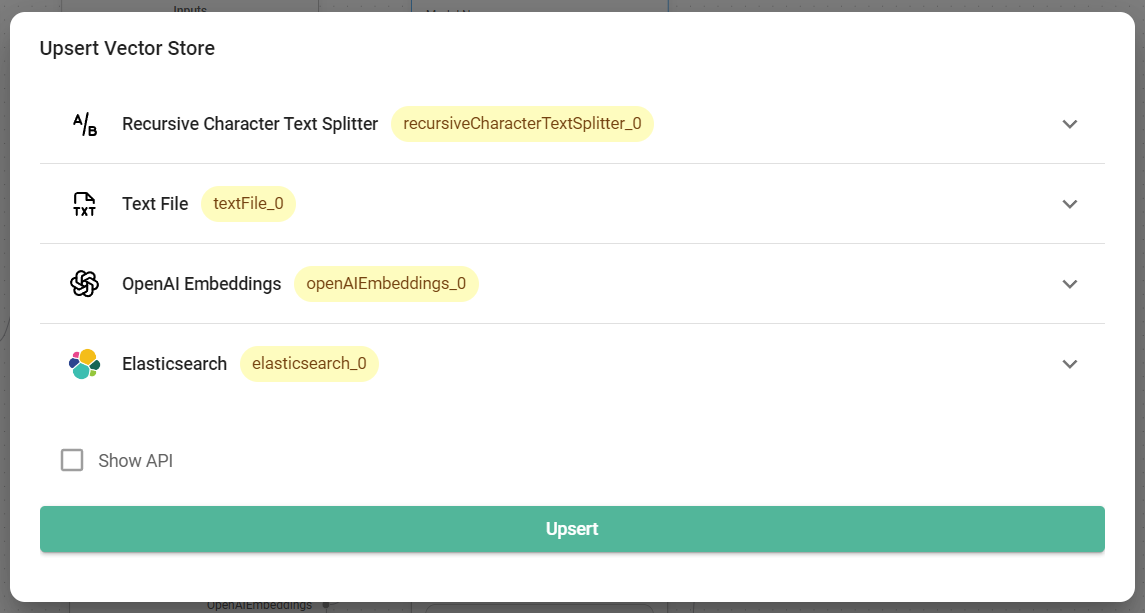
- After data has been upserted successfully, you can verify it from Elastic dashboard:
 (1) (1) (1) (1) (1) (2) (1).png)
- Voila! You can now start asking question in the chat
 (1) (1) (1) (1) (1) (1) (2) (1).png)
Resources
description: >- Upsert embedded data and perform similarity search upon query using Faiss library from Meta.
Faiss
.png)
Faiss Node
{% hint style="info" %} This section is a work in progress. We appreciate any help you can provide in completing this section. Please check our Contribution Guide to get started. {% endhint %}
description: >- In-memory vectorstore that stores embeddings and does an exact, linear search for the most similar embeddings.
In-Memory Vector Store
.png)
In-Memory Vector Store Node
{% hint style="info" %} This section is a work in progress. We appreciate any help you can provide in completing this section. Please check our Contribution Guide to get started. {% endhint %}
description: >- Upsert embedded data and perform similarity search upon query using Milvus, world's most advanced open-source vector database.
Milvus
.png)
Milvus Node
{% hint style="info" %} This section is a work in progress. We appreciate any help you can provide in completing this section. Please check our Contribution Guide to get started. {% endhint %}
description: >- Upsert embedded data and perform similarity or mmr search upon query using MongoDB Atlas, a managed cloud mongodb database.
MongoDB Atlas
.png)
MongoDB Atlas Node
Cluster Configuration
To set up a MongoDB Atlas cluster, go to the MongoDB Atlas website and sign up if you don’t have an account. When prompted, create and name your cluster, which will appear under the Database section. Then, select "Browse Collections" to either create a new collection or use one from the sample data provided.
{% hint style="warning" %} Ensure the cluster you create is version 7.0 or higher. {% endhint %}
Creating Index
After setting up your cluster, the next step is to create an index for the collection field you intend to search.
- Go to the Atlas Search tab and click on Create Search Index.
- Select Atlas Vector Search - JSON Editor, choose the appropriate database and collection, and then paste the following into the text box:
{
  "fields": [
    {
      "numDimensions": 1536,
      "path": "embedding",
      "similarity": "euclidean",
      "type": "vector"
    }
  ]
}
Make sure the numDimensions property corresponds to the dimensionality of the embeddings you're using. For instance, Cohere embeddings typically have 1024 dimensions, while OpenAI embeddings have 1536 by default.
Note: The vector store expects certain default values, such as:
- An index name of
default - A collection field name of
embedding - A raw text field name of
text
Ensure you initialize the vector store with field names that match your index and collection schema, as shown in the example above.
Once this is done, proceed to build the index.
{% hint style="info" %} This section is a work in progress. We appreciate any help you can provide in completing this section. Please check our Contribution Guide to get started. {% endhint %}
AiMicromind Configuration
Drag and drop the MongoDB Atlas Vector Store, and add a new credential. Use the connection string provided from the MongoDB Atlas dashboard:
 (1) (1) (1) (1) (1) (1).png)
Fill in the rest of the fields:
 (1) (1) (1) (1) (1) (1) (1).png)
You may also configure more details from Additional Parameters:
.png)
description: >- Upsert embedded data and perform similarity search upon query using OpenSearch, an open-source, all-in-one vector database.
OpenSearch
.png)
OpenSearch Node
{% hint style="info" %} This section is a work in progress. We appreciate any help you can provide in completing this section. Please check our Contribution Guide to get started. {% endhint %}
description: >- Upsert embedded data and perform similarity search upon query using Pinecone, a leading fully managed hosted vector database.
Pinecone
Prerequisite
- Register an account for Pinecone
- Click Create index
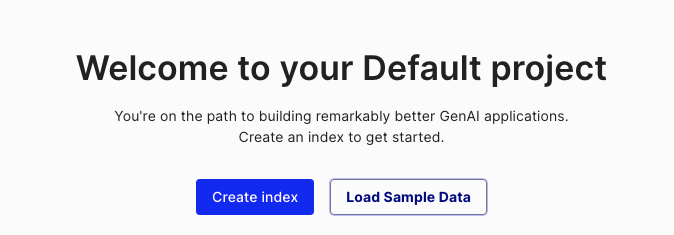
- Fill in required fields:
- Index Name, name of the index to be created. (e.g. "aimicromind-test")
- Dimensions, size of the vectors to be inserted in the index. (e.g. 1536)

- Click Create Index
Setup
- Get/Create your API Key
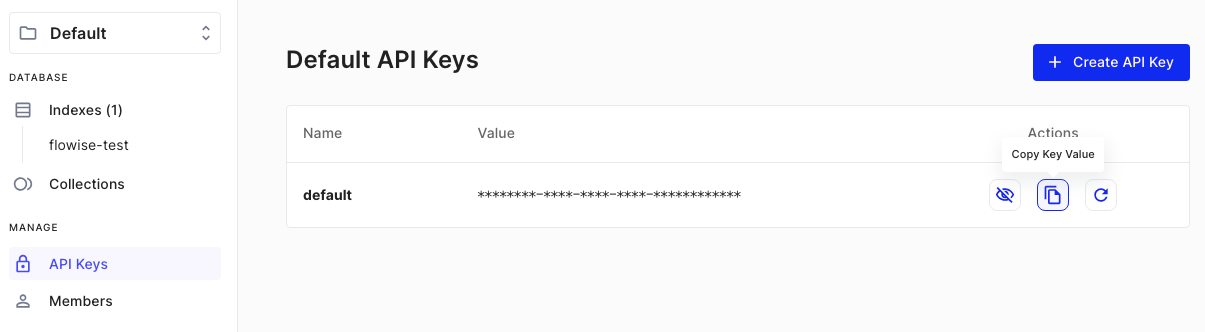
- Add a new Pinecone node to canvas and fill in the parameters:
- Pinecone Index
- Pinecone namespace (optional)
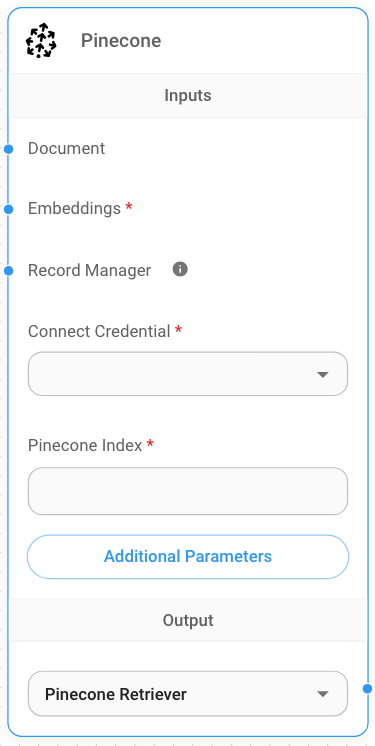
- Create new Pinecone credential -> Fill in API Key
- Add additional nodes to canvas and start the upsert process
- Document can be connected with any node under Document Loader category
- Embeddings can be connected with any node under Embeddings category
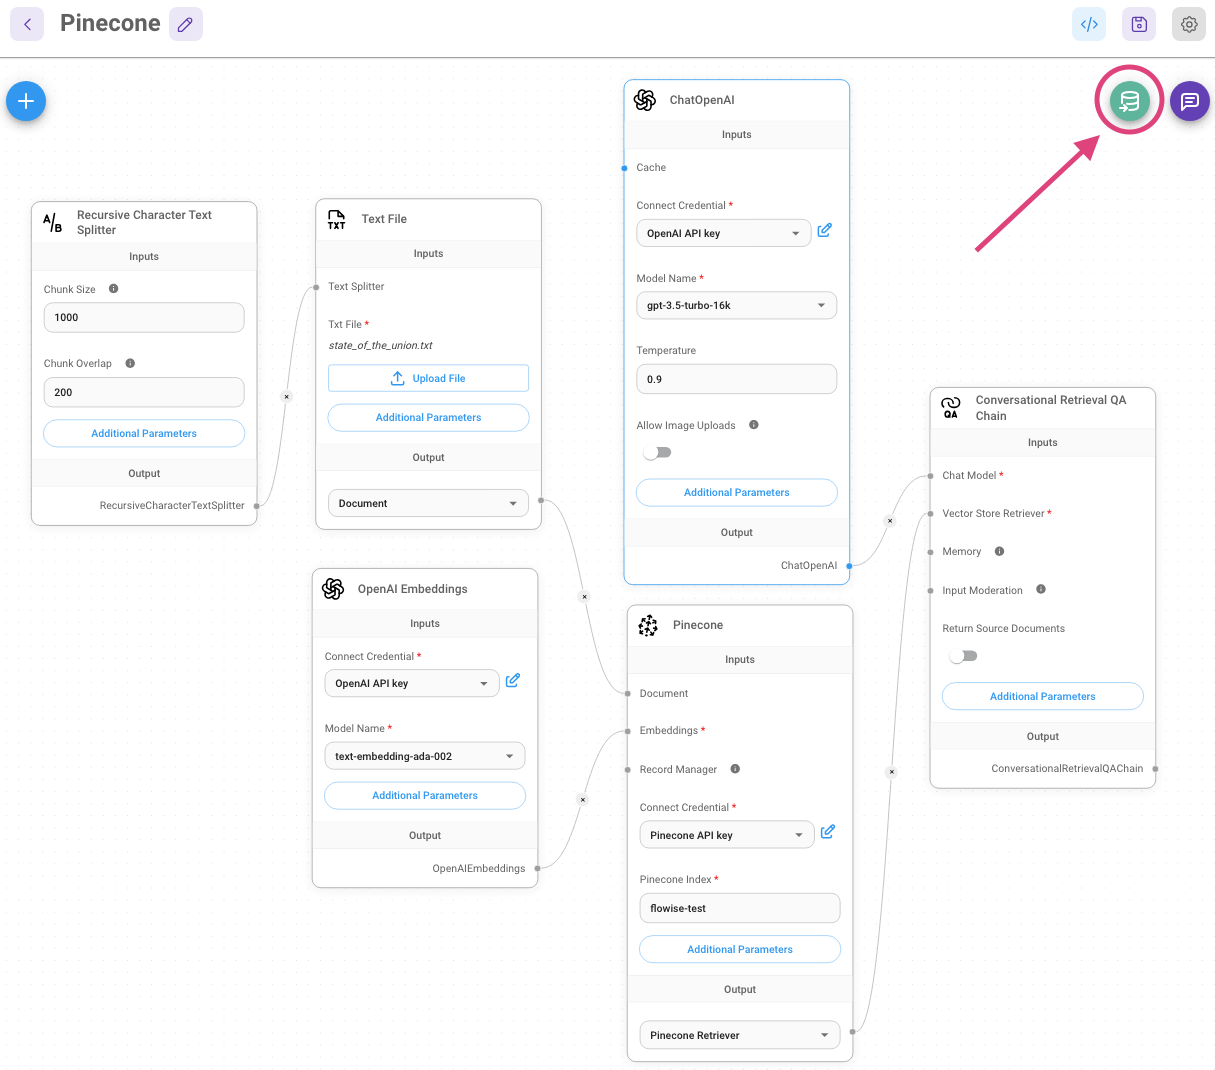
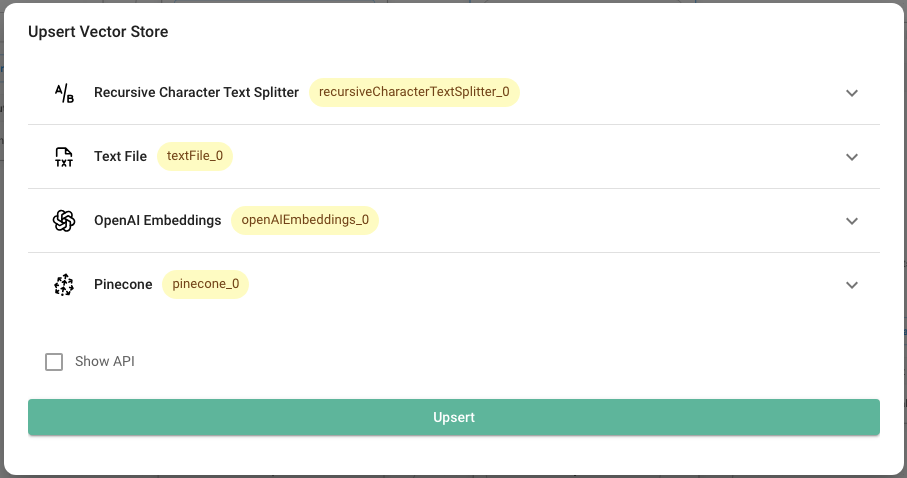
- Verify from Pinecone dashboard to see if data has been successfully upserted:
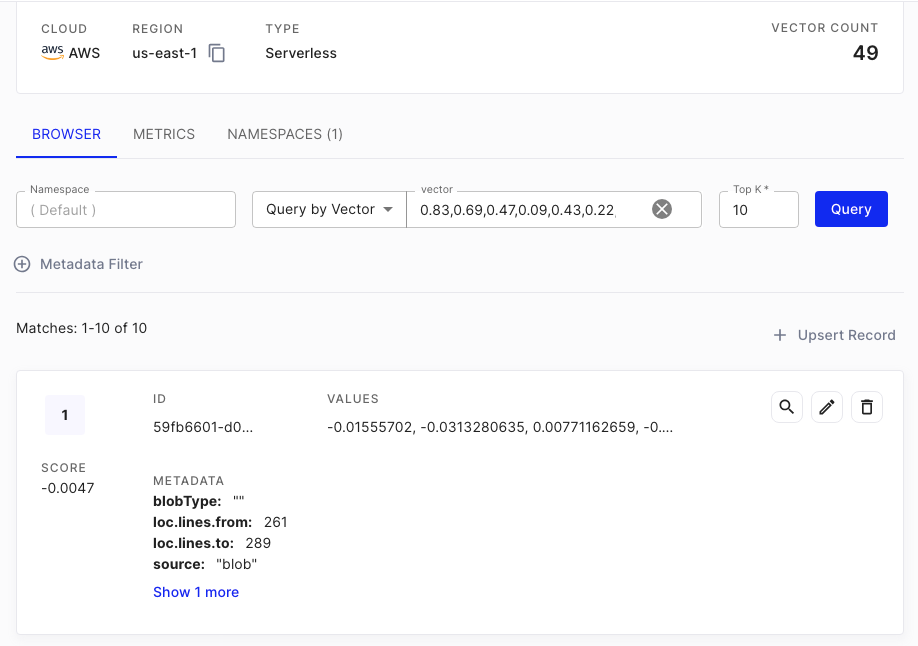
Resources
- LangChain Pinecone vectorstore integrations
- Pinecone LangChain integration
- Pinecone aimicromind integration
- Pinecone official clients
description: >- Upsert embedded data and perform similarity search upon query using pgvector on Postgres.
Postgres
.png)
Postgres Node
There are multiple methods to connect to Postgres based on how your instance is set up. Below is an example of a local configuration using a prebuilt Docker image provided by the pgvector team.
Create a file named docker-compose.yml with the content below:
# Run this command to start the database:
# docker-compose up --build
version: "3"
services:
  db:
    hostname: 127.0.0.1
    image: pgvector/pgvector:pg16
    ports:
      - 5432:5432
    restart: always
    environment:
      - POSTGRES_DB=api
      - POSTGRES_USER=myuser
      - POSTGRES_PASSWORD=ChangeMe
    volumes:
      - ./init.sql:/docker-entrypoint-initdb.d/init.sql
docker compose up to start the Postgres container.
Create new credential with the configured user and password:
.png)
Fill in the node's field with values configured in docker-compose.yml. For example:
- Host: localhost
- Database: api
- Port: 5432
Voila! You have now successfully setup Postgres Vector ready to be used.
Qdrant
Prerequisites
A locally running instance of Qdrant or a Qdrant cloud instance.
To get a Qdrant cloud instance:
- Head to the Clusters section of the Cloud Dashboard.
- Select Clusters and then click + Create.
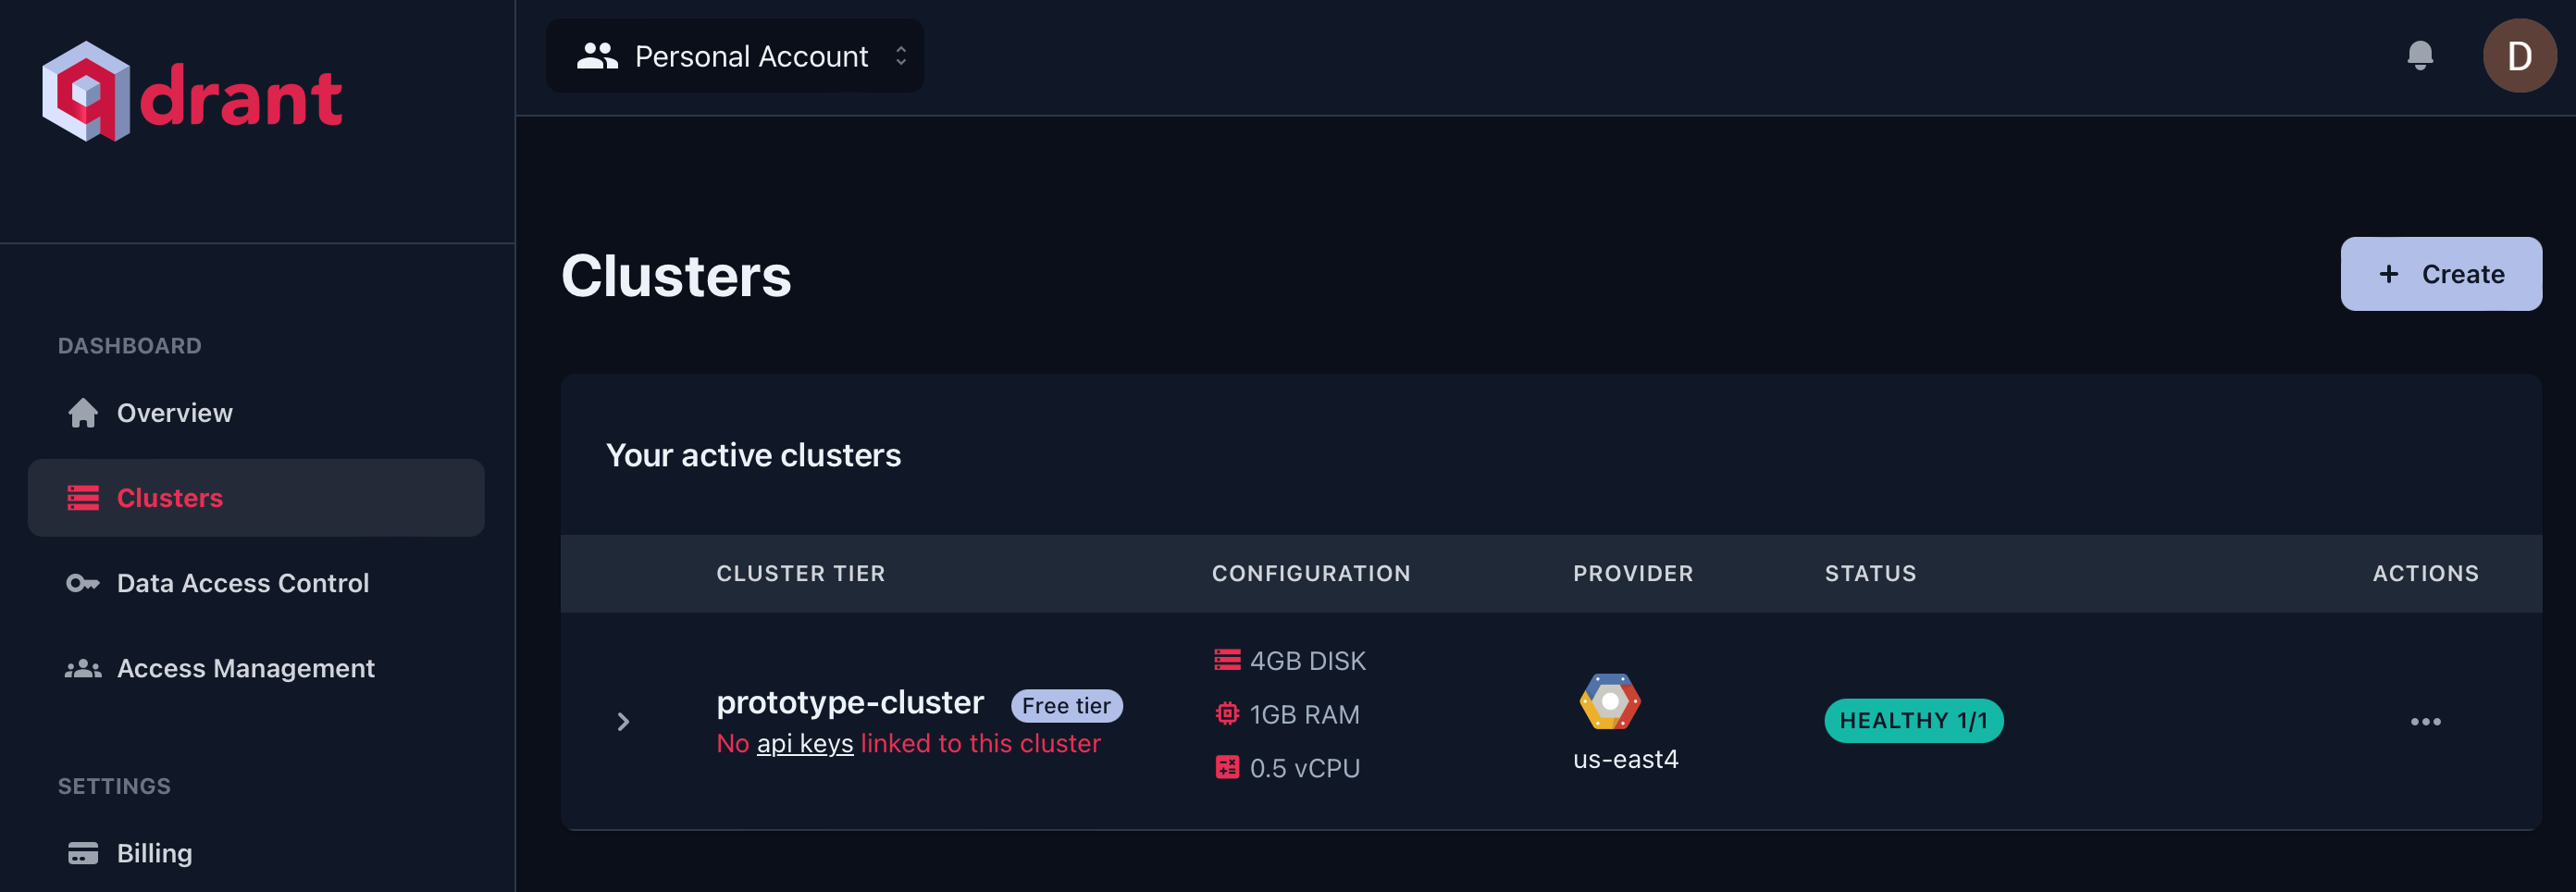
- Choose your cluster configurations and region.
- Hit Create to provision your cluster.
Setup
- Get/Create your API Key from the Data Access Control section of the Cloud Dashboard.
- Add a new Qdrant node on canvas.
- Create new Qdrant credential using the API Key
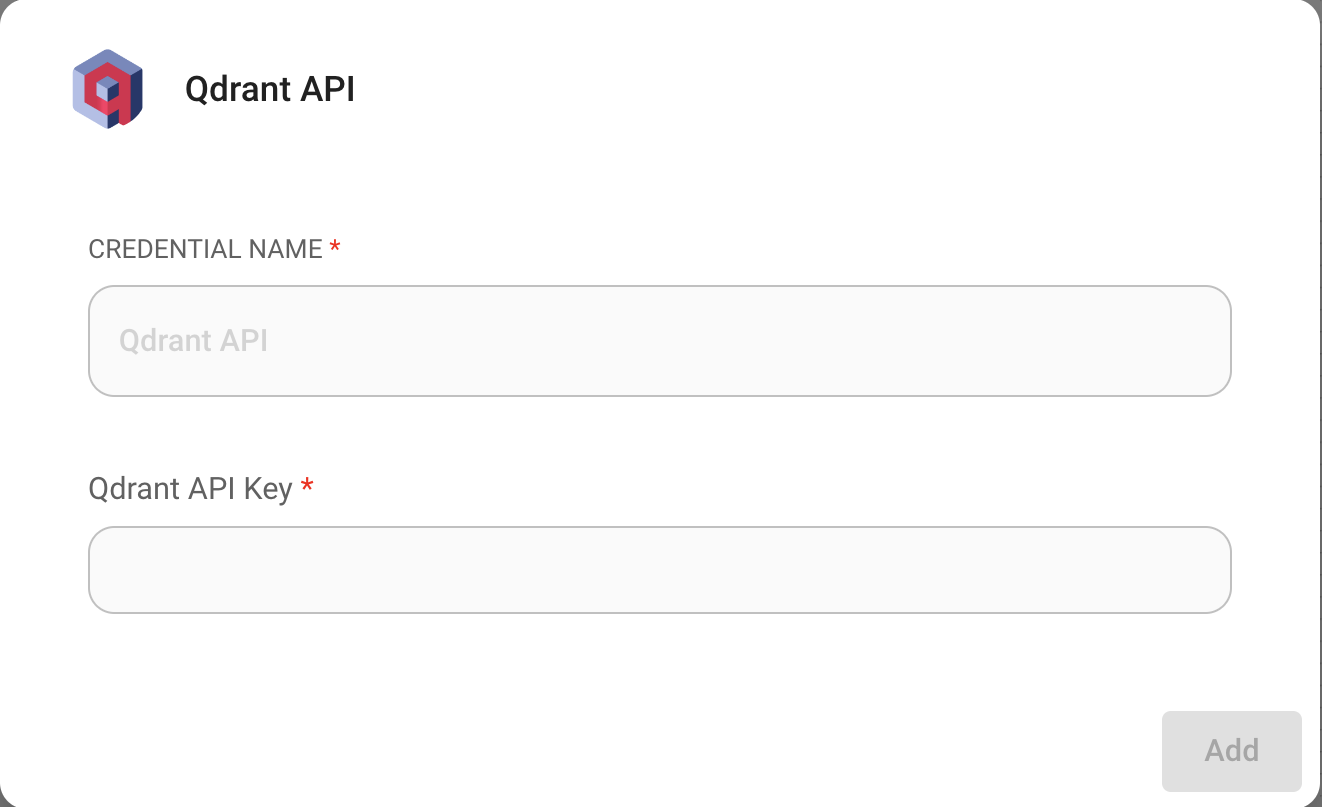
- Enter the required info into the Qdrant node:
- Qdrant server URL
- Collection name
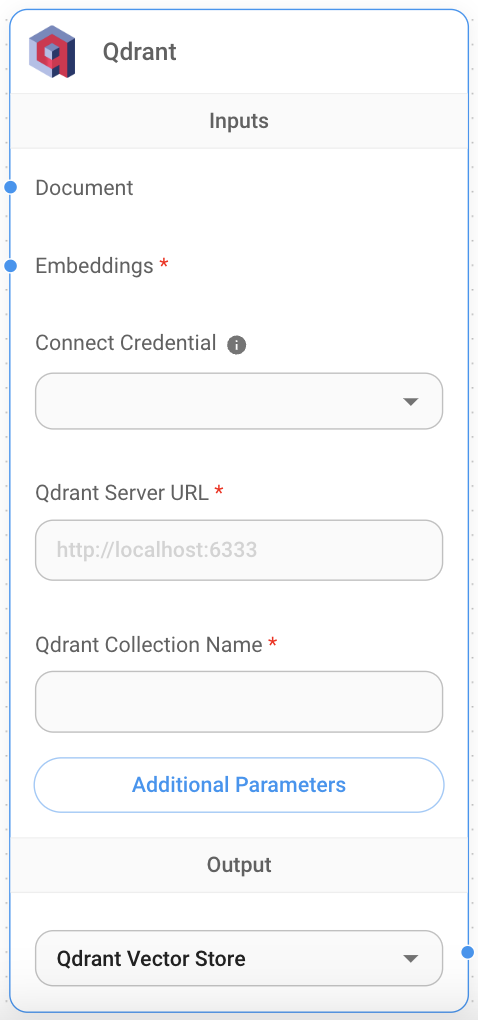
- Document input can be connected with any node under Document Loader category.
- Embeddings input can be connected with any node under Embeddings category.
Filtering
Let's say you have different documents upserted, each specified with a unique value under the metadata key {source}
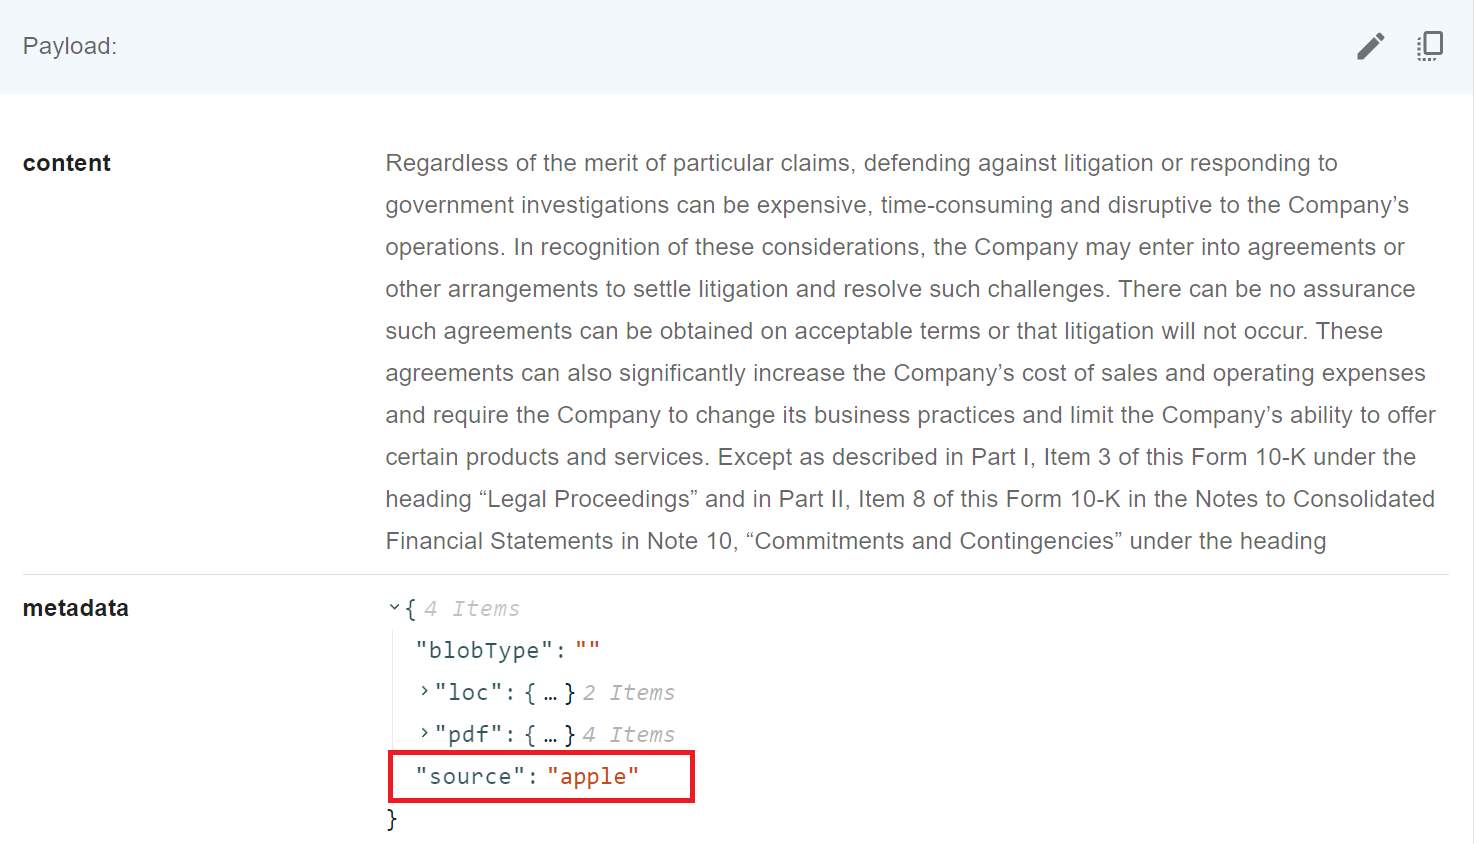
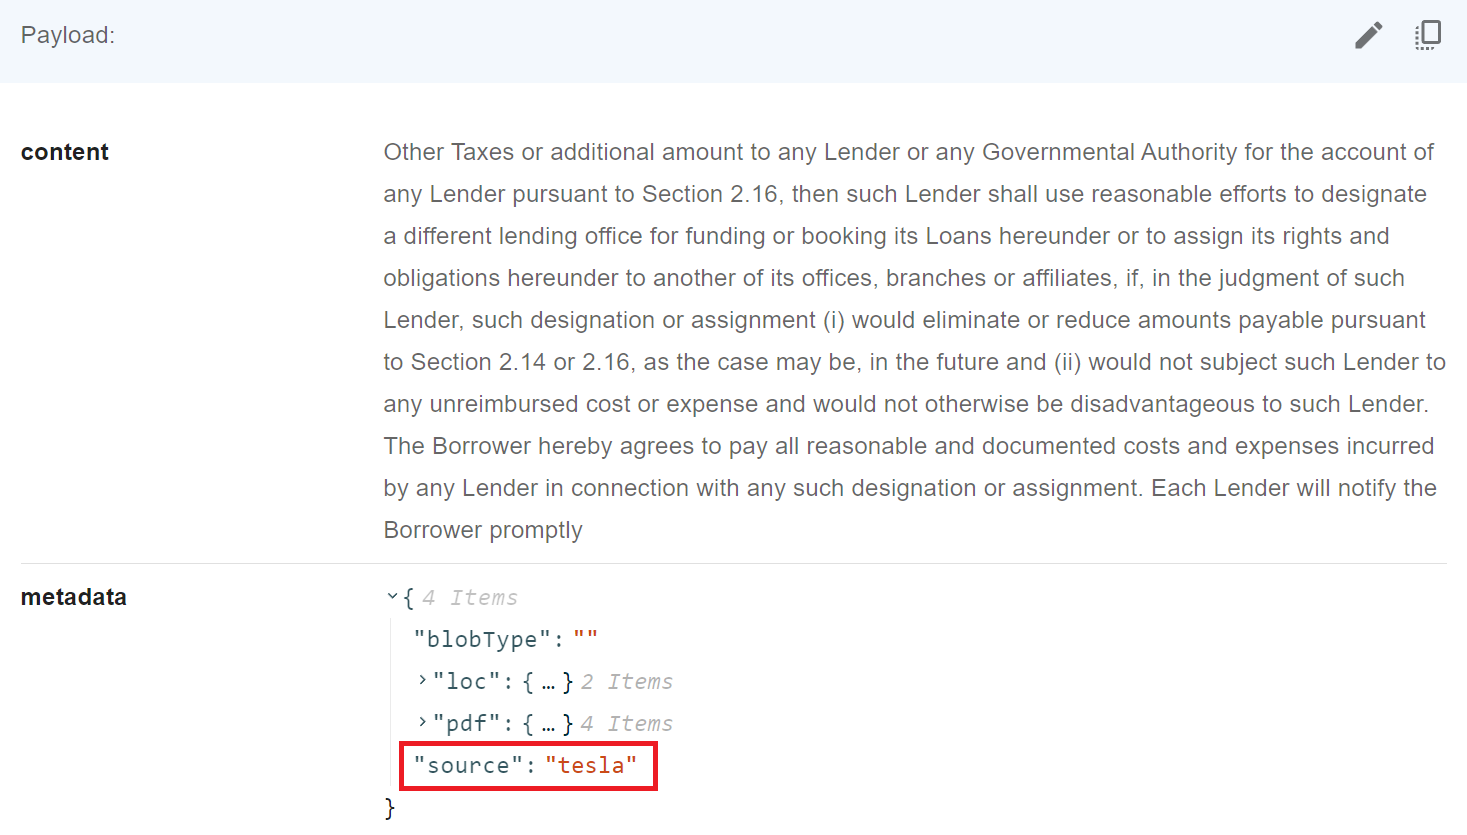
Then, you want to filter by it. Qdrant supports following syntax when it comes to filtering:
UI
 (1) (1) (1) (1) (1) (1) (2) (1) (1) (1).png)
API
"overrideConfig": {
    "qdrantFilter": {
        "should": [
            {
                "key": "metadata.source",
                "match": {
                    "value": "apple"
                }
            }
        ]
    }
}
Resources
Redis
Prerequisite
- Spin up a Redis-Stack Server using Docker
docker run -d --name redis-stack-server -p 6379:6379 redis/redis-stack-server:latest
Setup
- Add a new Redis node on canvas.
- Create new Redis credential.
 (1) (3) (1) (1).png)
- Select type of Redis Credential. Choose Redis API if you have username and password, otherwise Redis URL:
 (1) (1) (2).png)
- Fill in the url:
 (1) (1) (1) (2) (1).png)
- Now you can start upserting data with Redis:
 (1) (1) (1) (1) (1) (1) (1) (1) (1).png)
 (2).png)
- Navigate to Redis Insight portal, and to your database, you will be able to see all the data that has been upserted:
.png)
SingleStore
Setup
- Register an account on SingleStore
- Login to portal. On the left side panel, click CLOUD -> Create new workspace group. Then click Create Workspace button.
.png)
- Select cloud provider and data region, then click Next:
.png)
- Review and click Create Workspace:
.png)
- You should now see your workspace created:
.png)
- Proceed to create a database
.png)
- You should be able to see your database created and attached to the workspace:
.png)
- Click Connect from the workspace dropdown -> Connect Directly:
.png)
- You can specify a new password or use the default generated one. Then click Continue:
.png)
- On the tabs, switch to Your App, and select Node.js from the dropdown. Take note/save the
Username,Host,Passwordas you will need these in aimicromindlater.
.png)
- Back to aimicromind canvas, drag and drop SingleStore nodes. Click Create New from the Credentials dropdown:
 (1) (2) (1).png)
- Put in the Username and Password from above:
.png)
- Then specify the Host and Database Name:
 (1) (2).png)
- Now you can start upserting data with SingleStore:
 (1) (2).png)
 (1) (2).png)
- Navigate back to SingleStore portal, and to your database, you will be able to see all the data that has been upserted:
.png)
Supabase
Prerequisite
- Register an account for Supabase
- Click New project
 (2) (1).png)
- Input required fields
| Field Name | Description |
|---|---|
| Name | name of the project to be created. (e.g. AiMicromind) |
| Database Password | password to your postgres database |
 (1) (1).png)
- Click Create new project and wait for the project to finish setting up
- Click SQL Editor
 (2).png)
- Click New query
 (1).png)
- Copy and Paste the below SQL query and run it by
Ctrl + Enteror click RUN. Take note of the table name and function name.
- Table name:
documents - Query name:
match_documents
-- Enable the pgvector extension to work with embedding vectors
create extension vector;

-- Create a table to store your documents
create table documents (
  id bigserial primary key,
  content text, -- corresponds to Document.pageContent
  metadata jsonb, -- corresponds to Document.metadata
  embedding vector(1536) -- 1536 works for OpenAI embeddings, change if needed
);

-- Create a function to search for documents
create function match_documents (
  query_embedding vector(1536),
  match_count int DEFAULT null,
  filter jsonb DEFAULT '{}'
) returns table (
  id bigint,
  content text,
  metadata jsonb,
  similarity float
)
language plpgsql
as $$
#variable_conflict use_column
begin
  return query
  select
    id,
    content,
    metadata,
    1 - (documents.embedding <=> query_embedding) as similarity
  from documents
  where metadata @> filter
  order by documents.embedding <=> query_embedding
  limit match_count;
end;
$$;
If some cases, you might be using Record Manager to keep track of the upserts and prevent duplications. Since Record Manager generates a random UUID for each embeddings, you will have to change the id column entity to text:
-- Enable the pgvector extension to work with embedding vectors
create extension vector;

-- Create a table to store your documents
create table documents (
  id text primary key, -- CHANGE TO TEXT
  content text,
  metadata jsonb,
  embedding vector(1536)
);

-- Create a function to search for documents
create function match_documents (
  query_embedding vector(1536),
  match_count int DEFAULT null,
  filter jsonb DEFAULT '{}'
) returns table (
  id text, -- CHANGE TO TEXT
  content text,
  metadata jsonb,
  similarity float
)
language plpgsql
as $$
#variable_conflict use_column
begin
  return query
  select
    id,
    content,
    metadata,
    1 - (documents.embedding <=> query_embedding) as similarity
  from documents
  where metadata @> filter
  order by documents.embedding <=> query_embedding
  limit match_count;
end;
$$;
 (1) (1) (1).png)
Setup
- Click Project Settings
 (1).png)
- Get your Project URL & API Key
 (3).png)
- Copy and Paste each details (API Key, URL, Table Name, Query Name) into Supabase node
.png)
- Document can be connected with any node under Document Loader category
- Embeddings can be connected with any node under Embeddings category
Filtering
Let's say you have different documents upserted, each specified with a unique value under the metadata key {source}

You can use metadata filtering to query specific metadata:
UI
 (1) (1) (1) (1) (2) (1).png)
API
"overrideConfig": {
    "supabaseMetadataFilter": {
        "source": "henry"
    }
}
Resources
Upstash
Prequisites
-
Sign up or Sign In to Upstash Console
-
Navigate to Vector page and click Create Index
-
Do the necessary configurations and create the index.
- Index Name, name of the index to be created. (e.g. "aimicromind-upstash-demo")
- Dimensions, size of the vectors to be inserted in the index. (e.g. 1536)
- Embedding Model, the model to be used in Upstash Embeddings. This is optional. If you enable it, you don't need to provide embeddings model.

Setup
- Get your index credentials
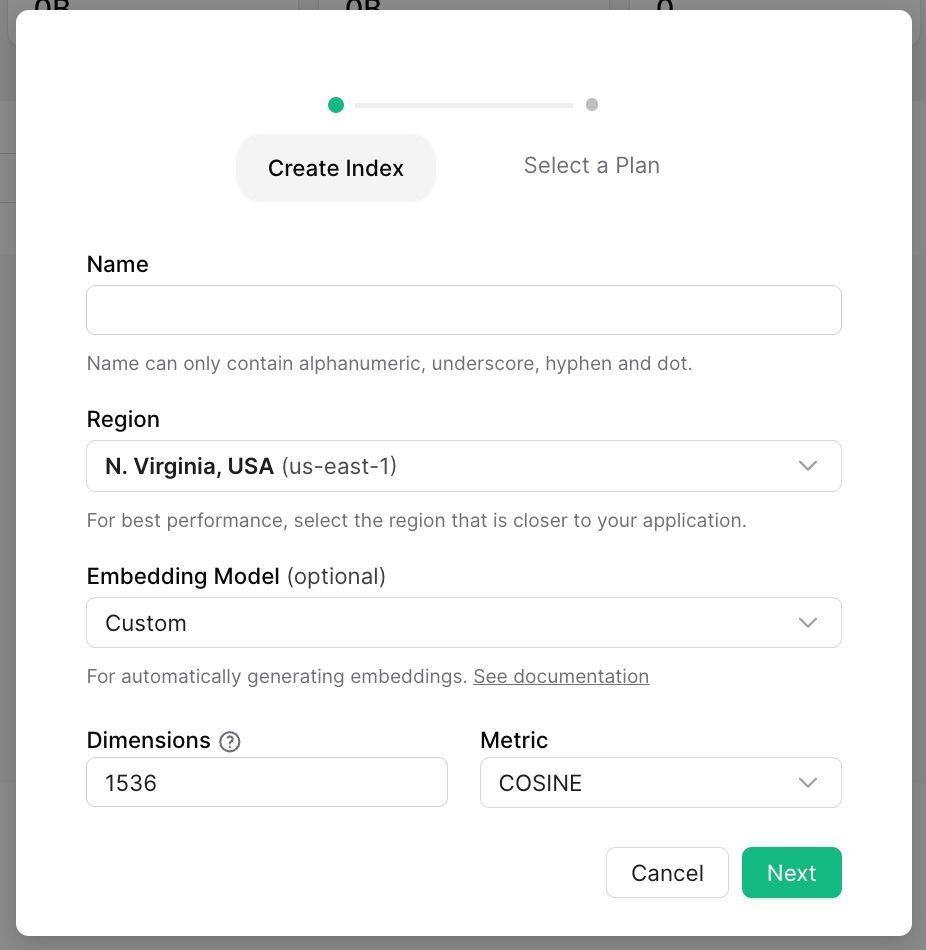
- Create new Upstash Vector credential and fill in
- Upstash Vector REST URL from UPSTASH_VECTOR_REST_URL on console
- Upstash Vector Rest Token from UPSTASH_VECTOR_REST_TOKEN on console
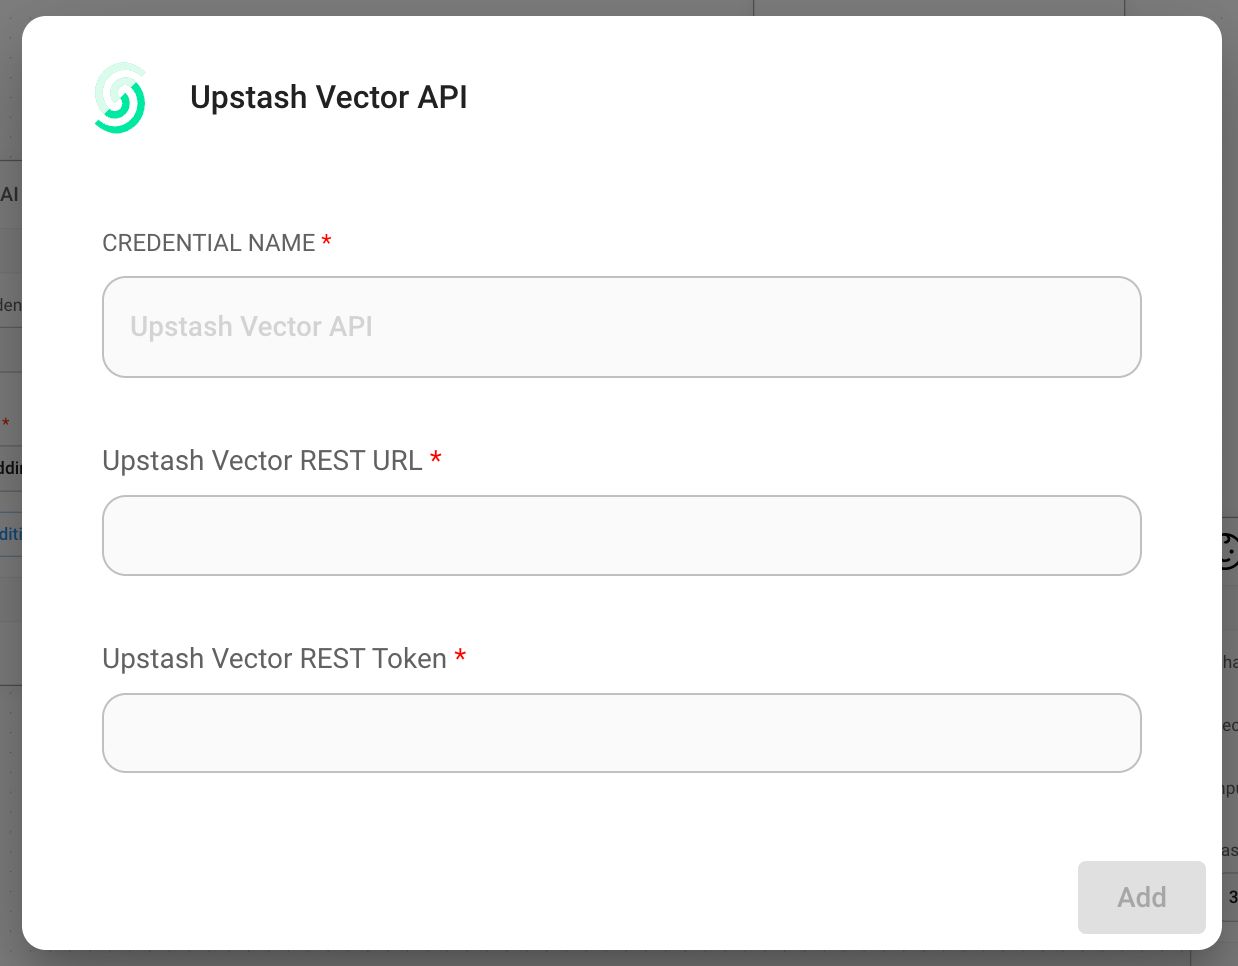
- Add a new Upstash Vector node to canvas
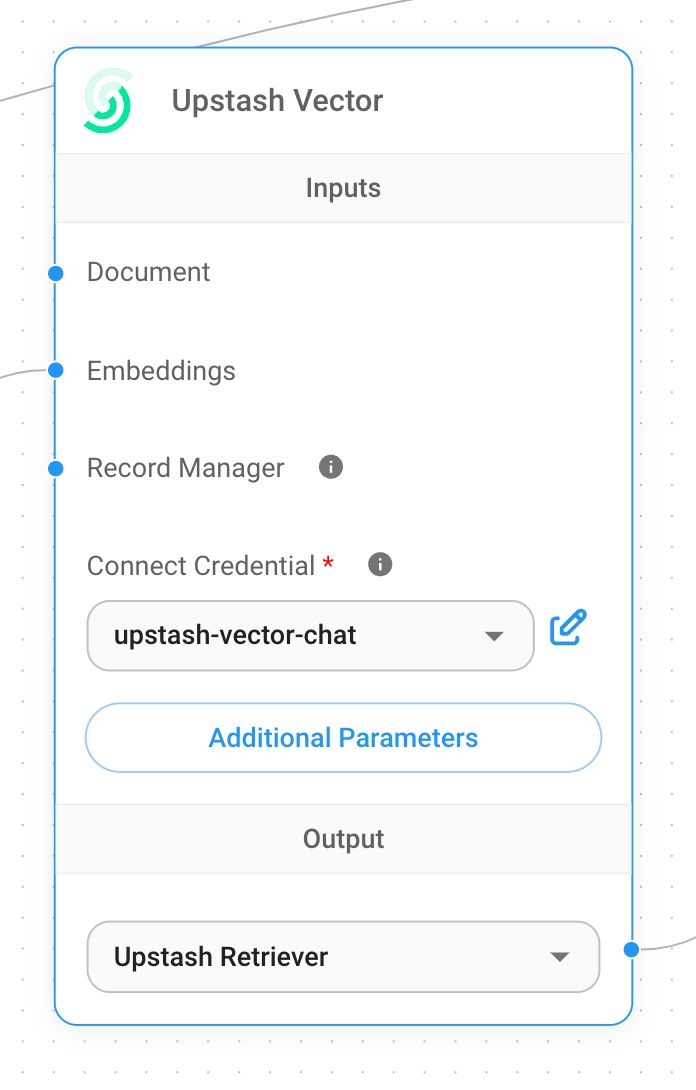
- Add additional nodes to canvas and start the upsert process
- Document can be connected with any node under Document Loader category
- Embeddings can be connected with any node under Embeddings category

- Verify from Upstash dashboard to see if data has been successfully updated:
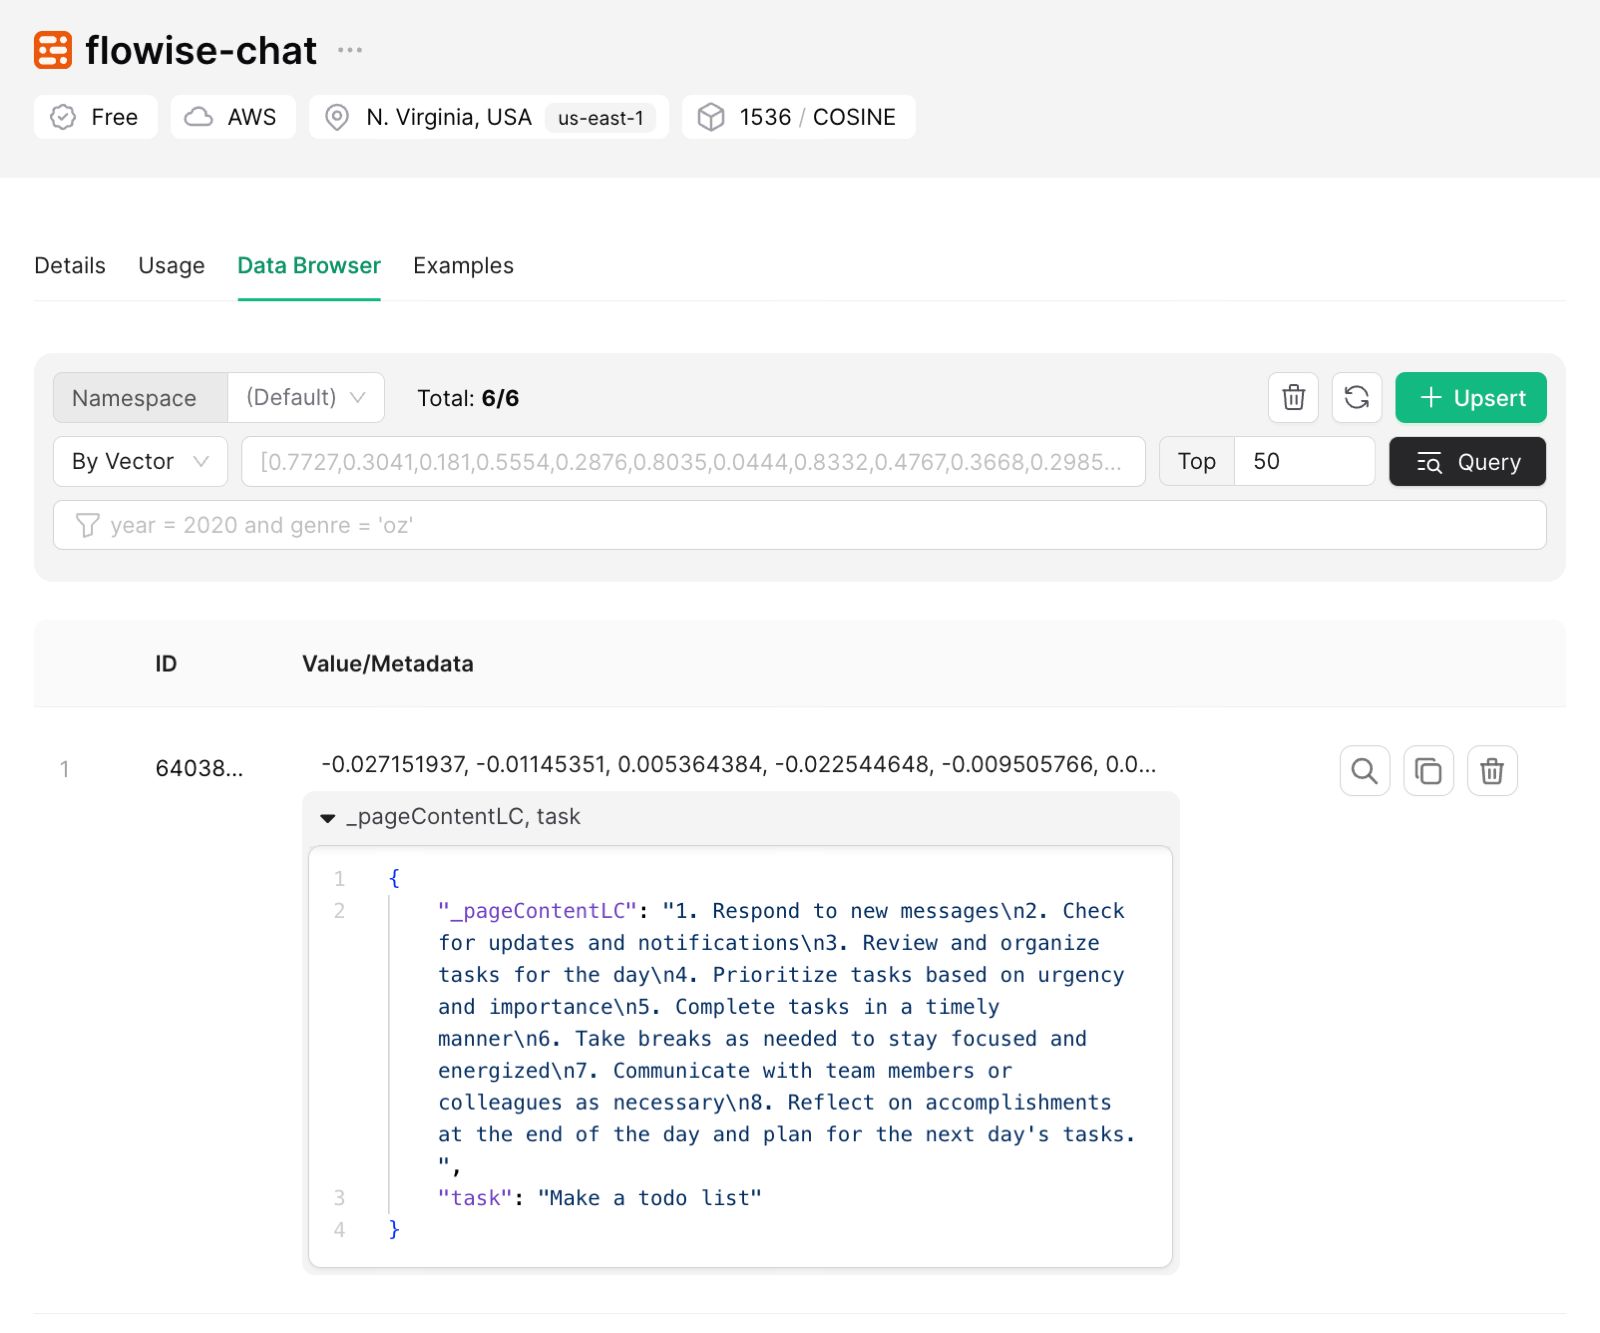
Vectara
Quickstart Tutorial (coming soon)
Prerequisite
- Register an account for Vectara
- Click Create Corpus
Name the corpus to be created and click Create Corpus then wait for the corpus to finish setting up.
Setup
- Click on the "Access Control" tab in the corpus view
- Click on the "Create API Key" button, choose a name for the API key and pick the QueryService & IndexService option

- Click Create to create the API key
- Get your Corpus ID, API Key, and Customer ID by clicking the down-arrow under "copy" for your new API key:
- Back to aimicromind canvas, and create your chatflow. Click Create New from the Credentials dropdown ane enter your Vectara credentials.
- Enjoy!
Vectara Query Parameters
For finer control over the Vectara query parameters, click on "Additional Parameters" and then you can update the following parameters from their default:
- Metadata Filter: Vectara supports meta-data filtering. To use filtering, ensure that metadata fields you want to filter by are defined in your Vectara corpus.
- "Sentences before" and "Sentences after": these control how many sentences before/after the matching text are returned as results from the Vectara retrieval engine
- Lambda: defines the behavior of hybrid search in Vectara
- Top-K: how many results to return from Vectara for the query
- MMR-K: number of results to use for MMR (max marginal relvance)
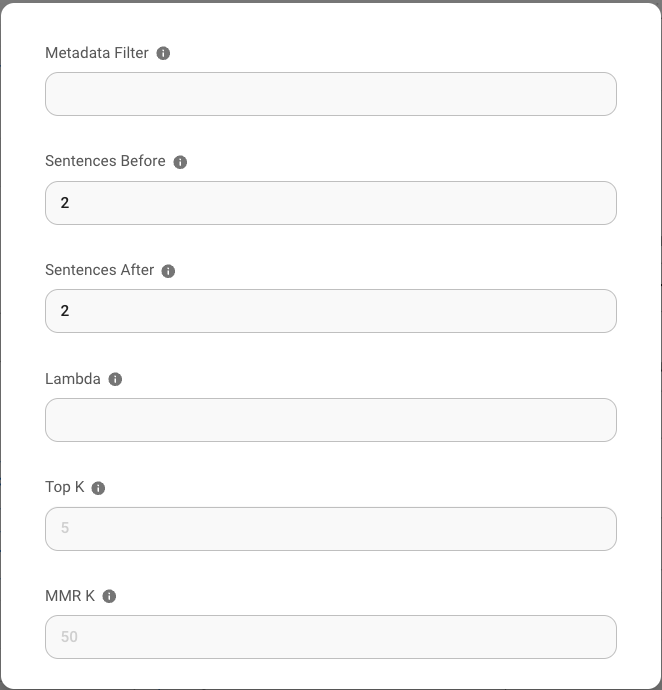
Resources
- LangChain JS Vectara Blog Post
- 5 Reasons to Use Vectara's Langchain Integration Blog Post
- Max Marginal Relevance in Vectara
- Vectara Boomerang embedding model Blog Post
- Detecting Hallucination with Vectara's HHEM
description: >- Upsert embedded data and perform similarity or mmr search using Weaviate, a scalable open-source vector database.
Weaviate
.png)
Weaviate Node
Filtering
Weaviate supports following syntax when it comes to filtering:
UI
 (1) (1).png)
API
"overrideConfig": {
    "weaviateFilter": {
        "where": {
            "operator": "Equal",
            "path": [
                "test"
            ],
            "valueText": "key"
        }
    }
}
Resources
{% hint style="info" %} This section is a work in progress. We appreciate any help you can provide in completing this section. Please check our Contribution Guide to get started. {% endhint %}
description: >- Upsert embedded data and perform similarity or mmr search upon query using Zep, a fast and scalable building block for LLM apps.
Zep Collection - Open Source
.png)
Zep Collection - Open Source Node
{% hint style="info" %} This section is a work in progress. We appreciate any help you can provide in completing this section. Please check our Contribution Guide to get started. {% endhint %}
description: >- Upsert embedded data and perform similarity or mmr search upon query using Zep, a fast and scalable building block for LLM apps.
Zep Collection - Cloud
 (1) (1) (1).png)
Zep Collection - Cloud Node
{% hint style="info" %} This section is a work in progress. We appreciate any help you can provide in completing this section. Please check our Contribution Guide to get started. {% endhint %}
description: Learn how aimicromind integrates with LiteLLM Proxy
LiteLLM Proxy
Use LiteLLM Proxy with aimicromind to:
- Load balance Azure OpenAI/LLM endpoints
- Call 100+ LLMs in the OpenAI Format
- Use Virtual Keys to set budgets, rate limits and track usage
How to use LiteLLM Proxy with AiMicromind
Step 1: Define your LLM Models in the LiteLLM config.yaml file
LiteLLM Requires a config with all your models defined - we will call this file litellm_config.yaml
Detailed docs on how to setup litellm config - here
model_list:
  - model_name: gpt-4
    litellm_params:
      model: azure/chatgpt-v-2
      api_base: https://openai-gpt-4-test-v-1.openai.azure.com/
      api_version: "2023-05-15"
      api_key:
  - model_name: gpt-4
    litellm_params:
      model: azure/gpt-4
      api_key:
      api_base: https://openai-gpt-4-test-v-2.openai.azure.com/
  - model_name: gpt-4
    litellm_params:
      model: azure/gpt-4
      api_key:
      api_base: https://openai-gpt-4-test-v-2.openai.azure.com/
Step 2. Start litellm proxy
docker run \
    -v $(pwd)/litellm_config.yaml:/app/config.yaml \
    -p 4000:4000 \
    ghcr.io/berriai/litellm:main-latest \
    --config /app/config.yaml --detailed_debug
On success, the proxy will start running on http://localhost:4000/
Step 3: Use the LiteLLM Proxy in AiMicromind
In AiMicromind, specify the standard OpenAI nodes (not the Azure OpenAI nodes) -- this goes for chat models, embeddings, llms -- everything
- Set
BasePathto LiteLLM Proxy URL (http://localhost:4000when running locally) - Set the following headers
Authorization: Bearer <your-litellm-master-key>
description: Learn how aimicromind integrates with the LlamaIndex framework
LlamaIndex
LlamaIndex is a data framework for LLM applications to ingest, structure, and access private or domain-specific data. It has advanced retrieval techniques for designing RAG (Retrieval Augmented Generation) apps.
AiMicromind complements LlamaIndex by offering a visual interface. Here, nodes are organized into distinct sections, making it easier to build workflows.
LlamaIndex Sections:
description: LlamaIndex Agent Nodes
Agents
By themselves, language models can't take actions - they just output text.
Agents are systems that use an LLM as a reasoning engine to determine which actions to take and what the inputs to those actions should be. The results of those actions can then be fed back into the agent, and it determines whether more actions are needed, or whether it is okay to finish.
Agent Nodes:
description: >- Agent that uses OpenAI Function Calling to pick the tools and args to call using LlamaIndex.
OpenAI Tool Agent
 (1) (1).png)
OpenAI Tool Agent Node
{% hint style="info" %} This section is a work in progress. We appreciate any help you can provide in completing this section. Please check our Contribution Guide to get started. {% endhint %}
description: >- Agent that uses Anthropic Function Calling to pick the tools and args to call using LlamaIndex.
Anthropic Tool Agent
.png)
{% hint style="info" %} This section is a work in progress. We appreciate any help you can provide in completing this section. Please check our Contribution Guide to get started. {% endhint %}
description: LlamaIndex Chat Model Nodes
Chat Models
Chat models take a list of messages as input and return a model-generated message as output. These models such as gpt-3.5-turbo or gpt4 are powerful and cheaper than its predecessor Completions models such as text-davincii-003.
Chat Model Nodes:
description: Wrapper around Azure OpenAI Chat LLM specific for LlamaIndex.
AzureChatOpenAI
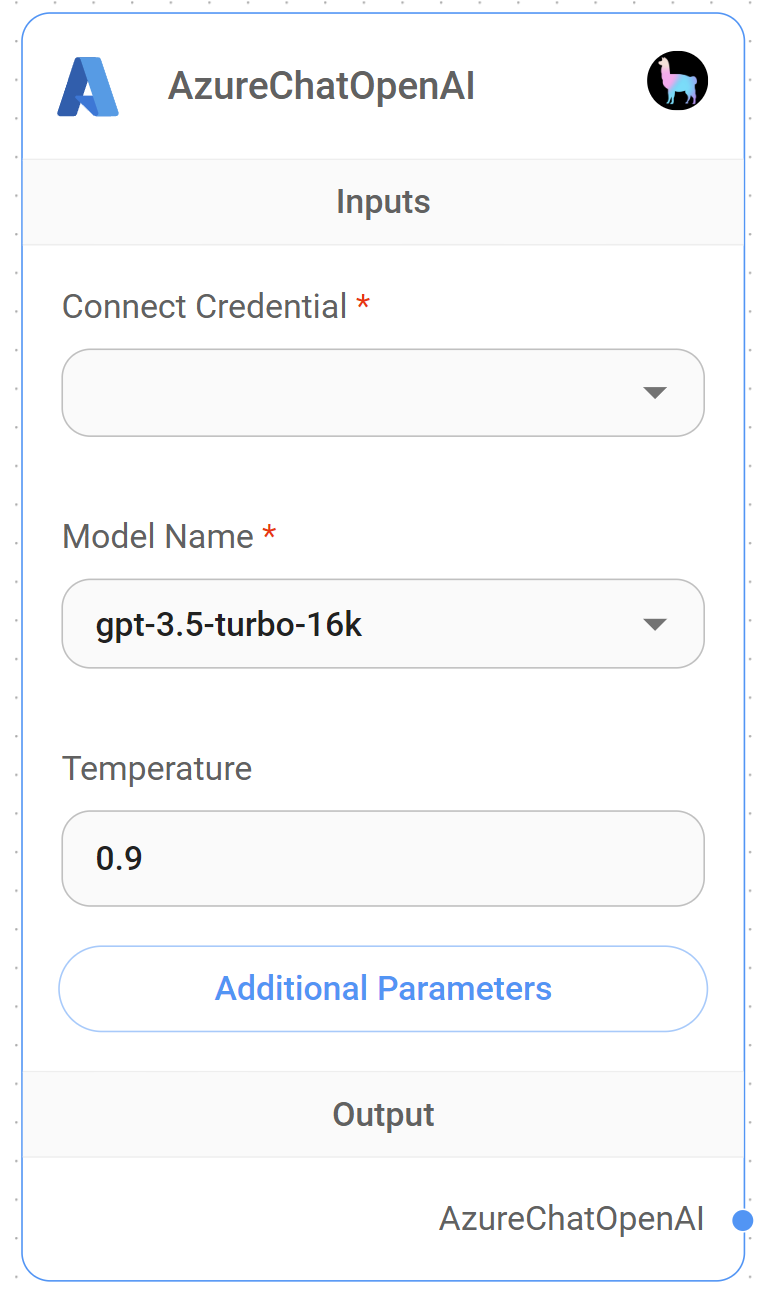
AzureChatOpenAI Node
{% hint style="info" %} This section is a work in progress. We appreciate any help you can provide in completing this section. Please check our Contribution Guide to get started. {% endhint %}
description: Wrapper around ChatAnthropic LLM specific for LlamaIndex.
ChatAnthropic
 (1) (1) (1) (1) (1) (1) (1) (1).png)
ChatAnthropic Node
{% hint style="info" %} This section is a work in progress. We appreciate any help you can provide in completing this section. Please check our Contribution Guide to get started. {% endhint %}
description: Wrapper around ChatMistral LLM specific for LlamaIndex.
ChatMistral
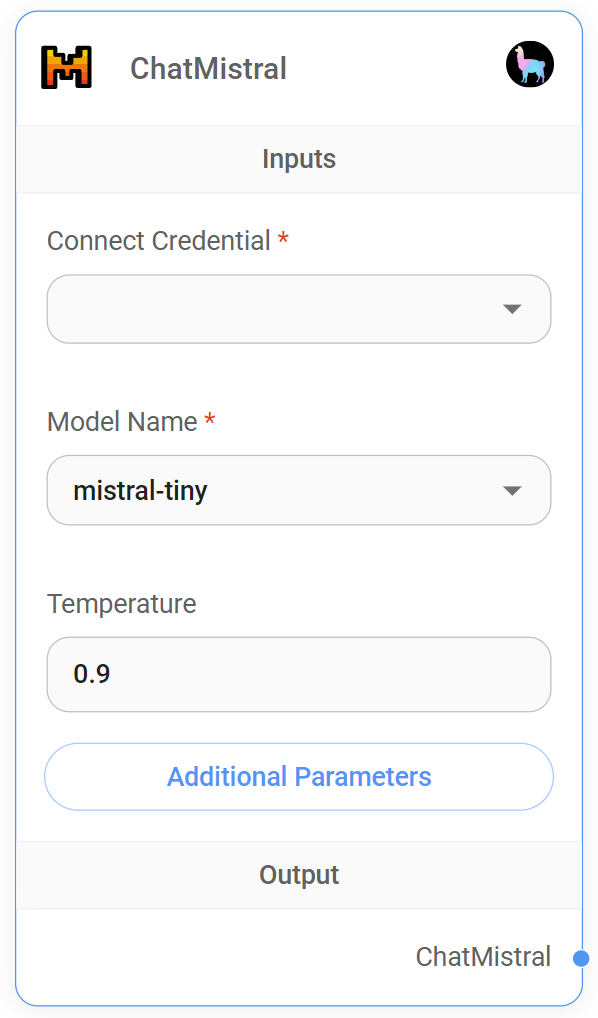
ChatMistral Node
{% hint style="info" %} This section is a work in progress. We appreciate any help you can provide in completing this section. Please check our Contribution Guide to get started. {% endhint %}
description: Wrapper around ChatOllama LLM specific for LlamaIndex.
ChatOllama
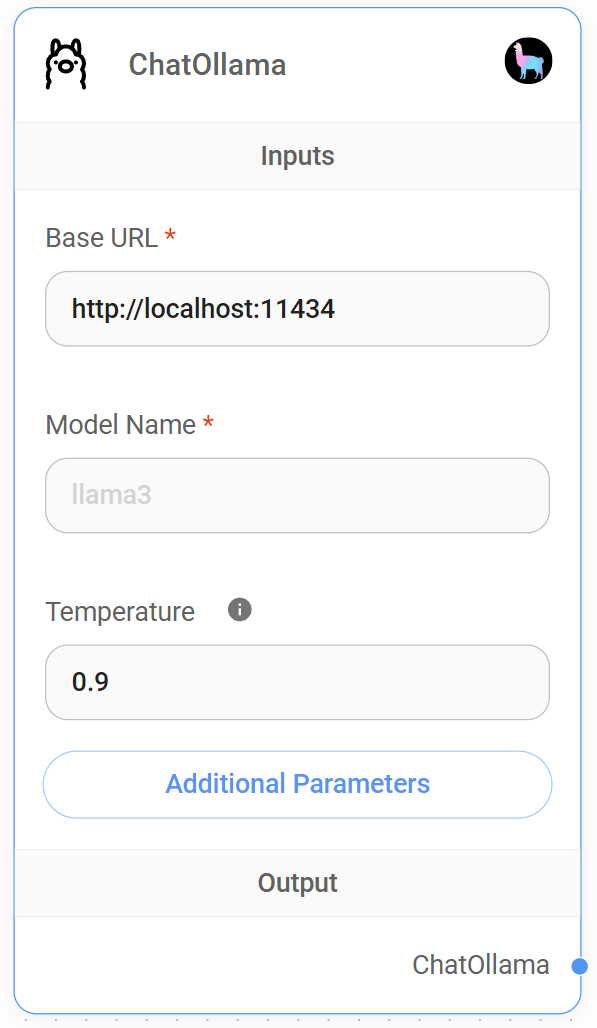
ChatOllama Node
{% hint style="info" %} This section is a work in progress. We appreciate any help you can provide in completing this section. Please check our Contribution Guide to get started. {% endhint %}
description: Wrapper around OpenAI Chat LLM specific for LlamaIndex.
ChatOpenAI
 (1) (1) (1) (1) (1).png)
ChatOpenAI Node
{% hint style="info" %} This section is a work in progress. We appreciate any help you can provide in completing this section. Please check our Contribution Guide to get started. {% endhint %}
description: Wrapper around ChatTogetherAI LLM specific for LlamaIndex.
ChatTogetherAI
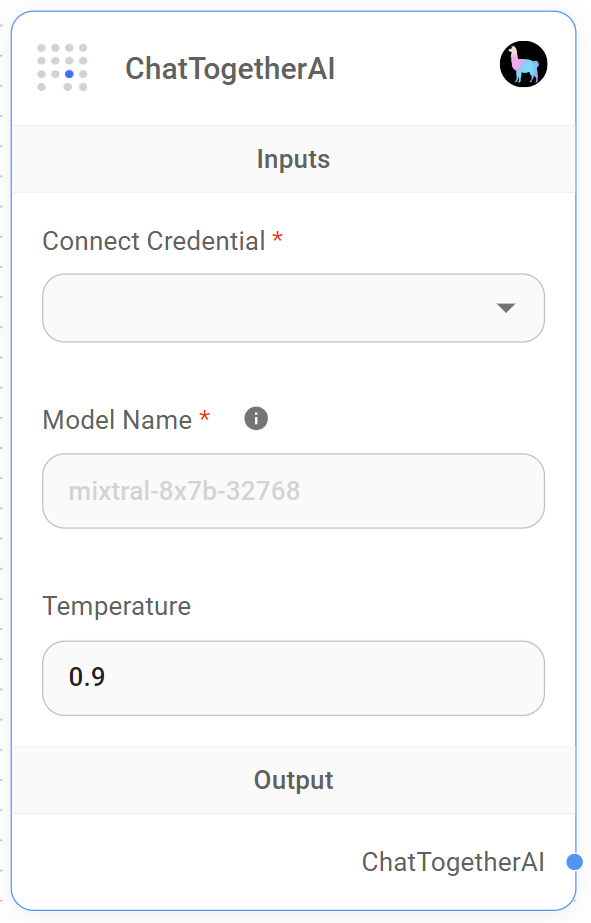
ChatTogetherAI Node
{% hint style="info" %} This section is a work in progress. We appreciate any help you can provide in completing this section. Please check our Contribution Guide to get started. {% endhint %}
description: Wrapper around Groq LLM specific for LlamaIndex.
ChatGroq
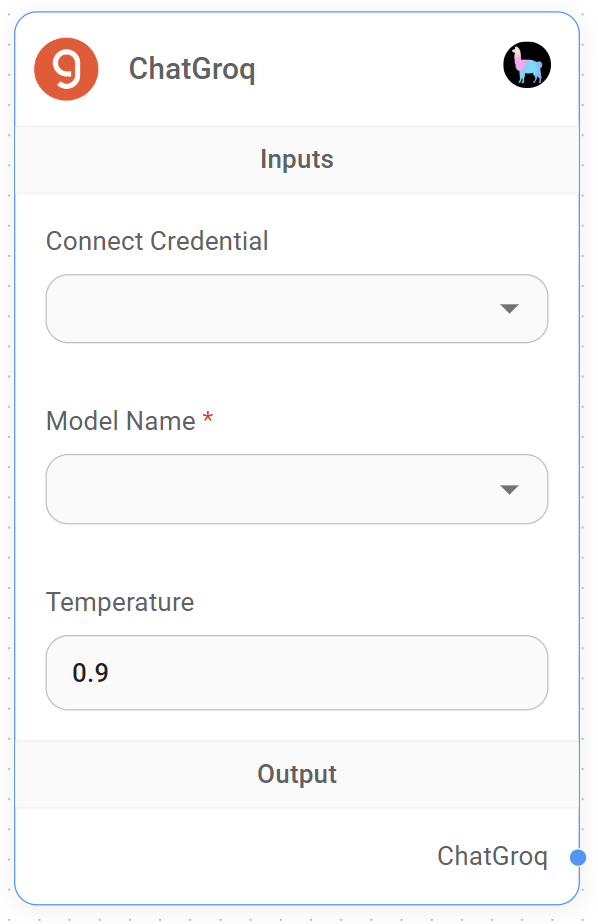
ChatGroq Node
{% hint style="info" %} This section is a work in progress. We appreciate any help you can provide in completing this section. Please check our Contribution Guide to get started. {% endhint %}
description: LlamaIndex Embeddings Nodes
Embeddings
An embedding is a vector (list) of floating point numbers. The distance between two vectors measures their relatedness. Small distances suggest high relatedness and large distances suggest low relatedness.
Embeddings can be used to create a numerical representation of textual data. This numerical representation is useful because it can be used to find similar documents.
They are commonly used for:
- Search (where results are ranked by relevance to a query string)
- Clustering (where text strings are grouped by similarity)
- Recommendations (where items with related text strings are recommended)
- Anomaly detection (where outliers with little relatedness are identified)
- Diversity measurement (where similarity distributions are analyzed)
- Classification (where text strings are classified by their most similar label)
Embedding Nodes:
description: Azure OpenAI API embeddings specific for LlamaIndex.
Azure OpenAI Embeddings
 (1) (1) (1) (1).png)
{% hint style="info" %} This section is a work in progress. We appreciate any help you can provide in completing this section. Please check our Contribution Guide to get started. {% endhint %}
description: OpenAI Embedding specific for LlamaIndex.
OpenAI Embedding
 (1) (1) (1).png)
OpenAI Embedding Node
{% hint style="info" %} This section is a work in progress. We appreciate any help you can provide in completing this section. Please check our Contribution Guide to get started. {% endhint %}
description: LlamaIndex Engine Nodes
Engine
In LlamaIndex, an engine node refers to two key components that handle information processing and user interaction.
Engine Nodes:
Query Engine
A query engine serves as an end-to-end pipeline enabling users to ask questions about their data. It receives a natural language query and furnishes a response, accompanied by relevant context information retrieved and passed to the LLM (Large Language Model).
 (1) (1) (1) (1) (1) (1) (2) (1).png)
Inputs
- Vector Store Retriever
- Response Synthesizer
Parameters
| Name | Description |
|---|---|
| Return Source Documents | To return citations/sources that were used to build up the response |
Outputs
| Name | Description |
|---|---|
| QueryEngine | Final node to return response |
Simple Chat Engine
A simple chat engine functions as a complete pipeline for engaging in a dialogue between AI and user, without context retrieval. However it does equipped with Memory, allowing to remember conversations.
 (1) (1) (1) (1) (1) (1) (1) (2).png)
Inputs
- Chat Model
- Memory
Parameters
| Name | Description |
|---|---|
| System Message | An instruction for LLM on how to answer query |
Outputs
| Name | Description |
|---|---|
| SimpleChatEngine | Final node to return response |
Context Chat Engine
A chat engine serves as an end-to-end pipeline for having a human-like conversation with your data, allowing for multiple exchanges rather than a single question-and-answer interaction.
 (1) (1) (1) (1) (1) (1) (2) (1) (1).png)
Inputs
- Chat Model
- Vector Store Retriever
- Memory
Parameters
| Name | Description |
|---|---|
| Return Source Documents | To return citations/sources that were used to build up the response |
| System Message | An instruction for LLM on how to answer query |
Outputs
| Name | Description |
|---|---|
| ContextChatEngine | Final node to return response |
Sub-Question Query Engine
A query engine designed to solve problem of answering a complex query using multiple data sources. It first breaks down the complex query into sub questions for each relevant data source, then gather all the intermediate reponses and synthesizes a final response.
 (1) (1) (1) (1) (2) (1).png)
Inputs
- Query Engine Tools
- Chat Model
- Embeddings
- Response Synthesizer
Parameters
| Name | Description |
|---|---|
| Return Source Documents | To return citations/sources that were used to build up the response |
Outputs
| Name | Description |
|---|---|
| SubQuestionQueryEngine | Final node to return response |
description: LlamaIndex Response Synthesizer Nodes
Response Synthesizer
Response Synthesizer nodes are responsible for sending the query, nodes, and prompt templates to the LLM to generate a response. There are 4 modes for generating a response:
Synthesizer Nodes:
Refine
Create and refine an answer by sequentially going through each retrieved text chunk.
Pros: Good for more detailed answers
Cons: Separate LLM call per Node (can be expensive)
 (1) (1) (1) (1) (2) (1).png)
Refine Prompt
The original query is as follows: {query}
We have provided an existing answer: {existingAnswer}
We have the opportunity to refine the existing answer (only if needed) with some more context below.
------------
{context}
------------
Given the new context, refine the original answer to better answer the query. If the context isn't useful, return the original answer.
Refined Answer:
Text QA Prompt
Context information is below.
---------------------
{context}
---------------------
Given the context information and not prior knowledge, answer the query.
Query: {query}
Answer:
Compact And Refine
This is the default when no Response Synthesizer is explicilty defined.
Compact the prompt during each LLM call by stuffing as many text chunks that can fit within the maximum prompt size. If there are too many chunks to stuff in one prompt, "create and refine" an answer by going through multiple compact prompts.
Pros: The same as Refine, Good for more detailed answers, and should result in less LLM calls
Cons: Due to the multiple LLM calls , can be expensive
 (1) (1) (1) (2).png)
Refine Prompt
The original query is as follows: {query}
We have provided an existing answer: {existingAnswer}
We have the opportunity to refine the existing answer (only if needed) with some more context below.
------------
{context}
------------
Given the new context, refine the original answer to better answer the query. If the context isn't useful, return the original answer.
Refined Answer:
Text QA Prompt
Context information is below.
---------------------
{context}
---------------------
Given the context information and not prior knowledge, answer the query.
Query: {query}
Answer:
Simple Response Builder
Using a collection of text segments and a query, execute the query on each segment, gathering the responses into an array. Return a combined string containing all responses.
Pros: Useful for individually querying each text segment with the same query
Cons: Not suitable for complex and detailed answer
 (1) (1) (1) (1) (1) (1) (2).png)
Tree Summarize
When provided with text chunks and a query, recursively build a tree structure and return the root node as the result.
Pros: Beneficial for summarization tasks
Cons: Accuracy of answer might be lost during traversal of tree structure
 (1) (1) (1) (2).png)
Prompt
Context information from multiple sources is below.
---------------------
{context}
---------------------
Given the information from multiple sources and not prior knowledge, answer the query.
Query: {query}
Answer:
description: LlamaIndex Agent Nodes
Tools
Tools are functions that agents can use to interact with the world. These tools can be generic utilities (e.g. search), other chains, or even other agents.
Tool Nodes:
Query Engine Tool
Turns Query Engine into a Tool which can then be used by Sub-Question Query Engine or Agent.
 (1) (1) (1) (2).png)
Inputs
- Vector Store Index
Parameters
| Name | Description |
|---|---|
| Tool Name | Name of the tool |
| Tool Description | A description to tell when LLM should use this tool |
Outputs
| Name | Description |
|---|---|
| QueryEngineTool | Connecting point to Agent or Sub-Question Query Engine |
description: LlamaIndex Vector Store Nodes
Vector Stores
A vector store or vector database refers to a type of database system that specializes in storing and retrieving high-dimensional numerical vectors. Vector stores are designed to efficiently manage and index these vectors, allowing for fast similarity searches.
Watch an intro on Vector Stores and how you can use that on AiMicromind (coming soon)
Vector Store Nodes:
description: >- Upsert embedded data and perform similarity search upon query using Pinecone, a leading fully managed hosted vector database.
Pinecone
Prerequisite
- Register an account for Pinecone
- Click Create index

- Fill in required fields:
- Index Name, name of the index to be created. (e.g. "aimicromind-test")
- Dimensions, size of the vectors to be inserted in the index. (e.g. 1536)

- Click Create Index
Setup
- Get/Create your API Key

- Add a new Pinecone node to canvas and fill in the parameters:
- Pinecone Index
- Pinecone namespace (optional)
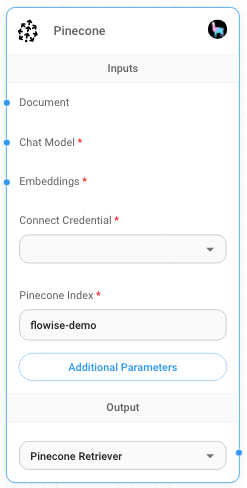
Pinecone Node
- Create new Pinecone credential -> Fill in API Key

- Add additional nodes to canvas and start the upsert process
- Document can be connected with any node under Document Loader category {% hint style="info" %} Document loaders and text splitters for LlamaIndex are not yet available, but using one of the ones available under LangChain will still allow querying with LlamaIndex as normal. {% endhint %}
- Embeddings can be connected with any node under Embeddings category
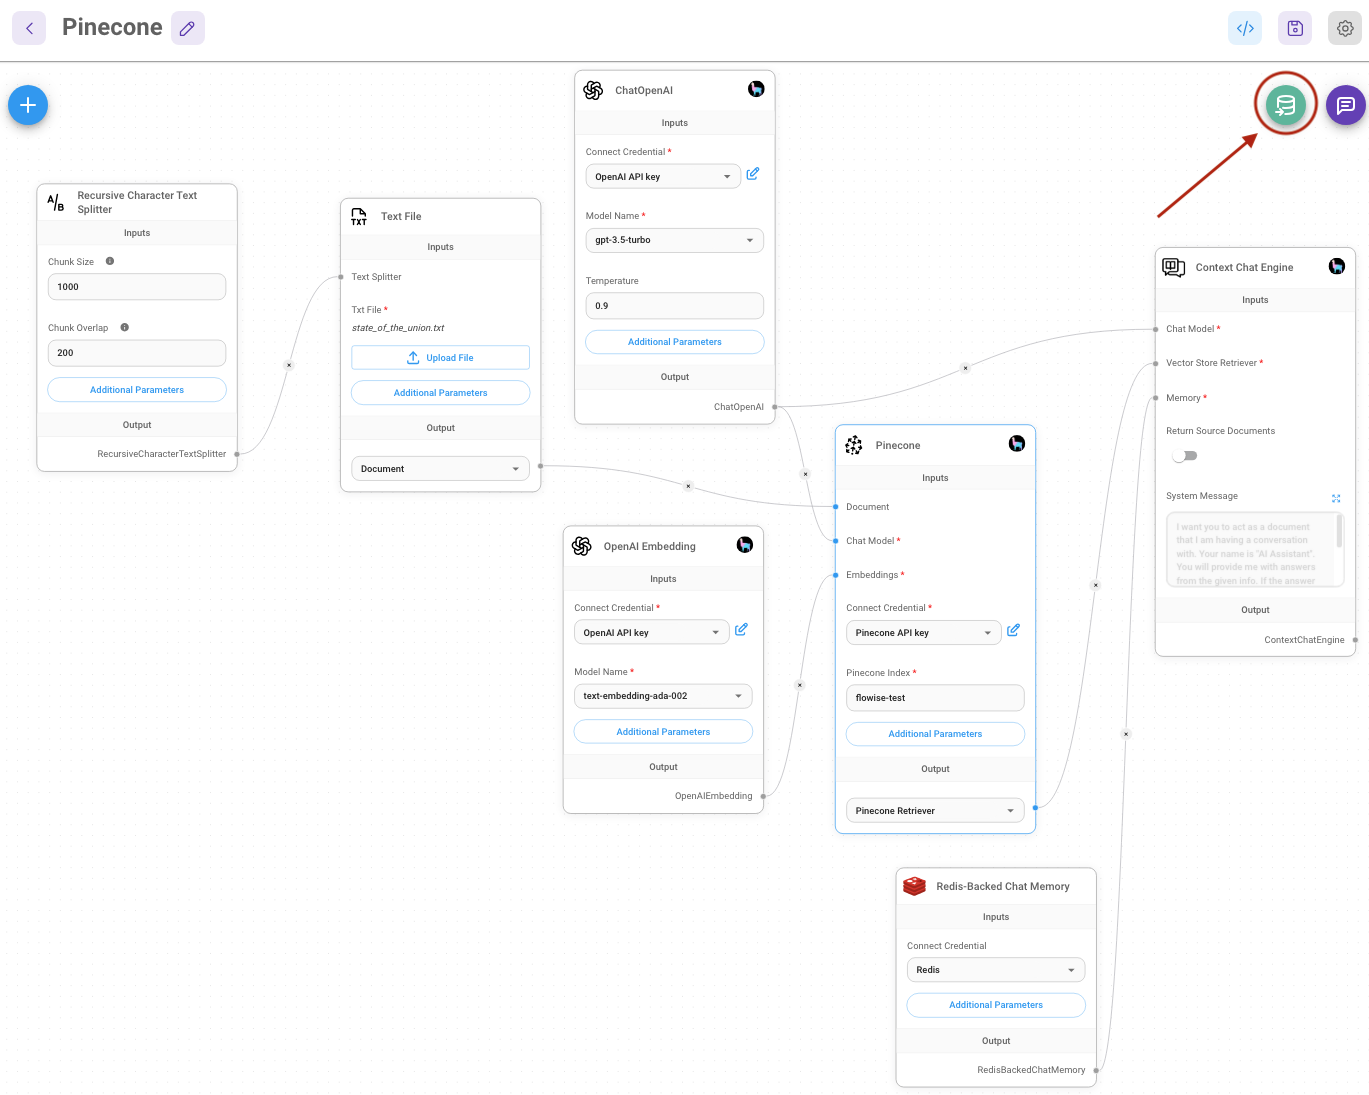
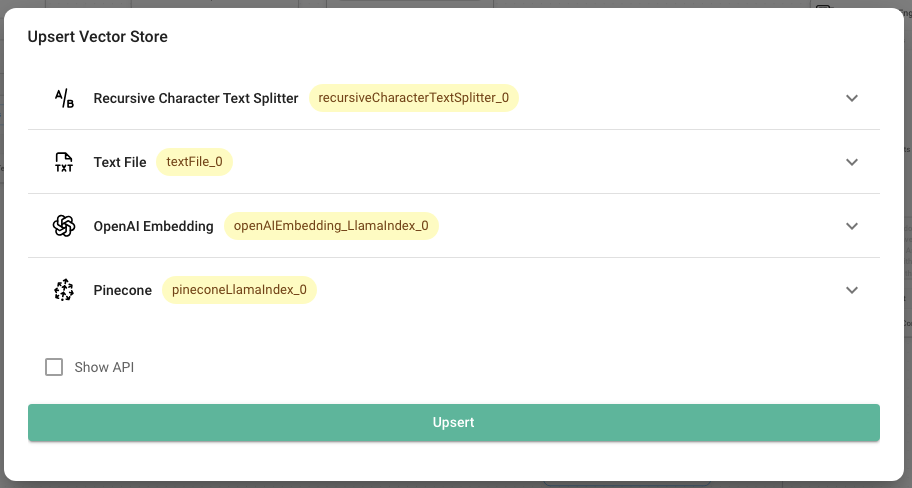
- Verify on Pinecone dashboard that data has been successfully upserted:

description: Upsert embedded data to local path and perform similarity search.
SimpleStore
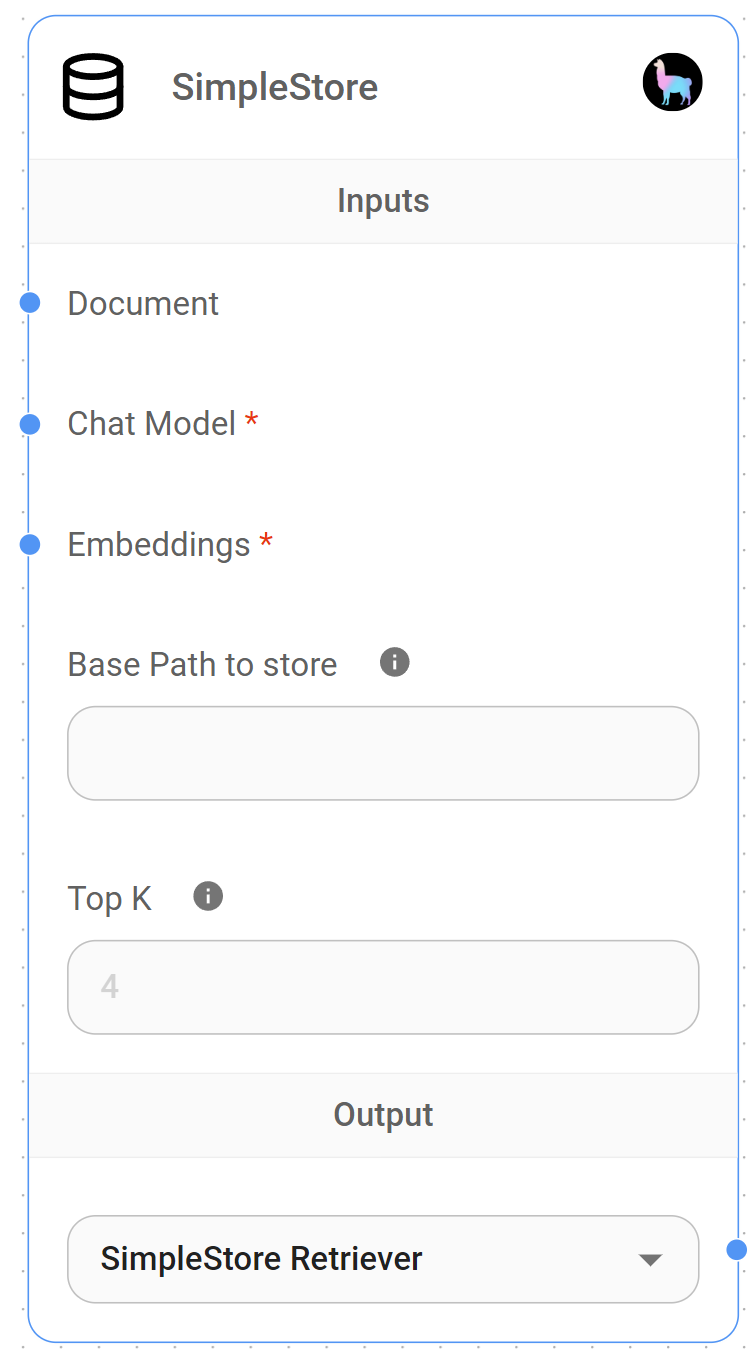
SimpleStore Node
{% hint style="info" %} This section is a work in progress. We appreciate any help you can provide in completing this section. Please check our Contribution Guide to get started. {% endhint %}
description: Learn how to use aimicromind utility nodes
Utilities
Utility nodes are development tools that help you implement custom JS, logic and notes in your flows.
Available Utilities:
description: Execute custom javascript function.
Custom JS Function
 (1) (1) (1).png)
Custom JS Function Node
{% hint style="info" %} This section is a work in progress. We appreciate any help you can provide in completing this section. Please check our Contribution Guide to get started. {% endhint %}
Set/Get Variable
If you are running a Custom Function, or LLM Chain, you might want to reuse the result in other nodes without having to recompute/rerun the same thing again. You can save the output result as a variable, and reuse it for other nodes that is further down the flow path.
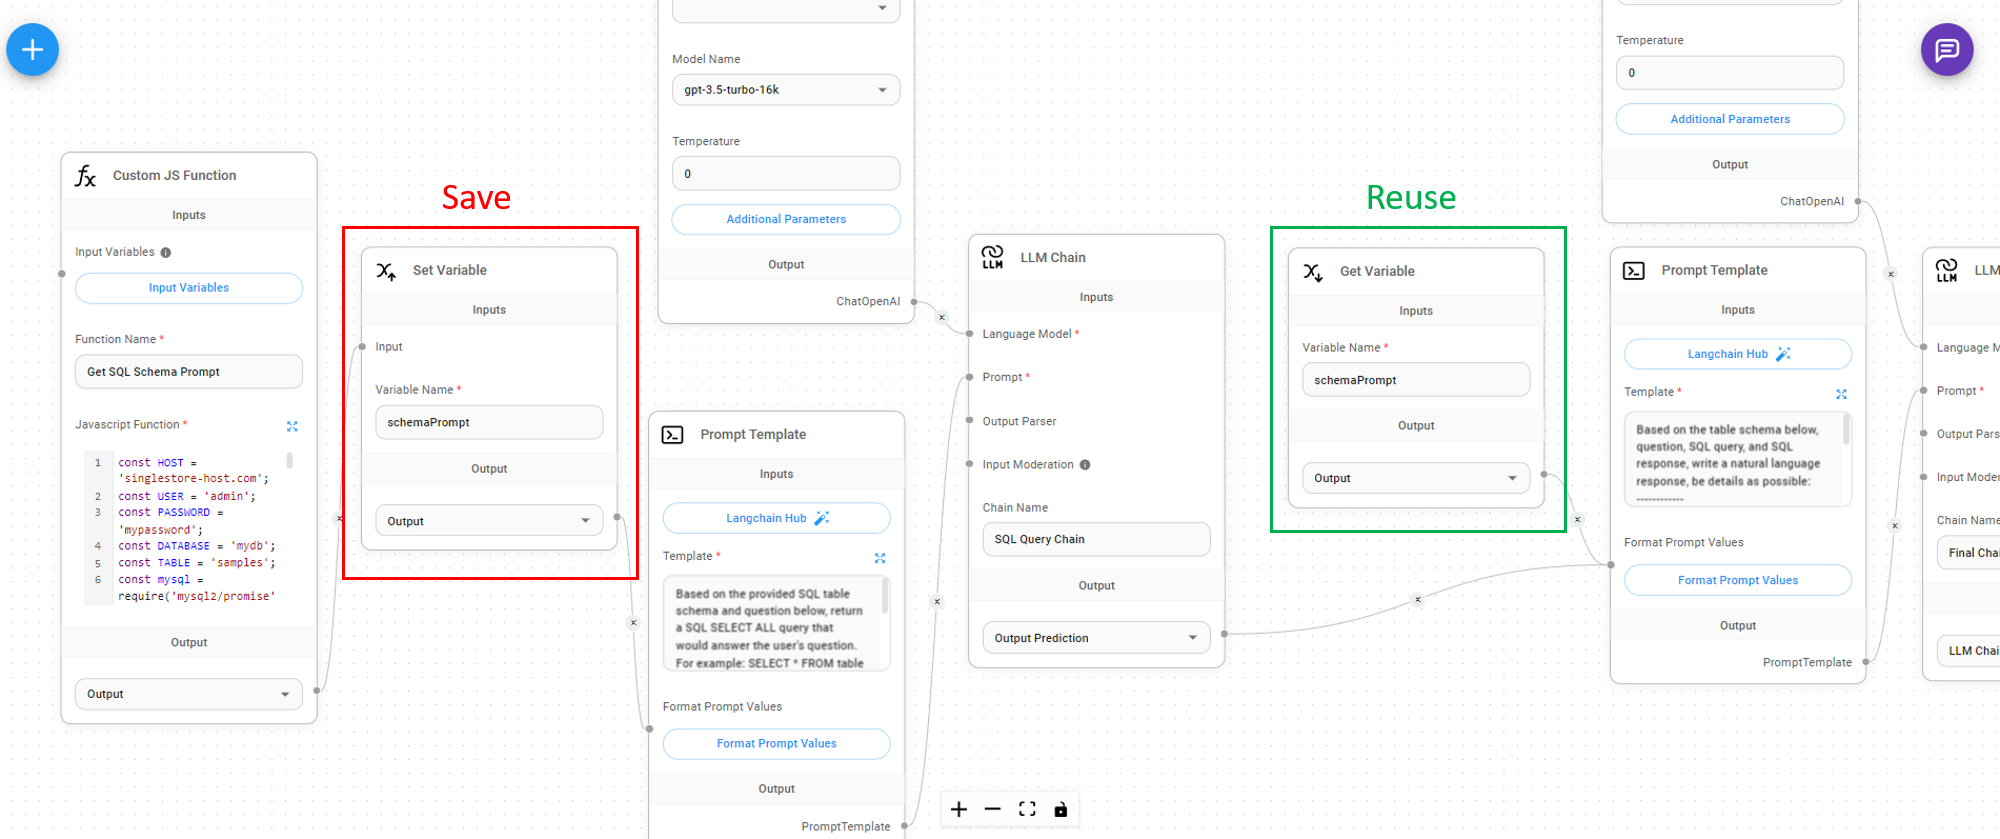
Set Variable
Taking inputs from any node that outputs string, number, boolean, json, array, we can assign a variable name to it.
 (1) (1) (1) (1) (1).png)
Get Variable
You can get the variable value from the variable name at a later stage:
 (1) (2).png)
If Else
AiMicromind allows you to split your chatflow into different branches depending on If/Else condition.
 (1) (1) (1) (1) (1) (1) (1) (1) (1) (1) (2).png)
Input Variables
 (1) (1) (1) (1) (1) (1) (1) (1) (1) (1) (1) (1) (1) (1) (1) (1) (1) (1) (1).png)
As noticed from the image above, it takes in any nodes that has json output. Some examples are: Custom Function, LLM Chain Output Prediction, Get/Set Variables.
 (1) (1) (1) (1) (1) (1) (1) (1) (1) (1) (1) (2) (1).png)
You can then give a variable name:
 (1) (1) (1) (1) (1) (1) (1) (1) (1) (1) (1) (1) (1) (1).png)
This variable can then be used in the If Function and Else Function with the prefix $. For example:
$output
If Else Name
You can name the node for easier visualization of what it does.
If Function
This is a piece of JS code that is ran on Node sandbox. It must:
- Contains the
ifstatement - Returns a value within
ifstatement
 (1) (1) (1) (1) (1) (1) (1) (1) (1) (1) (2) (1).png)
This gives much more flexibility for users to do complex comparison like regex, date comparsion and many more.
Else Function
Similar to If Function, it must returns a value. This function will only be ran if the If Function does not return a value.
 (1) (1) (1) (1) (1) (1) (2) (1) (1).png)
Output
 (1) (1) (1) (1) (1) (1) (2) (1).png)
When the If Function successfully returns a value, it will be passed to the True output dot as shown above. This allow users to pass the value to the next node.
Otherwise, the returned value from Else Function will be passed to the False output dot.
User can also take a look at the If Else template in the marketplace:
 (1) (1) (1) (1) (2) (1) (1).png)
description: Add a sticky note to the flow.
Sticky Note
 (1) (1) (1) (1) (1) (1) (1) (1) (1).png)
{% hint style="info" %} This section is a work in progress. We appreciate any help you can provide in completing this section. Please check our Contribution Guide to get started. {% endhint %}
description: Learn how to integrate aimicromind with third-party platforms
External Integrations
AiMicromind can also be used in 3rd party platform. Here are some usage examples:
description: Learn how to integrate aimicromindand Zapier
Zapier Zaps
Prerequisite
- Log in or sign up to Zapier
- Refer deployment to create a cloud hosted version of AiMicromind.
Setup
- Go to Zapier Zaps
- Click Create
Receive Trigger Message
-
Click or Search for Discord
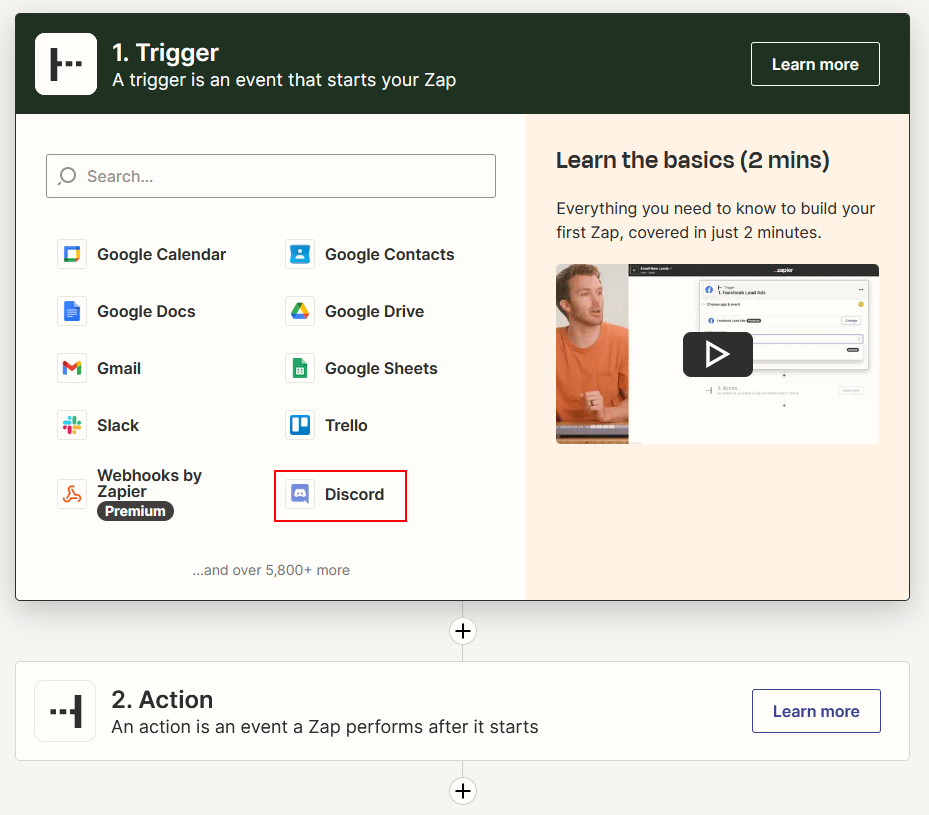
-
Select New Message Posted to Channel as Event then click Continue
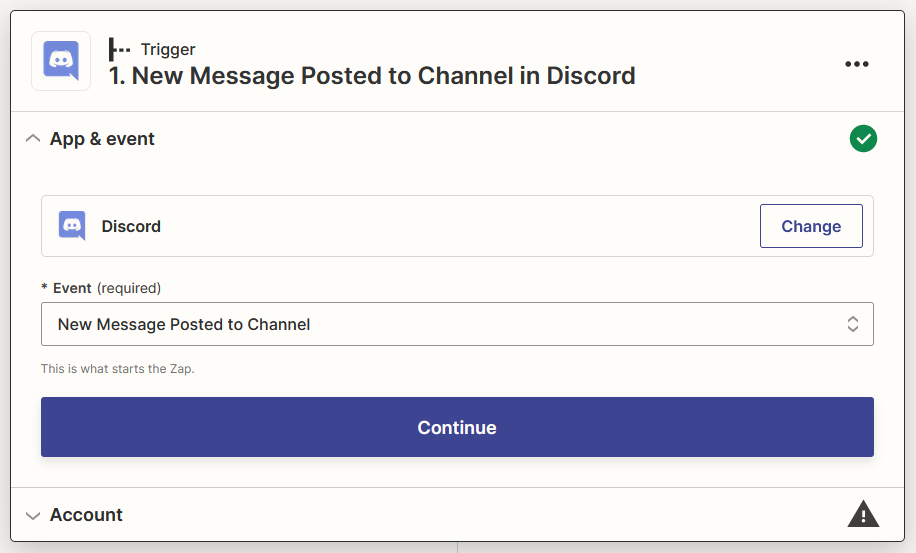
-
Sign in your Discord account

-
Add Zapier Bot to your prefered server
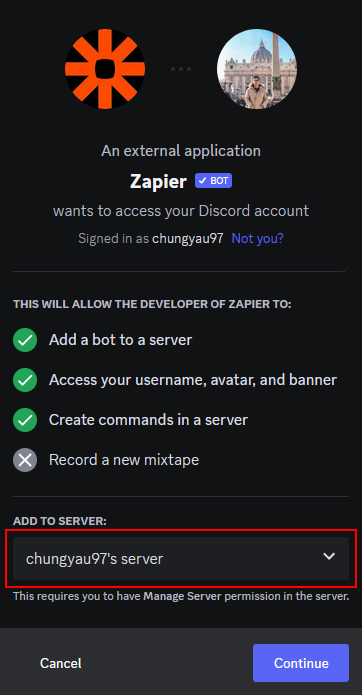
-
Give appropriate permissions and click Authorize then click Continue
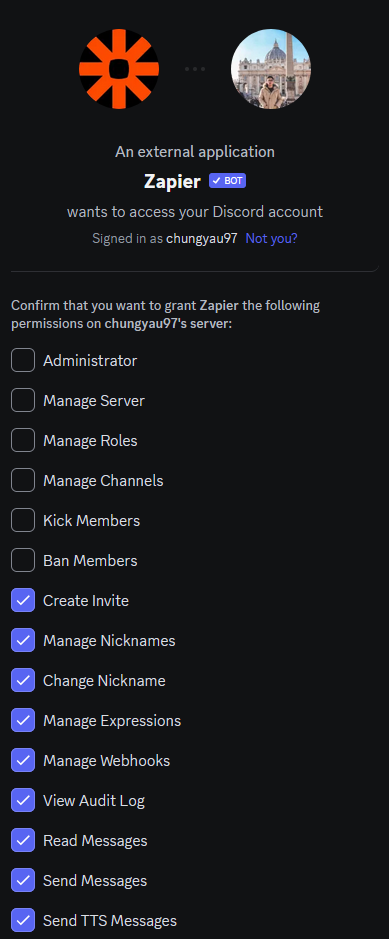
-
Select your prefered channel to interact with Zapier Bot then click Continue
-
Send a message to your selected channel on step 8

-
Click Test trigger
-
Select your message then click Continue with the selected record
Filter out Zapier Bot's Message
-
Click or search for Filter
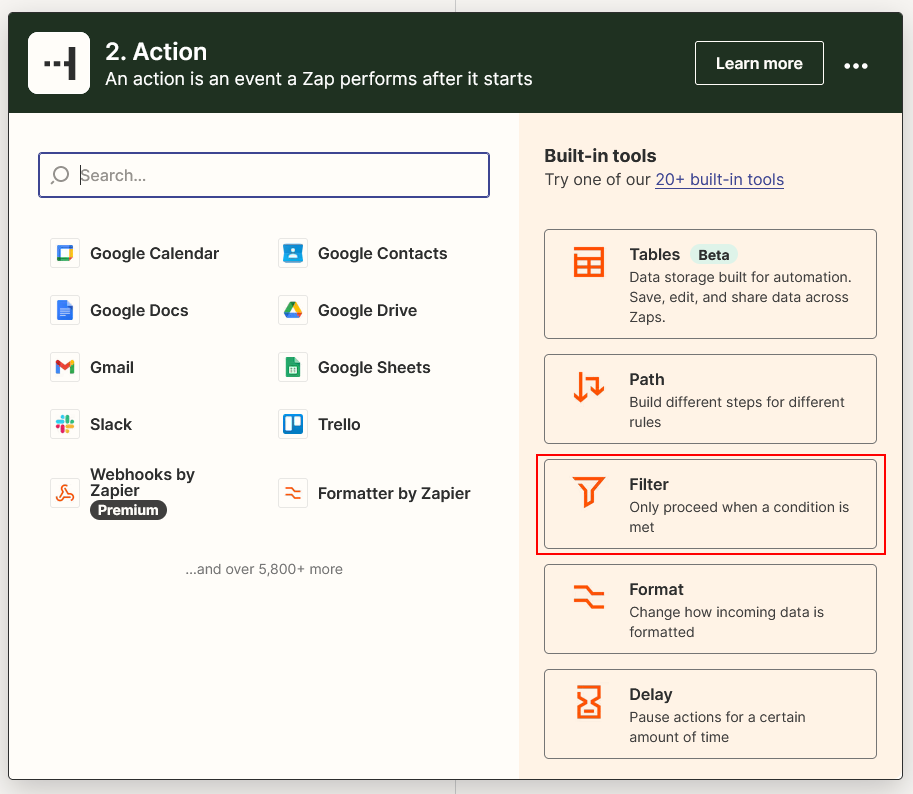
-
Configure Filter to not continue if received message from Zapier Bot then click Continue
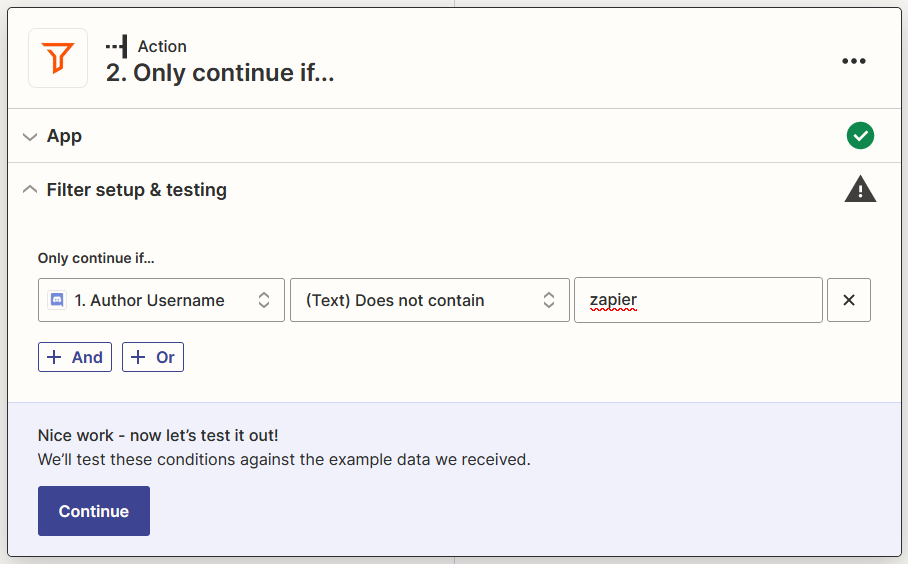
AiMicromind generate Result Message
-
Click +, click or search for AiMicromind
-
Select Make Prediction as Event, then click Continue
-
Click Sign in and insert your details, then click Yes, Continue to AiMicromind
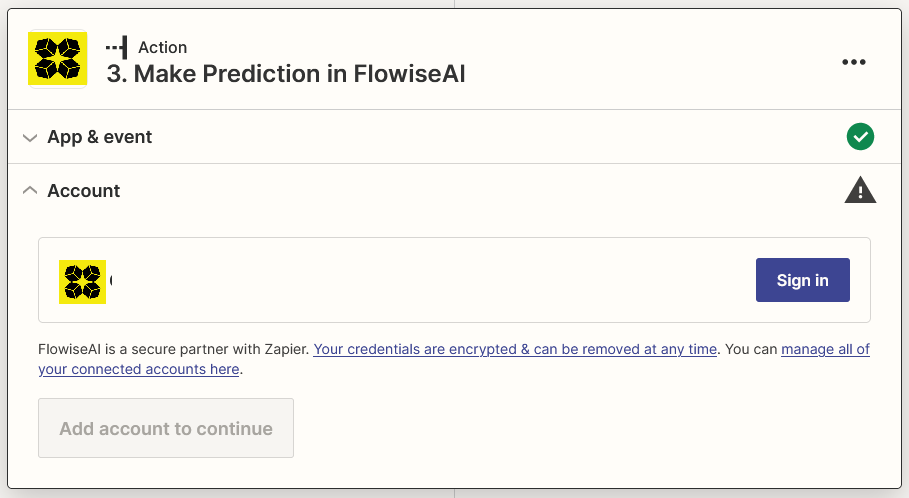
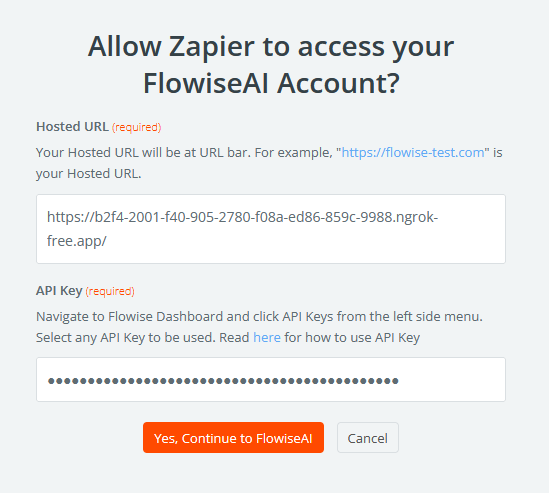
-
Select Content from Discord and your Flow ID, then click Continue
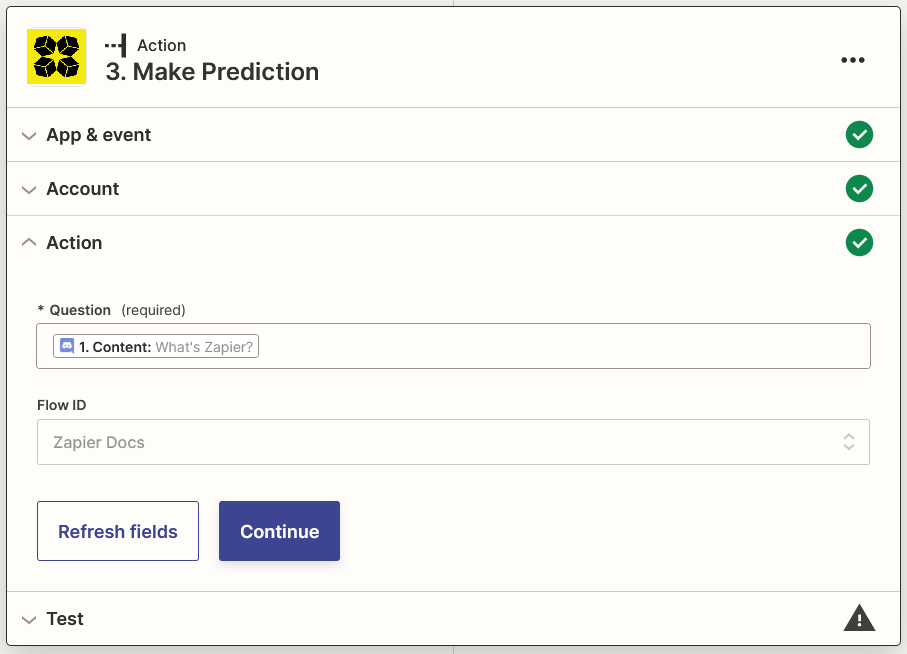
-
Click Test action and wait for your result
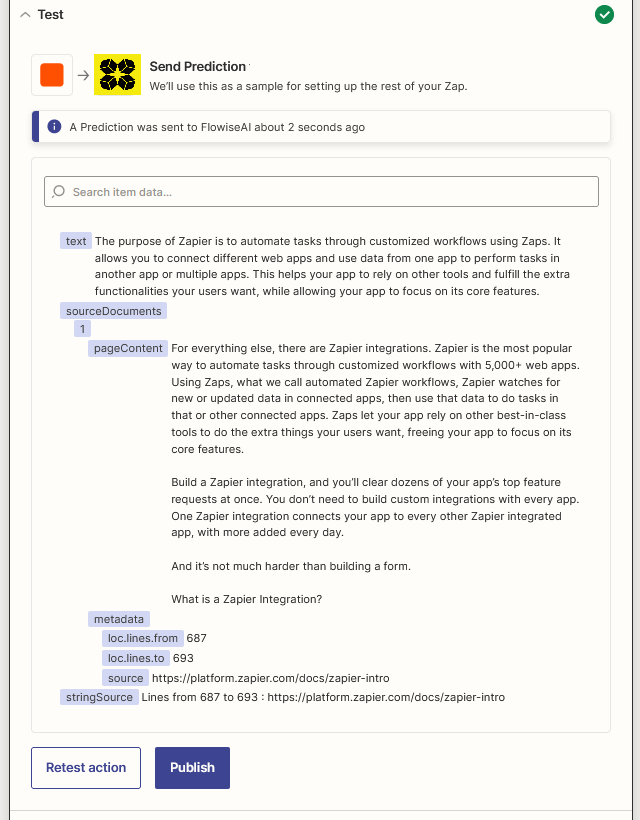
Send Result Message
-
Click +, click or search for Discord
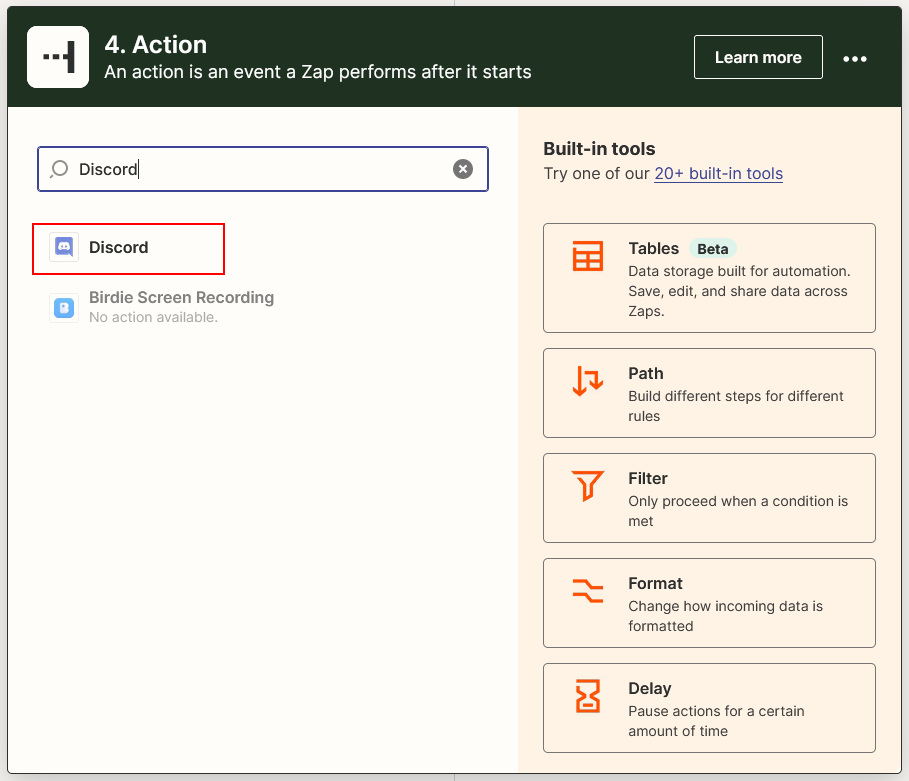
-
Select Send Channel Message as Event, then click Continue
-
Select the Discord's account that you signed in, then click Continue
-
Select your prefered Channel for channel and select Text and String Source (if available) from AiMicromind for Message Text, then click Continue
-
Click Test action
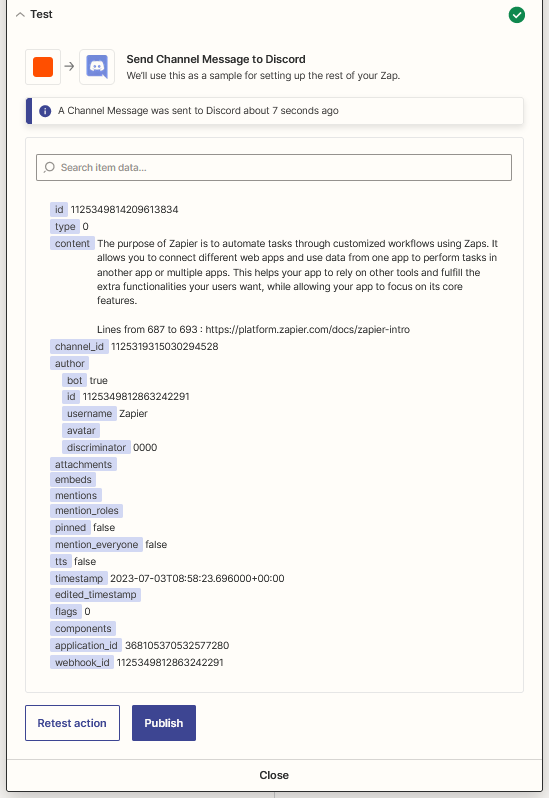
-
Voila 🎉 you should see the message arrived in your Discord Channel
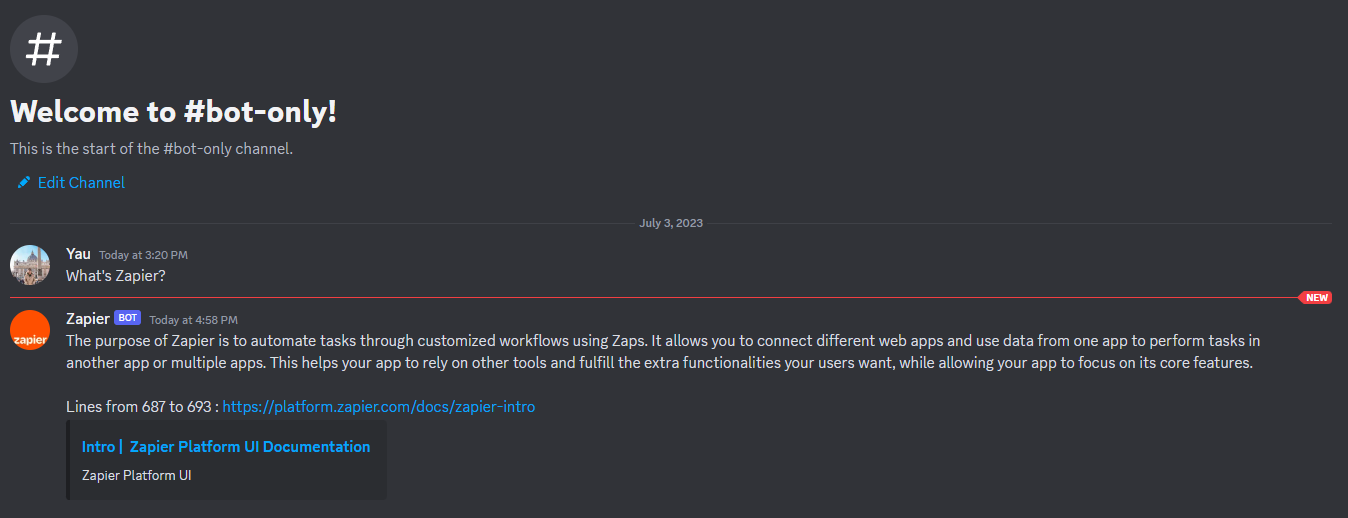
-
Lastly, rename your Zap and publish it
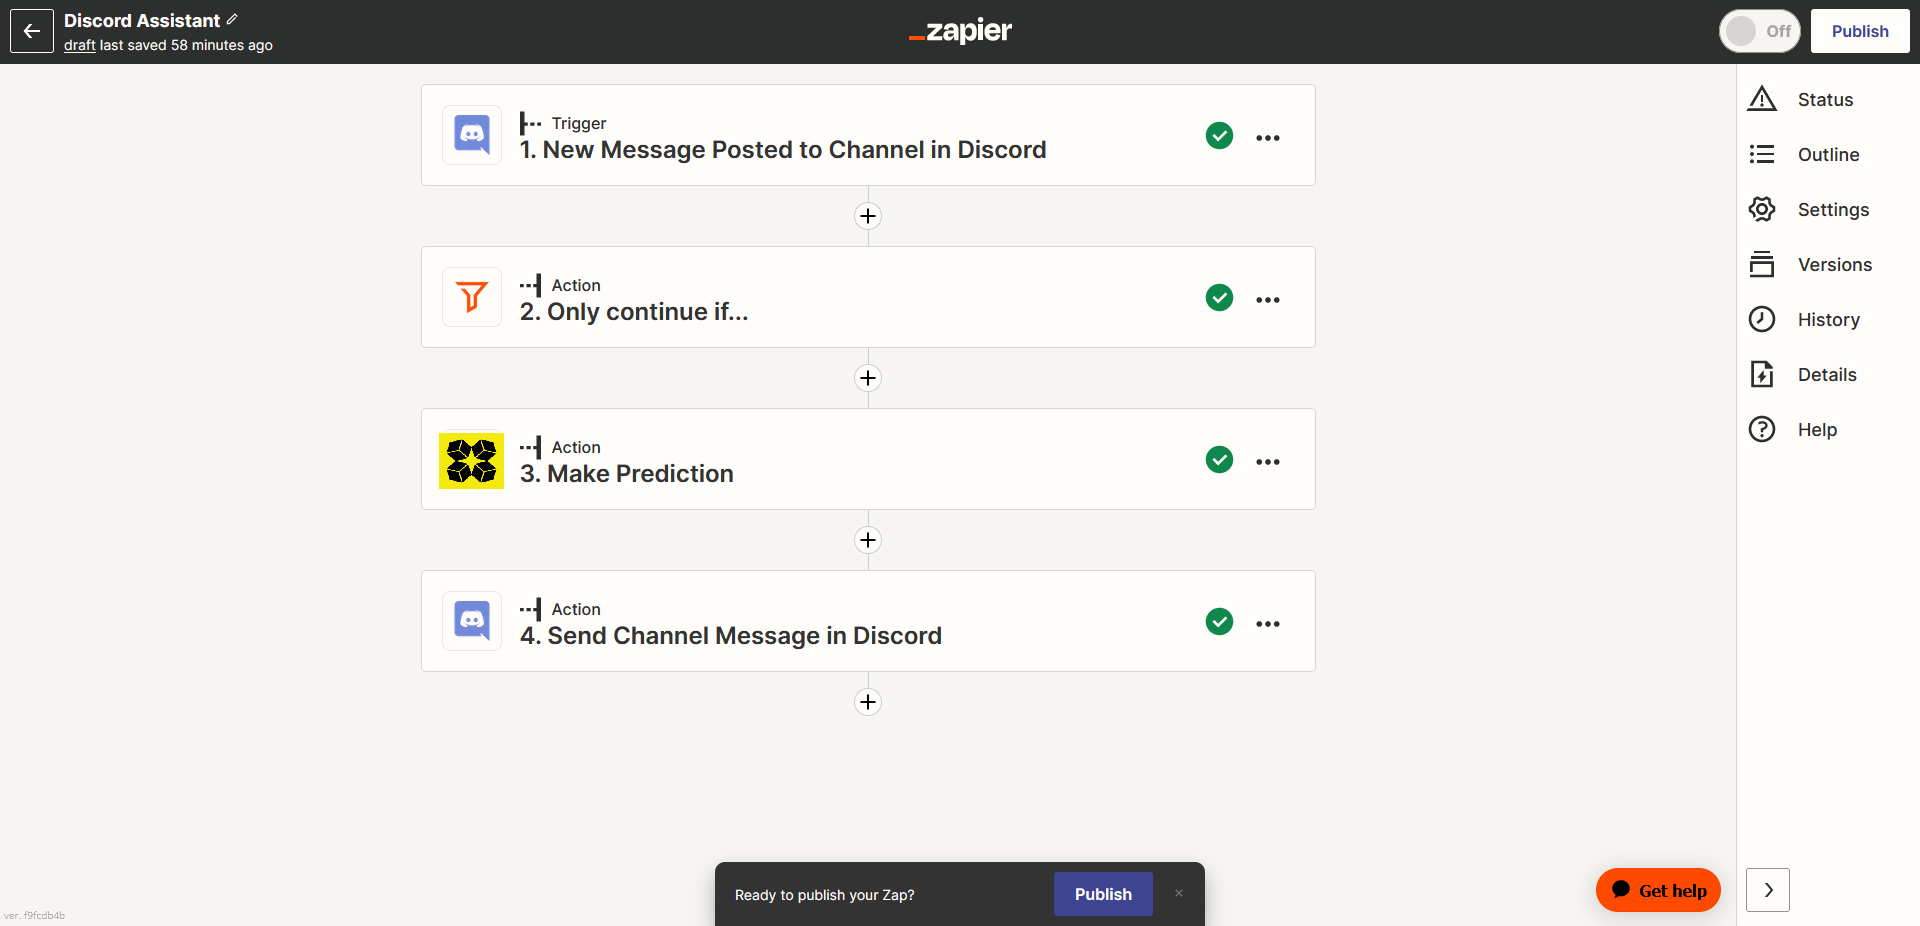
description: Learn about legacy versions of AiMicromind
Migration Guide
AiMicromind typically offers backward compatibility, meaning its updates follow a continuous development path. However, sometimes there can be breaking changes.
This section provides guidance when migrating to different breaking versions.
Versions
Cloud Migration
This guide is to help users to migrate from Cloud V1 to V2.
In Cloud V1, the URL of the apps looks like https://<your-instance-name>.app.aimicromind.com
In Cloud V2, the URL of the apps is https://cloud.aimicromind.com
Why Cloud V2? We have re-written cloud from scratch, that has 5x speed improvement, ability to have multiple workspaces, organization members, and most importantly it is highly scalable with production-ready architecture.
- Login to Cloud V1 via https://aimicromind.com/auth/login
- In your dashboard, at the top right corner, select Export:
.png)
- Select the data you would like to export:
.png)
- Save the exported JSON file.
- Navigate to Cloud V2 https://cloud.aimicromind.com
- Cloud V2 account does not sync with your existing account in Cloud V1, you'll have to register again or sign in with Google/Github.
.png)
- Once logged in, from the dashboard top right corner, click Import and upload the exported JSON file.
.png)
- New user by default is on the Free Plan with a limitation of 2 flows and assistants (for each). If your exported data has more than that, importing the exported JSON file will throw an error. This is why we are giving FIRST MONTH FREE on Starter Plan which has unlimited flows & assistants!
.png)
- Click the Get Started button, and add your preferred payment method:
.png)
.png)
- After added payment method, navigate back to AiMicromind, click Get Started on the selected plan and Confirm Change:
.png)
- If everything goes smoothly, you should be on Starter Plan with unlimited flows & assistants! Hooray :tada: Try importing the JSON file again if it was failing previously due to the free plan limitation.
{% hint style="success" %} All the IDs from exported data remain the same, so you don't have to worry about updating the ID for the API, you just need to update the URL such as https://cloud.aimicromind.com/api/v1/prediction/69fb1055-ghj324-ghj-0a4ytrerf {% endhint %}
{% hint style="warning" %} Credentials are not exported. You will have to create new credentials and use those in the flows and assistants. {% endhint %}
- After you have verified everything is working as expected, you can now cancel the Cloud V1 subscription.
- From the left side panel, click Account Settings, scroll to the bottom, and you will see Cancel Previous Subscription:
.png)
- Enter your previous email that was used to sign up the Cloud V1, and hit Send Instructions.
- You will then receive an email to cancel your previous subscription:
.png)
- Clicking the Manage Subscription button will bring you to a portal where you can cancel the Cloud V1 subscription. Your Cloud V1 app will then get shut down on the next billing cycle.
.png)
We sincerely apologize for any inconvenience we have caused during the process of migration. If anything we would love to help, don't hesitate to reach us at support@aimicromind.com.
description: In v1.3.0, we introduced Credentials
v1.3.0 Migration Guide
Credentials allow user to store all 3rd party API keys into database, and can be easily reused on respective nodes, without having to copy pasting every time.
Credentials are encrypted by an encryption key created using a passphrase. Only user who has access to the key can encrypt/decrypt the credentials. Furthermore, decrypted credentials will never get sent back to client to avoid network spoofing.
Below are a few important guides to help you migrate to v1.3.0:
- Set
PASSPHRASEenv variable. This is used to generate an encryption key used to encrypt/decrypt your credentials - Set
SECRETKEY_PATHenv variable. To persist your encryption key, specify the location where encryption key is being saved.
A typical .env file should looks like this:
PORT=3000
PASSPHRASE=MYPASSPHRASE
DATABASE_PATH=/root/.aimicromind
APIKEY_PATH=/root/.aimicromind
SECRETKEY_PATH=/root/.aimicromind
LOG_PATH=/root/.aimicromind/logs
- Node version. There will be warning message shown on the top right side of a node if the version is outdated. This means there is a new changes on the node, and you should delete and re-add it from the menu list.
 (1) (1) (1) (1) (1) (1).png)
That's it! Let us know if you've come across with any issues. Happy upgrading!
Video Tutorial
In this video tutorial (coming soon): Microminders will show how to set up credentials on AiMicromind.
description: In v1.4.3, we introduced a unified Vector Store node
v1.4.3 Migration Guide
Before
Previously, users would have to create 2 flows to perform upsert and query:
Upsert
 (1) (1) (1) (1) (1) (1) (1) (1) (1) (1) (1) (1) (1) (1) (1) (1) (1) (1) (1) (1) (1).png)
Load Existing
 (1) (1) (1) (1) (1) (1) (1) (1) (1) (1) (1) (1) (1) (1) (1) (1) (1) (1) (1) (1) (1) (1).png)
With this technique, there are 2 drawbacks:
- Additional LLM call will need to be made in order for the upsert to happen
- Any slight changes will caused the flow to be upserted again
After
Now, user can just use one node to accomplish all:
 (1) (1) (1) (1) (1) (1) (1) (1) (1) (1) (1) (1) (1) (1) (1) (1) (1) (1) (1).png)
Users now have the option to manually kickoff the upsert by clicking the green button at the top right:
 (1) (1) (1) (1) (1) (1) (1) (1) (1) (1) (2) (1) (1).png)
 (1) (1) (1) (1) (1) (1) (1) (1) (1) (1) (1) (1) (1) (1) (1) (1).png)
It comes with the new API - /api/v1/vector/upsert:
 (1) (1) (1) (1) (1) (1) (1) (1) (1) (1) (2).png)
In future, we will be rolling out feature for querying, deleting indexes. This is the first step towards a more flexible way of performing vector-related operations. We strongly recommend users to update to the new nodes.
v2.1.4 Migration Guide
OverrideConfig enables users to override flow configurations from the API or when using Embed. Due to security concerns, it is now disabled by default.
Users must explicitly specify which config can be overriden from the UI.
1.) Go to Configuration:
.png)
2.) Enable Override Configuration:
.png)
3.) Turn on the toggle for the config that can be overriden and save it.
.png)
4.) For example, users can then override these variables and config. Refer to OverrideConfig.
{
    "overrideConfig": {
        "systemMessage": "You are helpful assistant",
        "vars": {
            "character": "nice"
        }
    }
}
description: Learn to build your own aimicromind solutions through practical examples
Use Cases
This section provides a collection of practical examples to demonstrate how aimicromind can be used to build a variety of solutions.
Each use case will guide you through the process of designing, building, and deploying real-world applications using AiMicromind.
Guides
- Calling Children Flows
- Calling Webhook
- Interacting with API
- Multiple Documents QnA
- SQL QnA
- Upserting Data
- Web Scrape QnA
description: Learn how to effectively use the Chatflow Tool and the Custom Tool
Calling Children Flows
One of the powerful features of aimicromind is that you can turn flows into tools. For example, having a main flow to orchestrate which/when to use the necessary tools. And each tool is designed to perform a niece/specific thing.
This offers a few benefits:
- Each children flow as tool will execute on its own, with separate memory to allow cleaner output
- Aggregating detailed outputs from each children flow to a final agent, often results in higher quality output
You can achieve this by using the following tools:
- Chatflow Tool
- Custom Tool
Chatflow Tool
- Have a chatflow ready. In this case, we create a Chain of Thought chatflow that can go through multiple chainings.
.png)
- Create another chatflow with Tool Agent + Chatflow Tool. Select the chatflow you want to call from the tool. In this case, it was Chain of Thought chatflow. Give it a name, and an appropriate description to let LLM knows when to use this tool:
.png)
- Test it out!
.png)
- From the response, you can see the input and output from the Chatflow Tool:
.png)
Custom Tool
With the same example as above, we are going to create a custom tool that will calls the Prediction API of the Chain of Thought chatflow.
- Create a new tool:
| Tool Name | Tool Description |
|---|---|
| ideas_flow | Use this tool when you need to achieve certain objective |
Input Schema:
| Property | Type | Description | Required |
|---|---|---|---|
| input | string | input question | true |
 (1).png)
Javascript Function of the tool:
const fetch = require('node-fetch');
const url = 'http://localhost:3000/api/v1/prediction/<chatflow-id>'; // replace with specific chatflow id

const body = {
	"question": $input
};

const options = {
	method: 'POST',
	headers: {
		'Content-Type': 'application/json'
	},
	body: JSON.stringify(body)
};

try {
	const response = await fetch(url, options);
	const resp = await response.json();
	return resp.text;
} catch (error) {
	console.error(error);
	return '';
}
- Create a Tool Agent + Custom Tool. Specify the tool we've created in Step 1 in the Custom Tool.
.png)
- From the response, you can see the input and output from the Custom Tool:
.png)
Conclusion
In this example, we have successfully demonstrate 2 ways of turning other chatflows into tools, via Chatflow Tool and Custom Tool. Both are using the same code logic under the hood.
description: Learn how to call a webhook on Make
Calling Webhook
This tutorial walks you through creating a custom tool in AiMicromind that calls a webhook endpoint, passing the necessary parameters in the request body. We will use Make.com to set up a webhook workflow that sends messages to a Discord channel.
Setting Up a Webhook in Make.com
-
Sign up or log in to Make.com.
-
Create a new workflow containing a Webhook module and a Discord module, as shown below:
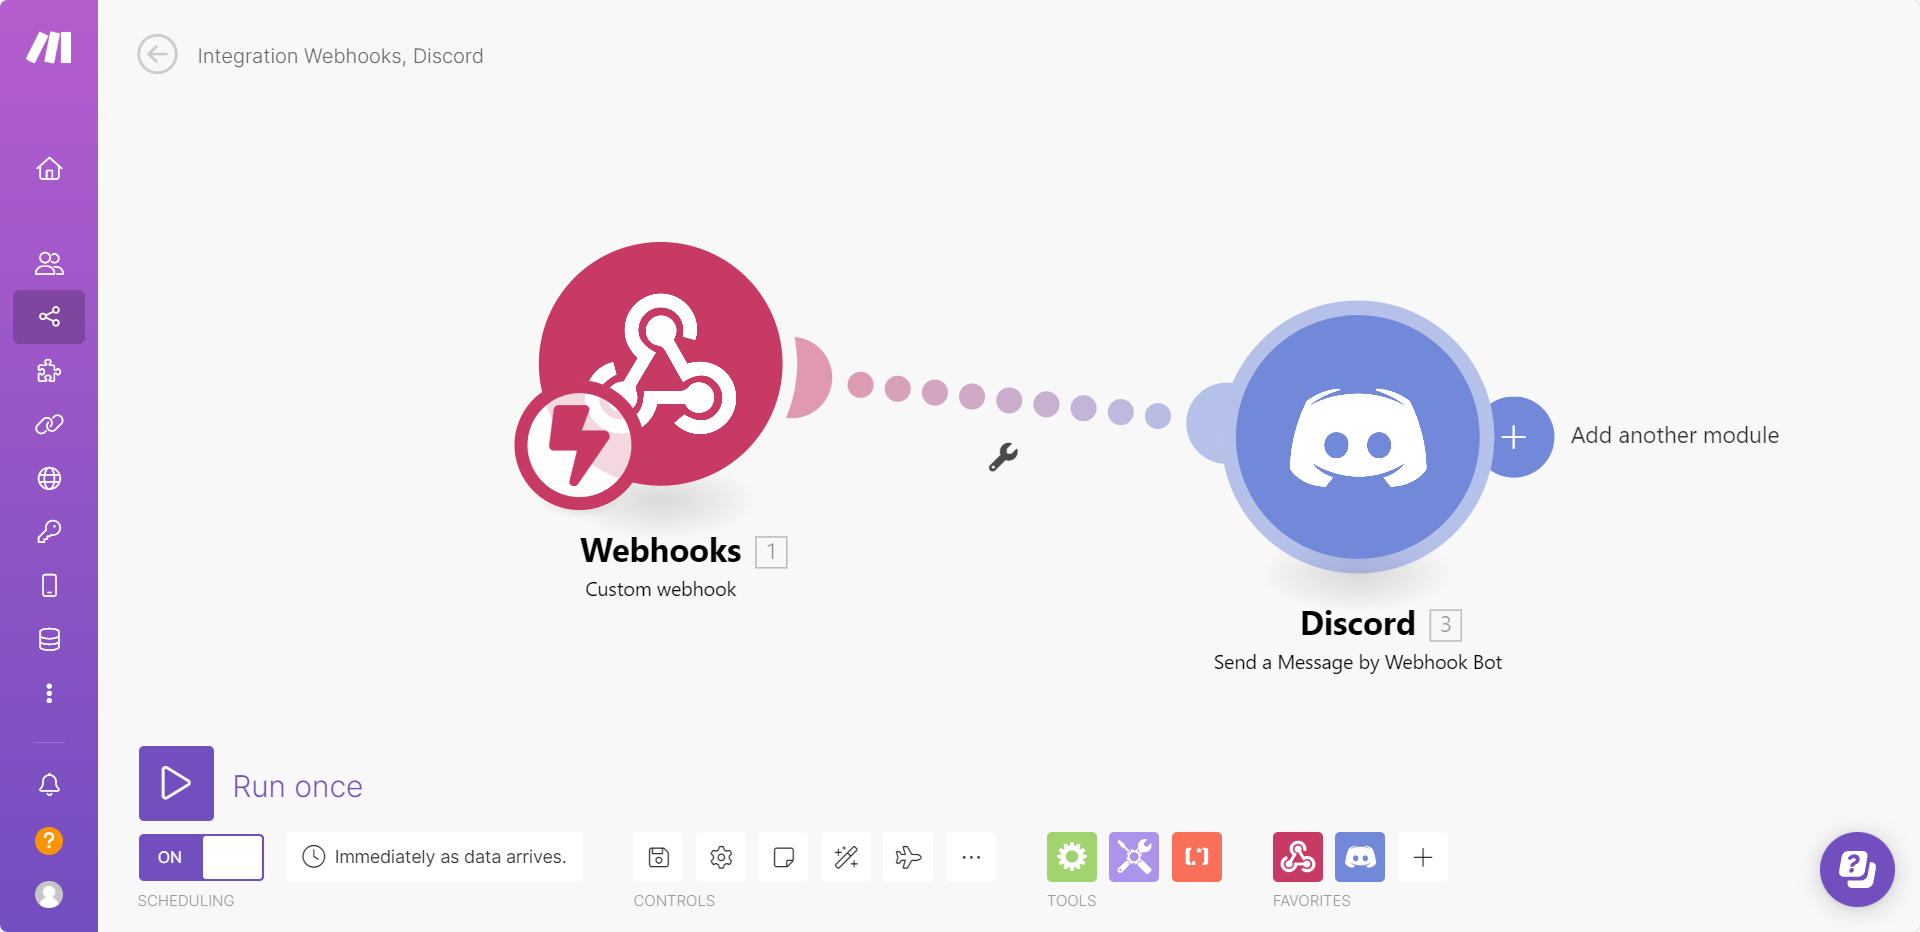
-
From the Webhook module, copy the webhook URL:
.png)
-
In the Discord module, configure it to pass the
messagefrom the webhook body as the message sent to the Discord channel:.png)
-
Click Run Once to start listening for incoming requests.
-
Send a test POST request with the following JSON body:
{ "message": "Hello Discord!" }.png)
-
If successful, you will see the message appear in your Discord channel:
.png)
Congratulations! You have successfully set up a webhook workflow that sends messages to Discord. 🎉
Creating a Webhook Tool in AiMicromind
Next, we will create a custom tool in AiMicromind to send webhook requests.
Step 1: Add a New Tool
-
Open the AiMicromind dashboard.
-
Click Tools, then select Create.
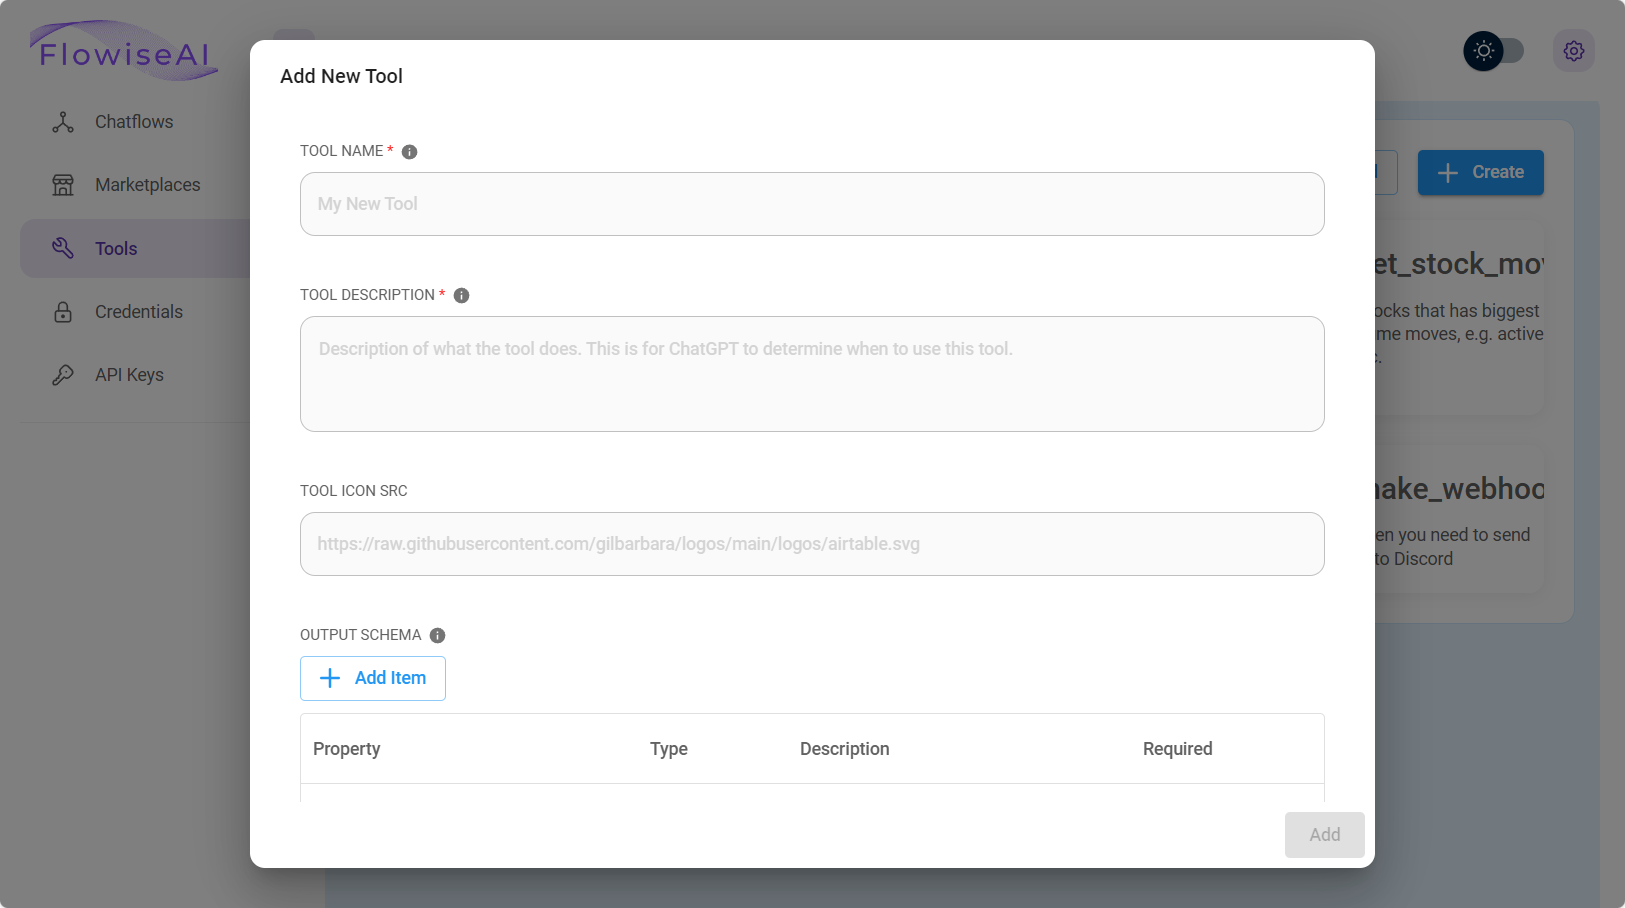
-
Fill in the following fields:
Field Value Tool Name make_webhook(must be in snake_case)Tool Description Useful when you need to send messages to Discord Tool Icon Src AiMicromind Tool Icon -
Define the Input Schema:
.png)
Step 2: Add Webhook Request Logic
Enter the following JavaScript function:
const fetch = require('node-fetch');
const webhookUrl = 'https://hook.eu1.make.com/abcdef';
const body = {
    "message": $message
};
const options = {
    method: 'POST',
    headers: {
        'Content-Type': 'application/json'
    },
    body: JSON.stringify(body)
};
try {
    const response = await fetch(webhookUrl, options);
    const text = await response.text();
    return text;
} catch (error) {
    console.error(error);
    return '';
}
-
Click Add to save your custom tool.
.png)
Step 3: Build a Chatflow with Webhook Integration
-
Create a new canvas and add the following nodes:
- Buffer Memory
- ChatOpenAI
- Custom Tool (select
make_webhook) - OpenAI Function Agent
-
Connect them as shown:
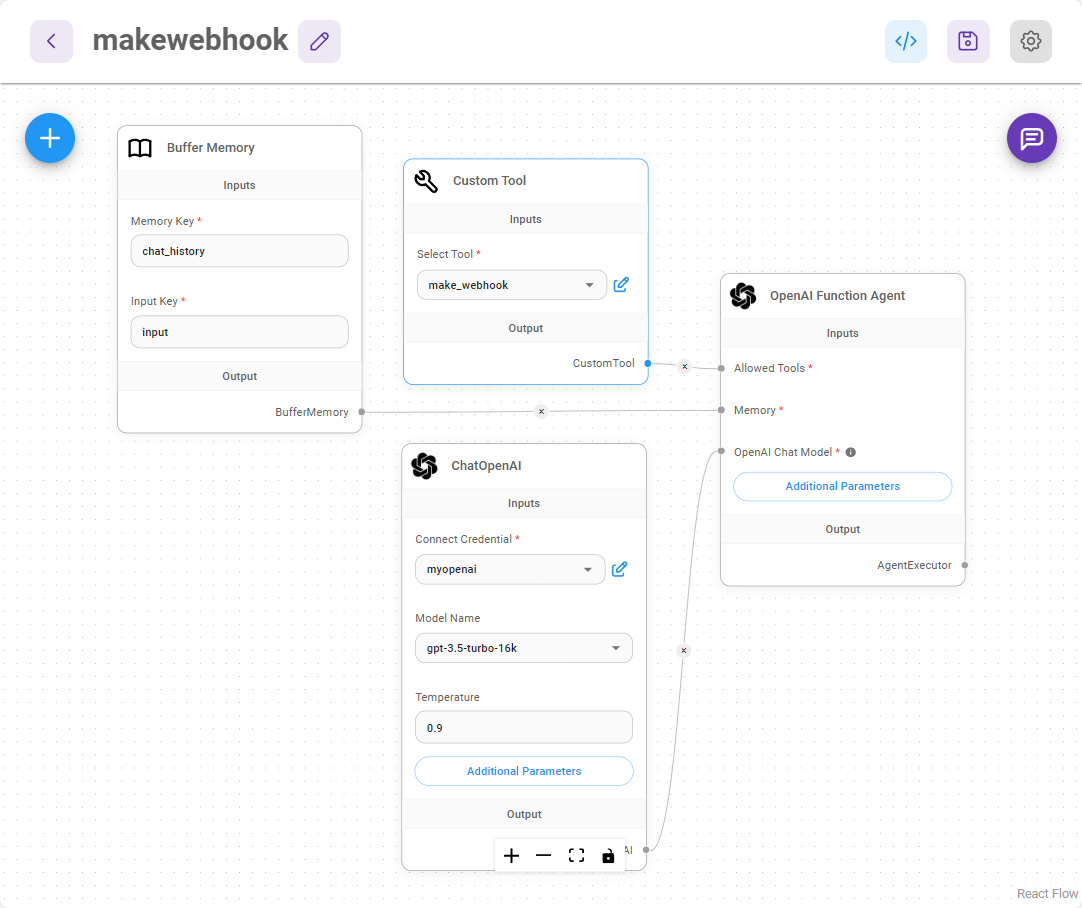
-
Save the chatflow and start testing it.
Step 4: Sending Messages via Webhook
Try asking the chatbot a question like:
"How to cook an egg?"
Then, request the agent to send this information to Discord:
.png)
You should see the message appear in your Discord channel:
.png)
Alternative Webhook Testing Tools
If you want to test webhooks without Make.com, consider using:
- Beeceptor – Quickly set up a mock API endpoint.
- Webhook.site – Inspect and debug HTTP requests in real-time.
- Pipedream RequestBin – Capture and analyze incoming webhooks.
More Tutorials (coming soon)
By following this guide, you can trigger webhook workflows dynamically and extend automation to various services like Gmail, Google Sheets, and more.
description: Learn how to use external API integrations with AiMicromind
Interacting with API
The OpenAPI Specification (OAS) defines a standard, language-agnostic interface to HTTP APIs. The goal of this use case is to have the LLM automatically figure out which API to call, while still having a stateful conversation with user.
OpenAPI Chain
- In this tutorial, we are going to use Klarna OpenAPI
{% code overflow="wrap" %}
{
  "openapi": "3.0.1",
  "info": {
    "version": "v0",
    "title": "Open AI Klarna product Api"
  },
  "servers": [
    {
      "url": "https://www.klarna.com/us/shopping"
    }
  ],
  "tags": [
    {
      "name": "open-ai-product-endpoint",
      "description": "Open AI Product Endpoint. Query for products."
    }
  ],
  "paths": {
    "/public/openai/v0/products": {
      "get": {
        "tags": [
          "open-ai-product-endpoint"
        ],
        "summary": "API for fetching Klarna product information",
        "operationId": "productsUsingGET",
        "parameters": [
          {
            "name": "countryCode",
            "in": "query",
            "description": "ISO 3166 country code with 2 characters based on the user location. Currently, only US, GB, DE, SE and DK are supported.",
            "required": true,
            "schema": {
              "type": "string"
            }
          },
          {
            "name": "q",
            "in": "query",
            "description": "A precise query that matches one very small category or product that needs to be searched for to find the products the user is looking for. If the user explicitly stated what they want, use that as a query. The query is as specific as possible to the product name or category mentioned by the user in its singular form, and don't contain any clarifiers like latest, newest, cheapest, budget, premium, expensive or similar. The query is always taken from the latest topic, if there is a new topic a new query is started. If the user speaks another language than English, translate their request into English (example: translate fia med knuff to ludo board game)!",
            "required": true,
            "schema": {
              "type": "string"
            }
          },
          {
            "name": "size",
            "in": "query",
            "description": "number of products returned",
            "required": false,
            "schema": {
              "type": "integer"
            }
          },
          {
            "name": "min_price",
            "in": "query",
            "description": "(Optional) Minimum price in local currency for the product searched for. Either explicitly stated by the user or implicitly inferred from a combination of the user's request and the kind of product searched for.",
            "required": false,
            "schema": {
              "type": "integer"
            }
          },
          {
            "name": "max_price",
            "in": "query",
            "description": "(Optional) Maximum price in local currency for the product searched for. Either explicitly stated by the user or implicitly inferred from a combination of the user's request and the kind of product searched for.",
            "required": false,
            "schema": {
              "type": "integer"
            }
          }
        ],
        "responses": {
          "200": {
            "description": "Products found",
            "content": {
              "application/json": {
                "schema": {
                  "$ref": "#/components/schemas/ProductResponse"
                }
              }
            }
          },
          "503": {
            "description": "one or more services are unavailable"
          }
        },
        "deprecated": false
      }
    }
  },
  "components": {
    "schemas": {
      "Product": {
        "type": "object",
        "properties": {
          "attributes": {
            "type": "array",
            "items": {
              "type": "string"
            }
          },
          "name": {
            "type": "string"
          },
          "price": {
            "type": "string"
          },
          "url": {
            "type": "string"
          }
        },
        "title": "Product"
      },
      "ProductResponse": {
        "type": "object",
        "properties": {
          "products": {
            "type": "array",
            "items": {
              "$ref": "#/components/schemas/Product"
            }
          }
        },
        "title": "ProductResponse"
      }
    }
  }
}
{% endcode %}
- You can use a JSON to YAML converter and save it as a
.yamlfile, and upload it to OpenAPI Chain, then test by asking some questions. OpenAPI Chain will send the whole specs to LLM, and have the LLM automatically use the correct method and parameters for the API call.
.png)
- However, if you want to have a normal conversation chat, it is not able to do so. You will see the following error. This is because OpenAPI Chain has the following prompt:
Use the provided API's to respond to this user query
Since we "forced" it to always find the API to answer user query, in the cases of normal conversation that is irrelevant to the OpenAPI, it fails to do so.
.png)
Using this method might not work well if you have large OpenAPI spec. This is because we are including all the specifications as part of the message sent to LLM. We then rely on LLM to figure out the correct URL, query parameters, request body, and other necessary parameters needed to answer user query. As you can imagine, if your OpenAPI specs are complicated, there is a higher chance LLM will hallucinates.
Tool Agent + OpenAPI Toolkit
In order to solve the above error, we can use Agent. From the official cookbook by OpenAI: Function calling with an OpenAPI specification, it is recommended to convert each API into a tool itself, instead of feeding all the APIs into LLM as single message. An agent is also capable of having human-like interaction, with the ability to decide which tool to use depending on user's query.
OpenAPI Toolkit will converts each of the API from YAML file into a set of tools. This way, users don't have to create a Custom Tool for each API.
- Connect ToolAgent with OpenAPI Toolkit. Here, we upload the YAML spec for OpenAI API. The spec file can be found at the bottom of the page.
.png)
- Let's try it!
 (1) (1) (1) (1) (1).png)
As you can noticed from the chat, the agent is capable of carrying out normal conversation, and use appropriate tool to answer user query. If you are using Analytic Tool, you can see the list of tools we converted from the YAML file:
 (1) (1) (1) (1).png)
Conclusion
We've successfully created an agent that can interact with API when necessary, and still be able handle stateful conversations with users. Below are the templates used in this section:
{% file src="../.gitbook/assets/OpenAPI Chatflow.json" %}
{% file src="../.gitbook/assets/OpenAPI Toolkit with ToolAgent Chatflow.json" %}
{% file src="../.gitbook/assets/openai_openapi.yaml" %}
description: Learn how to query multiple documents correctly
Multiple Documents QnA
From the last Web Scrape QnA example, we are only upserting and querying 1 website. What if we have multiple websites, or multiple documents? Let's take a look and see how we can achieve that.
In this example, we are going to perform QnA on 2 PDFs, which are FORM-10K of APPLE and TESLA.
.png)
.png)
Upsert
- Find the example flow called - Conversational Retrieval QA Chain from the marketplace templates.
- We are going to use PDF File Loader, and upload the respective files:
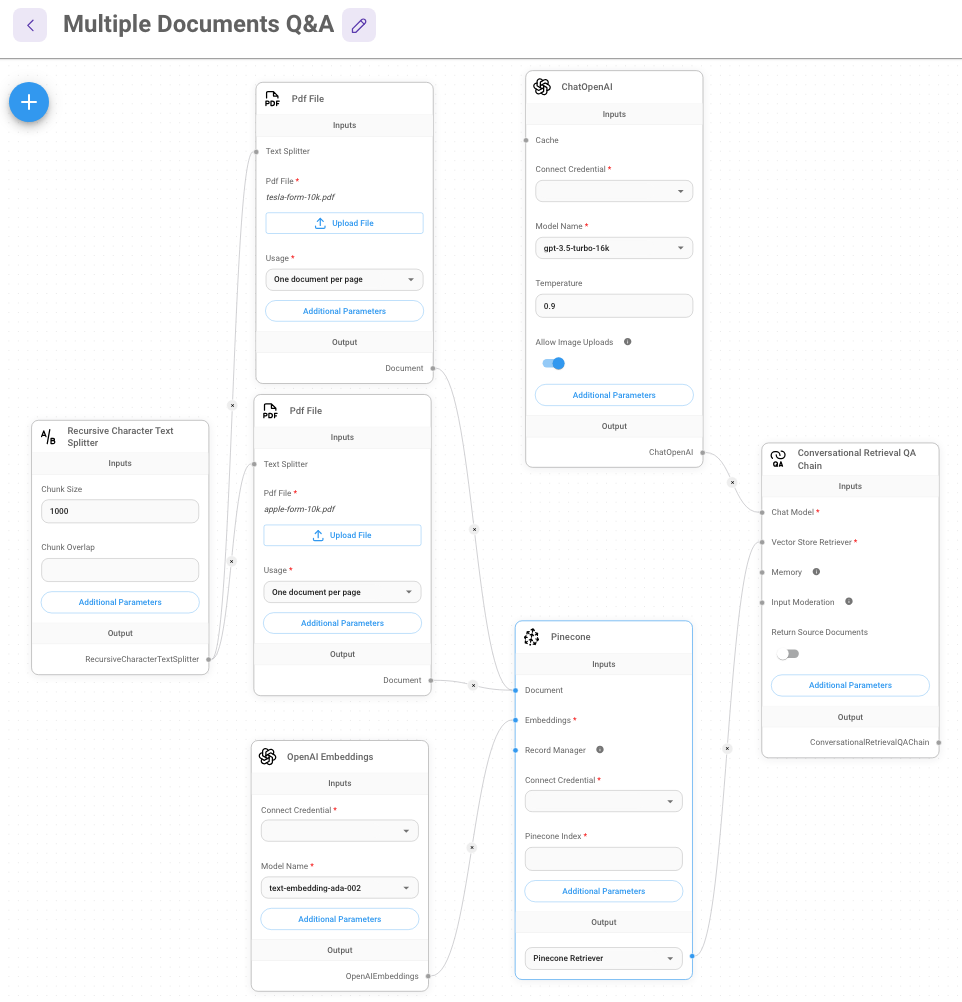
- Click the Additional Parameters of PDF File Loader, and specify metadata object. For instance, PDF File with Apple FORM-10K uploaded can have a metadata object
{source: apple}, whereas PDF File with Tesla FORM-10K uploaded can have{source: tesla}. This is done to seggregate the documents during retrieval time.
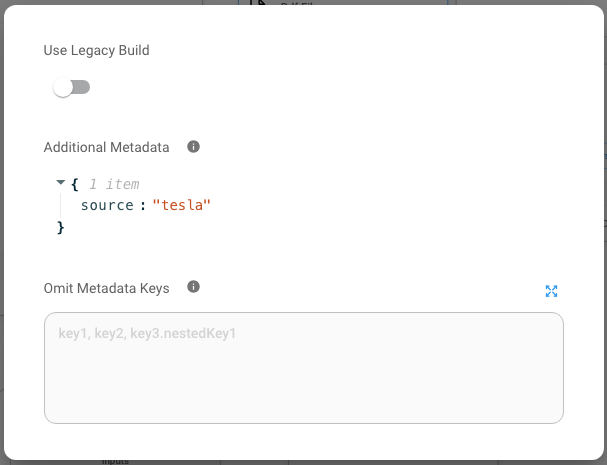
- After filling in the credentials for Pinecone, click Upsert:
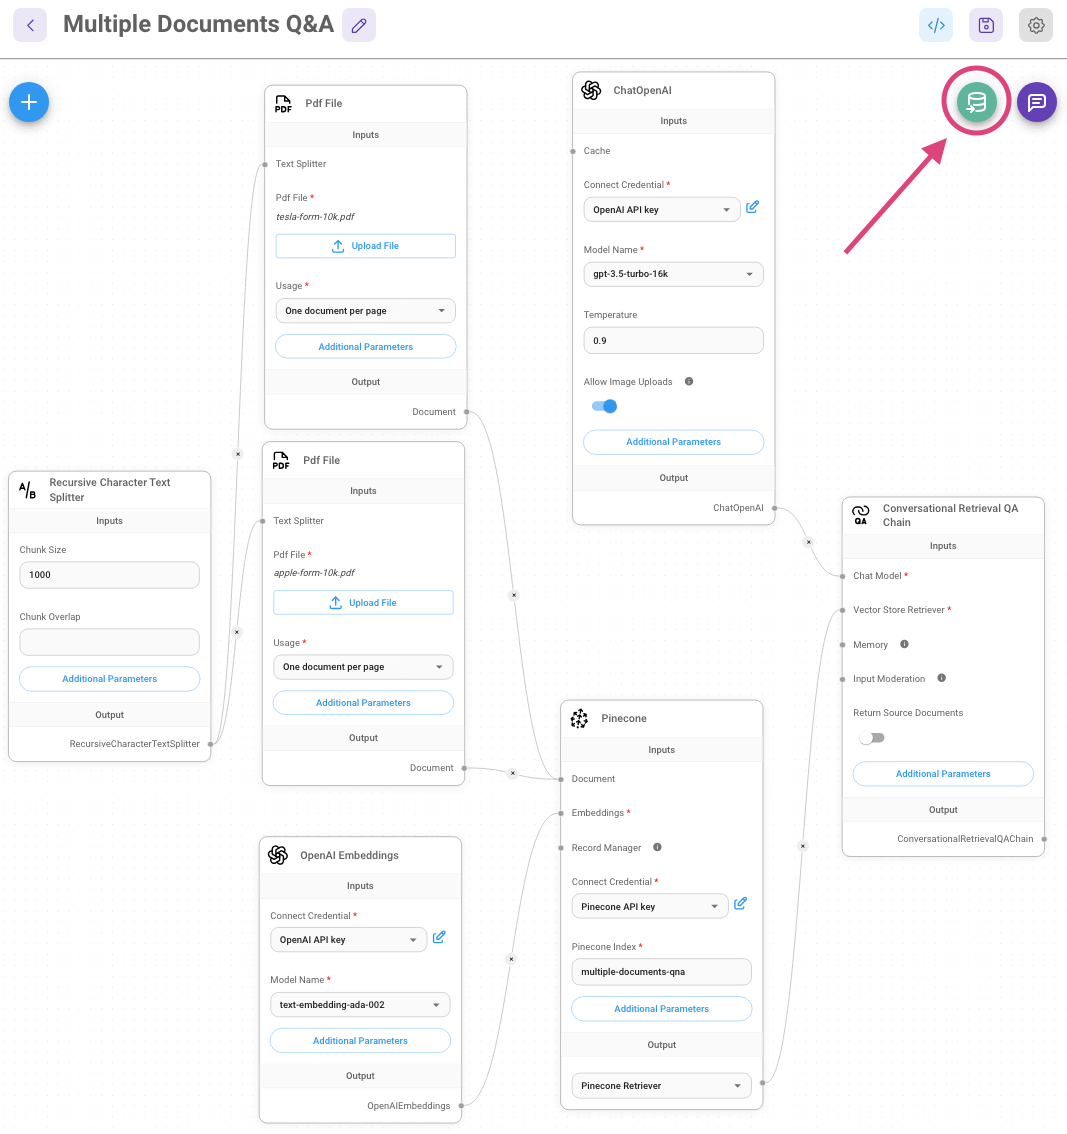
.png)
- On the Pinecone console you will be able to see the new vectors that were added.
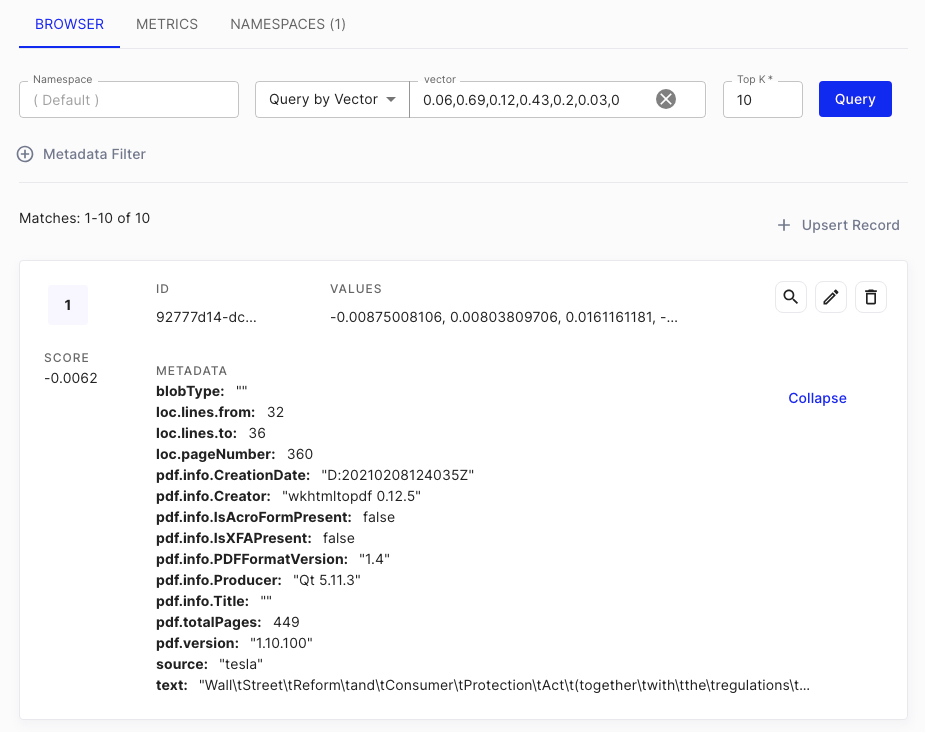
Query
- After verifying data has been upserted to Pinecone, we can now start asking question in the chat!
.png)
- However, the context retrieved used to return the answer is a mix of both APPLE and TESLA documents. As you can see from the Source Documents:
.png)
.png)
- We can fix this by specifying a metadata filter from the Pinecone node. For example, if we only want to retrieve context from APPLE FORM-10K, we can look back at the metadata we have specified earlier in the #upsert step, then use the same in the Metadata Filter below:
.png)
- Let's ask the same question again, we should now see all context retrieved are indeed from APPLE FORM-10K:
.png)
{% hint style="info" %} Each vector databse provider has different format of filtering syntax, recommend to read through the respective vector database documentation {% endhint %}
- However, the problem with this is that metadata filtering is sort of "hard-coded". Ideally, we should let the LLM to decide which document to retrieve based on the question.
Tool Agent
We can solve the "hard-coded" metadata filter problem by using Tool Agent.
By providing tools to agent, we can let the agent to decide which tool is suitable to be used depending on the question.
- Create a Retriever Tool with following name and description:
| Name | Description |
|---|---|
| search_apple | Use this function to answer user questions about Apple Inc (APPL). It contains a SEC Form 10K filing describing the financials of Apple Inc (APPL) for the 2022 time period. |
- Connect to Pinecone node with metadata filter
{source: apple}
.png)
- Repeat the same for Tesla:
| Name | Description | Pinecone Metadata Filter |
|---|---|---|
| search_tsla | Use this function to answer user questions about Tesla Inc (TSLA). It contains a SEC Form 10K filing describing the financials of Tesla Inc (TSLA) for the 2022 time period. | {source: tesla} |
{% hint style="info" %} It is important to specify a clear and concise description. This allows LLM to better decide when to use which tool {% endhint %}
Your flow should looks like below:
.png)
- Now, we need to create a general instruction to Tool Agent. Click Additional Parameters of the node, and specify the System Message. For example:
You are an expert financial analyst that always answers questions with the most relevant information using the tools at your disposal.
These tools have information regarding companies that the user has expressed interest in.
Here are some guidelines that you must follow:
* For financial questions, you must use the tools to find the answer and then write a response.
* Even if it seems like your tools won't be able to answer the question, you must still use them to find the most relevant information and insights. Not using them will appear as if you are not doing your job.
* You may assume that the users financial questions are related to the documents they've selected.
* For any user message that isn't related to financial analysis, respectfully decline to respond and suggest that the user ask a relevant question.
* If your tools are unable to find an answer, you should say that you haven't found an answer but still relay any useful information the tools found.
* Dont ask clarifying questions, just return answer.

The tools at your disposal have access to the following SEC documents that the user has selected to discuss with you:
- Apple Inc (APPL) FORM 10K 2022
- Tesla Inc (TSLA) FORM 10K 2022

The current date is: 2024-01-28
- Save the Chatflow, and start asking question!
.png)
.png)
.png)
- Follow up with Tesla:
.png)
- We are now able to ask questions about any documents that we've previously upserted to vector database without "hard-coding" the metadata filtering by using tools + agent.
Metadata Retriever
With the Tool Agent approach, user has to create multiple retriever tools to retrieve documents from different sources. This could be a problem if there is a large number of document sources with different metadata. Using the example above with only Apple and Tesla, we could potentially expand to other companies such as Disney, Amazon, etc. It would be a tedious task to create one retrever tool for each company.
Metadata Retriever comes into play. The idea is to have LLM extract the metadata from user question, then use it as filter when searching through vector databases.
For example, if a user is asking questions related to Apple, a metadata filter {source: apple} will be automatically applied on vector database search.
.png)
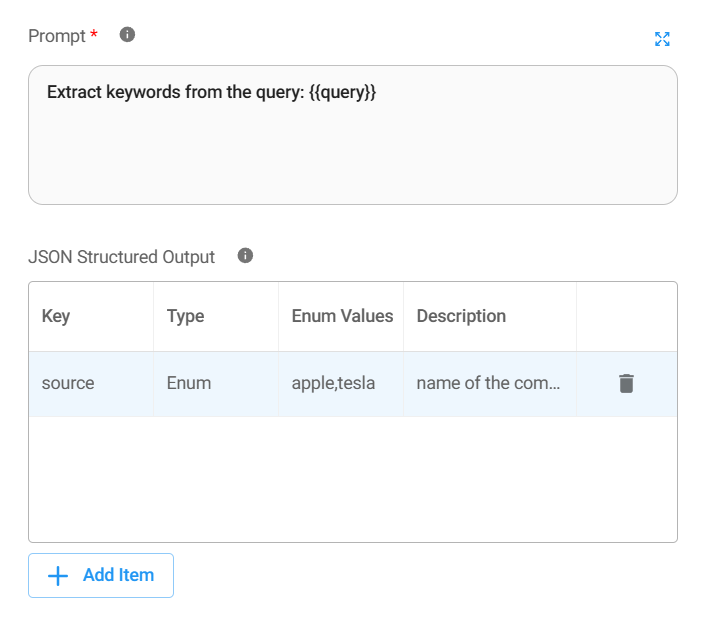
In this scenario, we can have a single retriever tool, and place the Metadata Retriever between vector database and retriever tool.
.png)
XML Agent
For some LLMs, function callings capabilities are not supported. In this case, we can use XML Agent to prompt the LLM in a more structured format/syntax, with the goal of using the provided tools.
It has the underlying prompt:
You are a helpful assistant. Help the user answer any questions.

You have access to the following tools:

{tools}

In order to use a tool, you can use <tool></tool> and <tool_input></tool_input> tags. You will then get back a response in the form <observation></observation>
For example, if you have a tool called 'search' that could run a google search, in order to search for the weather in SF you would respond:

<tool>search</tool><tool_input>weather in SF</tool_input>
<observation>64 degrees</observation>

When you are done, respond with a final answer between <final_answer></final_answer>. For example:

<final_answer>The weather in SF is 64 degrees</final_answer>

Begin!

Previous Conversation:
{chat_history}

Question: {input}
{agent_scratchpad}
 (1) (1).png)
Conclusion
We've covered using Conversational Retrieval QA Chain and its limitation when querying multiple documents. And we were able to overcome the issue by using OpenAI Function Agent/XML Agent + Tools. You can find the templates below:
{% file src="../.gitbook/assets/ToolAgent Chatflow.json" %}
{% file src="../.gitbook/assets/XMLAgent Chatflow.json" %}
description: Learn how to query structured data
SQL QnA
Unlike previous examples like Web Scrape QnA and Multiple Documents QnA, querying structured data does not require a vector database. At the high-level, this can be achieved with following steps:
- Providing the LLM:
- overview of the SQL database schema
- example rows data
- Return a SQL query with few shot prompting
- Validate the SQL query using an If Else node
- Create a custom function to execute the SQL query, and get the response
- Return a natural response from the executed SQL response
.png)
In this example, we are going to create a QnA chatbot that can interact with a SQL database stored in SingleStore
.png)
TL;DR
You can find the chatflow template:
{% file src="../.gitbook/assets/SQL Chatflow.json" %}
1. SQL Database Schema + Example Rows
Use a Custom JS Function node to connect to SingleStore, retrieve database schema and top 3 rows.
From the research paper, it is recommended to generate a prompt with following example format:
CREATE TABLE samples (firstName varchar NOT NULL, lastName varchar)
SELECT * FROM samples LIMIT 3
firstName lastName
Stephen Tyler
Jack McGinnis
Steven Repici
.png)
Full Javascript Code
const HOST = 'singlestore-host.com';
const USER = 'admin';
const PASSWORD = 'mypassword';
const DATABASE = 'mydb';
const TABLE = 'samples';
const mysql = require('mysql2/promise');
let sqlSchemaPrompt;
function getSQLPrompt() {
return new Promise(async (resolve, reject) => {
try {
const singleStoreConnection = mysql.createPool({
host: HOST,
user: USER,
password: PASSWORD,
database: DATABASE,
});
// Get schema info
const [schemaInfo] = await singleStoreConnection.execute(
`SELECT * FROM INFORMATION_SCHEMA.COLUMNS WHERE table_name = "${TABLE}"`
);
const createColumns = [];
const columnNames = [];
for (const schemaData of schemaInfo) {
columnNames.push(`${schemaData['COLUMN_NAME']}`);
createColumns.push(`${schemaData['COLUMN_NAME']} ${schemaData['COLUMN_TYPE']} ${schemaData['IS_NULLABLE'] === 'NO' ? 'NOT NULL' : ''}`);
}
const sqlCreateTableQuery = `CREATE TABLE samples (${createColumns.join(', ')})`;
const sqlSelectTableQuery = `SELECT * FROM samples LIMIT 3`;
// Get first 3 rows
const [rows] = await singleStoreConnection.execute(
sqlSelectTableQuery,
);
const allValues = [];
for (const row of rows) {
const rowValues = [];
for (const colName in row) {
rowValues.push(row[colName]);
}
allValues.push(rowValues.join(' '));
}
sqlSchemaPrompt = sqlCreateTableQuery + '\n' + sqlSelectTableQuery + '\n' + columnNames.join(' ') + '\n' + allValues.join('\n');
resolve();
} catch (e) {
console.error(e);
return reject(e);
}
});
}
async function main() {
await getSQLPrompt();
}
await main();
return sqlSchemaPrompt;
You can find more on how to get the HOST, USER, PASSWORD from this guide. Once finished, click Execute:
.png)
We can now see the correct format has been generated. Next step is to bring this into Prompt Template.
2. Return a SQL query with few shot prompting
Create a new Chat Model + Prompt Template + LLMChain
.png)
Specify the following prompt in the Prompt Template:
Based on the provided SQL table schema and question below, return a SQL SELECT ALL query that would answer the user's question. For example: SELECT * FROM table WHERE id = '1'.
------------
SCHEMA: {schema}
------------
QUESTION: {question}
------------
SQL QUERY:
Since we are using 2 variables: {schema} and {question}, specify their values in Format Prompt Values:
.png)
{% hint style="info" %} You can provide more examples to the prompt (i.e few-shot prompting) to let the LLM learns better. Or take reference from dialect-specific prompting {% endhint %}
3. Validate the SQL query using If Else node
Sometimes the SQL query is invalid, and we do not want to waste resources the execute an invalid SQL query. For example, if a user is asking a general question that is irrelevant to the SQL database. We can use an If Else node to route to different path.
For instance, we can perform a basic check to see if SELECT and WHERE are included in the SQL query given by the LLM.
{% tabs %} {% tab title="If Function" %}
const sqlQuery = $sqlQuery.trim();
const regex = /SELECT\s.*?(?:\n|$)/gi;
// Extracting the SQL part
const matches = sqlQuery.match(regex);
const cleanSql = matches ? matches[0].trim() : "";
if (cleanSql.includes("SELECT") && cleanSql.includes("WHERE")) {
return cleanSql;
}
{% endtab %}
{% tab title="Else Function" %}
return $sqlQuery;
{% endtab %} {% endtabs %}
.png)
In the Else Function, we will route to a Prompt Template + LLMChain that basically tells LLM that it is unable to answer user query:
.png)
4. Custom function to execute SQL query, and get the response
If it is a valid SQL query, we need to execute the query. Connect the True output from If Else node to a Custom JS Function node:
.png)
Full Javascript Code
const HOST = 'singlestore-host.com';
const USER = 'admin';
const PASSWORD = 'mypassword';
const DATABASE = 'mydb';
const TABLE = 'samples';
const mysql = require('mysql2/promise');
let result;
function getSQLResult() {
return new Promise(async (resolve, reject) => {
try {
const singleStoreConnection = mysql.createPool({
host: HOST,
user: USER,
password: PASSWORD,
database: DATABASE,
});
const [rows] = await singleStoreConnection.execute(
$sqlQuery
);
result = JSON.stringify(rows)
resolve();
} catch (e) {
console.error(e);
return reject(e);
}
});
}
async function main() {
await getSQLResult();
}
await main();
return result;
5. Return a natural response from the executed SQL response
Create a new Chat Model + Prompt Template + LLMChain
.png)
Write the following prompt in the Prompt Template:
Based on the question, and SQL response, write a natural language response, be details as possible:
------------
QUESTION: {question}
------------
SQL RESPONSE: {sqlResponse}
------------
NATURAL LANGUAGE RESPONSE:
Specify the variables in Format Prompt Values:
.png)
Voila! Your SQL chatbot is now ready for testing!
Query
First, let's ask something related to the database.
.png)
Looking at the logs, we can see the first LLMChain is able to give us a SQL query:
Input:
{% code overflow="wrap" %}
Based on the provided SQL table schema and question below, return a SQL SELECT ALL query that would answer the user's question. For example: SELECT * FROM table WHERE id = '1'.\n------------\nSCHEMA: CREATE TABLE samples (id bigint(20) NOT NULL, firstName varchar(300) NOT NULL, lastName varchar(300) NOT NULL, userAddress varchar(300) NOT NULL, userState varchar(300) NOT NULL, userCode varchar(300) NOT NULL, userPostal varchar(300) NOT NULL, createdate timestamp(6) NOT NULL)\nSELECT * FROM samples LIMIT 3\nid firstName lastName userAddress userState userCode userPostal createdate\n1125899906842627 Steven Repici 14 Kingston St. Oregon NJ 5578 Thu Dec 14 2023 13:06:17 GMT+0800 (Singapore Standard Time)\n1125899906842625 John Doe 120 jefferson st. Riverside NJ 8075 Thu Dec 14 2023 13:04:32 GMT+0800 (Singapore Standard Time)\n1125899906842629 Bert Jet 9th, at Terrace plc Desert City CO 8576 Thu Dec 14 2023 13:07:11 GMT+0800 (Singapore Standard Time)\n------------\nQUESTION: what is the address of John\n------------\nSQL QUERY:
{% endcode %}
Output
SELECT userAddress FROM samples WHERE firstName = 'John'
After executing the SQL query, the result is passed to the 2nd LLMChain:
Input
{% code overflow="wrap" %}
Based on the question, and SQL response, write a natural language response, be details as possible:\n------------\nQUESTION: what is the address of John\n------------\nSQL RESPONSE: [{\"userAddress\":\"120 jefferson st.\"}]\n------------\nNATURAL LANGUAGE RESPONSE:
{% endcode %}
Output
The address of John is 120 Jefferson St.
Now, we if ask something that is irrelevant to the SQL database, the Else route is taken.
.png)
For first LLMChain, a SQL query is generated as below:
SELECT * FROM samples LIMIT 3
However, it fails the If Else check because it doesn't contains both SELECT and WHERE, hence entering the Else route that has a prompt that says:
Politely say "I'm not able to answer query"
And the final output is:
I apologize, but I'm not able to answer your query at the moment.
Conclusion
In this example, we have successfully created a SQL chatbot that can interact with your database, and is also able to handle questions that are irrelevant to database. Further improvement includes adding memory to provide conversation history.
You can find the chatflow below:
{% file src="../.gitbook/assets/SQL Chatflow (1).json" %}
description: Learn how to upsert data to Vector Stores with AiMicromind
Upserting Data
There are two fundamental ways to upsert your data into a Vector Store using AiMicromind, either via API calls or by using a set of dedicated nodes we have ready for this purpose.
In this guide, even though it is highly recommended that you prepare your data using the Document Stores before upserting to a Vector Store, we will go through the entire process by using the specific nodes required for this end, outlining the steps, advantages of this approach, and optimization strategies for efficient data handling.
Understanding the upserting process
The first thing we need to understand is that the upserting data process to a Vector Store is a fundamental piece for the formation of a Retrieval Augmented Generation (RAG) system. However, once this process is finished, the RAG can be executed independently.
In other words, in aimicromind you can upsert data without a full RAG setup, and you can run your RAG without the specific nodes used in the upsert process, meaning that although a well-populated vector store is crucial for RAG to function, the actual retrieval and generation processes don't require continuous upserting.
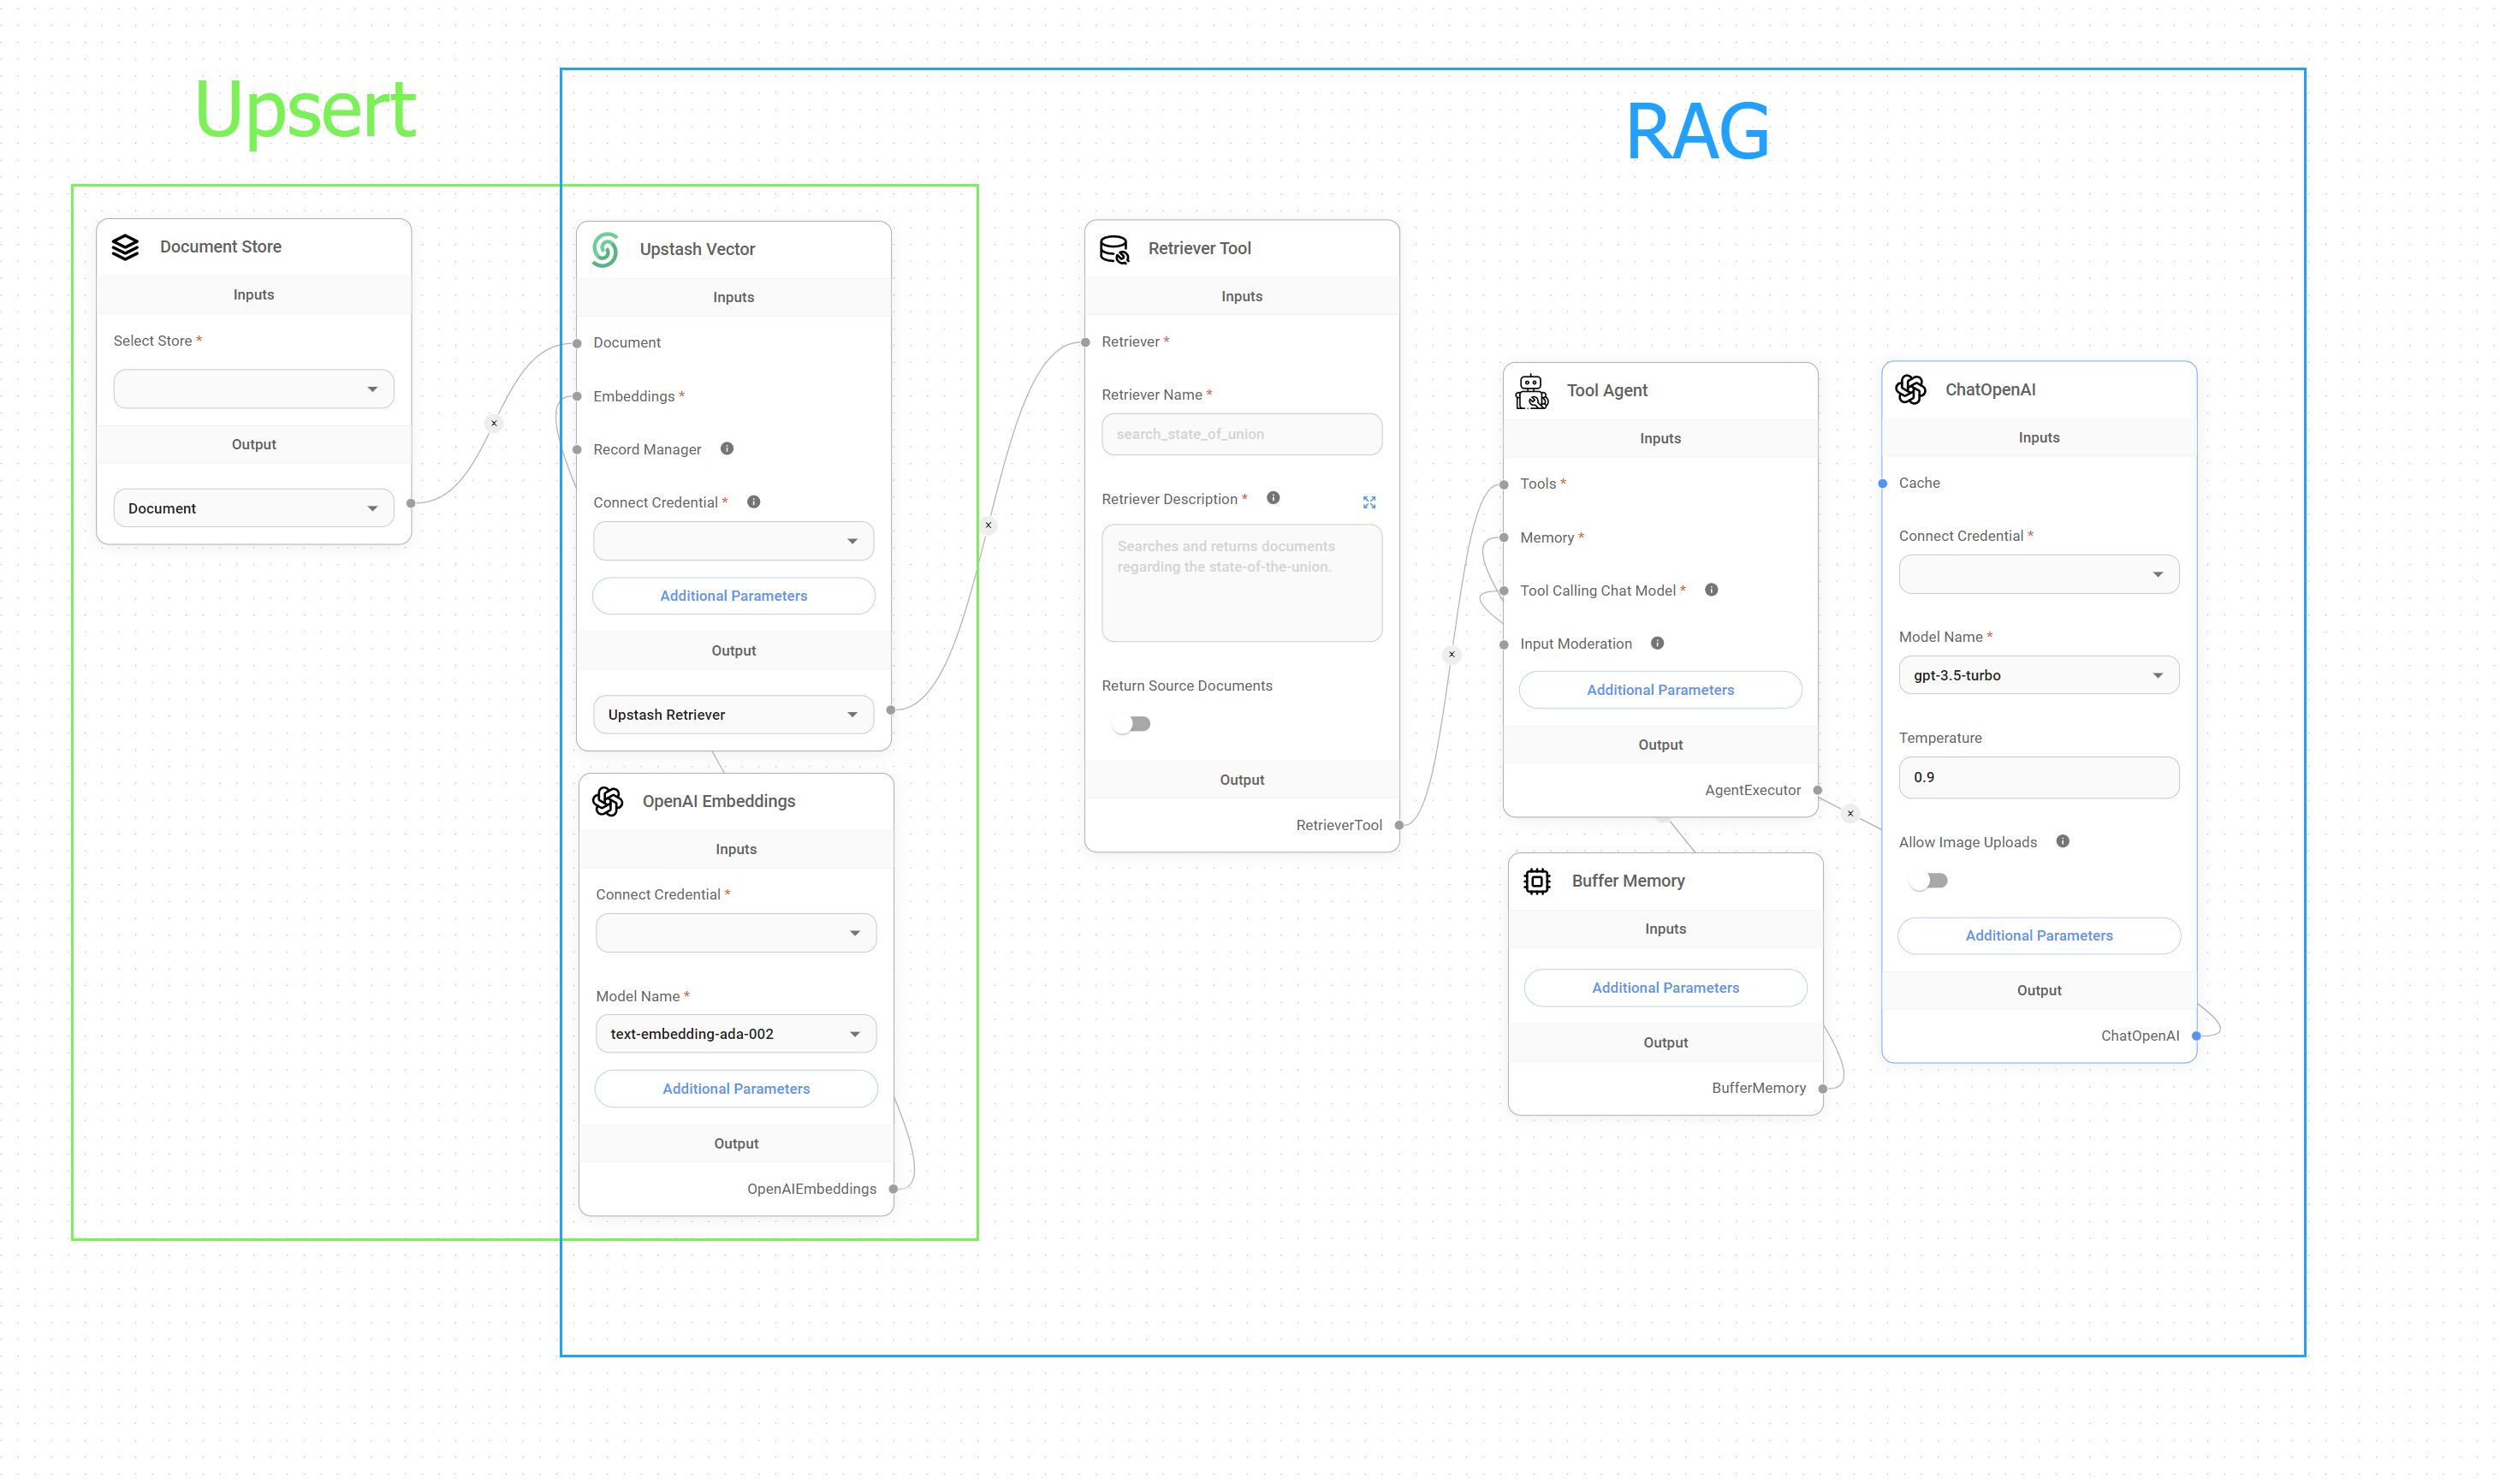
Upsert vs. RAG
Setup
Let's say we have a long dataset in PDF format that we need to upsert to our Upstash Vector Store so we could instruct an LLM to retrieve specific information from that document.
In order to do that, and for illustrating this tutorial, we would need to create an upserting flow with 5 different nodes:
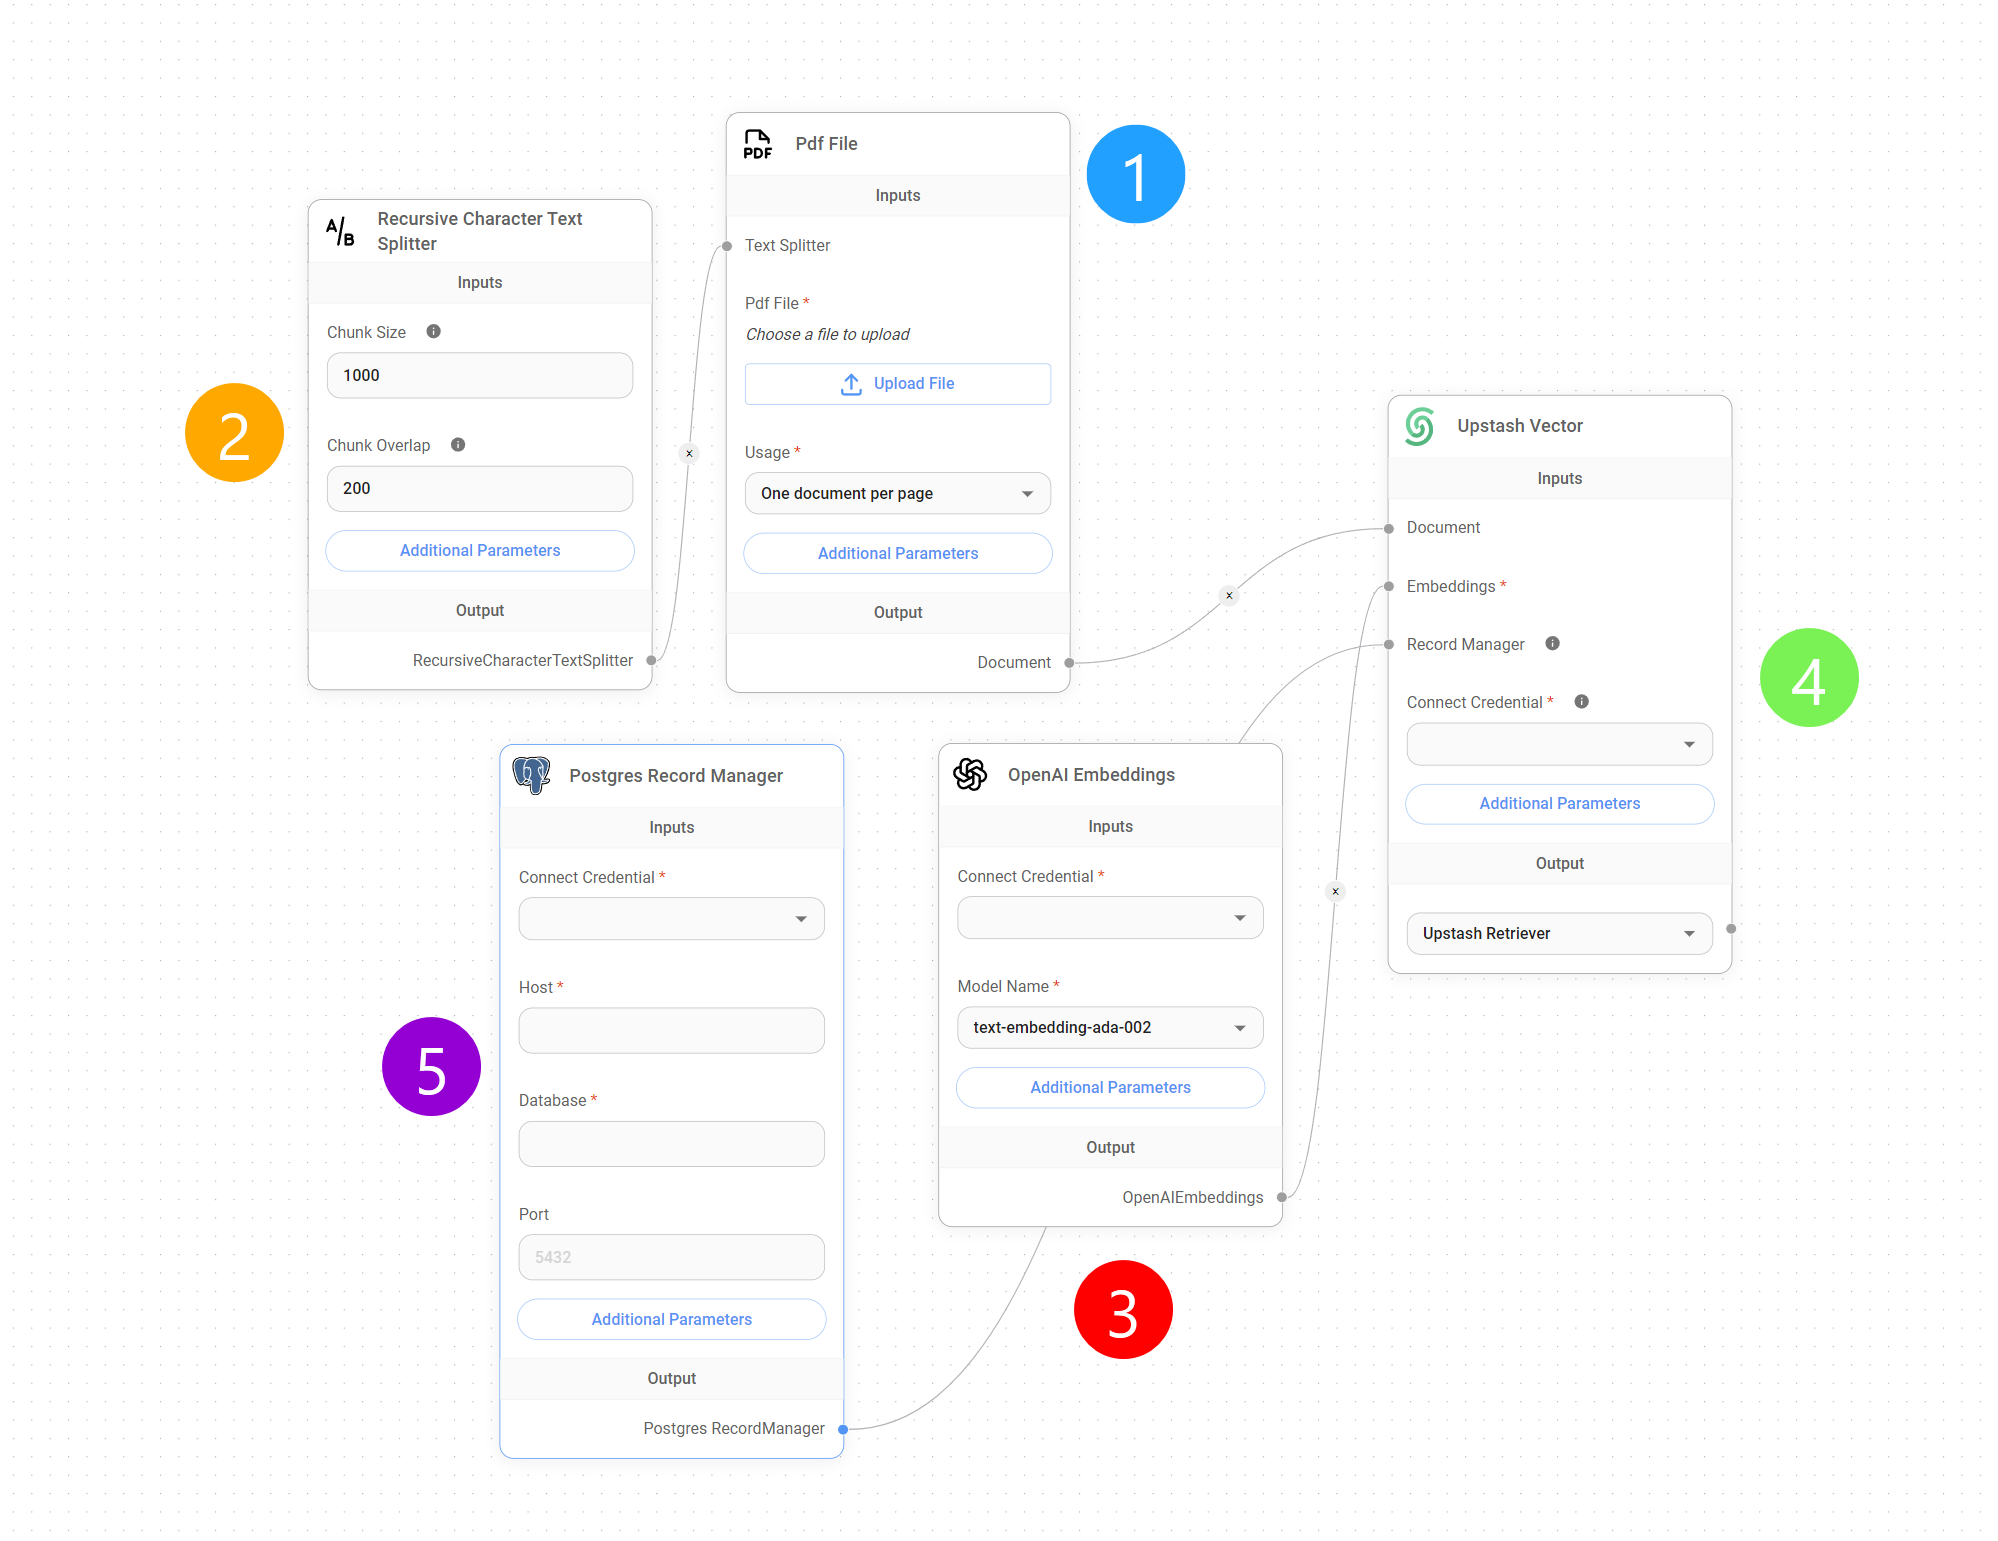
Upserting Flow
1. Document Loader
The first step is to upload our PDF data into the aimicromind instance using a Document Loader node. Document Loaders are specialized nodes that handle the ingestion of various document formats, including PDFs, TXT, CSV, Notion pages, and more.
It is important to mention that every Document Loader comes with two important additional parameters that allow us to add and omit metadata from our dataset at will.
Additional Parameters
{% hint style="info" %} Tip: The add/omit metadata parameters, although they are optional, are very useful for targeting our dataset once it is upserted in a Vector Store or for removing unnecessary metadata from it. {% endhint %}
2. Text Splitter
Once we have uploaded our PDF or datset, we need to split it into smaller pieces, documents, or chunks. This is a crucial preprocessing step for 2 main reasons:
- Retrieval speed and relevance: Storing and querying large documents as single entities in a vector database can lead to slower retrieval times and potentially less relevant results. Splitting the document into smaller chunks allows for more targeted retrieval. By querying against smaller, more focused units of information, we can achieve faster response times and improve the precision of the retrieved results.
- Cost-effective: Since we only retrieve relevant chunks rather than the entire document, the number of tokens processed by the LLM is significantly reduced. This targeted retrieval approach directly translates to lower usage costs for our LLM, as billing is typically based on token consumption. By minimizing the amount of irrelevant information sent to the LLM, we also optimize for cost.
Nodes
In AiMicromind, this splitting process is accomplished using the Text Splitter nodes. Those nodes provide a range of text segmentation strategies, including:
- Character Text Splitting: Dividing the text into chunks of a fixed number of characters. This method is straightforward but may split words or phrases across chunks, potentially disrupting context.
- Token Text Splitting: Segmenting the text based on word boundaries or tokenization schemes specific to the chosen embedding model. This approach often leads to more semantically coherent chunks, as it preserves word boundaries and considers the underlying linguistic structure of the text.
- Recursive Character Text Splitting: This strategy aims to divide text into chunks that maintain semantic coherence while staying within a specified size limit. It's particularly well-suited for hierarchical documents with nested sections or headings. Instead of blindly splitting at the character limit, it recursively analyzes the text to find logical breakpoints, such as sentence endings or section breaks. This approach ensures that each chunk represents a meaningful unit of information, even if it slightly exceeds the target size.
- Markdown Text Splitter: Designed specifically for markdown-formatted documents, this splitter logically segments the text based on markdown headings and structural elements, creating chunks that correspond to logical sections within the document.
- Code Text Splitter: Tailored for splitting code files, this strategy considers code structure, function definitions, and other programming language-specific elements to create meaningful chunks that are suitable for tasks like code search and documentation.
- HTML-to-Markdown Text Splitter: This specialized splitter first converts HTML content to Markdown and then applies the Markdown Text Splitter, allowing for structured segmentation of web pages and other HTML documents.
The Text Splitter nodes provide granular control over text segmentation, allowing for customization of parameters such as:
- Chunk Size: The desired maximum size of each chunk, usually defined in characters or tokens.
- Chunk Overlap: The number of characters or tokens to overlap between consecutive chunks, useful for maintaining contextual flow across chunks.
{% hint style="info" %}
Tip: Note that Chunk Size and Chunk Overlap values are not additive. Selecting chunk_size=1200 and chunk_overlap=400 does not result in a total chunk size of 1600. The overlap value determines the number of tokens from the preceding chunk included in the current chunk to maintain context. It does not increase the overall chunk size.
{% endhint %}
Undertanding Chunk Overlap
In the context of vector-based retrieval and LLM querying, chunk overlap plays an important role in maintaining contextual continuity and improving response accuracy, especially when dealing with limited retrieval depth or top K, which is the parameter that determines the maximum number of most similar chunks that are retrieved from the Vector Store in response to a query.
During query processing, the LLM executes a similarity search against the Vector Store to retrieve the most semantically relevant chunks to the given query. If the retrieval depth, represented by the top K parameter, is set to a small value, 4 for default, the LLM initially uses information only from these 4 chunks to generate its response.
This scenario presents us with a problem, since relying solely on a limited number of chunks without overlap can lead to incomplete or inaccurate answers, particularly when dealing with queries that require information spanning multiple chunks.
Chunk overlap helps with this issue by ensuring that a portion of the textual context is shared across consecutive chunks, increasing the likelihood that all relevant information for a given query is contained within the retrieved chunks.
In other words, this overlap serves as a bridge between chunks, enabling the LLM to access a wider contextual window even when limited to a small set of retrieved chunks (top K). If a query relates to a concept or piece of information that extends beyond a single chunk, the overlapping regions increase the likelihood of capturing all the necessary context.
Therefore, by introducing chunk overlap during the text splitting phase, we enhance the LLM's ability to:
- Preserve contextual continuity: Overlapping chunks provide a smoother transition of information between consecutive segments, allowing the model to maintain a more coherent understanding of the text.
- Improve retrieval accuracy: By increasing the probability of capturing all relevant information within the target top K retrieved chunks, overlap contributes to more accurate and contextually appropriate responses.
Accuracy vs. Cost
So, to further optimize the trade-off between retrieval accuracy and cost, two primary strategies can be used:
- Increase/Decrease Chunk Overlap: Adjusting the overlap percentage during text splitting allows for fine-grained control over the amount of shared context between chunks. Higher overlap percentages generally lead to improved context preservation but may also increase costs since you would need to use more chunks to encompass the entire document. Conversely, lower overlap percentages can reduce costs but risk losing key contextual information between chunks, potentially leading to less accurate or incomplete answers from the LLM.
- Increase/Decrease Top K: Raising the default top K value (4) expands the number of chunks considered for response generation. While this can improve accuracy, it also increases cost.
{% hint style="info" %} Tip: The choice of optimal overlap and top K values depends on factors such as document complexity, embedding model characteristics, and the desired balance between accuracy and cost. Experimentation with these values is important for finding the ideal configuration for a specific need. {% endhint %}
3. Embedding
We have now uploaded our dataset and configured how our data is going to be split before it gets upserted to our Vector Store. At this point, the embedding nodes come into play, converting all those chunks into a "language" that an LLM can easily understand.
In this current context, embedding is the process of converting text into a numerical representation that captures its meaning. This numerical representation, also called the embedding vector, is a multi-dimensional array of numbers, where each dimension represents a specific aspect of the text's meaning.
These vectors allow LLMs to compare and search for similar pieces of text within the vector store by measuring the distance or similarity between them in this multi-dimensional space.
Understanding Embeddings/Vector Store dimensions
The number of dimensions in a Vector Store index is determined by the embedding model used when we upsert our data, and vice versa. Each dimension represents a specific feature or concept within the data. For example, a dimension might represent a particular topic, sentiment, or other aspect of the text.
The more dimensions we use to embed our data, the greater the potential for capturing nuanced meaning from our text. However, this increase comes at the cost of higher computational requirements per query.
In general, a larger number of dimensions needs more resources to store, process, and compare the resulting embedding vectors. Therefore, embeddings models like the Google embedding-001, which uses 768 dimensions, are, in theory, cheaper than others like the OpenAI text-embedding-3-large, with 3072 dimensions.
It's important to note that the relationship between dimensions and meaning capture isn't strictly linear; there's a point of diminishing returns where adding more dimensions provides negligible benefit for the added unnecessary cost.
{% hint style="info" %} Tip: To ensure compatibility between an embedding model and a Vector Store index, dimensional alignment is essential. Both the model and the index must utilize the same number of dimensions for vector representation. Dimensionality mismatch will result in upsertion errors, as the Vector Store is designed to handle vectors of a specific size determined by the chosen embedding model. {% endhint %}
4. Vector Store
The Vector Store node is the end node of our upserting flow. It acts as the bridge between our aimicromind instance and our vector database, enabling us to send the generated embeddings, along with any associated metadata, to our target Vector Store index for persistent storage and subsequent retrieval.
It is in this node where we can set parameters like "top K", which, as we said previously, is the parameter that determines the maximum number of most similar chunks that are retrieved from the Vector Store in response to a query.
{% hint style="info" %} Tip: A lower top K value will yield fewer but potentially more relevant results, while a higher value will return a broader range of results, potentially capturing more information. {% endhint %}
5. Record Manager
The Record Manager node is an optional but incredibly useful addition to our upserting flow. It allows us to maintain records of all the chunks that have been upserted to our Vector Store, enabling us to efficiently add or delete chunks as needed.
For a more in-depth guide, we refer you to this guide.
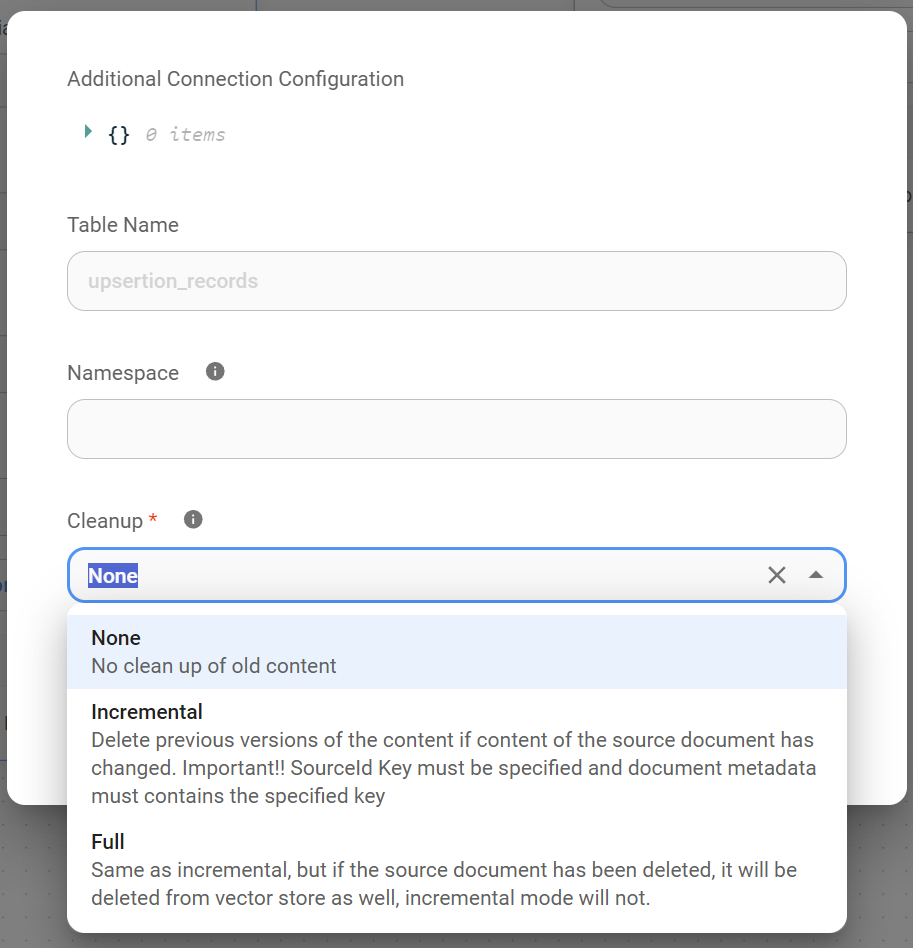
6. Full Overview
Finally, let's examine each stage, from initial document loading to the final vector representation, highlighting the key components and their roles in the upserting process.
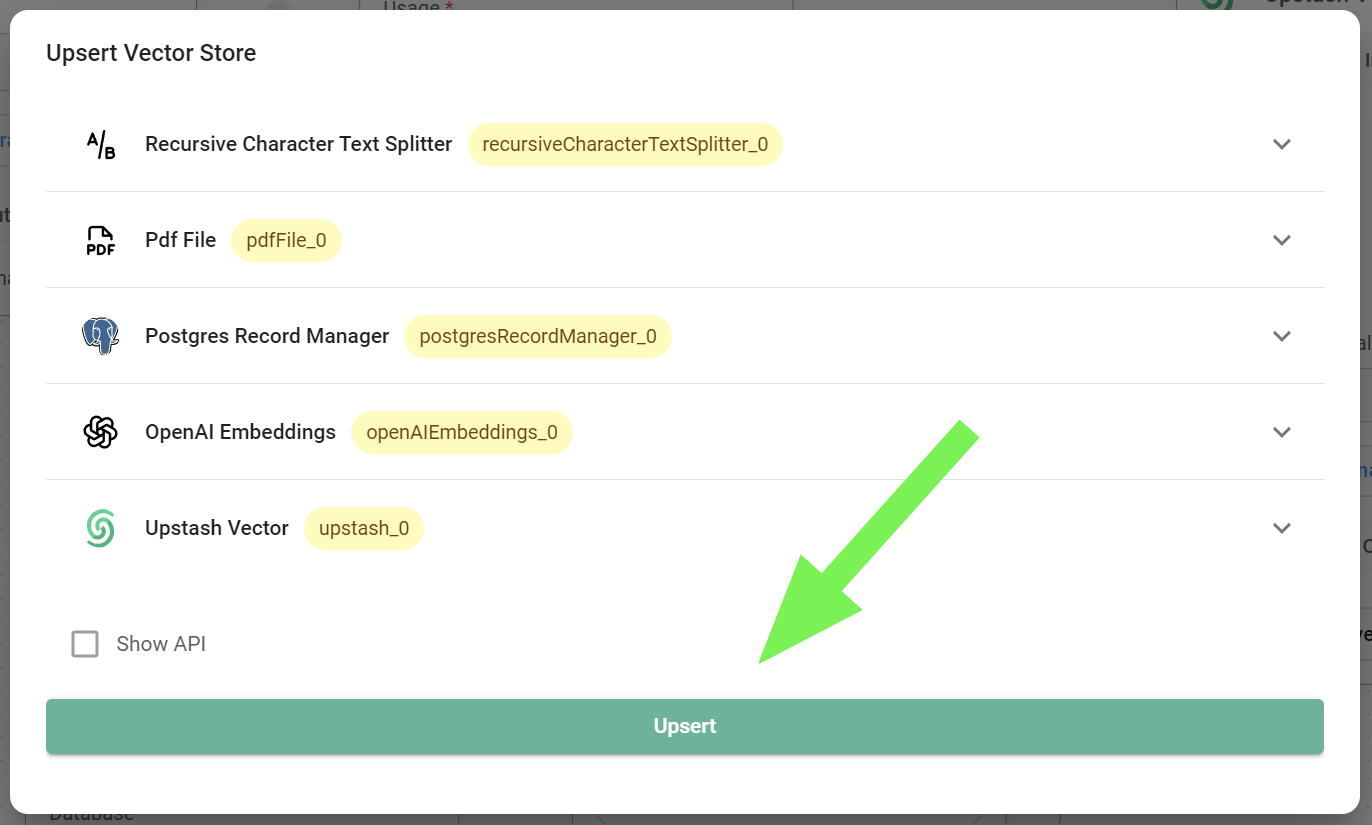
- Document Ingestion:
- We begin by feeding our raw data into aimicromind using the appropriate Document Loader node for your data format.
- Strategic Splitting
- Next, the Text Splitter node divides our document into smaller, more manageable chunks. This is crucial for efficient retrieval and cost control.
- We have flexibility in how this splitting happens by selecting the appropriate text splitter node and, importantly, by fine-tuning chunk size and chunk overlap to balance context preservation with efficiency.
- Meaningful Embeddings
- Now, just before our data is going to be recorded in the Vector Store, the Embedding node steps in. It transforms each text chunk and its meaning into a numerical representation that our LLM can understand.
- Vector Store Index
- Finally, the Vector Store node acts as the bridge between aimicromind and our database. It sends our embeddings, along with any associated metadata, to the designated Vector Store index.
- Here, in this node, we can control the retrieval behavior by setting the top K parameter, which influences how many chunks are considered when answering a query.
- Data Ready
- Once upserted, our data is now represented as vectors within the Vector Store, ready for similarity search and retrieval.
- Record Keeping (Optional)
- For enhanced control and management data, the Record Manager node keeps track of all upserted chunks. This facilitates easy updates or removals as your data or needs evolve.
In essence, the upserting process transforms our raw data into an LLM-ready format, optimized for fast and cost-effective retrieval.
description: Learn how to scrape, upsert, and query a website
Web Scrape QnA
Let's say you have a website (could be a store, an ecommerce site, a blog), and you want to scrap all the relative links of that website and have LLM answer any question on your website. In this tutorial, we are going to go through how to achieve that.
You can find the example flow called - WebPage QnA from the marketplace templates.
Setup
We are going to use Cheerio Web Scraper node to scrape links from a given URL and the HtmlToMarkdown Text Splitter to split the scraped content into smaller pieces.
.png)
If you do not specify anything, by default only the given URL page will be scraped. If you want to crawl the rest of relative links, click Additional Parameters of Cheerio Web Scraper.
1. Crawl Multiple Pages
- Select
Web CrawlorScrape XML Sitemapin Get Relative Links Method. - Input
0in Get Relative Links Limit to retrieve all links available from the provided URL.
.png)
Manage Links (Optional)
- Input desired URL to be crawled.
- Click Fetch Links to retrieve links based on the inputs of the Get Relative Links Method and Get Relative Links Limit in Additional Parameters.
- In Crawled Links section, remove unwanted links by clicking Red Trash Bin Icon.
- Lastly, click Save.
.png)
2. Upsert
- On the top right corner, you will notice a green button:
.png)
- A dialog will be shown that allow users to upsert data to Pinecone:
 (1) (1) (1) (1) (1) (1) (1) (1) (1) (1) (2).png)
Note: Under the hood, following actions will be executed:
- Scraped all HTML data using Cheerio Web Scraper
- Convert all scraped data from HTML to Markdown, then split it
- Splitted data will be looped over, and converted to vector embeddings using OpenAI Embeddings
- Vector embeddings will be upserted to Pinecone
- On the Pinecone console you will be able to see the new vectors that were added.
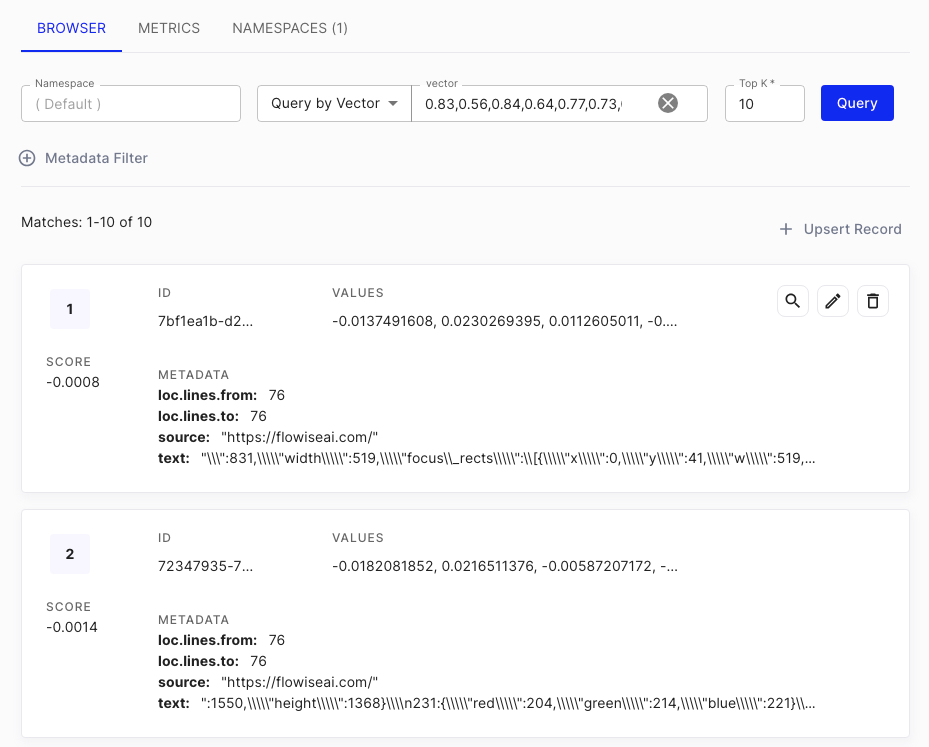
3. Query
Querying is relatively straight-forward. After you have verified that data is upserted to vector database, you can start asking question in the chat:
 (1) (1) (1) (1) (1) (1) (1) (1) (1) (2).png)
In the Additional Parameters of Conversational Retrieval QA Chain, you can specify 2 prompts:
- Rephrase Prompt: Used to rephrase the question given the past conversation history
- Response Prompt: Using the rephrased question, retrieve the context from vector database, and return a final response
.png)
{% hint style="info" %} It is recommended to specify a detailed response prompt message. For example, you can specify the name of AI, the language to answer, the response when answer its not found (to prevent hallucination). {% endhint %}
You can also turn on the Return Source Documents option to return a list of document chunks where the AI's response is coming from.
 (1) (1) (1).png)
Additional Web Scraping
Apart from Cheerio Web Scraper, there are other nodes that can perform web scraping as well:
- Puppeteer: Puppeteer is a Node.js library that provides a high-level API for controlling headless Chrome or Chromium. You can use Puppeteer to automate web page interactions, including extracting data from dynamic web pages that require JavaScript to render.
- Playwright: Playwright is a Node.js library that provides a high-level API for controlling multiple browser engines, including Chromium, Firefox, and WebKit. You can use Playwright to automate web page interactions, including extracting data from dynamic web pages that require JavaScript to render.
- Apify: Apify is a cloud platform for web scraping and data extraction, which provides an ecosystem of more than a thousand ready-made apps called Actors for various web scraping, crawling, and data extraction use cases.
.png)
{% hint style="info" %} The same logic can be applied to any document use cases, not just limited to web scraping! {% endhint %}
If you have any suggestion on how to improve the performance, we'd love your contribution!